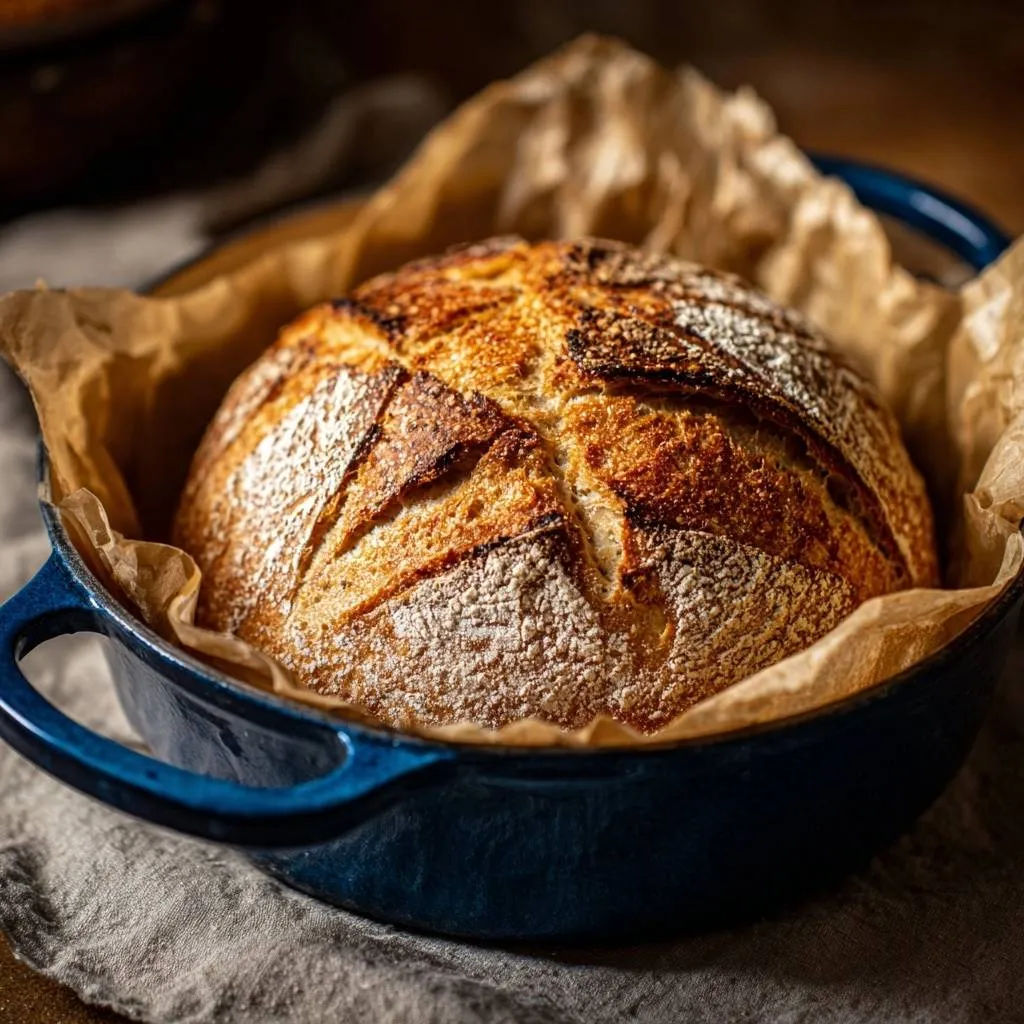
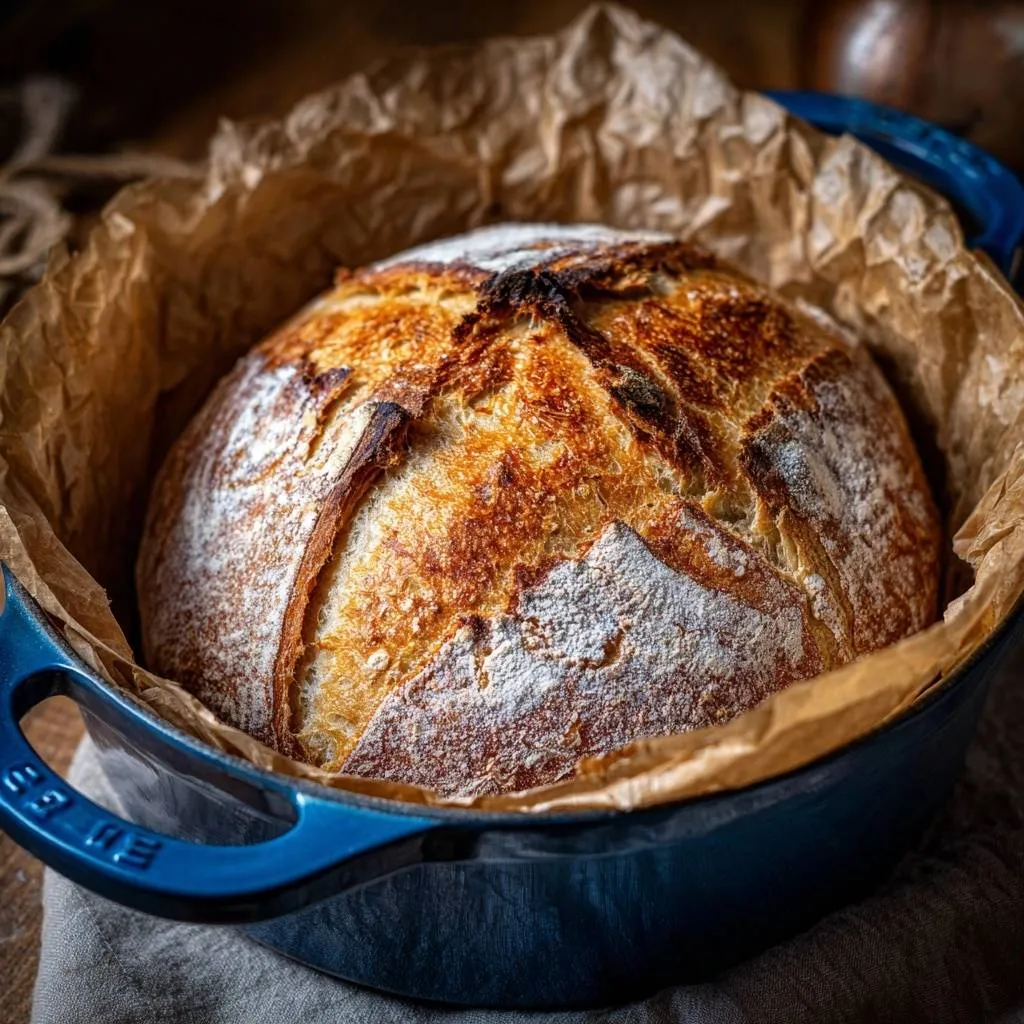
Homemade bread with a soft, pale crust drives you crazy? This 4-ingredient no-knead recipe changes everything. You get bakery-crisp crust without kneading or fancy gear. Just mix, wait, and bake in your Dutch oven for pro results that crackle under your knife.
Here’s why it works so well. The high hydration and long fermentation build massive bubbles for an open crumb. Plus, the Dutch oven traps steam like a steam injector, forcing that epic oven spring. You’ll yield one stunning 1.5-pound loaf, serves 8-10. Prep takes 10 minutes, rises 12-18 hours, bakes 45 minutes total.
The real secret? Preheat your Dutch oven at 450°F for a full 45 minutes. That thermal shock turns the dough’s own moisture into steam, creating the crispiest crust you’ve ever made at home. Oh man, that first bite shatters perfectly.
Essential Components for No-Knead Artisan Bread
Role of High-Hydration Flour Mix
Start with 3 cups all-purpose flour, about 360 grams if you weigh it. This flour’s 10-12% protein forms just enough gluten structure during the long rise. Therefore, it holds those big air pockets without kneading.
Bread flour works too, but it amps up chewiness thanks to higher protein. Spoon and level your flour, don’t pack it, or the dough gets too dry. In addition, sifting prevents lumps for even mixing.
Salt and Yeast Balance in Wet Dough
1 1/2 teaspoons salt sharpens flavor and slows yeast, preventing a bland or overproofed loaf. Use 1/4 teaspoon instant yeast, it’s more reliable than active dry since it doesn’t need proofing first.
Therefore, mix it dry with flour to distribute evenly. Add 1 1/2 cups warm water at 110°F to kickstart fermentation without killing the yeast. This balance creates tangy depth over 12-18 hours.
Parchment Paper’s Non-Stick Lift
Parchment paper acts as handles for your sticky dough, preventing it from welding to the scorching Dutch oven. Dust it heavily with flour or rice flour for extra insurance.
However, foil works in a pinch, but parchment breathes better. This simple trick keeps shaping stress-free.
Science of Steam-Trapped Crispy Crust
High Hydration Drives Bubble Formation
That 75% hydration from 1 1/2 cups water creates a shaggy dough that ferments slowly. Over 12-18 hours, enzymes break down starches into sugars, building acids for flavor and CO2 for bubbles.
In addition, the autolyse effect hydrates flour fully, forming gluten naturally. You’ll see a bubbly, domed surface ready to explode in the oven. No wonder the crumb stays so open and airy.
Dutch Oven Preheat Builds Thermal Shock
Preheat your 4-6 quart Dutch oven at 450°F for 45 minutes to superheat the cast iron. When wet dough hits it, steam bursts dramatically under the lid, mimicking pro bakeries.
This triggers the Maillard reaction for deep golden color and crunch. Therefore, skip this, and you get pale, soft crust every time.
Oven Spring from Strategic Slashing
Slash the dough 1/2-inch deep in a cross right before baking. This controls where gas escapes, boosting rise by 30% in the steam phase.
However, go shallower, and the top bursts randomly. A sharp knife or lame ensures pretty patterns and max lift.
Equipment Choices for Artisan Bread Success
Why Dutch Oven Excels Over Baking Sheets
A 4-6 quart enameled cast iron Dutch oven holds heat like a champ and traps every bit of humidity. Enameled versions clean easier, while bare iron adds smokiness.
Baking sheets? They let steam escape, killing crust. No Dutch oven? Try a foil-covered stockpot, but expect less snap.
Tools for Shaping Sticky Dough
Grab a wooden spoon for mixing, it won’t overwork the dough. Heavily flour your counter for folding, and use a sharp knife for scoring.
Finish on a wire rack to cool evenly. Soggy bottoms ruin the vibe, so don’t skip it.
Phase 1: Mixing and Long Fermentation
Whisk Dry Ingredients for Even Distribution
In a large bowl, whisk flour, salt, and yeast until no clumps hide. Pour in warm water and stir with a spoon till shaggy, about 1 minute. No dry spots, that’s your cue.
Cover tight with plastic wrap. At room temp around 70°F, it rises 12-18 hours into bubbly goodness.
Monitor 12-18 Hour Rise Indicators
Look for doubled size, bubbly surface, and a domed center full of holes. If underproofed, wait longer; overproofed smells boozy, so fridge it to slow down.
Pro tip: Poke test, it should spring back slowly.
Phase 2: Preheat, Shape, and Rest
Superheat Dutch Oven Safely
Slide your Dutch oven in cold, then crank to 450°F for 45 minutes. Use thick oven mitts, it gets lava-hot. This step delivers the crust snap you crave.
Fold-into-Ball Shaping Technique
Scrape dough onto a floured counter. Fold edges to center 8 times, rotating as you go, to build tension. Flip seam-side down on parchment, cover with a floured towel.
If you enjoy the satisfying fold of dough, you’ll also appreciate the flaky layers in cheddar biscuits.
Rest 30 minutes till puffy. It firms up just enough for transfer.
Phase 3: Bake Covered for Steam Rise
Transfer Dough via Parchment Handles
Grab pot with mitts, lift by parchment edges, drop dough in. Lid on, bake 30 minutes. You’ll hear crackling as steam works its magic for huge rise.
Don’t peek early, steam loss kills oven spring.
Phase 4: Uncovered Bake to Golden Finish
Lid Removal Timing Precision
Off with the lid at 30 minutes, bake 15 more till deep brown. Tap for hollow thud, or check 205-210°F internal. Perfect doneness every time.
One-Hour Cooling Transforms Texture
Cool on a rack at least 1 hour. Steam escapes, starch sets for sliceable crumb. Cut early? It gums up, but toasting revives it.
Avoiding Common No-Knead Bread Pitfalls
Fixing Pale Crust Issues
Pale crust? Blame short preheat, tiny pot, or low temp. Steam sneaks out without a tight lid too. Next time, preheat fully and use parchment seal.
Dough Too Wet or Dense Solutions
Too wet from heaping flour cups, measure precisely. Dense? Test yeast in water first, or overmixed it. Gummy crumb means no cooling, always wait.
Storage Beyond Three Days
Wrap in a towel then bag at room temp up to 3 days. For longer, slice and freeze 3 months in bags. Thaw and toast for fresh crunch.
Flavor Variations for 4-Ingredient Base
Herb and Seed Infusions
Mix chopped rosemary into dough, or brush olive oil and sesame seeds pre-bake. Add herbs post-rise to keep aromas fresh. Instant flavor upgrade.
For a delightful twist on this simple loaf, explore the foolproof Cheddar Herb Bread recipe.
Whole Grain Swaps
Swap 1 cup all-purpose for whole wheat, add 1 tablespoon vital wheat gluten for lift. Bump water slightly for nutty, hearty loaf. Tastes heartier too.
Pairing No-Knead Artisan Bread
Classic Dips and Spreads
Tear chunks for olive oil and balsamic, or slather garlic herb butter. Pairs perfect with minestrone, that crust scoops every drop.
Pairing Ideas
Enjoy your artisan bread with these complementary dishes.
- For a complete meal, try this creamy salmon and dill penne, which offers a different texture and flavor profile.
- Pair your bread with a warm bowl of creamy roasted tomato soup for a comforting combination.
Sandwich and Toast Applications
Thick slices hold up for panini, cheese melts divine inside. Cube for crostini, the crust stays crisp under toppings.
No-Knead Bread FAQ
Can I Use Bread Flour Instead?
Yes, bread flour gives chewier crumb from higher protein. Increase water to 1 3/4 cups for 80% hydration. Same timing, even better structure.
What If My Dough Didn’t Double?
Cold kitchen slows it, so extend rise or warm spot. Dead yeast? Proof in warm water with sugar first. Fridge overnight fixes underproofing too.
Gluten-Free Version Possible?
Try a 1:1 gluten-free blend with xanthan gum. Cut yeast to 1/2 teaspoon, add 2 tablespoons oil, bake same way. Hydration drops to 65%, expect denser loaf.
Halve Recipe for Smaller Loaf?
Absolutely, use 1.5 cups flour, 3/4 tsp salt, 1/8 tsp yeast, 3/4 cup water. Fits 3-4 qt pot, timings identical. Perfect for smaller households.
Why Wait to Cool Before Slicing?
Hot bread steams inside, collapses crumb when cut. One hour lets starch retrograde for firm slices. Toast early cuts to crisp them up.
Artisan Bread
Course: BreadCuisine: AmericanDifficulty: medium1
loaf15
minutes45
minutes2400
kcal1080
MinutesHomemade bread with a soft, pale crust? This dead-simple recipe fixes that forever using your Dutch oven to trap steam from the wet dough, creating bakery-level crispiness without any special equipment. No kneading, no fuss, pro results.
Ingredients
3 cups all-purpose flour
1 1/2 teaspoons salt
1/4 teaspoon instant yeast
1 1/2 cups warm water (about 110 degrees F)
Parchment paper
Directions
- In a large bowl, whisk together flour, salt, and yeast. Add warm water and stir with a wooden spoon until a shaggy, sticky dough forms, no dry spots remain. Cover bowl tightly with plastic wrap. Let rise at room temperature for 12 to 18 hours until doubled and bubbly.
- Place a 4- to 6-quart Dutch oven with lid in the oven. Preheat to 450 degrees F for 45 minutes, so the pot gets screaming hot. This is key for the crispy crust.
- While oven heats, turn dough onto a heavily floured surface. Fold edges into center to form a loose ball. Place seam-side down on parchment paper. Cover loosely with a floured towel and let rest 30 minutes.
- Slash top of dough 1/2-inch deep with a sharp knife in a cross pattern for oven spring.
- Carefully remove hot Dutch oven. Lift dough by parchment and place inside. Cover with lid. Bake covered 30 minutes. The sealed pot traps the doughs own steam, creating a steamy environment for massive rise and ultra-crispy crust formation.
- Remove lid. Bake uncovered 15 minutes more until deep golden brown and crust crackles when tapped.
- Cool on wire rack at least 1 hour before slicing. Store at room temperature up to 3 days.
Notes
- Cool on wire rack at least 1 hour before slicing. Store at room temperature up to 3 days.