
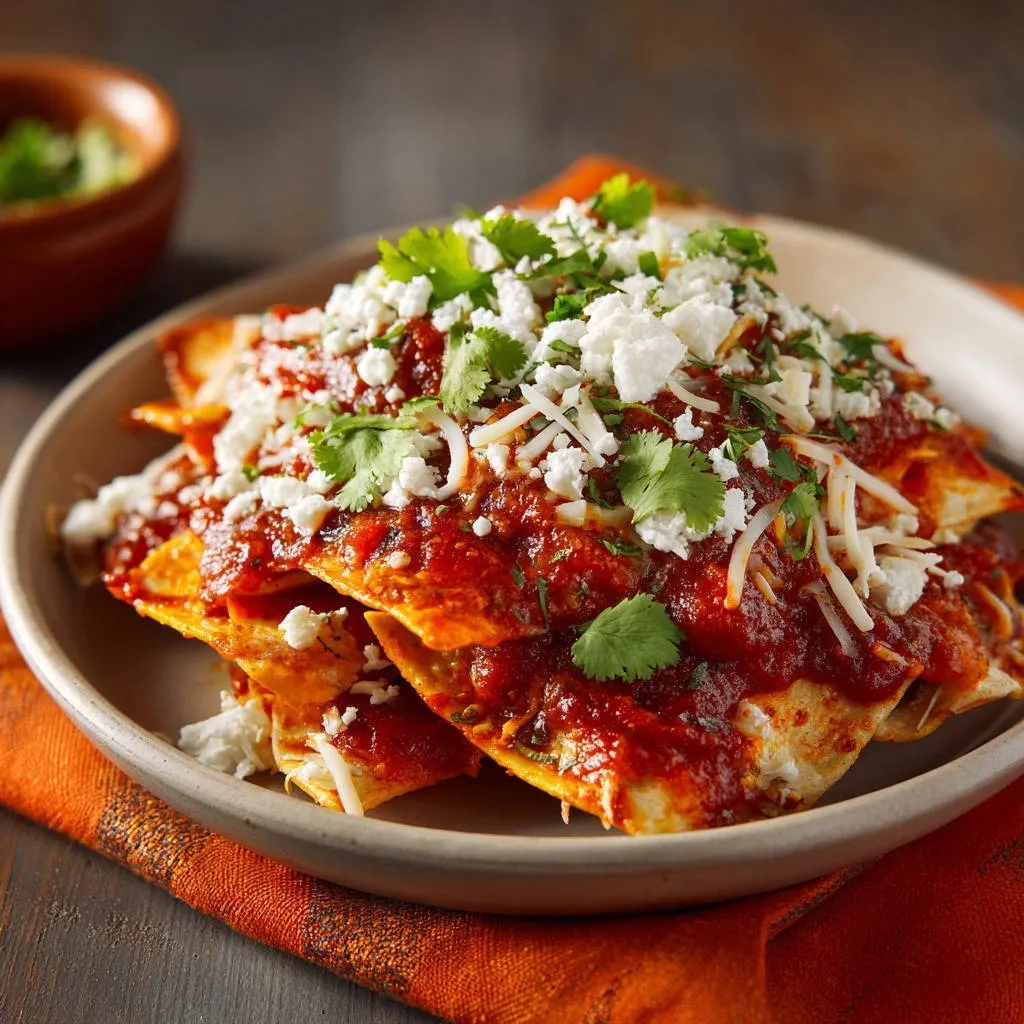
There’s nothing quite like a plate of Authentic Red Chilaquiles, but a soggy heap can be incredibly disappointing. Through years of testing, I’ve finally cracked the code to keeping those tortilla chips perfectly crisp, transforming a good dish into an unforgettable one.
This recipe provides a simple yet profound trick, ensuring every bite delivers that coveted crunch, making it the definitive guide for your next savory Mexican breakfast or delightful dinner.
The Crispy Chilaquiles Revolution: Say Goodbye to Soggy Chips
Our approach to Authentic Red Chilaquiles focuses on a crucial technique that guarantees crispy chips, defying the common soggy fate. This method ensures your homemade chilaquiles maintain their delightful texture from the first bite to the last.
Why Soggy Chilaquiles Happen (And How We Fix It)
Soggy chilaquiles typically result from chips absorbing too much sauce, too quickly. This usually happens when chips aren’t hot enough, or they sit in the sauce for too long.
Our recipe tackles this by focusing on pre-warming chips and a rapid, precise coating technique, ensuring each chip is coated but never saturated.
Beyond the Crunch: What Else Makes This Recipe Shine?
Beyond the texture, this recipe boasts an incredibly rich, silky red chile sauce. Straining the sauce through a fine-mesh sieve eliminates any fibrous bits, creating a velvety consistency.
The blend of guajillo and ancho chiles, combined with fresh aromatics, delivers a profound depth of flavor that is truly authentic.
Your Go-To for Brunch, Dinner, or Anytime Cravings
Authentic Red Chilaquiles are incredibly versatile, perfect for any meal. They make a hearty and satisfying Mexican breakfast classic, a quick and flavorful lunch, or a comforting dinner.
This savory Mexican dish is also ideal for entertaining, offering a vibrant and impressive centerpiece that will delight your guests.
Building Your Flavor Foundation: Essential Chilaquiles Ingredients
The quality of your ingredients directly impacts the success and flavor of your Authentic Red Chilaquiles. Selecting the right components ensures a truly delicious experience.
The Heart of the Dish: Tortilla Chips
Use good quality, thick-cut corn tortilla chips, about 12 ounces (8-10 cups). Thick-cut chips are paramount as they stand up better to the sauce and retain their crispiness longer than thin, delicate varieties.
Opt for chips with a robust corn flavor for the best base.
Crafting the Vibrant Red Sauce: Chiles, Tomatoes & Aromatics
The sauce starts with 4-5 dried guajillo chiles and 1-2 dried ancho chiles. Guajillos provide a mild, fruity, and slightly tangy base, while anchos add a deeper, smoky, and richer flavor.
Always remove stems and seeds from the chiles to reduce bitterness and ensure a smooth sauce. A large Roma tomato, a quarter white onion, and two cloves of garlic provide essential sweetness and aromatic depth to balance the chiles.
Liquid Gold: The Broth’s Role
Two cups of chicken or vegetable broth serve as the liquid base for the sauce. Chicken broth adds a savory richness, enhancing the overall depth of flavor.
For a vegetarian version, high-quality vegetable broth works perfectly, providing a clean and flavorful foundation.
Fresh Finishes and Essential Seasonings
Ground cumin and dried Mexican oregano are non-negotiable for an authentic flavor profile. Cumin offers earthy warmth, while Mexican oregano provides a distinct citrusy and slightly peppery note.
Salt is essential to bring out all the flavors in the sauce. For garnish, a generous half cup of crumbled Cotija cheese adds a salty, tangy creaminess, and a quarter cup of fresh chopped cilantro provides a vibrant, herbaceous finish.
Kitchen Essentials for Your Chilaquiles Journey
Having the right tools simplifies the preparation of your Authentic Red Chilaquiles, ensuring a smooth and enjoyable cooking process.
Blending and Straining Must-Haves
A powerful blender is crucial for achieving a perfectly smooth red chile sauce, ensuring no chunky bits remain. A fine-mesh sieve is equally important for straining the sauce, guaranteeing that coveted silky consistency.
Skillet Savvy: Choosing Your Cookware
A large, deep skillet or a Dutch oven is ideal for cooking the sauce and tossing the chips. Its generous size allows for even heating and easy manipulation of the ingredients without overcrowding.
Basic Prep Tools
Ensure you have a sturdy cutting board and a sharp knife for preparing the tomato, onion, and garlic. Measuring cups and spoons are also necessary for precise ingredient proportions.
Crafting Your Authentic Red Chilaquiles: Step-by-Step Guide
-
Prepare the Sauce Base:
In a medium saucepan, combine dried guajillo and ancho chiles (stems and seeds removed), Roma tomato halves, white onion, and garlic. Cover with about 3 cups of water and bring to a boil. Reduce heat and simmer for 10-15 minutes until chiles are softened.
Softening the chiles is crucial for a smooth sauce and to fully release their vibrant flavors. They should be pliable and easily pierced with a fork.
-
Blend the Sauce to Silky Perfection:
Carefully transfer the softened chiles, tomato, onion, garlic, and about 1 cup of the cooking liquid to a blender. Add 2 cups of chicken or vegetable broth, ground cumin, and dried Mexican oregano. Blend until completely smooth.
Strain the sauce through a fine-mesh sieve into a bowl, pressing on solids to extract all liquid, discarding the solids. This meticulous step ensures an incredibly silky-smooth sauce, free of any fibrous bits from the chiles, elevating the texture of your red chile sauce.
-
Cook and Thicken the Sauce:
Heat 2 tablespoons of vegetable oil in a large, deep skillet or Dutch oven over medium heat. Pour in the strained sauce. Bring to a simmer, stirring occasionally, and cook for 10-15 minutes, or until the sauce has thickened slightly and deepened in color.
Season generously with salt to taste. The sauce should be rich and thick enough to coat the back of a spoon, not watery. This optimal richness is key to preventing immediate sogginess when chips are added, ensuring your Authentic Red Chilaquiles remain crispy.
-
The Crispy Chip Secret: Pre-Warming Your Tortillas:
While the sauce is simmering, ensure your chips are at their absolute crispiest. If they aren’t, briefly warm them. You can spread them on a baking sheet and heat in a 300F oven for 5 minutes, or gently toss them in a dry skillet over medium-low heat for a minute or two.
This quick warm-up enhances their crispness, providing a critical barrier against the sauce and ensuring that coveted crunch in your crispy tortilla chips.
-
Combine and Serve IMMEDIATELY: The Golden Rule:
Crucially, do not add all the chips to the sauce and let them sit. Instead, add about half of the warmed tortilla chips to the hot sauce in the skillet. Using tongs or a large spoon, quickly and gently toss the chips just until they are coated in the sauce, about 30 seconds to 1 minute.
The goal is to coat the chips evenly, not to let them soak and become mushy. This quick toss preserves their texture, which is the cornerstone of perfect Authentic Red Chilaquiles.
-
Plate and Garnish for Perfection:
Immediately transfer the sauced chips to serving plates. Repeat with the remaining chips if serving a larger group, or sauce a smaller portion at a time.
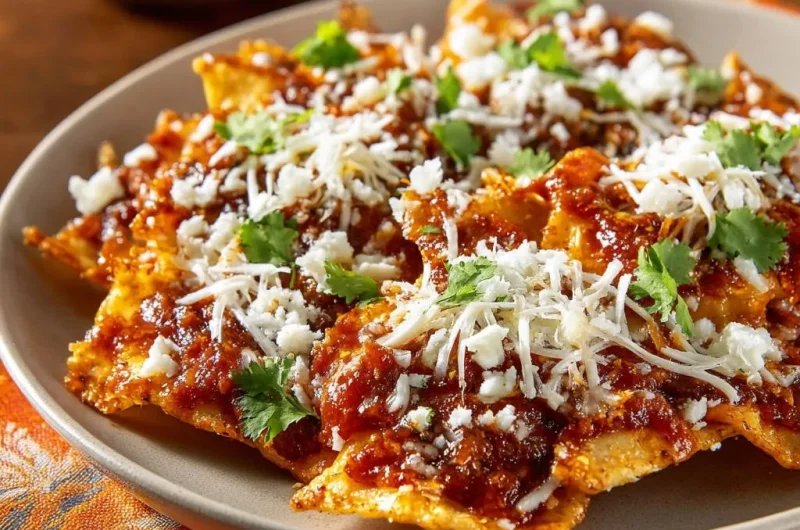
Top generously with crumbled or shredded Cotija cheese and fresh chopped cilantro. Serve piping hot and enjoy that perfect crunch before it fades! This Mexican breakfast classic is best enjoyed fresh.
Unlock the Crispy Secret: Pro Tips for Perfect Chilaquiles
Elevate your Authentic Red Chilaquiles further with these expert tips, ensuring a consistently delicious and perfectly textured dish every time.
Mastering the Sauce Consistency
If your sauce appears too thin after simmering, continue to cook it down until it coats the back of a spoon. If it becomes too thick, a splash of additional broth will easily bring it back to the ideal consistency.
The Art of the Quick Toss (No More Sog!)
Speed is your ally when combining chips and sauce. Toss quickly and serve immediately. For larger gatherings, it’s best to sauce and plate in smaller batches to maintain crispness for all servings.
Customizing Your Heat Level
For more heat, consider adding a small serrano chile (stems removed) to the blender with the other sauce ingredients. For a milder version, reduce the number of ancho chiles or omit them entirely.
Flavor Enhancers and Garnish Pairings
A squeeze of fresh lime juice brightens the flavors beautifully. A dollop of Mexican crema or sour cream adds a cooling, tangy counterpoint. Slices of creamy avocado or a fried egg on top are traditional and delicious additions.
Serving Suggestions & Smart Storage for Chilaquiles
Knowing how to serve and store your Authentic Red Chilaquiles ensures maximum enjoyment and minimizes waste.
Perfect Pairings: What to Serve With Chilaquiles
Chilaquiles are a meal in themselves, but they pair wonderfully with sides like refried beans or Mexican rice. For a complete brunch experience, consider serving them alongside scrambled eggs, or a fresh fruit platter.
A vibrant side of perfect pico de gallo or a refreshing Mexican street corn potato salad would also be fantastic accompaniments.
Storing Leftovers (If There Are Any!)
While best enjoyed immediately, any leftover sauced chilaquiles can be stored in an airtight container in the refrigerator for up to 1-2 days. Be aware that the chips will soften significantly upon storage.
For optimal texture, it’s best to store any unsauced chips and leftover sauce separately. This allows you to combine and heat small portions as needed, preserving some crunch.
Make-Ahead Sauce: Your Weekday Hero
The red chile sauce can be prepared up to 3 days in advance and stored in the refrigerator. This makes assembling your homemade chilaquiles incredibly quick on a busy morning or evening.
Simply reheat the sauce in a skillet, warm your chips, and proceed with the quick toss for a fast and delicious meal.
Troubleshooting Common Chilaquiles Challenges
Even with the best intentions, cooking can sometimes present challenges. Here’s how to address common issues when making Authentic Red Chilaquiles.
“My Chilaquiles Are Soggy!”
This is the most common issue. Ensure your chips are hot and crisp from pre-warming right before saucing. The key is the quick toss – coat them in the sauce for only 30-60 seconds, then immediately transfer to plates. Never let them sit in the sauce.
“The Sauce Lacks Depth/Flavor”
Taste and adjust seasoning frequently. If the sauce seems bland, a little more salt can make a big difference. Simmering the sauce longer also helps it deepen in color and intensify flavor. Some cooks lightly toast the dried chiles in a dry skillet before simmering them for an even richer, nuttier flavor.
“Too Spicy/Not Spicy Enough”
If your sauce is too spicy, add a dollop of Mexican crema, sour cream, or extra Cotija cheese to your individual serving to temper the heat. For more spice, you can add a pinch of cayenne pepper directly to the sauce while it simmers, or blend a small fresh serrano pepper into the initial sauce mixture for a brighter kick.
Your Chilaquiles Questions Answered
Here are answers to some common inquiries about making the best Authentic Red Chilaquiles.
Can I Use Store-Bought Red Sauce for Authentic Red Chilaquiles?
While homemade sauce offers superior depth, you can use a good quality store-bought red enchilada sauce as a shortcut. For best results, simmer it with a pinch of cumin and Mexican oregano to enhance the flavor, and consider blending in a small amount of roasted tomato or onion for freshness.
What’s the Best Tortilla Chip to Use?
The absolute best chips are fresh, fried-to-order, thick-cut corn tortillas. If that’s not feasible, look for sturdy, thick-cut, restaurant-style corn tortilla chips from a reputable brand. Avoid thin, overly salty, or flavored chips as they will disintegrate too quickly in the sauce.
Can I Make This Vegetarian?
Absolutely! This recipe is easily made vegetarian. Simply ensure you use vegetable broth instead of chicken broth for the sauce. Also, verify that your Cotija cheese is vegetarian-friendly, as some contain animal rennet.
How Can I Make My Chilaquiles Even More Authentic?
For an extra layer of authenticity, consider adding a sprig of epazote to the sauce while it simmers; it imparts a unique, slightly anise-like, earthy flavor common in traditional Mexican cooking. Additionally, some traditional recipes use lard instead of vegetable oil to cook the sauce, offering a richer flavor.
Ready to Impress? Share Your Chilaquiles Masterpiece!
You’ve now unlocked the secrets to perfectly crispy, incredibly flavorful Authentic Red Chilaquiles. This recipe isn’t just about cooking; it’s about mastering a technique that elevates a classic Mexican dish from good to unforgettable.
We encourage you to try this recipe, share your creations, and tag us on social media! We love seeing your culinary adventures. For more delicious and authentic recipes, explore our collection, including our perfect pico de gallo, for even more vibrant flavors.
Chilaquiles
Course: Main CourseCuisine: MexicanDifficulty: medium4
servings15
minutes30
minutes450
kcal45
minutesDiscover the secret to making authentic red chilaquiles without the dreaded soggy chips. This recipe teaches a simple trick to keep your tortilla chips perfectly crisp, combined with a rich, silky red chile sauce. A game-changer for your breakfast or brunch!
Ingredients
12 ounces good quality thick-cut corn tortilla chips (about 8-10 cups)
4-5 dried guajillo chiles, stems and seeds removed
1-2 dried ancho chiles, stems and seeds removed
1 large Roma tomato, halved
1/4 white onion, roughly chopped
2 cloves garlic
2 cups chicken or vegetable broth
1/2 teaspoon ground cumin
1/4 teaspoon dried Mexican oregano
Salt to taste
2 tablespoons vegetable oil
1/2 cup crumbled or shredded Cotija cheese
1/4 cup fresh cilantro, chopped
Directions
- Prepare the Sauce Base: In a medium saucepan, combine dried guajillo and ancho chiles (stems and seeds removed), Roma tomato halves, white onion, and garlic. Cover with about 3 cups of water and bring to a boil. Reduce heat and simmer for 10-15 minutes until chiles are softened.
- Blend the Sauce: Carefully transfer the softened chiles, tomato, onion, garlic, and about 1 cup of the cooking liquid to a blender. Add 2 cups of chicken or vegetable broth, ground cumin, and dried Mexican oregano. Blend until completely smooth. Strain the sauce through a fine-mesh sieve into a bowl, pressing on solids to extract all liquid, discarding the solids. This step ensures a silky smooth sauce.
- Cook the Sauce: Heat 2 tablespoons of vegetable oil in a large, deep skillet or Dutch oven over medium heat. Pour in the strained sauce. Bring to a simmer, stirring occasionally, and cook for 10-15 minutes, or until the sauce has thickened slightly and deepened in color. Season generously with salt to taste. The sauce should be rich and thick enough to coat the back of a spoon, not watery. This richness helps prevent immediate sogginess.
- The Crispy Chip Secret: While the sauce is simmering, if your chips aren’t super crisp, briefly warm them. You can spread them on a baking sheet and heat in a 300F oven for 5 minutes, or gently toss them in a dry skillet over medium-low heat for a minute or two. This ensures they are at their crispiest just before saucing.
- Combine and Serve IMMEDIATELY: Crucially, do not add all the chips to the sauce and let them sit. Instead, add about half of the warmed tortilla chips to the hot sauce in the skillet. Using tongs or a large spoon, quickly and gently toss the chips just until they are coated in the sauce, about 30 seconds to 1 minute. The goal is to coat, not to let them soak and become mushy.
- Plate and Garnish: Immediately transfer the sauced chips to serving plates. Repeat with the remaining chips if serving a larger group, or sauce a smaller portion at a time. Top generously with crumbled or shredded Cotija cheese and fresh chopped cilantro. Serve piping hot and enjoy that perfect crunch!
Notes
- Key trick for crispy chilaquiles: warm chips before coating and serve immediately!