For years, traditional cheesecakes and their notorious water baths felt like an intimidating challenge, often resulting in cracks or dry edges. Then I discovered the magic of Basque Cheesecake, and everything changed. This particular recipe consistently delivers that unbelievably creamy, almost custardy texture we all crave, without any fuss.
It’s the simplest secret to a show-stopping dessert that’s perfectly “burnt” on top and molten within, guaranteed to impress every time.
For a similar creamy delight, check out this method for Red Velvet Cheesecake stuffed cookies.
The Basque Cheesecake You’ve Dreamed Of: Here’s Why!
This isn’t just another cheesecake recipe; it’s a game-changer. It strips away the complexities of traditional cheesecakes, focusing purely on achieving an extraordinary texture and flavor with minimal effort.
Effortless Elegance: Simple Steps, Stunning Results
Forget the precise temperature controls and the dreaded water bath. This Basque cheesecake embraces simplicity, requiring basic mixing and a high-heat oven. The beauty is in its rustic, free-form presentation, eliminating the need for a perfect, unblemished surface.
It’s a truly approachable recipe that consistently yields professional-looking results with a surprisingly easy process.
The Secret to That Signature Melt-in-Your-Mouth Texture
The secret to this cheesecake’s incredible creaminess lies in a few key factors: a high ratio of cream cheese and heavy cream, coupled with minimal mixing. This technique prevents too much air from incorporating into the batter, which is often the culprit behind a dense or cake-like cheesecake.
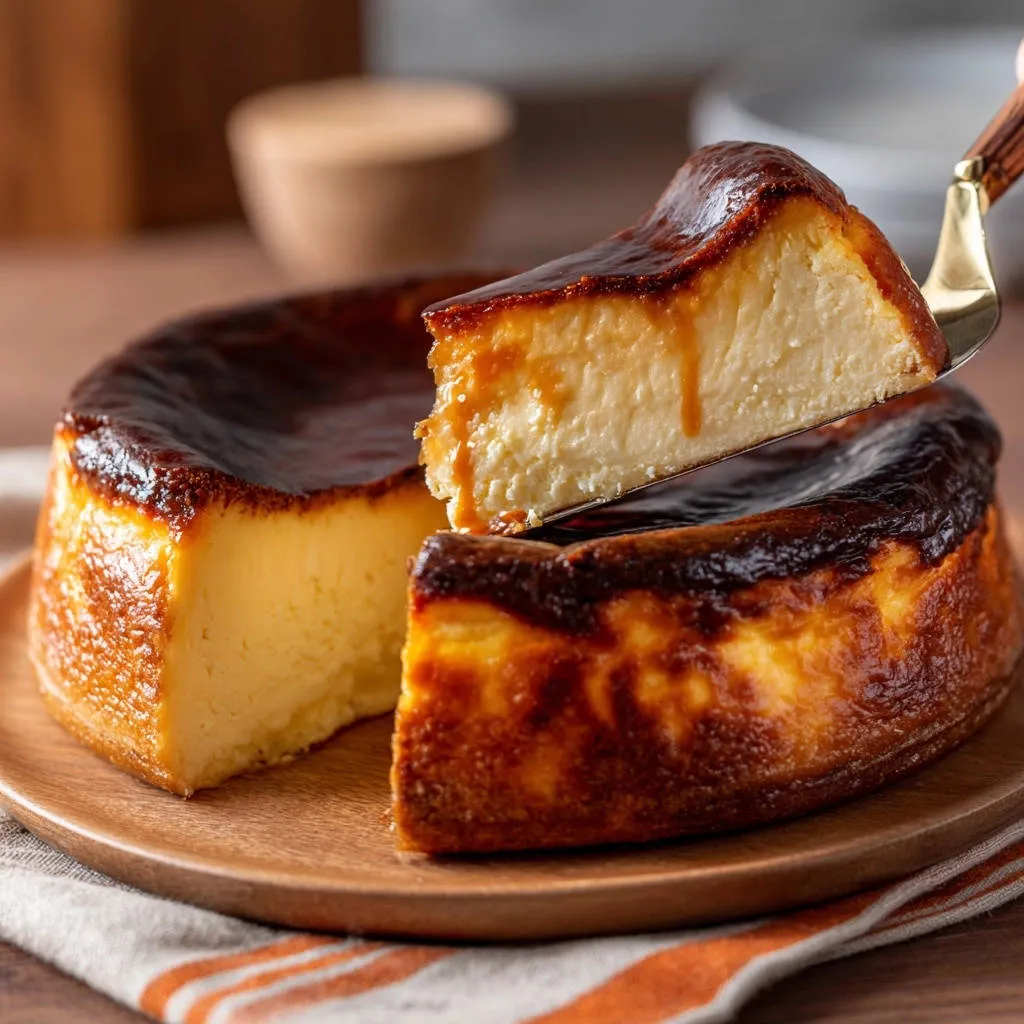
The result is a rich, almost custardy interior that truly melts in your mouth with every bite.
For even more creamy dessert ideas, check out this creamy pumpkin swirl cheesecake.
That Perfectly “Burnt” Top: A Flavor Revelation
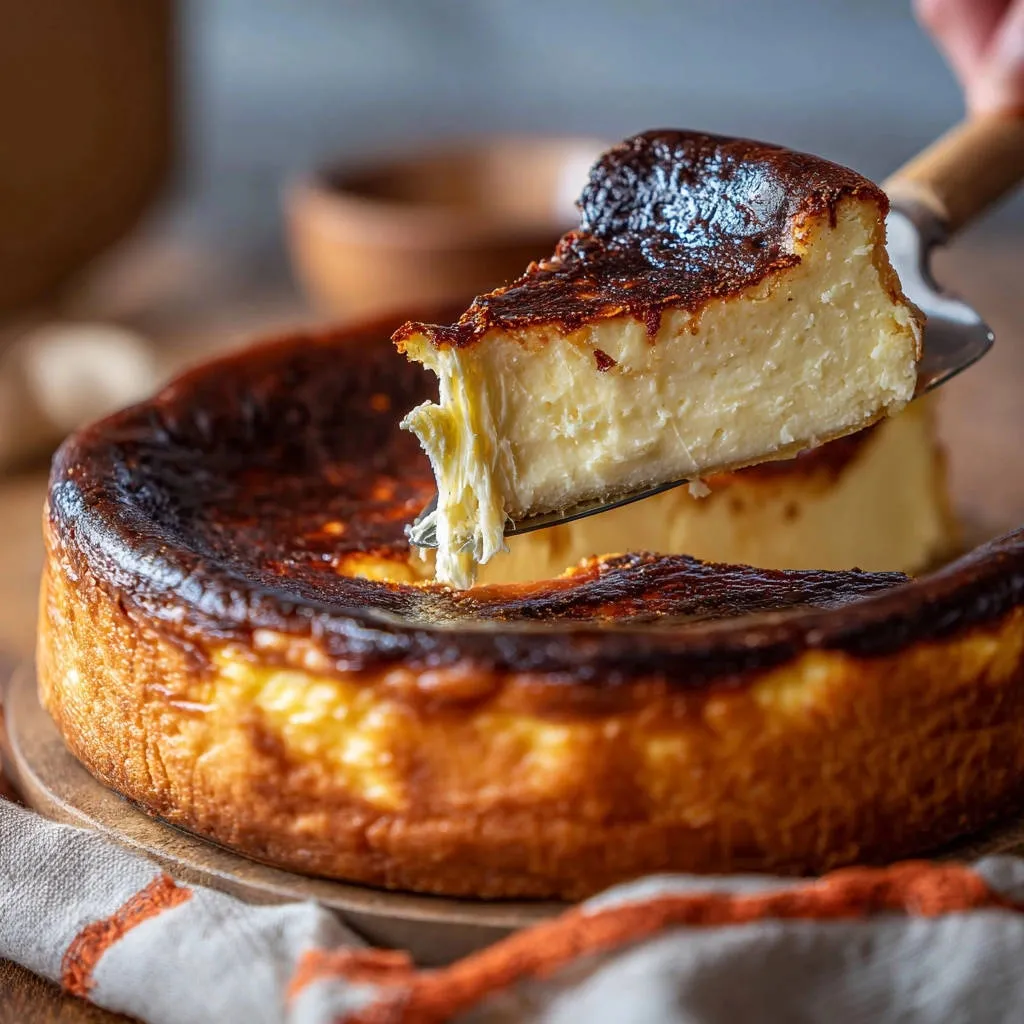
The deeply caramelized, almost blackened surface is not a mistake; it’s the defining characteristic of an authentic Basque cheesecake. This high-temperature bake creates a beautifully bitter, caramelized crust that perfectly contrasts the sweet, creamy interior.
It adds an unexpected depth of flavor, transforming a simple dessert into something truly extraordinary.
Building Your Masterpiece: Key Basque Cheesecake Ingredients
Each ingredient plays a vital role in crafting the distinctive texture and flavor of this beloved dessert. Quality and preparation truly matter here.
Cream Cheese: The Foundation of Creaminess
Always opt for full-fat cream cheese, and ensure it’s completely softened to room temperature. This is non-negotiable for achieving a smooth, lump-free batter that forms the rich, creamy base of your Basque cheesecake.
Using softened cream cheese also helps it emulsify properly with other ingredients, guaranteeing a uniform and luscious texture.
The Sweet Balance: Sugar’s Role
Granulated sugar provides more than just sweetness; it’s crucial for the cheesecake’s structure and the development of that iconic “burnt” top. As it bakes, the sugar caramelizes, contributing to both the color and the complex flavor profile.
Eggs & Cream: For That Signature Custard Texture
Large eggs, ideally at room temperature, contribute to the custardy texture and help set the cheesecake. Room temperature eggs blend more seamlessly into the batter, preventing curdling and promoting a smoother consistency.
Heavy cream is essential for the rich, decadent mouthfeel, creating that desirable almost-molten interior that makes Basque cheesecake so unique.
Flour & Salt: The Unsung Heroes
A small amount of all-purpose flour provides just enough structure to the cheesecake, preventing it from collapsing while still allowing it to remain incredibly tender. Its role is subtle but important.
Salt, though minimal, is a critical flavor enhancer. It balances the sweetness of the sugar and brightens all the other flavors, ensuring the cheesecake isn’t overly cloying.
Essential Tools for Your Basque Cheesecake Journey
Having the right equipment on hand makes the process smooth and ensures the best possible outcome for your Basque cheesecake.
Must-Have Baking Equipment
Electric Mixer (Handheld or Stand): Essential for thoroughly blending the cream cheese until smooth, and then gently incorporating the other ingredients without overmixing. A stand mixer offers more hands-free convenience.
Large Mixing Bowls: You’ll need ample space to beat the cream cheese and combine the batter without spills, especially given the generous quantities of ingredients.
Measuring Cups & Spoons: Accurate measurements are key in baking, ensuring the correct balance of flavors and proper setting of your cheesecake.
Preparing Your Springform Pan
A 9-inch springform pan is ideal for this recipe, allowing for easy release of the cheesecake. The critical step is lining it with two sheets of parchment paper.
By crinkling the parchment paper first, it becomes more pliable and easier to press into the pan, extending a few inches above the rim. This creates a protective barrier, helps achieve the signature rustic look, and prevents any potential leaks during baking.
Crafting Perfection: Your Step-by-Step Basque Cheesecake Guide
- Prepping for Success: Pan & Oven
Preheat your oven to 425°F (220°C). Carefully line a 9-inch springform pan with two sheets of crinkled parchment paper, pressing them into the pan so they extend several inches above the rim. This method is crucial for preventing leaks and achieving the rustic, ‘burnt’ aesthetic.
- Cream Cheese Base: Smooth & Lump-Free
In a large bowl, using an electric mixer, beat the softened cream cheese on medium speed until it’s completely smooth and free of any lumps. This foundational step guarantees a uniform, silky texture in your finished cheesecake.
- Gradually Add Sweetness
Slowly incorporate the granulated sugar into the cream cheese, beating until just combined and smooth. Be careful not to overmix at this stage; excessive air can compromise the creamy texture we’re aiming for.
- Eggs: Incorporate Gently, Avoid Overmixing
Add the eggs one at a time, beating on low speed for only about 15 seconds after each addition, just until they are fully incorporated. This is critical for achieving a creamy center; overmixing eggs introduces too much air, which can lead to a dense, cake-like result.
- Cream & Vanilla: A Light Touch
Pour in the heavy cream and vanilla extract, mixing on low speed until just combined. Again, minimize mixing to maintain the desired custardy consistency, ensuring your Basque cheesecake is perfectly smooth.
- Flour & Salt: The Final Whisk
Sift the all-purpose flour and salt directly into the batter. Mix on the lowest speed for only a few seconds, stopping as soon as no dry streaks remain. Overmixing flour develops gluten, which will lead to a tougher, less creamy cheesecake.
- Pour & Prepare for the Bake
Pour the now quite liquidy batter into your prepared springform pan. The runny consistency is perfectly normal and contributes significantly to the cheesecake’s unique texture as it bakes.
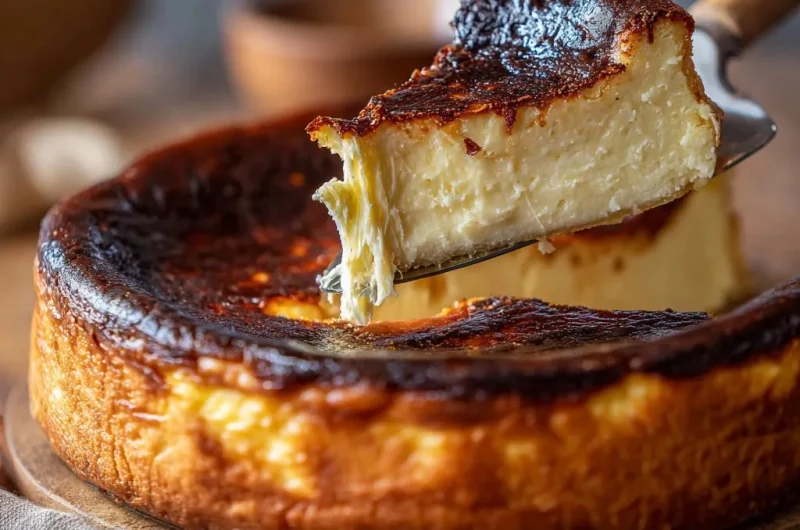
- The Signature “Burnt” Bake
Bake for 50-60 minutes, or until the top is deeply caramelized, almost black in spots, and the center is very jiggly when gently shaken. Do not be alarmed by the dark color; this is the signature ‘burnt’ crust. The visibly jiggly center indicates a perfectly creamy, almost molten interior that will set beautifully.
- Cooling: The Patience Factor
Remove the cheesecake from the oven and let it cool completely at room temperature for at least 3 hours. It will naturally deflate and firm up during this process, developing its luscious, creamy texture.
- Serve or Chill: Your Preference
Once fully cooled, you can refrigerate it for another 2-3 hours for a firmer slice, or serve it immediately at room temperature for an even softer, gooier experience. Slice and enjoy that unbelievably creamy center!
Chef’s Secrets: Elevating Your Basque Cheesecake Game
Achieving Basque cheesecake perfection is simple, especially with these expert tips:
Room Temperature Ingredients are Non-Negotiable: Ensure your cream cheese, eggs, and heavy cream are all at room temperature. This helps them emulsify properly, preventing lumps and ensuring a smooth, uniform batter that yields a silky-smooth texture.
Mastering the Art of Not Overmixing: The golden rule for Basque cheesecake is minimal mixing, particularly after adding eggs and flour. Overmixing incorporates too much air and develops gluten, leading to a denser, more cake-like texture instead of the desired creamy, custardy one.
Don’t Fear the “Burnt” Top: The deeply caramelized, almost blackened top is not a mistake but the defining characteristic of a Basque cheesecake. It provides a delightful contrast in flavor and texture, so trust the process and embrace the dark hue!
Embrace the Jiggly Center: A very jiggly center when you take the cheesecake out of the oven is exactly what you want. It signifies that the interior is still molten and will set to that perfect creamy consistency as it cools, ensuring a luscious final product.
The Parchment Paper Advantage: Crinkling and extending the parchment paper above the pan’s rim serves two crucial purposes: it protects the cheesecake from direct heat, preventing burning, and contributes to its rustic, free-form aesthetic.
Troubleshooting Your Basque Cheesecake: Common Questions Solved
Even with simple recipes, questions can arise. Here are solutions to common Basque cheesecake concerns.
Why Is My Cheesecake Too Dense?
A dense cheesecake often results from overmixing the batter, especially after adding the eggs or flour. Too much air gets incorporated, or gluten develops excessively. Ensure your ingredients are at room temperature and mix only until just combined at each stage.
Help! My Top Isn’t Dark Enough!
The signature “burnt” top comes from high heat and sufficient baking time. If your top isn’t dark enough, your oven might run cool, or it may need a few more minutes. Don’t be afraid to let it get deeply caramelized, almost black in spots; this is part of its charm and flavor.
Cracks in the Surface: What Went Wrong?
While Basque cheesecake often has a rustic, sometimes cracked appearance, deep cracks can indicate overbaking or too rapid cooling. Ensure you remove it when the center is still jiggly, and allow it to cool slowly at room temperature, away from drafts.
My Cheesecake Is Still Too Liquid!
If your cheesecake seems overly liquid after cooling, it might need more time to set. The “jiggly center” is crucial, but it will firm up considerably as it cools. For a firmer slice, refrigerate it for an additional 2-3 hours after it has fully cooled at room temperature.
Serving, Storing & Enjoying Your Basque Masterpiece
Knowing how to best serve and store your Basque cheesecake ensures every slice is as perfect as the first.
Ideal Serving Temperatures & Pairings
Basque cheesecake is incredibly versatile in serving temperature. For a truly gooey, molten center, serve it at room temperature. If you prefer a firmer slice, chill it for a few hours before serving. It’s spectacular on its own, but also pairs beautifully with fresh berries, a drizzle of chocolate sauce, or even a strong cup of coffee.
Complementary Dishes
Explore these dishes that offer a satisfying contrast or a shared theme with your Basque Cheesecake.
- For a hearty and savory counterpoint, consider the Savory Beef and Cheddar Breakfast Pie, featuring rich beef and sharp cheddar that complements the cheesecake’s sweetness.
- If you enjoy cheesy baked dishes, this Cheesy Artichoke and Ham Casserole offers a similar comforting texture with its blend of artichoke and savory notes.
For an extra touch, consider pairing it with a vibrant fruit compote, similar to how you might enhance a perfect strawberry swirl cheesecake.
Storage Solutions for Leftovers
Store any leftover Basque cheesecake in an airtight container in the refrigerator for up to 3-4 days. This helps maintain its freshness and prevents it from absorbing other odors in the fridge.
Always bring it closer to room temperature before serving if you prefer the gooier texture.
Can You Make It Ahead? Yes!
This Basque cheesecake is an excellent make-ahead dessert! You can bake it a day or two in advance, allowing it ample time to cool and fully set in the refrigerator. This makes it perfect for entertaining, as you can focus on other dishes on the day of your event.
Your Basque Cheesecake Questions Answered
Let’s clarify some common inquiries about this delightful dessert.
What’s the Difference Between Basque and New York Cheesecake?
Basque cheesecake, unlike its New York counterpart, has no crust and is baked at a high temperature to create a caramelized, almost burnt top. It’s known for its incredibly creamy, often molten interior and rustic appearance, with no water bath required.
New York cheesecake typically features a graham cracker crust, a dense and rich cream cheese filling, and is often baked in a water bath to prevent cracks, resulting in a smooth, lighter golden surface.
Can I Make This Basque Cheesecake Gluten-Free?
Yes, you can absolutely make this Basque cheesecake gluten-free. Simply substitute the all-purpose flour with an equal amount of a good quality gluten-free all-purpose flour blend. Ensure your blend contains xanthan gum for structure, or add a quarter teaspoon if it doesn’t.
Can I Halve or Double the Recipe?
You can successfully halve this recipe by using a 6-inch springform pan, keeping in mind the baking time might be slightly reduced (start checking around 40-45 minutes). Doubling the recipe is possible, but you would need a much larger pan (e.g., a 12-inch springform) or to bake two separate 9-inch cheesecakes, which is often easier.
The principles of minimal mixing remain crucial regardless of batch size.
Do I Need a Water Bath for This Recipe?
Absolutely not! One of the beautiful aspects of Basque cheesecake is its simplicity and the absence of a water bath. The high-heat baking and intentional “burnt” crust eliminate the need for this traditional cheesecake technique, making it far less intimidating.
What if I don’t have a springform pan?
While a springform pan is ideal for its easy release, you can use a regular deep 9-inch round cake pan. You’ll need to line it very carefully with parchment paper, allowing plenty of overhang, to assist with lifting the cheesecake out once cooled. It might not have the exact same rustic edge, but the flavor and texture will still be incredible. This method is similar to how you might handle other delicate bakes like a classic lemon cake if not using a bundt pan.
Ready to Impress? Share Your Basque Cheesecake Masterpiece!
There’s a unique satisfaction in pulling this rustic, deeply caramelized Basque cheesecake from the oven, knowing the perfectly creamy interior awaits. This recipe is more than just a dessert; it’s an experience in effortless elegance and incredible flavor.
Give it a try, trust the “burnt” process, and prepare to delight everyone with your impressive baking skills. We’d love to see your creations-share your Basque cheesecake triumphs with us!
Basque Cheesecake
Course: DessertCuisine: MediterraneanDifficulty: medium8
servings20
minutes1
hour550
kcal360
minutesThis Basque cheesecake offers a simple secret to achieving an unbelievably creamy, almost custardy texture every time. Enjoy a dessert that practically melts in your mouth, featuring its signature deeply caramelized ‘burnt’ crust. It’s surprisingly easy to make this level of perfection at home.
Ingredients
2 pounds cream cheese, softened
1 1/2 cups granulated sugar
6 large eggs, at room temperature
2 cups heavy cream
1/2 teaspoon vanilla extract
1/4 cup all-purpose flour
1/2 teaspoon salt
Directions
- Preheat your oven to 425F (220C). Line a 9-inch springform pan with two sheets of parchment paper, crinkling them up first and then pressing them into the pan so they extend a few inches above the rim. This creates a protective barrier and helps get that signature rustic look.
- In a large bowl, using a handheld or stand mixer, beat the softened cream cheese on medium speed until completely smooth and lump-free. This initial step is critical for a uniform, creamy base.
- Gradually add the granulated sugar to the cream cheese, beating until just combined and smooth. Avoid overmixing to prevent incorporating too much air.
- Add the eggs one at a time, beating on low speed for only about 15 seconds after each addition, just until fully incorporated. This is key for our creamy center: do not overmix the eggs! Excess air can lead to a denser, more cake-like texture.
- Pour in the heavy cream and vanilla extract, mixing on low speed until just combined. Again, minimize mixing.
- Sift the all-purpose flour and salt directly into the batter. Mix on the lowest speed for only a few seconds, just until no dry streaks remain. Overmixing the flour will develop gluten, leading to a tougher, less creamy cheesecake.
- Pour the batter into your prepared springform pan. The batter will be quite liquidy, which is exactly what we want.
- Bake for 50-60 minutes, or until the top is deeply caramelized and almost black in spots, and the center is very jiggly when you gently shake the pan. Do not be afraid of the dark color; this is the signature ‘burnt’ crust! The jiggly center is your guarantee of a perfectly creamy, almost molten interior.
- Remove the cheesecake from the oven and let it cool completely at room temperature for at least 3 hours. It will deflate and firm up as it cools, developing that luscious, creamy texture.
- Once cooled, you can refrigerate it for another 2-3 hours for a firmer slice, or serve it at room temperature for an even softer, gooier experience. Slice and enjoy that unbelievably creamy center!
Notes
- Ensure all dairy and eggs are at room temperature for the creamiest texture. Avoid overmixing the batter at each step.