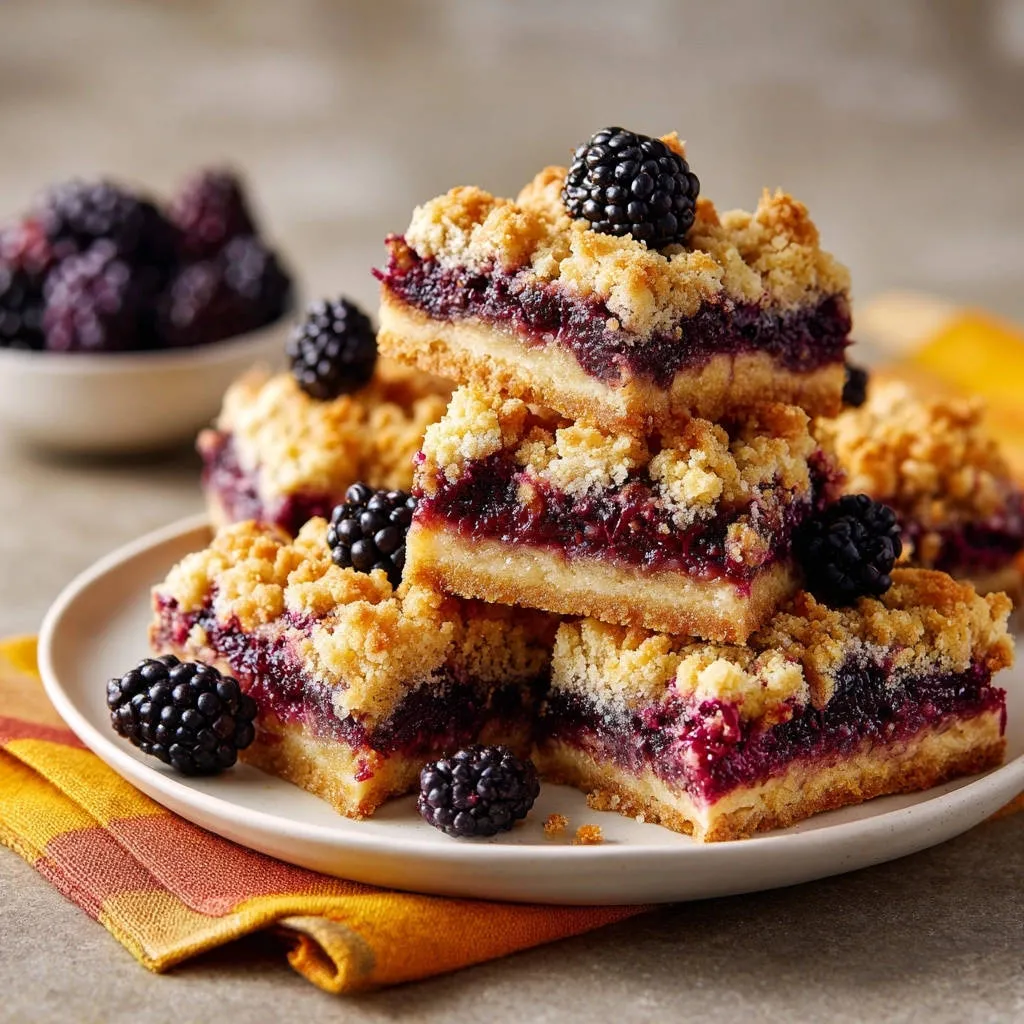
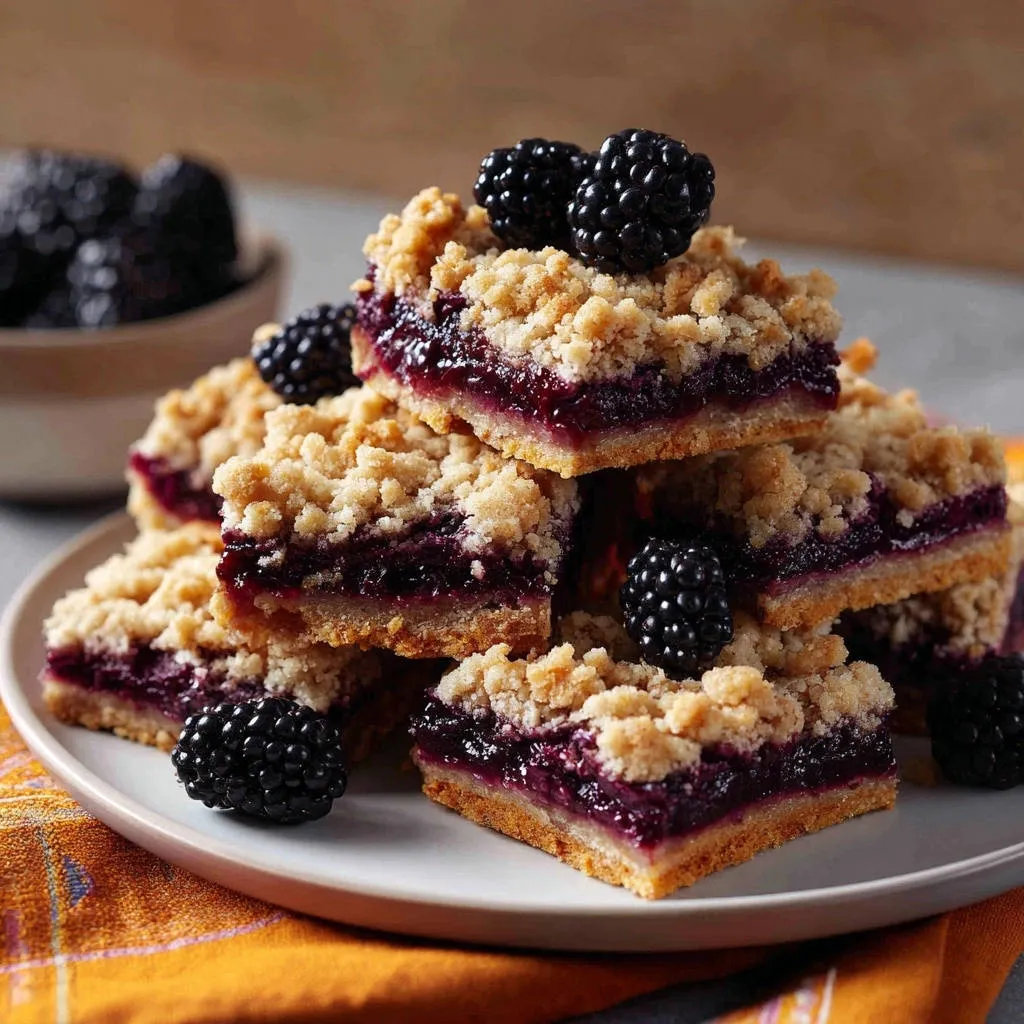
There’s nothing quite like the warmth of homemade baked goods, but I know the frustration of a beautifully golden top only to find a disappointing, soggy bottom with Blackberry Crumble Bars. It used to be my biggest challenge! After years of testing, I’ve finally perfected a method that guarantees a firm, buttery crust every single time, letting that vibrant, sweet-tart blackberry filling truly shine.
Why These Blackberry Crumble Bars Will Be Your New Go-To
The Game-Changing Secret to a Crisp, Never-Soggy Crust
The dreaded soggy bottom is a common woe for many bakers, especially with juicy fruit fillings. This recipe tackles it head-on with a two-pronged approach: a crucial partial bake of the crust and the strategic use of cornstarch in the filling.
These techniques work together to create an impenetrable barrier, protecting the buttery base from the fruit’s natural moisture. You’ll achieve a perfectly crisp and sturdy foundation that holds up beautifully to every bite.
Bursting with Flavor: What Makes Our Filling Shine
Our blackberry filling strikes the perfect balance between sweet and tart, allowing the natural vibrancy of the berries to dominate. Fresh lemon juice cuts through the sweetness, enhancing the fruit’s brightness, while cornstarch ensures a luscious, thick consistency.
This careful combination creates a filling that’s not just delicious, but also perfectly textured to complement the rich, crumbly topping.
Gathering Your Essentials: Ingredients for Incredible Crumble Bars
For the Golden Crumble & Sturdy Base
All-Purpose Flour: Provides the fundamental structure for both the base and the crumbly topping. It ensures a tender, yet firm, texture.
Granulated Sugar: Adds essential sweetness and helps create that desirable golden-brown color and crispness.
Salt: A small but mighty ingredient, salt balances the sweetness and enhances all the other flavors in the crust, making it truly irresistible.
Cold Unsalted Butter: The secret to flakiness! Keeping butter cold before cutting it in creates pockets of steam during baking, resulting in a wonderfully tender and crumbly texture.
For the Sweet-Tart Blackberry Center
Fresh Blackberries: The star of the show, offering vibrant color and a naturally sweet-tart flavor. Choose plump, firm berries for the best results.
Granulated Sugar: Sweetens the berries, drawing out their natural juices and creating a syrupy filling.
Cornstarch: This is a critical thickening agent for the fruit filling. It absorbs excess liquid from the berries, preventing a runny consistency and, crucially, protecting the crust from becoming soggy.
Fresh Lemon Juice: Brightens the blackberry flavor and adds a touch of acidity that perfectly balances the sweetness, enhancing the overall taste of the filling.
Pre-Bake Prep: Essential Tools for Seamless Baking
8×8 Inch Baking Pan: Essential for achieving the correct thickness and structure of your crumble bars. A square pan ensures even baking and easy cutting.
Parchment Paper: Crucial for no-fuss removal of the bars from the pan. Leave an overhang on the sides to create “handles.”
Large Mixing Bowls: You’ll need separate bowls for the crumble mixture and the fruit filling to keep your prep organized.
Pastry Blender or Fork: Perfect for cutting cold butter into the flour mixture, ensuring a consistent, crumbly texture without overworking the dough.
Measuring Cups & Spoons: Accurate measurements are key in baking for consistent results every time.
Wire Cooling Rack: Absolutely necessary for allowing your bars to cool completely and evenly, preventing condensation and aiding in setting.
Your Step-by-Step Journey to Perfect Blackberry Crumble Bars
Setting the Stage: Oven & Pan Preparation
Start by preheating your oven to a precise 375°F (190°C). Then, line an 8×8 inch baking pan with parchment paper, making sure to leave an overhang on all sides. This simple step is a game-changer for effortlessly lifting the entire slab of bars out once they’re baked and cooled.
Crafting Your Signature Crumble Mixture
In a medium bowl, combine the flour, 1/2 cup granulated sugar, and salt. Next, cut in the small pieces of cold butter using your fingertips, a pastry blender, or a fork. Work quickly until the mixture resembles coarse crumbs with some pea-sized pieces of butter still visible; this texture is essential for a tender, flaky crust and topping.
Building the Foundation: Pressing the Crust
Take about two-thirds of your prepared crumb mixture and firmly press it evenly into the bottom of your parchment-lined baking pan. A strong, compact base is your first and best defense against any potential sogginess from the juicy fruit filling.
The Crucial Pre-Bake: Preventing Soggy Bottoms
Bake this pressed crust for 15 minutes. This partial baking step is absolutely vital for preventing a soggy bottom. It gives the crust a head start, allowing it to firm up and begin to crisp before the moist blackberry filling is added, creating a protective barrier.
Whipping Up the Luscious Blackberry Filling
While your crust is pre-baking, turn your attention to the filling. In a separate bowl, gently combine the fresh blackberries, 1/2 cup granulated sugar, cornstarch, and lemon juice. The cornstarch is especially important here; it will absorb the excess liquid that the berries release during baking and thicken the filling, further safeguarding your precious crust.
Assembling Layers for Maximum Flavor
Once the crust has completed its initial bake, carefully remove the pan from the oven. Spread the prepared blackberry filling evenly over the warm, partially baked crust, ensuring it reaches all the edges. Then, evenly sprinkle the remaining one-third of your crumb mixture over the blackberry filling to create a delicious, golden crumble topping.
The Final Bake: Golden Edges, Bubbly Filling
Return the pan to the oven and bake for an additional 30-35 minutes. You’ll know it’s ready when the crumble topping is beautifully golden brown, and you can see the fruit filling bubbling invitingly around the edges.
Patience is a Virtue: The Essential Cooling Phase
Once baked, resist the urge to cut into them immediately! This is perhaps the most critical step for perfect Blackberry Crumble Bars. Let the bars cool completely in the pan on a wire rack for several hours, or even overnight.
This extended cooling time allows the fruit filling to set properly and the crust to firm up, guaranteeing clean, non-soggy bars when you finally slice them. Rushing this step will result in a messy, crumbly outcome.
Cutting and Serving Your Flawless Bars
When fully cooled, use the parchment paper overhang as handles to gently lift the entire block of bars out of the pan. Place them on a cutting board, slice into neat squares, and prepare to enjoy your perfectly textured, flavorful Blackberry Crumble Bars.
Beyond the Recipe: Chef’s Tips for Elevating Your Bars
The Golden Rule: Why Cooling Completely is Non-Negotiable
Allowing your Blackberry Crumble Bars to cool fully is more than just patience; it’s essential science. As the bars cool, the cornstarch in the filling continues to set, transforming from a liquid to a firm gel. Simultaneously, the butter in the crust re-solidifies, giving the base its structure and preventing it from crumbling.
Cutting into warm bars interrupts this setting process, leading to a runny filling and a soft, messy crust. Trust the process, and you’ll be rewarded with perfectly neat, delicious squares every time.
Picking Your Berries: Fresh vs. Frozen & Sweetness Adjustments
While fresh blackberries offer the best texture and vibrant flavor, frozen berries can certainly be used in a pinch. If using frozen, there’s no need to thaw them first; simply add them to the filling mixture as directed.
However, frozen berries tend to release more liquid, so consider adding an extra teaspoon of cornstarch to your filling if using them. Also, taste your fresh berries before adding sugar; if they are particularly tart, you might want to increase the sugar by a tablespoon or two, or reduce it if they are exceptionally sweet.
Crust & Crumble Customization Ideas
While the classic crumble is delightful, don’t hesitate to personalize your bars. For an extra layer of texture and flavor, try mixing in 1/2 cup of rolled oats or finely chopped pecans or almonds into your crumble mixture. A dash of cinnamon or a pinch of cardamom can also add a warm, inviting spice note.
If you enjoy experimenting with different bar recipes, you might find inspiration in our chewy oatmeal bars, which demonstrate how simple additions can transform a classic.
Solving Common Baking Woes: Troubleshooting Your Crumble Bars
Help! My Crumble Bars Are Crumbly (But Not in a Good Way)
If your bars are falling apart when cut, it’s often due to not pressing the crust firmly enough during assembly, or not allowing them to cool completely. Ensure you really compact that bottom layer, and that your butter is cold when you cut it into the flour.
Finally, always, always let them reach room temperature before attempting to slice them – patience truly makes the difference here.
Why Did My Filling Turn Out Too Runny?
A runny filling typically means the cornstarch didn’t fully activate or there wasn’t enough to handle the fruit’s moisture. This can happen if the bars weren’t baked long enough, or if your blackberries were exceptionally juicy or overripe.
Next time, ensure your filling is visibly bubbling in the oven, and consider adding an extra half-tablespoon of cornstarch if your fruit is particularly wet.
My Bars Are Sticking to the Pan!
Sticking bars are usually a result of insufficient parchment paper overhang or trying to remove them before they are completely cool and set. Always make sure your parchment paper creates generous “handles” on all sides.
If you’re still having trouble, a quick remedy is to place the pan in the freezer for 15-20 minutes, which can help the butter solidify and release the bars more easily.
Serving, Storing & Making Ahead: Maximize Your Enjoyment
Creative Ways to Serve Your Blackberry Crumble Bars
These Blackberry Crumble Bars are absolutely divine on their own, but a scoop of vanilla bean ice cream or a dollop of freshly whipped cream takes them to another level. They also make a fantastic addition to a brunch spread or as a comforting dessert after any meal.
Keeping Them Fresh: Storage Best Practices
Store your cooled Blackberry Crumble Bars in an airtight container at room temperature for up to 2-3 days, or in the refrigerator for up to 5 days. For optimal freshness, a cool, dry pantry works best.
Planning Ahead: Can You Freeze Blackberry Crumble Bars?
Absolutely! These bars freeze beautifully, making them perfect for meal prep or unexpected guests. Once completely cooled, wrap individual bars or the entire slab tightly in plastic wrap, then again in aluminum foil.
They can be stored in the freezer for up to 3 months. Thaw them at room temperature for a few hours before serving, or warm slightly in a low oven for a fresh-baked feel. For more fruit-forward inspiration, our homestyle apple crumble bars also freeze wonderfully.
Frequently Asked Questions About Blackberry Crumble Bars
Can I Use a Different Fruit for This Recipe?
Yes, this recipe is highly adaptable! You can easily substitute blackberries with other berries like raspberries, blueberries, or a mix. Stone fruits such as peaches, plums, or even apples (peeled and diced) also work wonderfully, though you might need to adjust the sugar and cornstarch slightly depending on the fruit’s sweetness and moisture content.
What If I Don’t Have Lemon Juice?
Fresh lemon juice provides a crucial bright counterpoint to the sweetness of the berries, really making the flavors pop. If you absolutely don’t have it, you can omit it, but you might notice a slight difference in the overall brightness of the filling. A very small splash of apple cider vinegar could offer a similar acidic lift in a pinch, but use sparingly.
Can I Make a Gluten-Free Version?
You can certainly try! A 1:1 gluten-free all-purpose flour blend can be substituted for regular flour in this recipe. Be aware that gluten-free flours can sometimes absorb liquids differently, potentially affecting the texture of the crumble, making it a bit more delicate. You might also want to add a tiny bit more liquid (like a teaspoon of milk or water) if the dough seems too dry.
Your Turn to Bake: Share Your Blackberry Crumble Bars Success!
Now that you have all the insider tips and a foolproof method, it’s your turn to create these incredible Blackberry Crumble Bars. Say goodbye to soggy bottoms and hello to perfectly crisp, fruit-filled treats! I encourage you to whip up a batch, savor the delightful layers, and share your baking triumphs.
Don’t stop the baking adventure here; if you’re looking for more crowd-pleasing dessert ideas, why not give our epic S’mores bars a try? Happy baking!

Blackberry Crumble Bars
Course: DessertCuisine: AmericanDifficulty: medium9
bars20
minutes50
minutes350
kcal70
minutesPerfect your homemade blackberry crumble bars with this guaranteed method for a firm, buttery crust and vibrant, non-soggy filling. Enjoy a golden crumble top every time. A delicious dessert or snack.
Ingredients
For the Crust and Crumble:
1 1/2 cups all-purpose flour
1/2 cup granulated sugar
1/4 teaspoon salt
1/2 cup (1 stick) cold unsalted butter, cut into small pieces
For the Filling:
4 cups fresh blackberries
1/2 cup granulated sugar
2 tablespoons cornstarch
1 tablespoon fresh lemon juice
Directions
- Preheat your oven to 375 degrees Fahrenheit (190 degrees Celsius). Line an 8×8 inch baking pan with parchment paper, leaving an overhang on the sides for easy removal.
- In a medium bowl, combine the flour, 1/2 cup granulated sugar, and salt. Cut in the cold butter pieces using your fingertips, a pastry blender, or a fork, until the mixture resembles coarse crumbs with some pea-sized pieces of butter remaining. This crumbly texture is key.
- Press about two-thirds of the crumb mixture firmly and evenly into the bottom of the prepared baking pan to form the crust. This firm base is your first defense against sogginess.
- Bake the pressed crust for 15 minutes. This partial baking step is crucial for preventing a soggy bottom by giving the crust a head start before the moist filling is added.
- While the crust bakes, prepare the filling. In a separate bowl, gently combine the fresh blackberries, 1/2 cup granulated sugar, cornstarch, and lemon juice. The cornstarch is vital here; it will absorb excess liquid from the berries and thicken the filling, further protecting your crust from becoming wet.
- Remove the partially baked crust from the oven. Spread the blackberry filling evenly over the warm crust.
- Sprinkle the remaining one-third of the crumb mixture evenly over the blackberry filling to create your crumble topping.
- Return the pan to the oven and bake for an additional 30-35 minutes, or until the topping is golden brown and the filling is bubbly.
- Once baked, let the bars cool completely in the pan on a wire rack. This is extremely important! Cooling completely allows the filling to set properly and the crust to firm up, ensuring clean, non-soggy bars when you cut them. Do not rush this step.
- Once cooled, use the parchment paper overhang to lift the bars out of the pan. Cut into squares and serve.
Notes
- Ensure bars cool completely in the pan on a wire rack before cutting to allow the filling to set and the crust to firm up, preventing sogginess.