For years, I struggled to achieve that perfect oatmeal cookie-one that wasn’t disappointingly puffy or dry. But mastering the brown butter technique changed everything, transforming a simple dessert into the gold standard of chewy texture and rich depth.
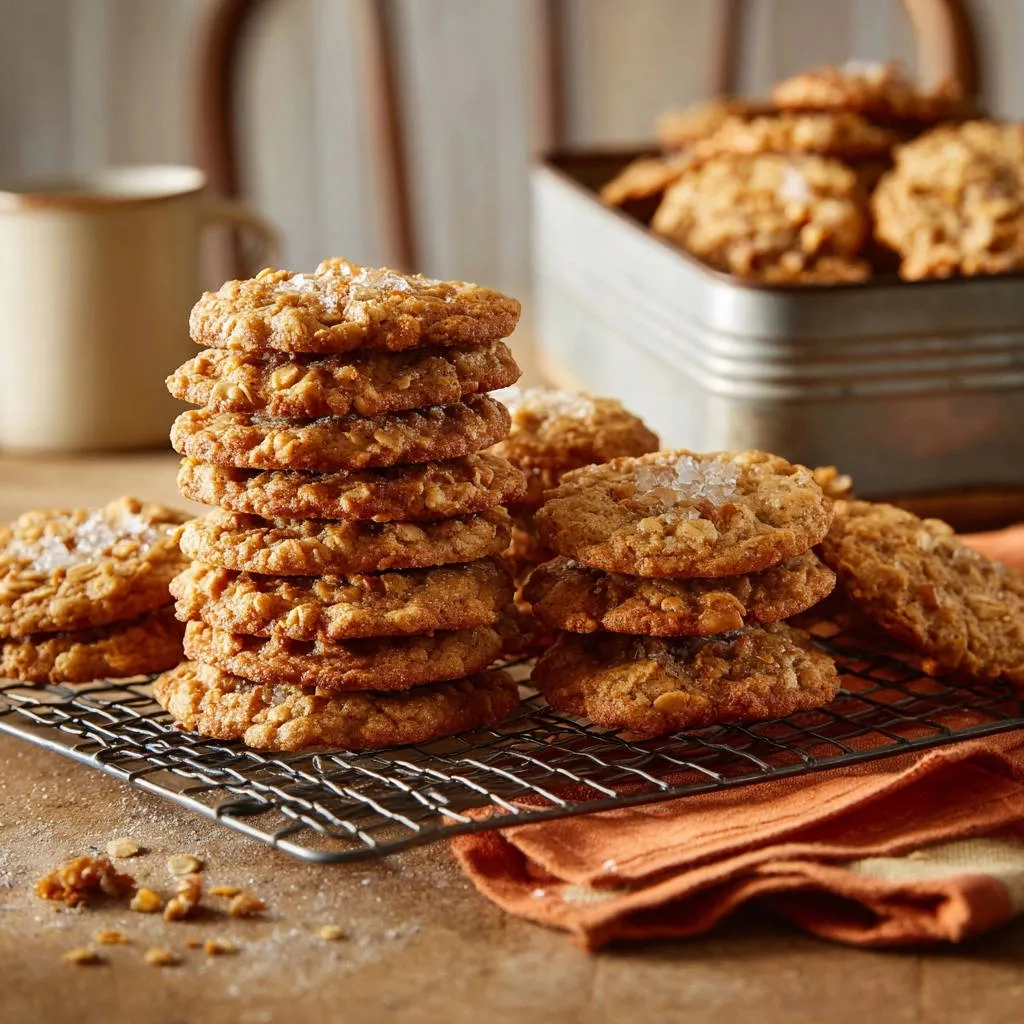
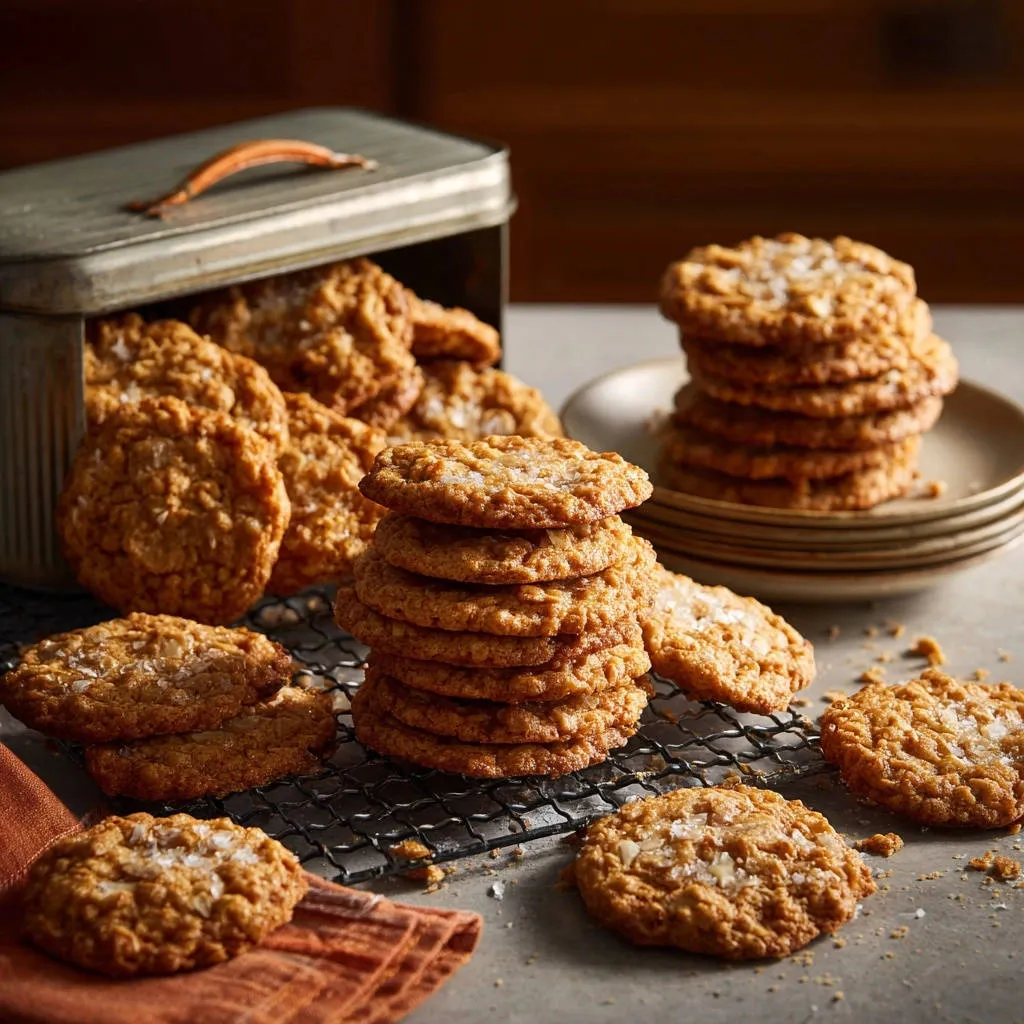
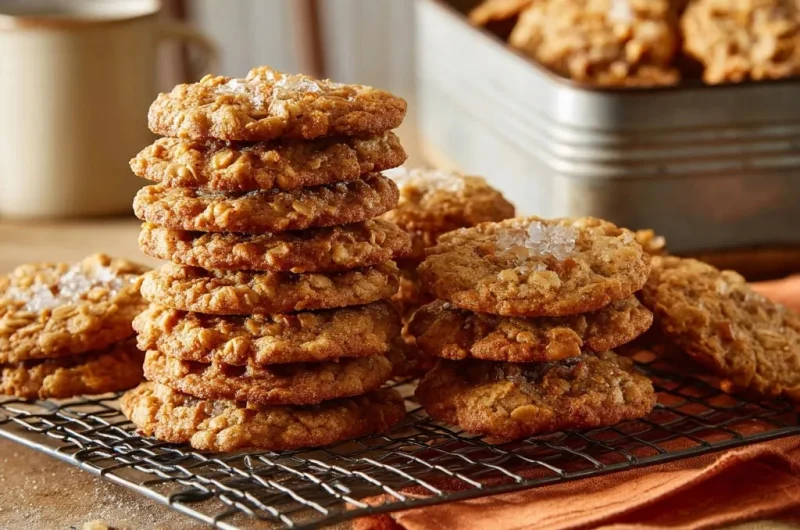
This recipe for Brown Butter Salted Oatmeal Cookies solves the cakey cookie problem entirely, guaranteeing a beautifully spread edge, a substantial chew, and an intense nutty flavor that elevates every bite.
Say Goodbye to Dry: Why Our Cookies Never Turn Out Cakey
The secret to avoiding the dreaded dry or cakey oatmeal cookie lies in carefully managing the moisture content and the state of the fat before baking.
The Secret Weapon: Mastering the Brown Butter Technique
Browning butter (the French call it beurre noisette) involves cooking out the water content and caramelizing the milk solids in a process known as the Maillard reaction.
When you use liquid fat that contains water (like melted butter), that water converts to steam during baking, interacting with the flour and activating gluten, which gives the cookie a puffy, cake-like lift.
By cooking the water out of the butter and then allowing it to cool and solidify, we reduce the total amount of available liquid, leading to a denser, chewier, and beautifully structured cookie.
The Critical Role of Temperature in Cookie Dough
Once your butter is browned, it is vital to pour it immediately into a separate bowl to halt the cooking process, preventing the solids from scorching.
The brown butter must cool slightly before mixing with the sugars and especially before adding the eggs. If the butter is too hot, it will melt the sugar immediately (leading to excessive spread) or, worse, partially cook the eggs, resulting in a greasy, unevenly mixed dough.
The Power of Patience: Mandatory Dough Chilling
Dough chilling is non-negotiable for achieving a superior texture in these Brown Butter Salted Oatmeal Cookies.
First, chilling allows the oats to fully hydrate, absorbing the moisture and resulting in an incredibly soft and chewy texture instead of a tough one.
Second, chilling re-solidifies the fat, ensuring the cookies spread slowly and evenly when they hit the oven, giving you those desirable thick centers and slightly crisp edges.
Essential Building Blocks for Rich, Chewy Oatmeal Cookies
Achieving bakery-quality oatmeal cookies requires understanding the specific roles each ingredient plays in flavor, spread, and chew.
Choosing Your Oats: Old-Fashioned vs. Quick-Cooking
Always use old-fashioned rolled oats for this recipe. Their thicker structure prevents them from turning mushy when hydrated.
Quick-cooking oats are pre-steamed and cut into smaller pieces; while convenient, they absorb liquid too quickly and will dissolve into the dough, yielding a softer, less texturally interesting cookie.
Sugar Strategy: The Balance of Brown and White
The ratio of sugar here is intentionally high in brown sugar for maximum chew. Brown sugar contains molasses, which adds necessary moisture and a deeper caramel flavor.
The smaller amount of granulated white sugar provides slight contrast, helping the edges crisp up beautifully and controlling the cookie’s total spread in the oven.
Fine Salt vs. Flaky Salt: A Necessary Distinction
The fine-grain salt is added directly into the dough to balance the sweetness, enhance the brown butter notes, and aid slightly in the overall leavening structure.
The flaky sea salt is the non-negotiable finishing touch. Sprinkled immediately after baking, it adheres to the warm surface, providing a striking visual contrast and a burst of salinity that cuts through the richness of the butter and molasses.
Prep Like a Pro: Tools and Setup for Brown Butter Success
Having the right equipment ensures the unique browning and mixing steps proceed without a hitch, minimizing the chance of burnt butter or overmixing.
The Right Pan for Browning Butter
Always use a stainless steel or light-colored saucepan when browning butter. The light interior allows you to easily monitor the color of the milk solids.
If you use a dark non-stick pan, it is incredibly easy to miss the crucial moment between perfect amber brown and burnt black sediment.
Must-Have Baking Essentials
Parchment Paper: Lining your baking sheets prevents sticking, promotes even browning on the bottom, and makes cleanup effortless.
Wire Rack: This allows air circulation around the cooling cookies, preventing steam from collecting underneath and maintaining those desirable crisp edges.
Sturdy Whisk and Spatula: A robust whisk is essential for properly combining the heavy brown butter and sugars, and a rubber spatula is necessary for gently folding the oats without developing excess gluten.
Step-by-Step Guide to Perfect Brown Butter Salted Oatmeal Cookies
Mastering the Brown Butter Technique
Start by melting the 1 cup of unsalted butter in a medium saucepan over medium heat.
Continue cooking, stirring frequently, until the butter foams, the milk solids fall to the bottom, and the butter turns a deep amber brown with a distinct nutty aroma.
This usually takes 5 to 8 minutes. Immediately pour the brown butter into a separate heatproof bowl to cool slightly (about 10 minutes) before proceeding; this stops the residual heat from burning the solids.
Creating the Sugar and Butter Base
In a large bowl, whisk the cooled brown butter with the brown sugar and granulated white sugar until the mixture is smooth and resembles thick, wet sand.
Ensure the mixture is fully incorporated before moving on, but avoid over-aerating it at this stage.
Incorporating Eggs and Vanilla
Add the two large eggs one at a time, mixing well after each addition until the yolk is fully integrated into the batter.
This technique allows the eggs to emulsify more effectively, strengthening the dough’s structure. Stir in the vanilla extract last.
Preparing and Adding the Dry Mix
In a separate medium bowl, whisk together the flour, baking soda, cinnamon, and fine grain salt until they are uniformly combined.
Gradually add the dry ingredient mixture to the wet ingredients, mixing only until you see a few streaks of flour remaining.
The Gentle Fold: Oats and Flour Combined
Fold in the 3 cups of old-fashioned rolled oats using a rubber spatula.
CRITICAL: Do not overmix the dough once the flour is added. Overmixing develops gluten, which will result in a tough, rubbery cookie instead of a tender, chewy one.
The Crucial Chilling Step for Optimal Chew
Cover the dough tightly and chill in the refrigerator for at least 30 minutes, though an hour is ideal.
This resting period allows the oats to absorb moisture from the sugar and butter and firms up the fat, which is the foundation for an incredibly chewy texture and controlled spread.
Scoop, Bake, and Garnish
Preheat your oven to 350 degrees F and line baking sheets with parchment paper.
Scoop rounded tablespoon portions of dough onto the sheets, ensuring all cookies are uniform in size for even baking.
Bake for 10 to 12 minutes, or until the edges are golden brown but the centers still look slightly soft and underbaked.
The Finishing Touch: Flaky Salt Application
Remove the cookies from the oven and immediately sprinkle the tops with flaky sea salt while the cookies are piping hot.
Allow the cookies to cool on the baking sheet for 5 minutes (they will continue cooking during this time) before transferring them to a wire rack to finish cooling.
Elevate Your Bake: Expert Tips and Troubleshooting
Even seasoned bakers encounter issues; knowing how to troubleshoot texture and flavor problems ensures consistent success with these rich treats.
Common Cookie Spread Issues (And How to Fix Them)
If your cookies spread too much and end up wafer-thin, the most common culprit is warm butter or an insufficient chill time.
Ensure your brown butter cools sufficiently before mixing, and never skip the 30-minute minimum chilling period; cold dough equals controlled spread.
Another factor is the oven temperature: if the oven is running too cool, the fat melts completely before the structure sets. Verify your oven temperature with a thermometer.
Customizing the Recipe: Delicious Add-Ins and Variations
The deep, nutty flavor of brown butter pairs perfectly with robust additions.
Toasted Nuts: Fold in 1/2 cup of coarsely chopped and toasted pecans or walnuts for added crunch and depth.
Dried Fruit: Add 1/2 cup of dried cherries or golden raisins for a tart, chewy counterpoint to the sweetness.
Chocolate Chunks: Use dark or semi-sweet chocolate chunks (not chips) for superior melt and texture within the finished cookie.
If you’re a fan of rich chocolate, you’ll want to see these frosted dark chocolate toffee cookies.
Achieving the Perfect Chewy Center Every Time
The secret to chewiness is purposeful underbaking. You want the edges of your Brown Butter Salted Oatmeal Cookies to be set and golden, but the center should still look slightly glossy and undone.
For those who enjoy a perfectly chewy texture, see how to achieve a no-spread method for glazed raspberry thumbprint cookies.
Removing them at this stage and letting them rest on the warm baking sheet allows residual heat to finish cooking the cookie without drying it out.
Make-Ahead, Storage, and Freezing Tips
Raw cookie dough freezes exceptionally well. Scoop portions onto a lined sheet, freeze until solid, then transfer the frozen dough balls to an airtight bag for up to 3 months.
Baked cookies should be stored in an airtight container at room temperature for up to 5 days. For the best texture, place a half slice of sandwich bread in the container to help maintain softness.
Your Baking Questions Answered: FAQs
Can I skip browning the butter?
The defining characteristic of this recipe is the deep, nutty flavor and the superior chewy texture achieved by removing the water content from the butter.
If you skip browning the butter, you will end up with a standard oatmeal cookie that is more prone to a cakey texture and lacks the signature depth of these exceptional Brown Butter Salted Oatmeal Cookies.
How do I know if my brown butter is burned instead of just browned?
Proper brown butter should smell sweetly nutty, like toasted hazelnuts, and the milk solids at the bottom should be deep amber.
If you smell an acrid, smoky odor or if the solids appear black instead of brown, the butter is burned and should be discarded, as the bitter flavor will ruin the entire batch of cookies.
What if I don’t have enough time to chill the dough?
While the minimum 30 minutes is critical for oat hydration, if time is extremely tight, you can flash chill the dough in the freezer for 15 minutes.
However, note that longer chilling-even overnight-yields a significantly more flavorful and texturally complex cookie because the flour and oats have more time to fully absorb the moisture.
How long will Brown Butter Salted Oatmeal Cookies stay fresh?
When stored properly in a sealed, airtight container at room temperature, these cookies will maintain their optimal flavor and chewy texture for up to 5 days.
Ready to Bake? Share Your Brown Butter Masterpiece!
The transformation of simple butter into beurre noisette is the single most important step in elevating these treats from a standard dessert to an unforgettable experience.
Follow these steps precisely, honor the mandatory chill time, and you will be rewarded with the richest, chewiest oatmeal cookie imaginable, perfectly finished with that burst of flaky sea salt.
Now that you have the expertise and the formula for these flawless Brown Butter Salted Oatmeal Cookies, grab your whisk and get started! Be sure to share a photo of your golden-edged creations and let us know your favorite add-ins.
More Sweet Treats to Try
Round out your baking with these other delightful cookie and waffle recipes.
- For a breakfast that offers a sweet crunch alongside your cookies, consider these Cinnamon Sugar Churro Waffles, which bake up wonderfully crisp.
- If you’re after another cozy, spice-infused bake, these Fluffy Pumpkin Spice Pancakes make a great pairing with their warm flavors.
Salted Oatmeal Cookies
Course: DessertCuisine: AmericanDifficulty: medium4
about 28 cookies30
minutes12
minutes350
kcal60
minutesAchieve the perfect chewy center and crisp edge every time using the simple brown butter technique. This step prevents dry, cakey texture and adds incredible depth of flavor. Finished with flaky sea salt, these are the best oatmeal cookies you will ever bake.
Ingredients
1 cup unsalted butter
1 1/2 cups packed light brown sugar
1/2 cup granulated white sugar
2 large eggs
1 tablespoon vanilla extract
1 3/4 cups all-purpose flour
1 teaspoon baking soda
1 teaspoon cinnamon
1/2 teaspoon salt (fine grain)
3 cups old-fashioned rolled oats
Flaky sea salt (for sprinkling)
Directions
- Prepare the Butter: Melt the 1 cup of unsalted butter in a medium saucepan over medium heat. Continue cooking, stirring frequently, until the butter foams, the milk solids fall to the bottom, and the butter turns a deep amber brown with a nutty smell. This process takes 5 to 8 minutes. Immediately pour the brown butter into a heatproof bowl to cool slightly (about 10 minutes) before proceeding. This browning step is the key to preventing a cakey texture and adding rich flavor depth.
- Mix Wet Ingredients: In a large bowl, whisk the cooled brown butter with the brown sugar and granulated white sugar until smooth. Add the eggs one at a time, mixing well after each addition. Stir in the vanilla extract.
- Mix Dry Ingredients: In a separate medium bowl, whisk together the flour, baking soda, cinnamon, and fine grain salt.
- Combine: Gradually add the dry ingredient mixture to the wet ingredients, mixing only until just combined. Fold in the old-fashioned rolled oats. Do not overmix the dough once the flour is added.
- Chill for Hydration: Cover the dough and chill in the refrigerator for at least 30 minutes. This allows the oats to absorb some moisture, resulting in a more uniform spread and incredibly chewy texture.
- Scoop and Bake: Preheat oven to 350 degrees F. Line baking sheets with parchment paper. Scoop rounded tablespoon portions of dough onto the prepared sheets, leaving adequate space between them.
- Finish and Serve: Bake for 10 to 12 minutes, or until the edges are golden brown and the centers still look slightly soft and underbaked. Remove from the oven and immediately sprinkle the tops of the cookies with flaky sea salt. Let the cookies cool on the baking sheet for 5 minutes before transferring them to a wire rack to cool completely.
Notes
- Cooling the brown butter and chilling the dough for at least 30 minutes are mandatory steps to ensure the perfect chewy, non-cakey texture.