You’ve likely experienced the disappointment of a pasta dish that looks beautiful in the pan but turns into a sticky, gummy mess the moment it hits your plate. Most home cooks assume they need heavy cream or jars of sauce to achieve a silky finish, but the truth is much simpler. This Caramelized Onion Bucatini relies on the golden, jammy sweetness of slow-cooked onions and a clever bit of kitchen science to create a luxurious coating that feels indulgent without being heavy.
The magic lies in the contrast of textures. You have the hollow, chewy snap of the bucatini strands paired against the melt-in-your-mouth onions, all topped with a shatteringly crisp layer of toasted Panko. It’s a dish that celebrates patience, turning humble pantry staples into something that tastes like it came out of a high-end bistro kitchen. Once you master the balance of starch and fat, you’ll never settle for dry noodles again.
For another satisfying pasta bake, try this cheesy beef rigatoni.
The secret to this restaurant-quality finish is the starch-emulsion technique. Instead of draining your pasta into the sink, you’ll use that cloudy, salty cooking water as a bridge between the butter and the noodles. This liquid gold contains starches that act as a natural thickener, binding the fats to the pasta to create a glossy, slippery sauce that clings to every inch of the bucatini. It’s the difference between a “sauce” and a “coating,” and it’s the key to avoiding that dreaded gummy texture.
For a hearty meal, consider the satisfying cheesy skillet ravioli with meaty ragu.
The Anatomy of Caramelized Onion Bucatini
Every ingredient in this recipe serves a structural purpose. We use yellow onions because they possess a higher sugar content than red or white varieties, which is essential for achieving that deep, mahogany caramelization. As they cook down, they lose their pungent bite and transform into a savory jam that provides the primary flavor profile for the entire dish.
Bucatini is the superior choice here because of its unique shape. It looks like thick spaghetti, but it’s actually a long tube with a hole running through the center. This “straw” allows the onion-infused emulsion to coat both the outside and the inside of the noodle, ensuring every bite is packed with flavor. If you used a thin noodle like angel hair, it would simply collapse under the weight of the jammy onions.
For the topping, Panko breadcrumbs are non-negotiable. Unlike traditional fine breadcrumbs, which can turn sandy or gritty, Panko is flaky and jagged. This increased surface area means more crunch and a better ability to hold onto the salt and thyme. It provides the necessary “snap” to break up the richness of the butter and caramelized sugars.
Selecting the Right Alliums and Fats
We use a combination of olive oil and butter for the onion base to get the best of both worlds. While butter provides that classic, nutty flavor, it has a low smoke point and can burn during a 40-minute cook time. By blending it with olive oil, we raise the overall heat tolerance, allowing the onions to brown deeply without the milk solids in the butter turning bitter or black.
Fresh thyme is another critical component. Dried herbs often have a dusty, muted flavor that can get lost in the sweetness of the onions. Fresh thyme leaves release volatile oils the moment they hit the warm butter, adding a bright, earthy aroma that cuts through the richness. If you can’t find fresh, use half the amount of dried, but the fresh sprigs really make the dish pop.
The Science of Non-Gummy Pasta Emulsions
To understand why pasta gets gummy, we have to look at amylose and amylopectin, the starches released by the flour as it boils. When you drain pasta and let it sit, these starches act like glue, causing the strands to stick together. However, when you introduce a fat (like butter or oil) and a bit of the starchy water back into the pan, you create a stable emulsion.
Think of the starch as a stabilizer that prevents the oil and water from separating. By tossing the bucatini vigorously in the skillet with the reserved water, you are mechanically forcing these elements to bond. This creates a creamy, opaque sauce that stays fluid. Rinsing your pasta is the ultimate sin here; you’d be washing away the very tool you need to make the sauce work.
The result is a glossy finish that looks like it contains cream, even though it’s just a clever manipulation of the ingredients already in your pot. This emulsion also helps the garlic and thyme flavors penetrate the surface of the pasta rather than just sliding off to the bottom of the bowl.
Mastering the 40-Minute Onion Caramelization
Caramelization is a marathon, not a sprint. It relies on the Maillard reaction, a chemical process where heat breaks down the sugars and proteins in the onion. In the first ten minutes, your onions will “sweat,” becoming translucent and releasing moisture. This is where you build the foundation of the texture.
As the water evaporates, the onions will turn a pale golden hue. This is the danger zone where they might start to stick. If you see dark spots forming on the bottom of the pan, don’t panic. Add a tablespoon of water to “deglaze” the pan, scraping up those brown bits with a wooden spoon. Those bits are pure flavor, and the water helps redistribute them back into the onions.
By the 35-minute mark, the onions should be dark, jammy, and significantly reduced in volume. They will smell sweet rather than sharp. If you rush this process with high heat, you’ll end up with burnt edges and raw centers, which introduces a bitter taste that ruins the delicate balance of the bucatini.
Step-by-Step: Building the Bucatini Base
The most important rule for the pasta itself is to under-cook it. You want to pull the bucatini out of the boiling water about two minutes before the package says it’s “al dente.” It should still have a firm, almost chalky bite in the very center. This is because the pasta will finish cooking inside the onion sauce, absorbing the flavored liquid like a sponge.
Once you transfer the noodles to the skillet, the “Vigorous Toss” begins. Use high-quality tongs to lift and swirl the pasta constantly. You aren’t just mixing; you are aerating the sauce and encouraging the emulsion to form. You’ll see the liquid transform from a thin, watery puddle into a thick, shimmering glaze that coats every strand perfectly.
If the pan starts to look dry or the noodles are clumping, add another splash of that reserved pasta water. It’s better to add too much and let it reduce slightly than to have too little and end up with a sticky mess. The final texture should be slippery and smooth, with the onions evenly distributed throughout the tangle of noodles.
Achieving the Golden Panko Crunch
Toasting your breadcrumbs separately is a small step that makes a massive difference. If you were to toss raw breadcrumbs directly into the pasta, they would absorb the moisture from the sauce and turn into soggy mush. By toasting them in olive oil first, you create a fat-based barrier that keeps them crispy even after they hit the noodles.
Stir them constantly in the skillet, as they can go from golden to burnt in a matter of seconds. I like to season them with a pinch of salt while they are still hot so the flavor sticks. This creates a layered experience where you get a hit of salt and crunch before the sweet, soft onions take over.
Troubleshooting Common Texture Issues
If your sauce looks thin and watery, increase the heat to medium-high and keep tossing. The evaporation will concentrate the starches and thicken the sauce. Conversely, if the pasta looks “gummy” or heavy, you likely didn’t use enough pasta water. Add a few more tablespoons and give it a quick, aggressive stir to loosen the starches.
For burnt onions, there isn’t much of a fix other than starting over, as the bitterness will permeate the whole dish. However, if they are just a bit too dark, a tiny splash of water and a lower heat setting can usually save them. If the emulsion “breaks” and you see pools of oil, add a teaspoon of fresh water and whisk or toss rapidly to bring it back together.
Flavor Variations and Pantry Swaps
While this recipe is perfect in its simplicity, you can easily adapt it. If you want a bit of heat, add a teaspoon of red pepper flakes when you add the garlic. For a brighter finish, a squeeze of fresh lemon juice right before serving can cut through the sugar of the onions. The acidity acts as a spotlight for the other flavors.
Complementary Dishes
Round out your meal with these dishes that pair well with the caramelized onion bucatini.
- For a warming start, consider this Roasted Carrot Thyme Soup, offering a smooth texture that complements the pasta.
- Serve alongside this Cheesy Garlic Bread for an extra layer of savory goodness.
If you need to use gluten-free pasta, be aware that the cooking water will be much starchier and thicker. You may need to use slightly less water for the emulsion to prevent it from becoming too gummy. For a different allium profile, you can swap one of the yellow onions for a large leek (white and light green parts only) to add a subtle, buttery depth.
Essential Tools for Pasta Success
A wide skillet or a heavy-bottomed Dutch oven is much better for this dish than a deep pot. The wide surface area allows for faster evaporation when you are finishing the sauce, and it gives you plenty of room to toss the bucatini without it flying out of the pan. It also ensures the onions cook in an even layer during the caramelization phase.
Invest in a good pair of stainless steel tongs. You need the grip and leverage to move a pound of heavy bucatini around quickly. Silicone-tipped tongs are fine, but metal ones offer more precision when you’re trying to emulsify the sauce. Also, a wooden spoon is your best friend for scraping the “fond” (the brown bits) off the bottom of the pan while the onions cook.
Expert Tips for Professional Results
One of the best things you can do is warm your serving bowls. If you put hot, emulsified pasta into a cold ceramic bowl, the fat will seize up instantly, making the sauce thick and tacky. A minute in a low oven or a quick rinse with hot water makes a huge difference in how the dish eats.
Always salt your pasta water until it tastes like the sea. This is your only chance to season the actual noodle from the inside out. Since the sauce itself is relatively simple, the salt in the pasta water provides the necessary backbone for the entire flavor profile. Don’t be shy with the black pepper at the end, either; the sharp bite balances the sweet onions beautifully.
If you want a deeper color and a more complex tang, use the “Balsamic Deglaze” trick. Adding just a half-teaspoon of balsamic vinegar at the end of the onion cooking process adds a dark hue and a subtle acidity that mimics the complexity of a long-aged sauce. It’s a tiny addition that provides a massive boost in perceived effort.
How to Store and Reheat Leftovers
Pasta is notoriously difficult to reheat because the starches continue to absorb moisture as it sits in the fridge. To revive this dish, avoid the microwave, which will cause the butter to separate and make the noodles oily. Instead, place the leftovers in a cold skillet with two tablespoons of water.
Heat it over medium-low, tossing gently as the water warms up. The steam will loosen the noodles, and the water will re-emulsify with the existing fats to recreate that glossy sauce. If you have extra breadcrumbs, store them in a separate airtight container at room temperature so they stay crunchy for the second round.
Frequently Asked Questions
Can I use a different pasta shape?
You can substitute spaghetti or linguine if you can’t find bucatini. However, try to avoid short shapes like penne or rigatoni for this specific recipe. The long strands are essential for the “toss” that creates the emulsion, and the surface area of long noodles holds the thin onion glaze much better than tubular shapes.
Why are my onions taking longer than 40 minutes?
The timing depends heavily on the moisture content of your onions and the size of your pan. If your onions are very fresh, they contain more water and will take longer to reduce. Additionally, if your pan is crowded, the moisture can’t evaporate as quickly. Just keep the heat low and be patient; the color is a better indicator than the clock.
Can I make the onion base ahead of time?
Yes, the caramelized onions can be made up to three days in advance. Store them in an airtight container in the refrigerator. When you’re ready to eat, simply warm them in the skillet with a tiny bit of water or butter before adding the cooked pasta and the starchy water to finish the dish.
Is the balsamic vinegar mandatory?
It is not mandatory, but it is highly recommended. Caramelized onions are very sweet, and the balsamic vinegar provides a necessary acidic counterpoint. If you don’t have balsamic, a teaspoon of sherry vinegar or even a tiny splash of apple cider vinegar can provide a similar balancing effect.
How do I keep the breadcrumbs from burning?
Breadcrumbs have very little moisture and burn almost instantly once they reach a certain temperature. The key is to remove them from the heat the moment they turn a light golden brown. The residual heat in the pan will continue to cook them for another 30 seconds. Always transfer them to a cool bowl immediately rather than leaving them in the hot skillet.
Caramelized Onion Bucatini
Course: Main CourseCuisine: Italian-AmericanDifficulty: medium4
servings10
minutes45
minutes510
kcal55
MinutesA rich and savory pasta dish featuring deeply caramelized onions, aromatic thyme, and crunchy toasted breadcrumbs. The recipe focuses on using starchy pasta water to create a perfect emulsion that prevents gummy noodles.
Ingredients
1 pound bucatini pasta
4 large yellow onions, thinly sliced (onions reduce significantly)
5 tablespoons olive oil, divided
3 tablespoons butter, divided
1 cup Panko breadcrumbs
3 cloves garlic, minced
1 tablespoon fresh thyme leaves, plus sprigs for garnish
1/2 teaspoon balsamic vinegar (optional, for depth)
Salt and freshly cracked black pepper to taste
1 cup reserved pasta cooking water
Directions
- Toast the breadcrumbs: In a small skillet over medium heat, add 1 tablespoon of olive oil and the breadcrumbs. Stir constantly for 3-5 minutes until they are a deep golden brown. Season with a pinch of salt and set aside in a bowl to maintain crunch.
- Caramelize the onions: In a large, wide skillet or Dutch oven, heat 3 tablespoons of olive oil and 1 tablespoon of butter over medium heat. Add the sliced onions and a generous pinch of salt. Once the onions soften (about 5 minutes), reduce heat to medium-low. Cook for 35 to 40 minutes, stirring occasionally. If the onions stick or brown too quickly, add a tablespoon of water. They should be dark, jammy, and sweet.
- Cook the pasta: While onions are finishing, bring a large pot of heavily salted water to a boil. Cook the bucatini for 2 minutes less than the package directions. It must be firm (al dente) as it will finish cooking in the sauce.
- Prepare the base: Add the minced garlic, thyme leaves, and the remaining 2 tablespoons of butter to the caramelized onions. Cook for 2 minutes until the garlic is fragrant. If using balsamic vinegar, stir it in now.
- Emulsify: Before draining the pasta, reserve 1 cup of the starchy cooking water. Transfer the pasta directly from the water into the skillet with the onions.
- The Finish: Pour in 1/2 cup of the reserved pasta water. Increase the heat to medium-high and toss vigorously with tongs for 2 minutes. The starch in the water will emulsify with the butter and onion oils to create a glossy, slippery sauce. If the pasta looks dry or “gummy,” add more pasta water a splash at a time until the noodles are perfectly coated.
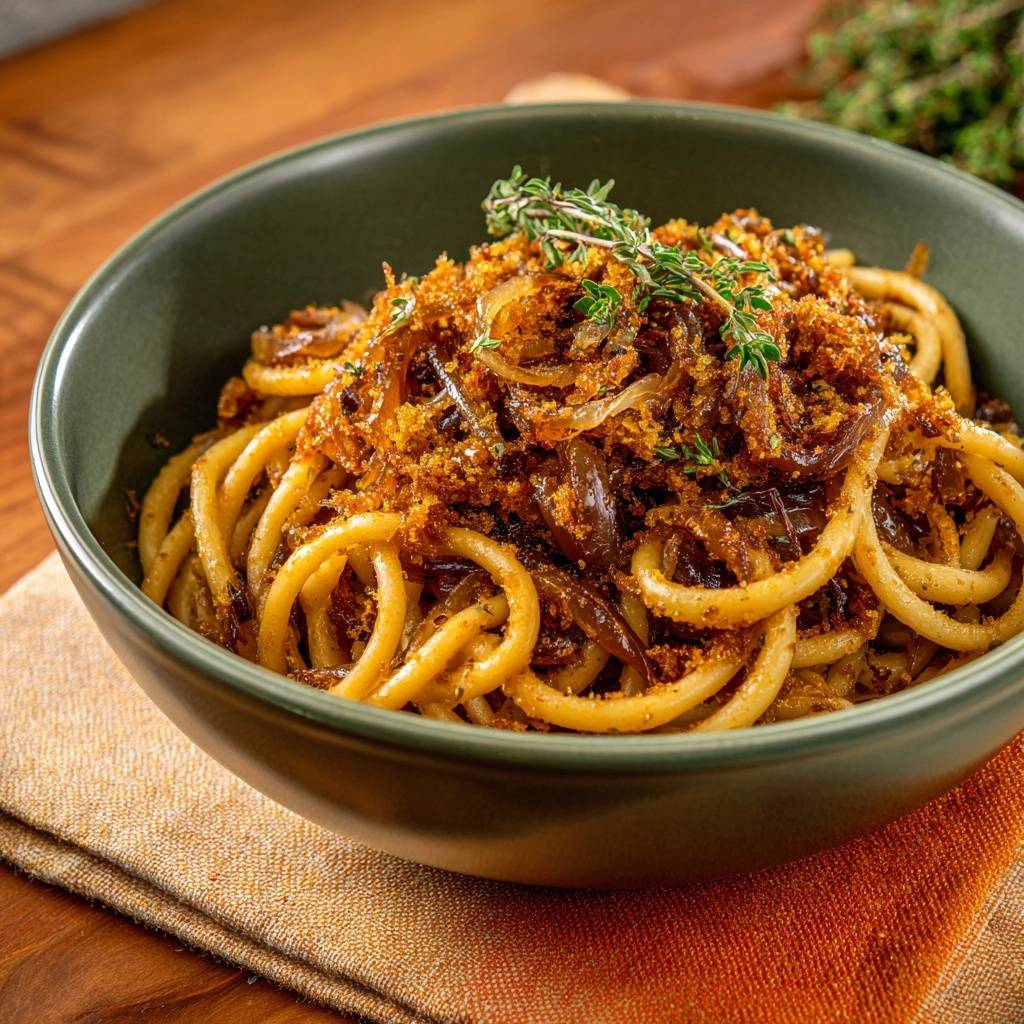
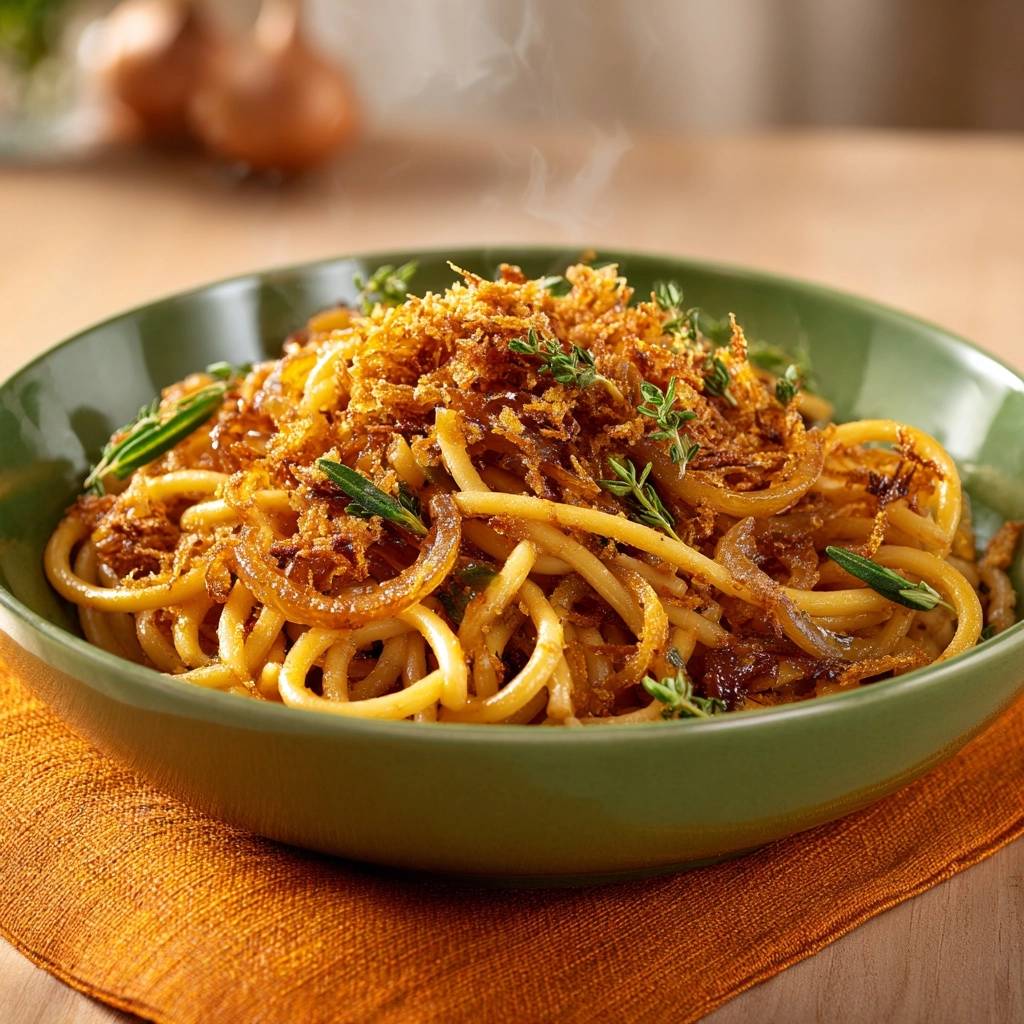
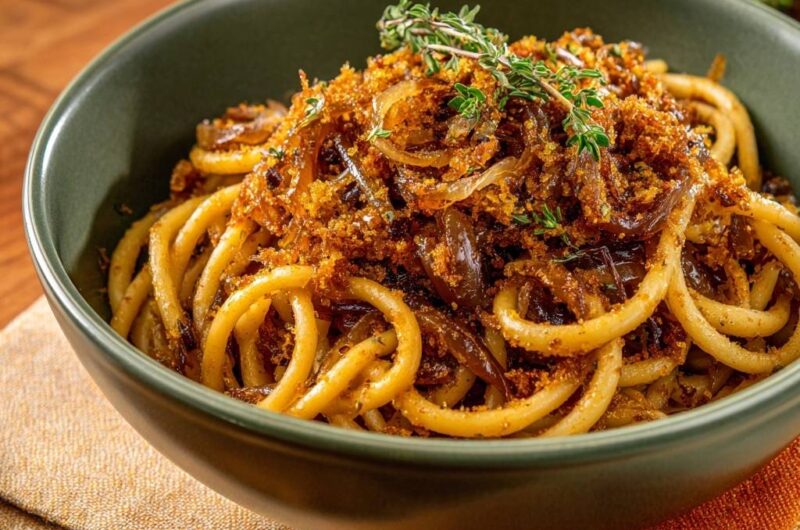
- Serve: Divide into warm bowls. Top generously with the toasted breadcrumbs, cracked black pepper, and a fresh sprig of thyme as shown in the image. Serve immediately.
Notes
- The secret to avoiding gummy pasta is reserving the starchy cooking water and finishing the pasta in the skillet. Ensure the onions are cooked slowly until jammy and sweet for the best flavor profile.