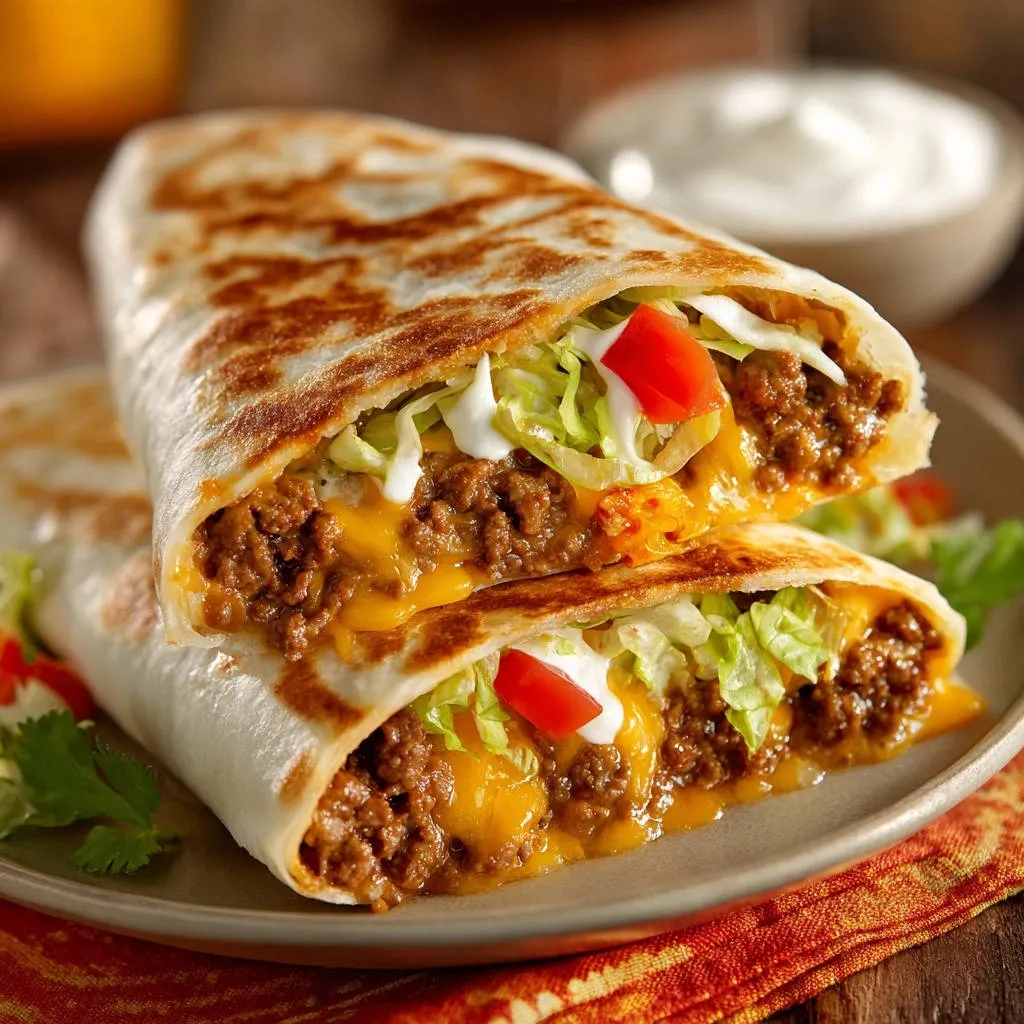
There’s nothing quite like biting into a perfectly constructed burrito, but how often do you end up with half the delicious filling spilling out? I’ve been there countless times, perfecting my technique over the years to conquer the frustrating “burrito blowout” and achieve a truly portable, mess-free meal.
This recipe for Cheesy Beef Burritos isn’t just about incredible flavor; it’s about mastering a simple yet effective wrapping method that guarantees every bite stays exactly where it should. Get ready for a reliable, satisfying, and utterly delicious experience that will change your weeknight dinner game forever.
For a similarly satisfying experience with that beefy goodness, check out this crispy beef burrito.
Why These Cheesy Beef Burritos Will Become Your Go-To Meal
Effortless Enjoyment: No More Messy Spills!
The star of this recipe is the ingenious wrapping technique, which means your perfectly loaded burrito stays intact from the first bite to the last. Say goodbye to frustrating spills and hello to truly mess-free enjoyment, whether you’re at the dinner table or on the go.
Unbeatable Flavor with Simple, Accessible Ingredients
You don’t need exotic spices or hard-to-find components to create a burst of authentic flavor. This recipe uses everyday ingredients to deliver a robust, satisfying taste that hits all the right notes for a classic beef burrito.
Quick Weeknight Win for the Whole Family
Designed with busy schedules in mind, these burritos come together quickly, making them an ideal solution for a flavorful and filling weeknight dinner. They’re a guaranteed crowd-pleaser that minimizes fuss without sacrificing taste.
Customizable to Every Palate
From adjusting the spice level to adding your favorite extra fillings, this recipe offers a fantastic base for customization. Easily tailor it to suit individual preferences, ensuring everyone at the table finds their perfect burrito.
The Heart of the Burrito: Essential Ingredients Explained
Savory Ground Beef & Flavorful Seasoning
We use lean ground beef as the hearty base, which browns beautifully and absorbs flavor like a dream. The choice between a store-bought taco seasoning packet or a homemade blend of chili powder, cumin, paprika, garlic, onion powder, salt, and pepper allows for ultimate control over the spice profile.
These spices aren’t just for heat; they build complex layers of savory, smoky, and aromatic notes crucial to the burrito’s character.
The Secret to the “Glue”: Perfect Cheese Choice
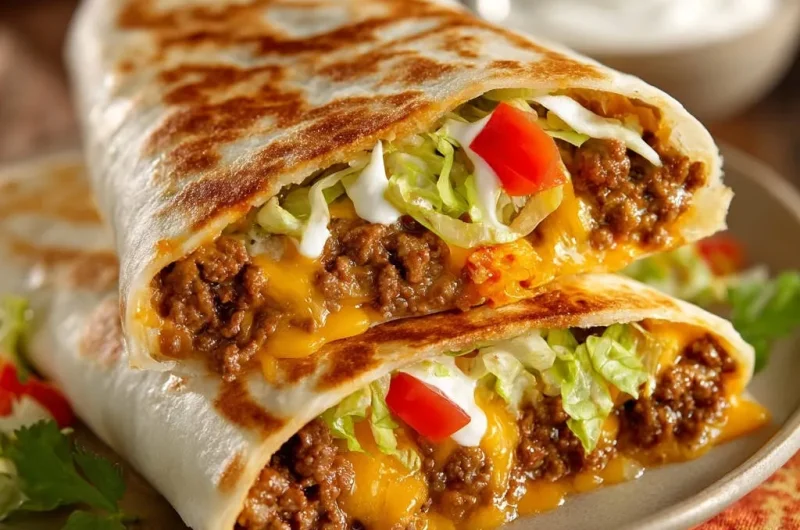
Shredded cheddar cheese is the unsung hero here, not just for its creamy, melty deliciousness, but for its role as a binder. As it warms, the cheese creates a gooey “glue” that helps hold the beef and other fillings securely in place within the tortilla.
Other excellent melting cheeses like Monterey Jack or a Mexican blend would also work wonderfully to achieve this crucial sealing effect.
Pliable Tortillas: The Foundation of a Great Wrap
Large flour tortillas are essential for housing all your delicious fillings without tearing. Warming them slightly before wrapping is a non-negotiable step; it makes them incredibly pliable, allowing for a tight, tear-free roll that seals everything inside.
Fresh Toppings for a Burst of Flavor
Crisp shredded iceberg lettuce and fresh diced tomatoes add vital texture and a refreshing counterpoint to the rich beef and cheese. A dollop of cool sour cream provides a creamy finish and balances any spice, tying all the flavors together.
Gearing Up: Kitchen Tools for Perfect Cheesy Beef Burritos
Your Essential Cooking Arsenal
Large Skillet: You’ll need this for browning the ground beef and later for pan-frying the wrapped burritos to a golden, crispy finish.
Spatula or Wooden Spoon: Ideal for breaking up the beef as it cooks and for stirring in the seasoning.
Measuring Cups and Spoons: Crucial for accurate ingredient portions, ensuring consistent flavor every time.
Beyond the Basics: Handy Extras for Efficiency
Colander: Perfect for easily draining excess fat from the ground beef after browning.
Microwave or Second Dry Skillet: Speeds up the tortilla warming process, which is key for flexibility.
Sharp Knife: Essential for dicing tomatoes and, if desired, cleanly slicing your finished burritos in half.
Crafting Your Cheesy Beef Burritos: A Step-by-Step Guide
Prep Your Protein: Browning and Seasoning the Beef
In a large skillet, warm 1 tablespoon of vegetable oil over medium-high heat. Add your pound of ground beef, breaking it apart with a spoon as it cooks until it’s beautifully browned throughout.
Once cooked, be sure to drain any excess fat to prevent greasy burritos and allow the flavors to truly shine. Stir in your taco seasoning (or your custom spice blend) and 1/4 cup of water, simmering for 5-7 minutes until the liquid is mostly absorbed and the beef is intensely flavorful.
Tortilla TLC: Warming for Flexibility
This step is crucial for a successful, tear-free wrap! Slightly warm each large flour tortilla.
You can do this in the microwave for 15-20 seconds per tortilla, or in a dry skillet over medium heat for about 10-15 seconds per side until it’s soft and pliable. This flexibility prevents cracking and allows for a tight roll.
The Game-Changer: Mastering the Spill-Proof Wrap
Lay a warmed tortilla flat on a clean surface. Spoon approximately 1/4 cup of the seasoned beef mixture onto the lower-middle section, leaving generous space around the edges-this is key for folding.
Top the beef with about 2 tablespoons of shredded cheddar cheese; this isn’t just for flavor, it’s the “glue” that will help bind everything together once it melts. Now, take the bottom edge of the tortilla and fold it up and tightly over the filling, tucking it snugly against the beef and cheese.
Next, fold in both the left and right sides of the tortilla towards the center, ensuring they overlap slightly. While maintaining a firm grip on these folded sides, roll the entire burrito up tightly from the bottom towards the top.
The goal is a compact, snug package that securely encases all the delicious fillings, preventing any leaks. Repeat this precise wrapping technique with your remaining tortillas and filling.
Golden Perfection: Pan-Frying for a Crispy Seal
Return to the same skillet (or a clean one) and add a tiny bit more oil if needed, heating it over medium heat. Carefully place each wrapped burrito into the skillet, starting with the seam-side down.
Cook for 2-3 minutes on this side until it’s beautifully golden brown and the seam has sealed shut. Flip the burrito and continue cooking on all remaining sides until each one is evenly golden and wonderfully crispy.
Finishing Touches: Loading and Serving
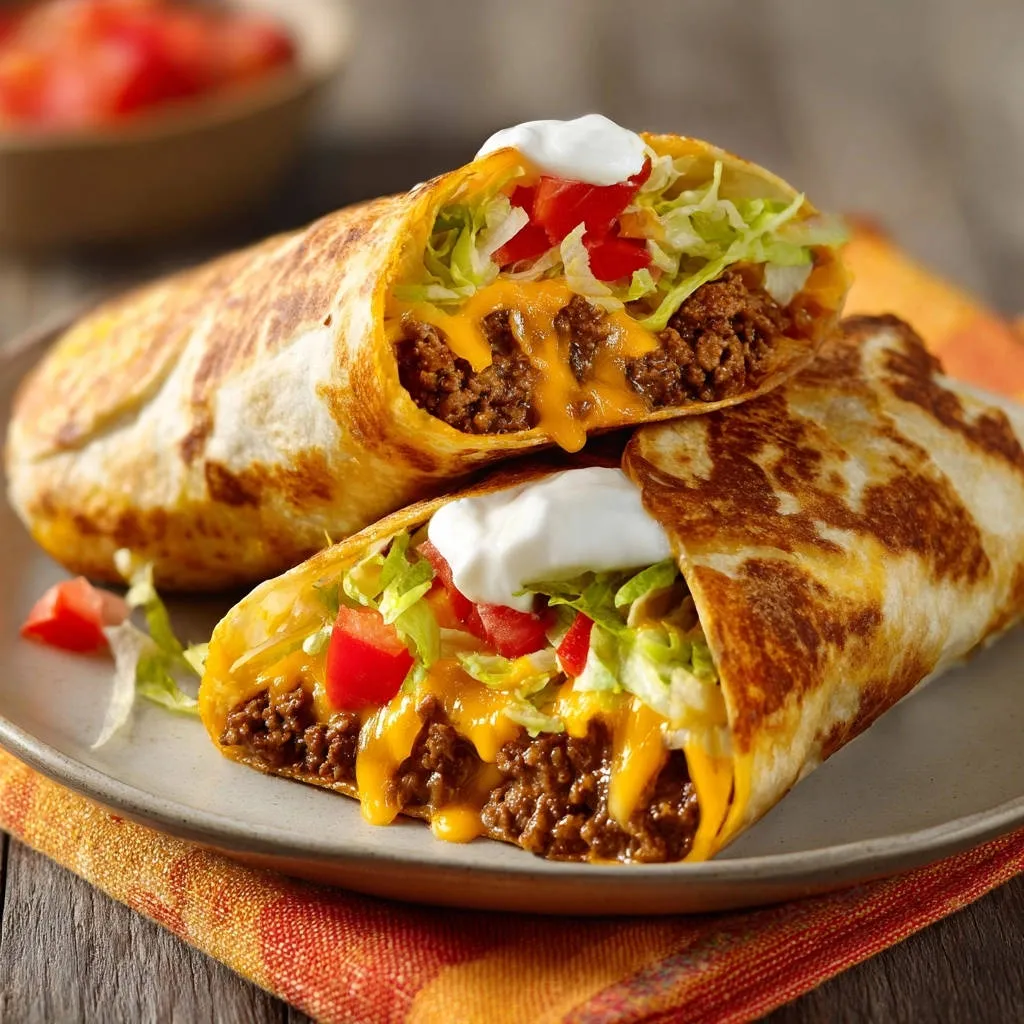
Once golden and sealed, remove the burritos from the skillet. If you prefer, carefully slice each burrito in half for easier handling and presentation.
Just before serving, stuff them generously with fresh shredded lettuce and diced tomatoes. A final dollop of sour cream on top adds a cool, creamy finish. Serve these delicious burritos immediately to enjoy them at their best!
Elevate Your Burrito Game: Pro Tips for Success
Spice it Up: Customizing Your Beef Seasoning
Don’t be afraid to make your seasoning blend your own. For a spicier kick, add a pinch of cayenne pepper or finely diced jalapeños to the beef mixture.
Smoked paprika can also introduce a deeper, more robust flavor, enhancing the overall profile of your Cheesy Beef Burritos.
Cheese Matters: Best Choices for Melt and Hold
While cheddar is fantastic, consider a blend for more complex flavor and better melt. A mix of cheddar and Monterey Jack offers both tang and superior creaminess.
The key is using good melting cheeses that will create that essential “glue” to keep your burrito fillings in place.
The Art of the Roll: Practice Makes Perfect
The spill-proof wrap might take a try or two to master, but don’t get discouraged! Focus on keeping the initial fold tight and rolling firmly to create a compact package.
You’ll soon develop the muscle memory for flawlessly wrapped Cheesy Beef Burritos.
Achieving the Crispiest Exterior
For an extra-crispy exterior, ensure your skillet is adequately hot before adding the burritos. A touch more oil will help achieve a beautiful, golden-brown crust.
Avoid overcrowding the pan, as this can steam the tortillas instead of crisping them.
Don’t Overstuff!
It’s tempting to pack in as much filling as possible, but overstuffing is the number one cause of burrito blowouts. Stick to the suggested 1/4 cup of beef mixture.
Leaving enough tortilla margin is critical for a secure and spill-proof wrap.
Beyond the Burrito: Perfect Pairings and Toppings
Classic Sides & Fresh Additions
These Cheesy Beef Burritos are satisfying on their own, but they also pair wonderfully with classic Mexican-inspired sides. Think a simple side of cilantro-lime rice, black beans, or a vibrant fresh tomato salad.
For extra freshness, consider adding diced avocado, a squeeze of lime juice, or a sprinkle of fresh cilantro to your finished burritos.
Sauce It Up!
Take your burritos to the next level with an array of sauces and dips. A tangy salsa verde, creamy guacamole, or a fiery hot sauce are all excellent choices.
For a unique twist, try a drizzle of our homemade sweet chili sauce for a sweet and spicy kick.
Plan Ahead: Batch Cooking & Storing Your Burritos
Freezing for Future Feasts
These burritos are fantastic for meal prep! Once pan-fried and cooled, wrap each burrito individually in plastic wrap, then again in aluminum foil.
Place them in a freezer-safe bag, label with the date, and freeze for up to 2-3 months. This method locks in the flavor and prevents freezer burn.
Reheating for Freshness
To reheat from frozen, unwrap the burrito and bake in a preheated oven at 375°F (190°C) for 25-30 minutes, or until heated through. Alternatively, microwave for 2-3 minutes, then pan-fry for a few minutes on each side to regain crispness.
From the refrigerator, simply pan-fry for 5-7 minutes, turning occasionally, or microwave for 1-2 minutes until warm.
Optimal Fridge Storage
Cooked Cheesy Beef Burritos can be stored in an airtight container in the refrigerator for up to 3-4 days. For best results, add fresh toppings like lettuce and tomato just before serving, as these can become soggy when stored.
Burrito Blunders? Quick Fixes & Common Issues
“My Burrito is Falling Apart!”
This is usually due to overstuffing or not warming the tortillas enough. Ensure you’re using the suggested amount of filling and always warm your tortillas to make them pliable.
Practice the tight folding and rolling technique; a firm, compact roll is key to preventing disintegration.
“The Filling is Dry or Bland”
If your beef mixture seems dry, a splash of beef broth or even a little extra water during the simmering stage can reintroduce moisture. For blandness, don’t hesitate to add more seasoning to taste, a squeeze of lime juice, or fresh cilantro right before wrapping.
“My Tortillas Are Breaking”
Tortillas that break are almost always cold or stale. Always warm your tortillas thoroughly before attempting to wrap them.
If you’re still having issues, try a different brand of large flour tortillas, as some are more flexible than others, or consider making a cheesy beef melt instead.
Your Cheesy Beef Burrito Questions Answered
Can I use different ground meat?
Absolutely! Ground turkey or chicken can be excellent substitutes for ground beef, offering a leaner alternative. You might need to adjust cooking times slightly and consider adding a little extra oil or broth to prevent the leaner meats from drying out.
What’s the best way to warm tortillas without a microwave?
A dry skillet over medium heat is fantastic for warming tortillas. Simply place one tortilla at a time in the hot skillet for 10-15 seconds per side until it’s soft and fragrant. You can also stack a few tortillas wrapped in foil and warm them in a low oven (around 250°F / 120°C) for about 10-15 minutes.
How can I make these Cheesy Beef Burritos spicier?
To crank up the heat, incorporate finely minced jalapeños or serrano peppers into your ground beef mixture while it cooks. A dash of cayenne pepper, a pinch of red pepper flakes, or a spicier brand of taco seasoning will also do the trick. Serve with your favorite hot sauce for an extra kick.
Can I bake these burritos instead of pan-frying?
Yes, you can definitely bake these burritos for a more hands-off approach. After wrapping, place them seam-side down on a baking sheet. Bake in a preheated oven at 375°F (190°C) for 15-20 minutes, or until golden and heated through. While they won’t have the same pan-fried crispness, they’ll still be delicious and golden, similar to our creamy beef enchiladas.
Your Next Family Favorite Awaits!
We hope this guide empowers you to create the most delicious and mess-free Cheesy Beef Burritos your family has ever enjoyed. With our proven wrapping technique and expert tips, you’re set for culinary success!
Don’t just make dinner; create a memorable, satisfying experience that proves homemade burritos are truly the best. We encourage you to try this recipe, customize it to your heart’s content, and share your fantastic creations with us!
Cheesy Beef Burritos
Course: Main CourseCuisine: MexicanDifficulty: easy8
burritos25
minutes35
minutes450
kcal60
minutesLearn the secret to perfectly portable, mess-free Cheesy Beef Burritos every time. This recipe guides you through making flavorful ground beef filling, mastering the wrap, and pan-frying for a golden finish. Enjoy a delicious, homemade burrito without the spills!
Ingredients
1 tablespoon vegetable oil
1 lb ground beef
1 packet (1 oz) taco seasoning OR 1 tablespoon chili powder, 1 teaspoon ground cumin, 1/2 teaspoon paprika, 1/2 teaspoon garlic powder, 1/4 teaspoon onion powder, 1/2 teaspoon salt, 1/4 teaspoon black pepper
1/4 cup water
8 large flour tortillas (burrito size)
1.5 cups shredded cheddar cheese
2 cups shredded iceberg lettuce
1 medium tomato, diced
1/2 cup sour cream (for serving)
Directions
- Cook the beef: In a large skillet, heat 1 tablespoon of vegetable oil over medium-high heat. Add the ground beef and cook, breaking it up with a spoon, until fully browned. Drain any excess fat.
- Season the beef: Add the taco seasoning (or your homemade spice blend) and 1/4 cup water to the skillet. Stir well and simmer for 5-7 minutes, or until the liquid has mostly absorbed and the beef is flavorful. Remove from heat.
- Prepare the tortillas: Warm the flour tortillas slightly in a microwave for 15-20 seconds each, or in a dry skillet over medium heat for 10-15 seconds per side. This makes them more pliable for wrapping.
- Master the wrap (No More Filling Spills!): Lay a warmed tortilla flat. Spoon about 1/4 cup of the seasoned beef mixture onto the lower-middle section of the tortilla, leaving plenty of space around the edges. Top with about 2 tablespoons of shredded cheddar cheese. (The cheese will help “glue” things in place). Fold the bottom edge of the tortilla up and over the filling, tucking it tightly against the filling. Next, fold in both the left and right sides of the tortilla towards the center, overlapping slightly. While maintaining a tight hold on the folded sides, roll the entire burrito up firmly from the bottom towards the top. The goal is a snug, compact package that holds everything in. Repeat with remaining tortillas and filling.
- Pan-fry for a golden finish: In the same skillet (or a clean one), add a tiny bit more oil if needed, and heat over medium heat. Place each wrapped burrito seam-side down first, and cook for 2-3 minutes until golden brown and sealed. Flip and cook on all remaining sides until evenly golden and crispy.
- Finish and serve: Remove burritos from the skillet. Carefully slice each in half if desired. Fill with shredded lettuce and diced tomatoes just before serving, and a dollop of sour cream on top. Enjoy immediately!
Notes
- Features a unique wrapping technique to prevent filling spills.