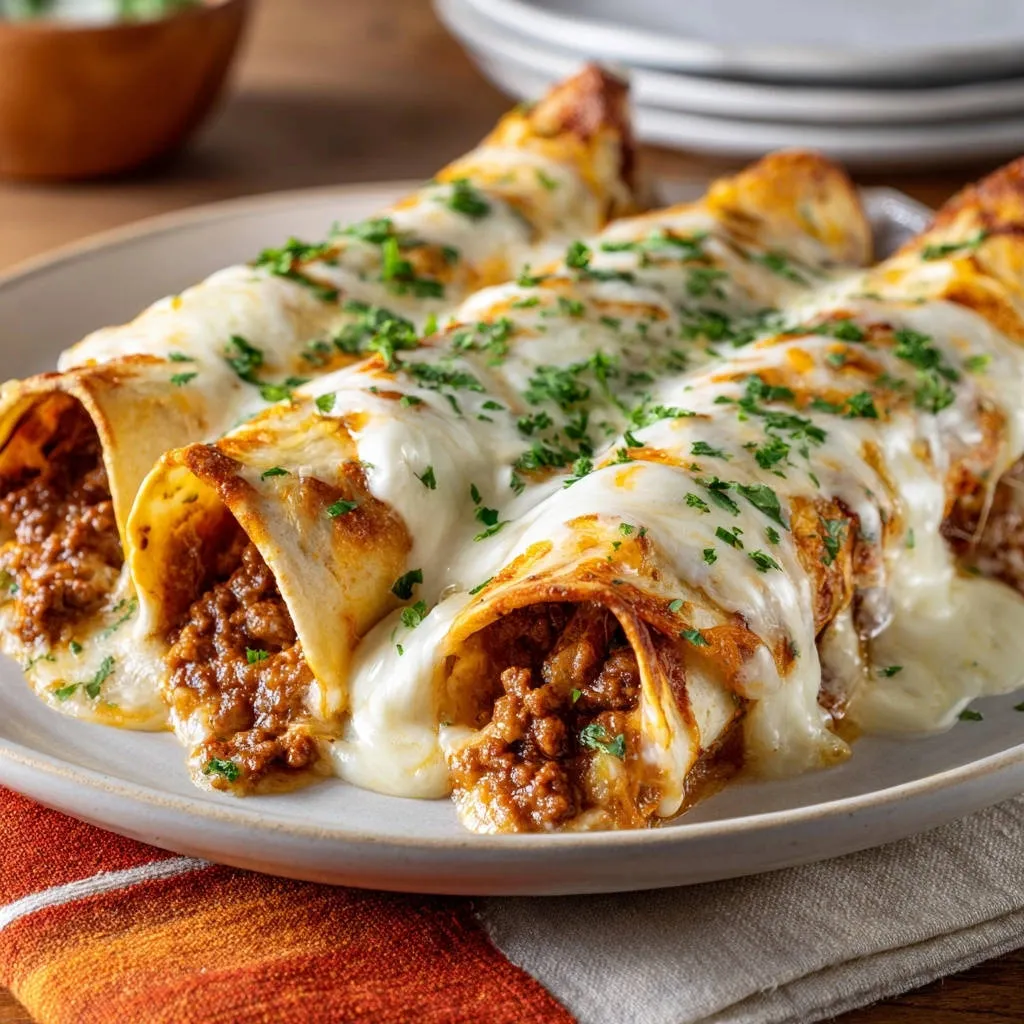
I distinctly remember my frustration with homemade enchiladas always turning out a bit mushy, sacrificing that delightful texture for soggy tortillas. It’s a common culinary challenge, but after much experimentation, I finally perfected these Cheesy Beef Enchiladas with a game-changing trick that guarantees perfectly pliable, never-soggy tortillas. This recipe delivers unparalleled comfort and flavor, making it an instant family favorite.
Why Our Cheesy Beef Enchiladas Will Become Your New Go-To
Ditch the Dreaded Mush: The Revolutionary Tortilla Trick
Our unique quick-fry technique creates a protective barrier on each tortilla, preventing it from absorbing excess moisture and becoming soggy. This ensures every bite of your Cheesy Beef Enchiladas maintains its satisfying texture and structural integrity.
For a similar crispy texture in another favorite, explore our cheesy beef taco casserole.
A Burst of Comfort: Rich, Savory Flavor in Every Bite
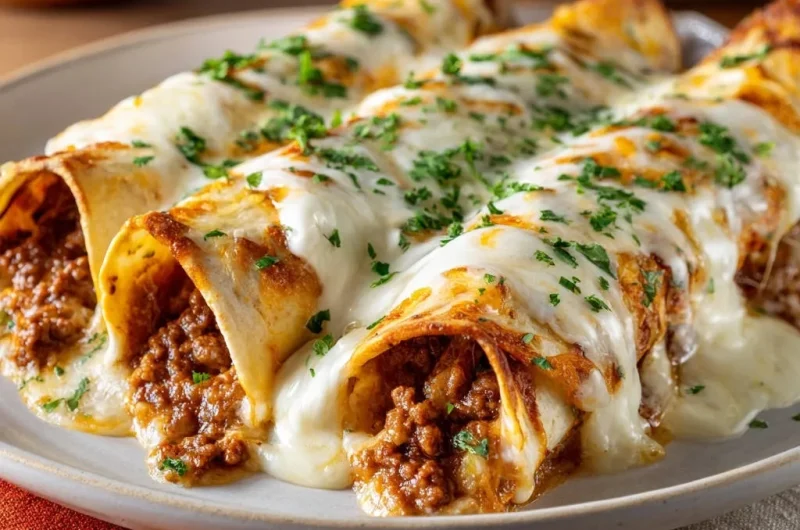
The savory ground beef filling, infused with aromatic spices and robust red enchilada sauce, delivers deep, comforting flavors. Each bite is a harmonious blend of seasoned meat, tangy sauce, and gooey melted cheese.
For another great way to achieve a crispy base, check out this loaded taco pie.
Perfect for Family Dinners & Crowd-Pleasing Gatherings
These Cheesy Beef Enchiladas are incredibly satisfying and universally loved, making them ideal for weeknight family meals or larger gatherings. They’re hearty, flavorful, and easy to scale for any occasion.
The Building Blocks of Flavor: Essential Cheesy Beef Enchilada Ingredients
The Hearty Filling: Ground Beef and Aromatics
Lean ground beef forms the robust foundation, providing savory depth to the enchilada filling.
Finely diced onion and minced garlic are crucial for building a flavorful aromatic base, cooked until softened and fragrant.

Spicy Warmth: Chili Powder and Cumin
Chili powder brings a mild, earthy heat and classic Tex-Mex essence.
Ground cumin adds a distinctive, warm, and slightly smoky flavor that is characteristic of enchiladas.
The Soul of the Dish: Red Enchilada Sauce
A good quality red enchilada sauce binds the flavors together and provides moisture.
It’s used both in the filling and as a generous topping, creating that signature rich, saucy finish.
The Game Changer: Corn Tortillas
Corn tortillas are traditional and provide a distinct flavor and texture.
Their preparation in this recipe is key to preventing sogginess and ensuring perfect pliability.
The Ultimate Melt: Monterey Jack or Mozzarella Cheese
Monterey Jack offers excellent meltability and a mild, creamy flavor that complements the beef and sauce.
Mozzarella is another fantastic option, known for its superb stretch and golden-brown melt.
Fresh Finish: Chopped Parsley
Fresh chopped parsley adds a bright, herbaceous note and a pop of color, lifting the richness of the dish.
Equip Your Kitchen: Essential Tools for Enchilada Success
Large Skillet: Essential for browning the ground beef and sautéing the aromatics.
Separate Small Skillet: Crucial for the unique tortilla-frying technique that prevents sogginess.
9×13 Inch Baking Dish: The ideal size for assembling and baking your enchiladas to perfection.
Shallow Dish: Used for dipping tortillas into the enchilada sauce.
Tongs or Spatula: For handling hot tortillas and beef in the skillets.
Measuring Cups and Spoons: For accurate ingredient proportions, ensuring consistent results.
Your Journey to Perfect Cheesy Beef Enchiladas: A Detailed Guide
- Preheat Your Oven:
Set your oven to 375 degrees Fahrenheit (190 degrees Celsius).
This ensures the oven is at the correct temperature for even baking once the enchiladas are assembled.
- Prepare the Savory Beef Filling:
In a large skillet, heat 1 tablespoon of vegetable oil over medium-high heat.
Add the ground beef and cook, breaking it apart with a spoon, until it’s thoroughly browned. Drain any excess fat to prevent a greasy filling.
- Infuse Aromatics and Spices:
Add the finely diced onion to the skillet with the beef and cook until it softens, which usually takes about 5 minutes.
Stir in the minced garlic, chili powder, ground cumin, salt, and black pepper, cooking for just one more minute until the spices become fragrant. Be careful not to burn the garlic.
- Marry Flavors with Enchilada Sauce:
Pour approximately 1/2 cup of the red enchilada sauce into the beef mixture and stir everything to combine thoroughly.
Allow it to simmer gently for 2-3 minutes, letting the flavors meld, then remove the skillet from the heat.
- Set Up for Tortilla Prep:
Pour the remaining enchilada sauce into a separate shallow dish. This will be used for dipping the tortillas.
- The Game-Changer: Prevent Soggy Tortillas with a Quick Fry:
In a separate small skillet, heat a small amount of vegetable oil (about 1/4 inch deep) over medium heat.
One at a time, briefly fry each corn tortilla for 15-20 seconds per side until it’s just softened and pliable, not crispy. This quick fry creates a protective barrier, preventing the tortillas from becoming mushy when baked.
- Dip and Fill Your Tortillas:
Immediately after frying, dip each softened tortilla into the warm enchilada sauce in the shallow dish, ensuring it’s fully coated.
Place the coated tortilla on a clean surface. Spoon about 1/4 cup of the beef filling down the center, then sprinkle with about 1 tablespoon of shredded cheese.
- Roll and Arrange:
Roll each filled tortilla up tightly and arrange it seam-side down in your 9×13 inch baking dish.
Repeat this process until all tortillas are filled and arranged snugly in the dish.
- Top with Sauce and Cheese:
Once all enchiladas are rolled and placed, pour any remaining enchilada sauce evenly over the top of the rolled tortillas.
Sprinkle generously with the rest of the shredded Monterey Jack or mozzarella cheese.
- Bake to Bubbly Perfection:
Bake the enchiladas in the preheated oven for 20-25 minutes.
They are ready when the cheese is melted and bubbly, and the enchiladas are heated through.
- Garnish and Serve:
Remove the baking dish from the oven and let it rest for a few minutes before serving.
Garnish generously with fresh chopped parsley just before serving for a burst of color and freshness.
Unlock the Secrets: Expert Tips for Next-Level Cheesy Beef Enchiladas
Mastering the Non-Soggy Tortilla Technique
Don’t Skip the Fry: The quick dip in hot oil is non-negotiable for perfectly pliable, non-mushy tortillas. It creates a slight barrier that prevents them from absorbing too much sauce.
Watch the Heat: Ensure the oil isn’t too hot, or your tortillas will become crispy instead of just softened. Medium heat is ideal for a gentle fry.
Work Quickly: Fry tortillas one at a time and move immediately to the sauce dip and filling to keep them warm and flexible.
Flavor Boosters for Your Beef Filling
Add a Dash of Broth: If your beef mixture seems a little dry, a splash of beef broth can add moisture and richness. For another hearty beef option, consider exploring a recipe like this comforting hearty beef stew.
A Secret Ingredient: A teaspoon of unsweetened cocoa powder can deepen the flavor of your chili, providing a complex, rich undertone.
Customizing Your Cheesy Goodness
Blend Your Cheeses: Experiment with a blend of cheeses like cheddar, colby jack, or even a sprinkle of cotija for varied flavor and texture.
Freshly Grated is Best: Pre-shredded cheeses often contain anti-caking agents that can hinder meltability. Freshly grating your cheese ensures a smoother, creamier melt.
Pairing Perfection: What to Serve with Your Cheesy Beef Enchiladas
Classic Side Dishes
Mexican Rice: A staple pairing, Mexican rice offers a flavorful and satisfying accompaniment.
Refried Beans: Creamy refried beans provide a comforting and traditional side.
Simple Green Salad: A light, crisp salad with a zesty vinaigrette can cut through the richness of the enchiladas.
Fresh Toppings & Garnishes for Extra Zing
Sour Cream or Mexican Crema: A dollop adds a cooling, tangy contrast.
Round Out Your Meal
To complement your cheesy beef enchiladas, consider these dishes that bring their own unique character to the table.
- For a bright, zesty counterpoint, try these spicy jalapeño marinated carrots, their tanginess cutting through the richness of the enchiladas.
- If you’re leaning into Southwestern flavors, this southwestern macaroni salad offers a creamy texture that pairs well without being too heavy.
Avocado Slices or Guacamole: Creamy avocado provides a rich, buttery counterpoint.
Pico de Gallo or Salsa: Fresh, vibrant salsa adds a burst of freshness and acidity, and you can even learn to make your own perfect pico de gallo for an authentic touch.
Chopped Cilantro: If you enjoy cilantro, it adds an extra layer of herbaceous flavor.
Smart Prep & Storage: Enjoying Cheesy Beef Enchiladas Longer
Can You Prepare Cheesy Beef Enchiladas in Advance?
Yes, you can assemble the enchiladas up to a day in advance without baking. Cover the baking dish tightly with plastic wrap or foil and refrigerate.
Allow the dish to come closer to room temperature for about 30 minutes before baking, and you might need to add an extra 5-10 minutes to the baking time.
How to Store Leftover Enchiladas
Store any leftover baked enchiladas in an airtight container in the refrigerator for up to 3-4 days.
Alternatively, cover the baking dish tightly with foil and refrigerate.
Reheating for Optimal Flavor
For best results, reheat individual servings in the microwave until warmed through.
To reheat a larger portion, cover the dish loosely with foil and warm in an oven at 300°F (150°C) until heated through, approximately 15-20 minutes, or until bubbling.
Common Enchilada Conundrums Solved
Why Are My Tortillas Still Soggy?
If your tortillas are still soggy despite the frying trick, ensure you heated the oil to the correct temperature and fried each side for long enough (15-20 seconds). The quick fry creates a crucial barrier; don’t under-fry.
Also, ensure you’ve drained enough excess fat from your beef filling before adding sauce, as too much grease can contribute to a greasy, soggy result.
My Beef Filling is Dry or Bland. What Happened?
A dry filling usually means it’s been overcooked, or not enough sauce was incorporated. Ensure you only simmer the beef mixture for 2-3 minutes after adding the sauce.
If bland, you might need to adjust seasoning. Don’t be shy with salt, pepper, and the chili powder/cumin. Taste the mixture before rolling!
The Cheese Isn’t Melting Right or Looks Oily.
Pre-shredded cheese can sometimes contain anti-caking agents that prevent smooth melting or cause an oily sheen. For the best melt, always grate your own cheese from a block.
Ensure your oven is at the correct temperature; a too-low temperature might not melt the cheese properly, while too high can cause it to burn or separate.
Your Top Cheesy Beef Enchiladas Questions Answered
Can I Use Flour Tortillas Instead of Corn?
While this recipe is specifically designed for corn tortillas to achieve that perfect non-soggy texture, you can use flour tortillas. However, the frying step won’t be as crucial for preventing sogginess, and the flavor profile will differ slightly. You might just need to warm them slightly to make them pliable.
What’s the Best Red Enchilada Sauce to Use?
For convenience, a good quality canned red enchilada sauce works perfectly. Look for brands with natural ingredients and a robust flavor. For an even more authentic taste, you can try making your own homemade red enchilada sauce from scratch – it’s easier than you think!
Can I Freeze Cooked Cheesy Beef Enchiladas?
Yes, cooked enchiladas freeze very well! Allow them to cool completely, then wrap the entire baking dish tightly with plastic wrap, then foil. They can be frozen for up to 2-3 months. Thaw overnight in the refrigerator before reheating.
How Can I Make These Enchiladas Spicier?
To add more heat, increase the amount of chili powder or add a pinch of cayenne pepper to the beef filling. You can also incorporate a finely diced jalapeño or serrano pepper when sautéing the onions, or drizzle with a spicy salsa before serving.
Savor the Moment: Your Enchilada Adventure Awaits!
With this foolproof recipe and its game-changing tortilla trick, you’re now equipped to create the most delicious and satisfying Cheesy Beef Enchiladas your family and friends have ever tasted. Say goodbye to soggy tortillas and hello to perfectly tender, flavor-packed bites every single time.
We encourage you to embark on this culinary adventure and make these incredible Cheesy Beef Enchiladas your own. Don’t forget to share your creations and tell us your favorite serving suggestions in the comments below! We’d love to hear from you.
Cheesy Beef Enchiladas
Course: Main CourseCuisine: MexicanDifficulty: easy12
enchiladas20
minutes30
minutes350
kcal50
minutesSay goodbye to mushy tortillas with this incredible Cheesy Beef Enchilada recipe! Discover the simple trick to achieving perfectly pliable, non-soggy tortillas every time, ensuring a comforting, cheesy goodness in every bite.
Ingredients
1 tablespoon vegetable oil, plus more for tortillas
1 pound ground beef
1 small onion, finely diced
2 cloves garlic, minced
1 tablespoon chili powder
1 teaspoon ground cumin
1/2 teaspoon salt
1/4 teaspoon black pepper
15 ounce can red enchilada sauce
12 corn tortillas
2 cups shredded Monterey Jack or mozzarella cheese
Fresh parsley, chopped, for garnish
Directions
- Preheat your oven to 375 degrees Fahrenheit.
- Heat 1 tablespoon of vegetable oil in a large skillet over medium-high heat. Add the ground beef and cook, breaking it apart with a spoon, until browned. Drain any excess fat.
- Add the diced onion to the skillet with the beef and cook until softened, about 5 minutes. Stir in the minced garlic, chili powder, cumin, salt, and pepper, and cook for another minute until fragrant.
- Pour about 1/2 cup of the enchilada sauce into the beef mixture and stir to combine. Simmer for 2-3 minutes, then remove from heat.
- Pour the remaining enchilada sauce into a shallow dish.
- To prevent soggy tortillas (the game-changer!): Heat a small amount of vegetable oil (about 1/4 inch deep) in a separate skillet over medium heat. One at a time, briefly fry each corn tortilla for 15-20 seconds per side until it’s just softened and pliable, not crispy. This quick fry creates a barrier.
- Immediately after frying, dip each tortilla into the warm enchilada sauce to fully coat, then place it on a clean surface.
- Spoon about 1/4 cup of the beef filling down the center of each tortilla, sprinkle with a little cheese (about 1 tablespoon), then roll it up tightly.
- Arrange the rolled enchiladas seam-side down in a 9×13 inch baking dish.
- Once all enchiladas are rolled and placed, pour any remaining enchilada sauce evenly over the top. Sprinkle generously with the rest of the shredded cheese.
- Bake for 20-25 minutes, or until the cheese is melted and bubbly and the enchiladas are heated through.
- Garnish with fresh chopped parsley before serving.
Notes
- The key to non-soggy tortillas is a quick fry in oil before dipping in sauce.