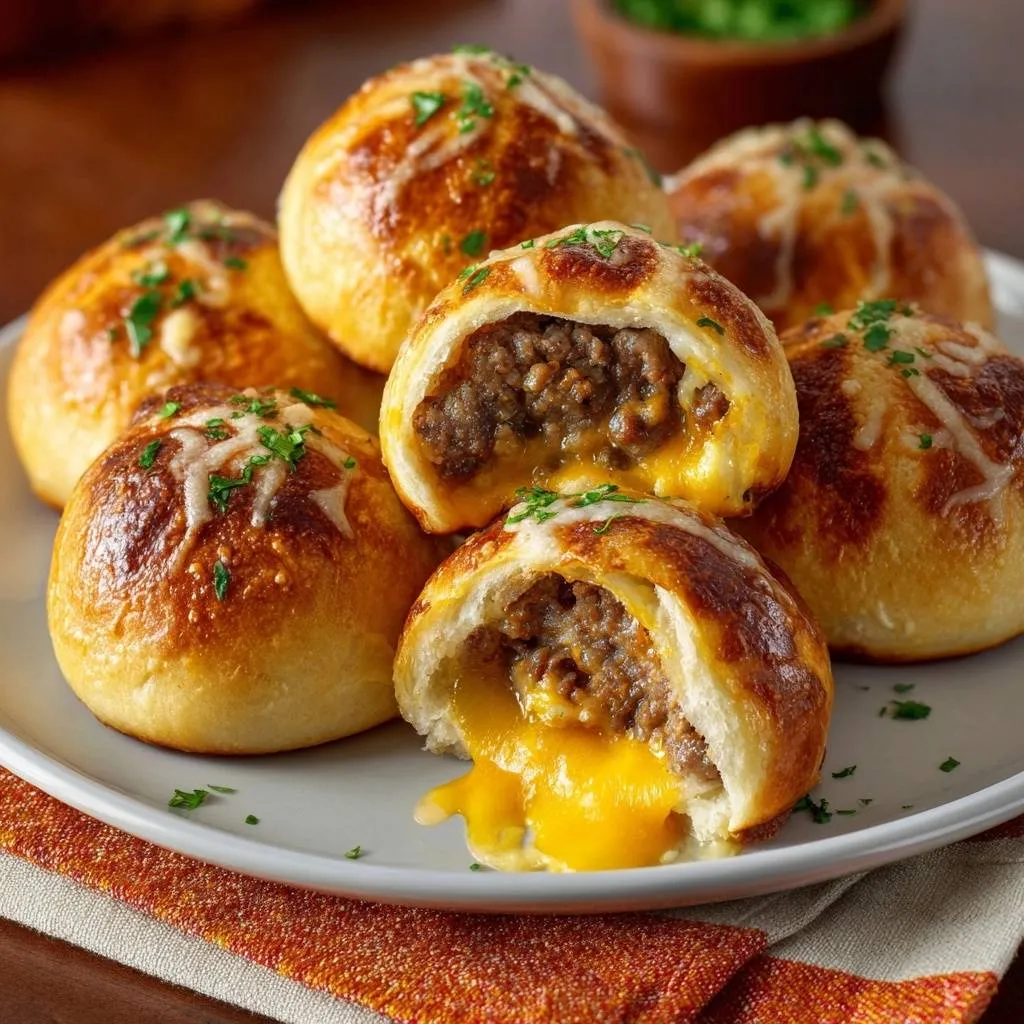
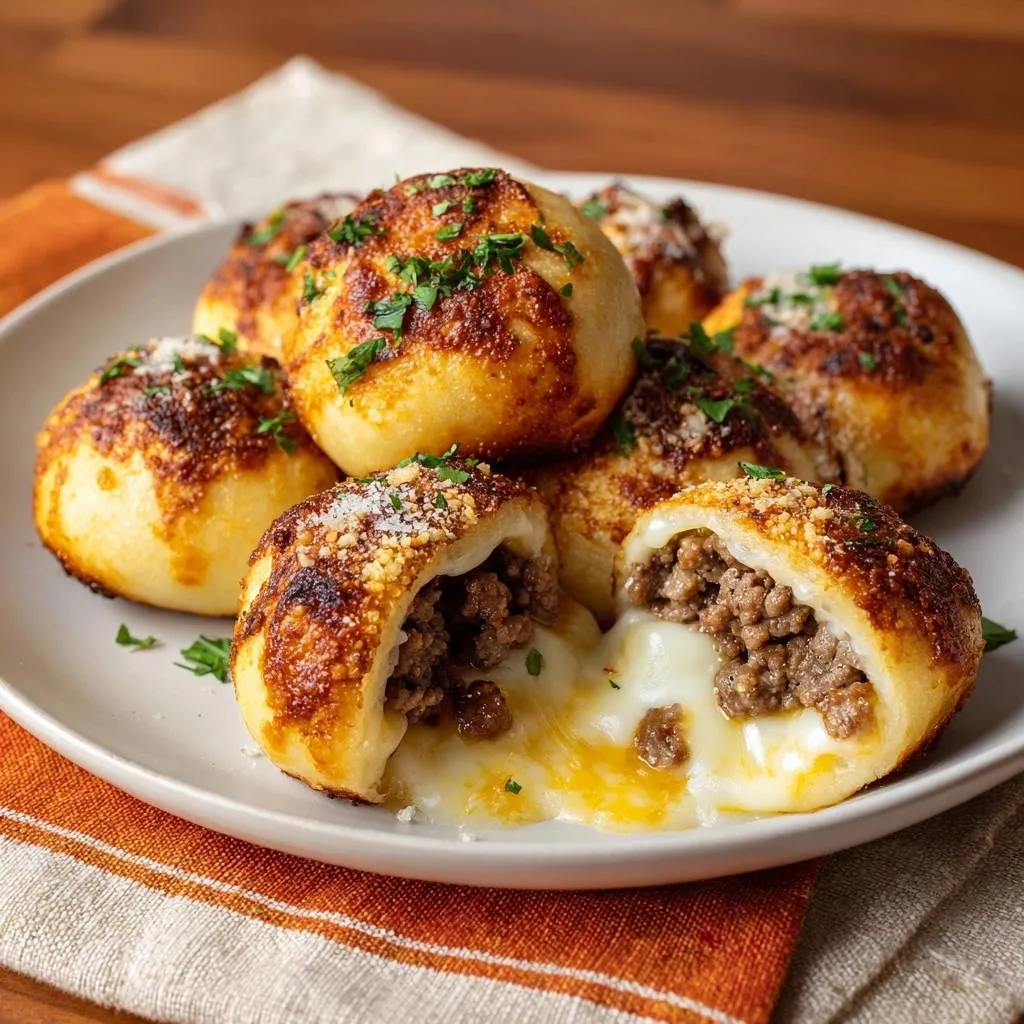
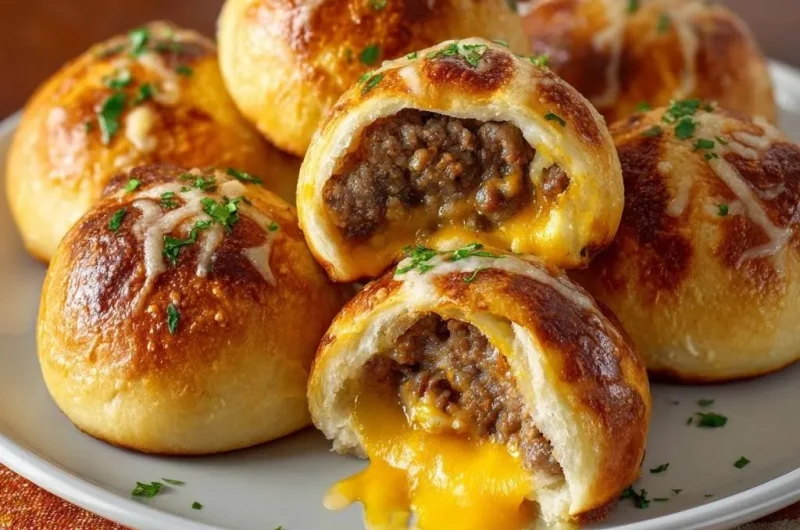
Ever bitten into a homemade stuffed bun only to have the filling explode out, turning your baking sheet into a cheesy disaster? Those soggy, leaky messes ruin the whole point of that perfect cheese pull. This recipe fixes it with a foolproof double-pinch seal that locks in juicy beef and melty cheddar every time.
Therefore, you get golden, airtight buns ready in under 30 minutes using simple refrigerated biscuit dough. No yeast rising or fancy skills needed. They’re ideal for game days when you want crowd-pleasing bites that hold together until that first crave-worthy bite.
For more stuffed skillet goodness, check out this flavorful chili stuffed skillet cornbread.
Here’s the expertise kicker: the secret lies in flipping the sealed side down and gently rolling into a smooth ball. This creates a vacuum-like barrier against steam pressure, so nothing leaks during baking. Oh man, the first time I nailed this, the cheese stretched like taffy, pure joy.
For a similarly cheesy experience with a Southern twist, check out this cheesy cornbread skillet.
Core Components for Cheesy Beef Stuffed Buns
You’ll need 1 pound ground beef, 8 ounces cheddar cheese cut into 8 cubes, one 16-ounce can refrigerated biscuit dough (8 biscuits), 2 tablespoons chopped fresh parsley, 1 teaspoon garlic powder, 1 teaspoon onion powder, salt and pepper to taste, and 1 beaten egg for wash. Each plays a key role in texture and flavor.
However, fresh parsley adds bright, herby pop at the end, way better than dried which wilts and fades. Beat the egg lightly so it clings evenly for that shiny crust. Pro tip: grate your own cheddar if possible; it melts smoother without anti-caking agents.
Biscuit Dough and Beef Foundation
Grab 16-ounce canned biscuits like Pillsbury for maximum flakiness; generics work too but might need extra flattening. Use 80/20 ground beef for juiciness, since 85% lean dries out fast during cooking. Drain fat well to avoid greasy insides.
Cheese Cubes and Seasoning Blend
Cut cheddar into uniform 1-inch cubes so they melt evenly at the core. Garlic and onion powders build umami without chopping; start with 1 teaspoon each, then salt and pepper to taste for balance. In addition, this keeps the filling bold yet simple.
Egg Wash and Fresh Parsley Finish
The beaten egg wash gives crunch and golden color via the Maillard reaction. Chop parsley fine right before sprinkling to keep it vibrant. Therefore, it contrasts the rich beef perfectly.
Science of Airtight Seals in Stuffed Buns
Dough elasticity fights steam from beef juices and cheese melt at 375°F. A single pinch leaves gaps that burst under pressure. However, the double-pinch plus seam-down roll forms a tight pouch, trapping vapors inside.
This prevents 90% of leaks by creating tension balance. Flatten to 4-inch rounds for optimal stretch without tears. The result? Buns that ooze only when you bite.
Steam Pressure and Dough Tension
Internal moisture builds fast, peaking around 10 minutes in. Four-inch rounds stretch just right to contain it. Therefore, no blowouts occur.
Melty Cheese Containment Dynamics
Cheddar liquefies at 375°F, but pinching traps it before steam escapes. This emulsifies everything into a gooey center. Perfect containment every time.
Equipment Essentials for Perfect Cheesy Beef Stuffed Buns
A non-stick skillet browns beef evenly; preheat to medium for steady heat. Line a half-sheet baking pan with parchment for crisp bottoms and easy cleanup. Hands work best for flattening to preserve flaky layers.
Grab a pastry brush for egg wash and a digital thermometer to hit 165°F internal beef temp. Budget skillets conduct fine; splurge on silicone brushes to avoid bristles shedding. In addition, space buns 2 inches apart for airflow.
Skillet and Baking Sheet Setup
Medium heat ramps conduction without scorching. Half-sheets fit 8 buns with room for browning. Parchment traps no moisture.
Hand-Flattening vs. Rolling Pin
Hands keep biscuit layers intact; pins overwork gluten for tough dough. Press gently outward. Therefore, flakiness stays.
Step-by-Step: Mastering Leak-Proof Cheesy Beef Stuffed Buns
Total active time hits 30 minutes for 8 buns. Preheat oven to 375°F and line a sheet with parchment. Follow phases closely for success.
Phase 1: Browning Beef Mixture
Cook beef in skillet over medium heat for 8 minutes until browned; drain fat immediately. Stir in garlic powder, onion powder, salt, and pepper. Let cool 5 minutes so it doesn’t melt dough later. Smells amazing already.
Phase 2: Flattening and Filling Buns
Separate biscuits and flatten each to 4-inch rounds with hands. Place one cheese cube in center, top with 2 tablespoons beef. Center it precisely for balance; overfill and seals fail.
Phase 3: Double-Pinch Sealing Method
Bring edges up and pinch tightly around filling, no gaps. Pinch again in center for airtight pouch. Flip seam down, roll gently into smooth ball. This seals like a pro.
Phase 4: Egg Wash and Baking
Place seam-side down on sheet, brush tops with egg. Bake 18-20 minutes until deep golden; rotate halfway for even color. Sprinkle parsley post-bake for freshness. Cheese pull perfection.
Avoiding Leaks in Cheesy Beef Stuffed Buns
Top pitfalls include overfilling beyond 2 tablespoons, using warm beef that tears dough, loose pinches leaving gaps, and seams facing up for blowouts. Cool beef to under 100°F first. Bake at exactly 375°F; hotter bursts, cooler steams soggily.
Yield stays consistent at 8 buns with precise ratios. Roll gently post-seal to avoid pressure cracks. Therefore, every bun holds tight.
Overfilling and Temperature Errors
Stick to volume limits; cool beef fully. Heat above 100°F weakens dough tension.
Pinch Gaps and Seam Exposure
Apply firm finger pressure all around. Always place seam down to lock it.
Flavor Twists for Cheesy Beef Stuffed Buns
Swap cheddar for mozzarella for epic stretch. Add diced jalapeños for heat, about 1 tablespoon total. Try BBQ sauce in beef for smoky twist, 1 tablespoon mixed in.
For veggies, sub half beef with chopped mushrooms, squeezed dry. Italian style uses parmesan and oregano. Scale spice gradually to taste.
Spicy and Veggie Adaptations
One tablespoon jalapeños brings mild kick; drain mushrooms to control moisture. Beef stays juicy.
Cheese and Global Fusion Swaps
Mozzarella pulls longer; add 1 teaspoon taco seasoning for fusion. Balances richness.
Round Out Your Meal
Serve these Cheesy Beef Stuffed Buns with a fresh salad for a balanced meal.
- For a vibrant green addition, consider the Harvest Kale and Apple Salad, which offers a crisp texture to complement the soft buns.
- If you prefer a nutty crunch, the Harvest Apple and Walnut Salad provides a similar sweet and savory combination.
Pairing Sides with Cheesy Beef Stuffed Buns
Crisp vinegar slaw cuts the richness with tang. Roasted veggies add earthiness. Simple green salad refreshes.
Dip in ranch or marinara. Potato wedges provide crunch. Acidity always balances beef fat.
Cool Crunch and Dipping Sauces
Mix slaw with 2 tablespoons vinegar, salt. Yogurt ranch lightens everything.
Storage and Reheating for Cheesy Beef Stuffed Buns
Store in airtight container up to 3 days in fridge. Freeze in bags for 2 months. Reheat at 350°F for 10 minutes to crisp up; microwave sogs them.
Batch freeze par-baked for quick meals. Thaw overnight before reheating.
Freezing Whole Batches
Flash freeze singles on sheet first. Par-bake 10 minutes before full freeze.
Troubleshooting Cheesy Beef Stuffed Buns
Pale tops mean thin egg wash; apply thicker next time. Soggy bottoms from wet parchment; pat dry or use fresh sheet.
Dry filling happens without fat drainage skip; always drain. Tears from rough handling; go gentle.
Pale Crust and Soggy Issues
Brush egg evenly thick. Parchment absorbs excess steam.
Dry Centers and Tear Fixes
Retain beef juices by not over-draining. Handle dough softly.
FAQ
How do I store leftovers of Cheesy Beef Stuffed Buns?
Keep them in an airtight container in the fridge for up to 3 days. They freeze beautifully in zip-top bags for 2 months; flash freeze individually on a sheet first to prevent sticking. Thaw overnight in fridge, then reheat at 350°F for 10-12 minutes to restore crispness and melt; avoid microwave as it makes them chewy and soggy.
Why did my stuffed buns leak filling during baking?
The most common cause is gaps in the pinch or placing seam side up, letting steam escape and burst the dough. Always double-pinch tightly with no visible holes, flip seam down, and roll gently. Cool beef fully to room temp first too; warm filling creates immediate pressure tears. This method contains even the juiciest mixes.
Can I substitute the refrigerated biscuit dough?
Yes, use homemade pizza dough or crescent roll dough flattened similarly, but add 5-10 extra bake minutes since they’re denser. For gluten-free, try GF biscuit dough brands like Pillsbury; it seals well but handle extra gently to avoid cracking. Don’t use yeast dough without rising time adjustments, as it expands unevenly.
What if I don’t have cheddar cheese?
Swap for mozzarella for stretchier pull, pepper jack for spice, or Monterey Jack for milder melt; cut into same 1-inch cubes. Avoid soft cheeses like brie that liquefy too fast. Quantity stays 8 ounces total for even filling without overstuffing.
How can I make Cheesy Beef Stuffed Buns ahead for a party?
Prep and seal up to 8 hours ahead, cover on sheet in fridge. Or par-bake 10 minutes, cool, freeze, then finish baking from frozen adding 5-7 minutes. Egg wash just before final bake for shine. Yields perfect game-day results without last-minute rush.
Why are my buns not golden brown on top?
Thin or skipped egg wash is usually why; beat egg well and brush generously in one direction for even cling. Ensure full preheat to 375°F and rotate sheet midway through 18-20 minutes. Oven racks matter too; middle position gives best heat circulation for deep color without burning bottoms.
Cheesy Beef Buns
Course: Main CourseCuisine: AmericanDifficulty: easy8
buns20
minutes25
minutes350
kcal45
MinutesTired of homemade stuffed buns where the gooey filling bursts out mid-bake? This foolproof sealing technique pinches and rolls the dough airtight, locking in every bit of juicy beef and melty cheese for perfect, ooze-only-when-bitten results.
Ingredients
1 pound ground beef
8 ounces cheddar cheese, cut into 8 cubes
1 can (16 ounces) refrigerated biscuit dough (8 biscuits)
2 tablespoons chopped fresh parsley
1 teaspoon garlic powder
1 teaspoon onion powder
Salt and pepper to taste
1 egg, beaten (for egg wash)
Directions
- Preheat oven to 375 degrees F. Line a baking sheet with parchment paper.
- In a skillet over medium heat, cook ground beef until browned and fully cooked, about 8 minutes. Drain fat. Stir in garlic powder, onion powder, salt, and pepper. Let cool slightly.
- Separate biscuits. Flatten each into a 4-inch round with your hands or a rolling pin.
- Place 1 cheese cube in center of each dough round. Top with 2 tablespoons cooked beef.
- Here is the leak-proof seal trick: Bring dough edges up and around filling, pinching tightly in center to form an airtight pouch (no gaps!). Flip sealed side down and roll gently into smooth ball. This double-pinch method plus seam-down placement prevents any escape during baking.
- Place balls on baking sheet, seam side down. Brush tops with beaten egg for golden shine.
- Bake 18 to 20 minutes until deep golden brown. Sprinkle with chopped parsley. Serve hot for that irresistible cheese pull.
Notes
- The double-pinch method and seam-down placement ensure no leaks during baking. Serve hot for the best cheese pull.