Stuffed peppers that turn out soggy every time? You’re not alone. Most recipes skip the key step that drains out excess moisture, leaving you with watery mush instead of that perfect crisp-tender bite. This version fixes it fast with a simple salt rub trick, and you’ll have dinner ready in just 45 minutes for 4 people.
However, it’s not just about the peppers. The beef filling bursts with bold cumin and tomato flavors that soak right in without overpowering. In addition, that generous cheddar topping bubbles to golden perfection. Therefore, you get way better results than those bland takeout versions.
The real secret lies in that 15-minute pre-bake drain. Rub salt inside the peppers, let them sit cut-side down, and watch the water weep out. This one move transforms everything, so your filling stays flavorful and the peppers hold their shape. Oh man, the first bite melts in your mouth with cheesy goodness.
Why Cheesy Beef Stuffed Peppers Fail (And How Yours Won’t)
The Soggy Pepper Trap Explained
Bell peppers release a ton of water when baked, especially green ones that hold more moisture than yellow. This dilutes your filling and turns everything mushy. However, the salt rub triggers osmosis, pulling out that liquid before baking starts.
After 15 minutes, you rinse and pat dry. Therefore, peppers stay crisp-tender instead of soggy. Picture this: no-prep peppers collapse into a puddle, but yours stand firm with a satisfying snap.
Beef Filling Science: Maillard Magic
Browning ground beef over medium heat sparks the Maillard reaction, creating deep, savory flavors you can’t get from undercooked meat. Drain the fat right after to ditch greasiness but keep those tasty browned bits. In addition, cumin amps up the beef’s umami without dominating.
Skip this, and your filling tastes flat. But done right, it simmers into something rich and irresistible.
Key Ingredients for Perfect Cheesy Beef Stuffed Peppers
Selecting Bell Peppers for Crisp Texture
Grab large green and yellow bell peppers; they’re sturdy and mildly sweet, perfect for holding filling. Firm, heavy ones in hand mean better structure. Avoid red here, as their extra sweetness can overpower the beef.
Store them in the fridge’s crisper drawer up to a week. Therefore, they’re always fresh when you need them.
Ground Beef and Rice: Filling Foundation
Use 80/20 ground beef for juiciness that drains clean. Day-old cooked rice soaks up flavors best, unlike fresh which stays gummy. Then, 1 cup diced tomatoes with juices binds it all into a saucy mix.
This combo gives bulk and moisture without sogginess. It’s the hearty base you crave.
For more ideas on hearty beef bases, explore the cheesy sweet potato and beef bake.
Cheese and Seasonings: Melty, Bold Finish
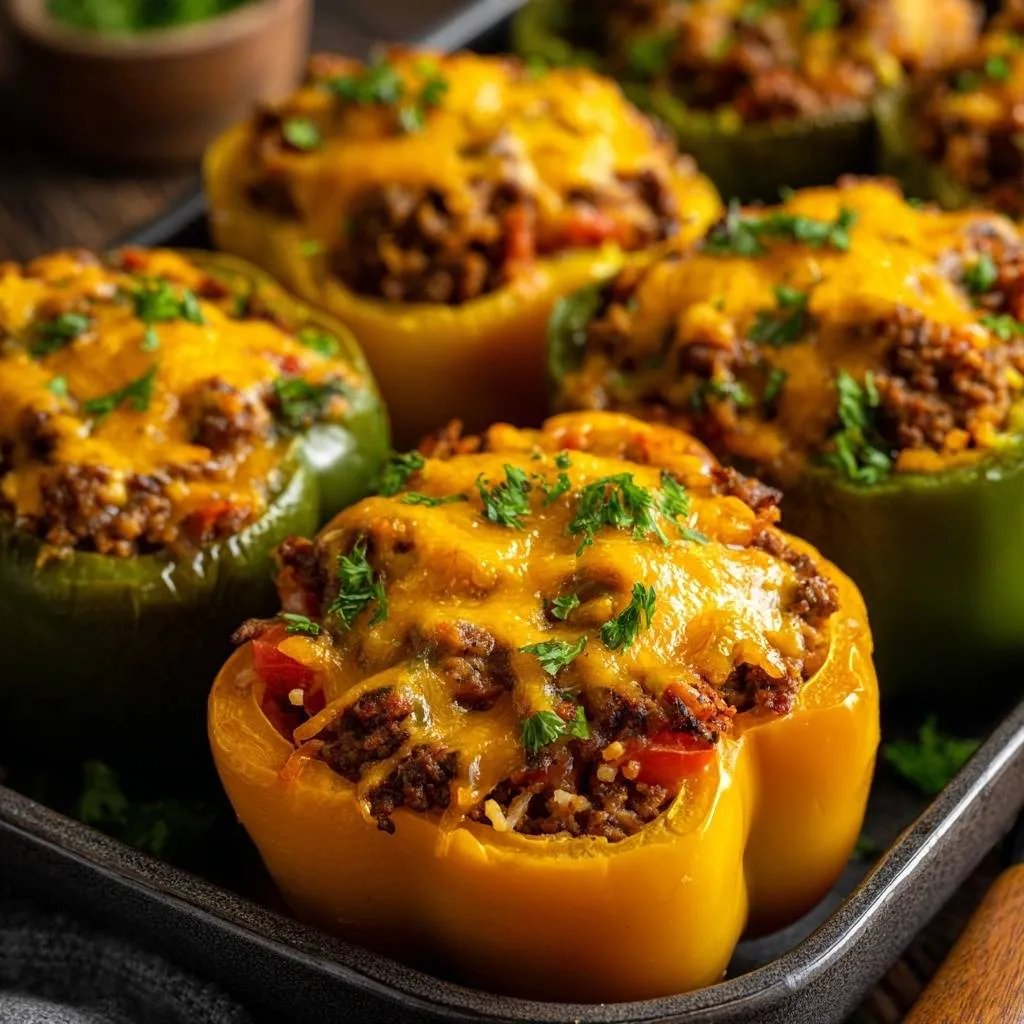
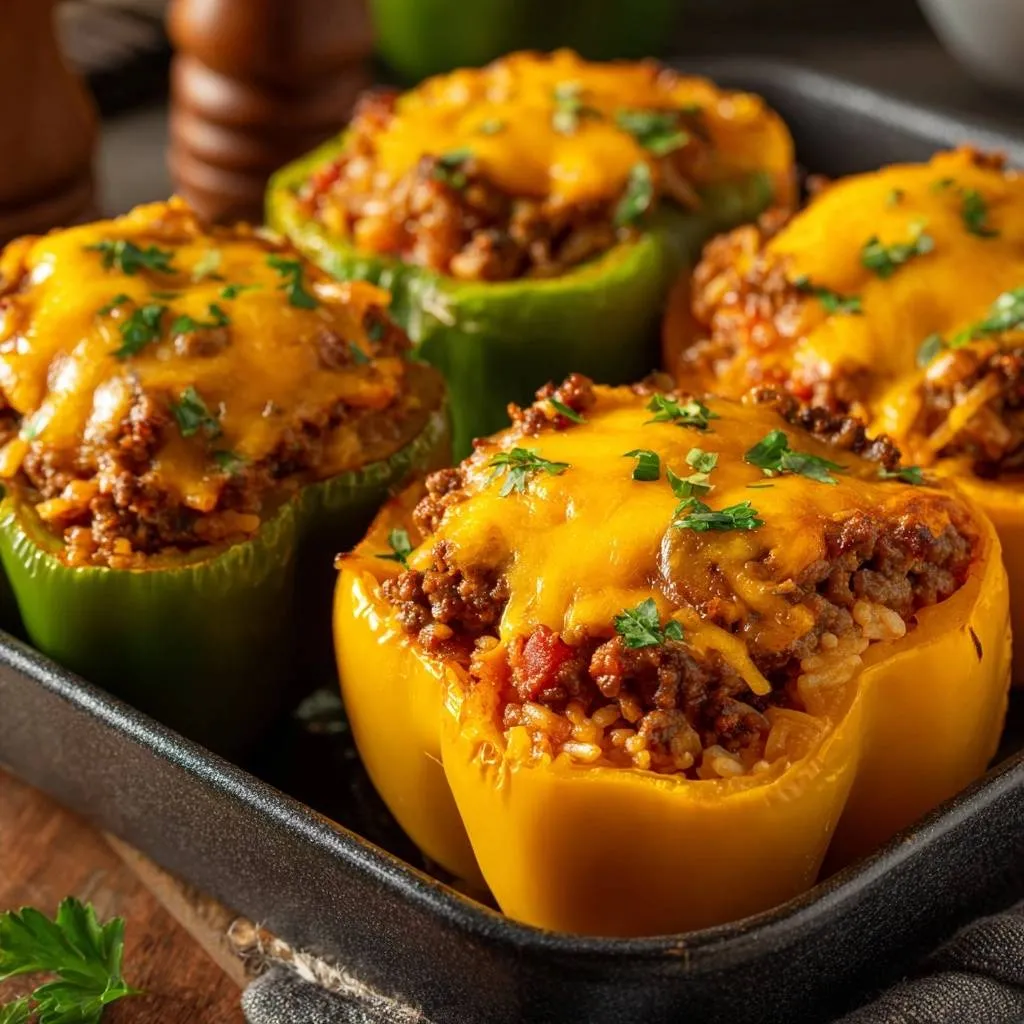
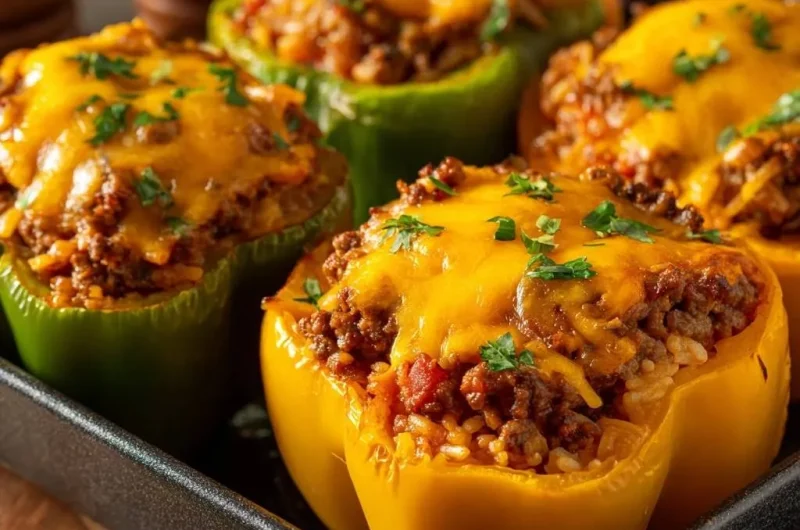
Shredded cheddar melts smooth; sharp adds tang, mild keeps it creamy, so pick your vibe. Two cups total ensure gooey insides and bubbly tops. Cumin brings smoky depth, salt and pepper sharpen it, while fresh parsley adds bright green punch.
That garnish isn’t just pretty; it cuts the richness perfectly.
Prepping Peppers: The Anti-Soggy Salt Drain Method
Slicing and Seeding Bell Peppers Precisely
Slice the tops straight off for stable bases. Scrape out seeds and membranes thoroughly; leftover white bits turn bitter. Stand them upright in your baking dish.
If they wobble, crumple foil balls to prop them up. This keeps everything steady through baking.
Salt Rub Technique to Extract Moisture
Generously rub 1 teaspoon salt inside each pepper. Place cut-side down on paper towel-lined plates for 15 minutes; you’ll see water bead out. Rinse briefly to avoid oversalting, then pat super dry.
They’ll look ready when no more moisture appears. Therefore, your peppers bake up crisp every time.
Cooking Cheesy Beef Filling: Skillet Mastery
Browning Beef Without Drying It Out
Heat your skillet to medium and crumble in the pound of ground beef. Cook about 7 minutes until browned all over, stirring often. Drain fat immediately, but leave those flavorful browned scraps.
Look for no pink and a meaty aroma. This prevents dry or greasy results.
Blending Rice, Tomatoes, and Spices
Stir in 1 cup cooked rice, diced tomatoes with juices, cumin, salt, pepper, and 1 cup cheddar. Simmer 5 minutes; the tomatoes reduce into a thick sauce. Taste and tweak spices gently.
For another comforting meal featuring ground beef, check out this hearty beef and potato stew.
The filling thickens and smells amazing. Pro tip: that cheese melts in for extra creaminess.
Assembling and Baking Cheesy Beef Stuffed Peppers
Stuffing Peppers Evenly for Uniform Cooking
Spoon filling into peppers, overfilling slightly for a dome. Pile on the remaining cup of cheddar. Add 1/2 cup water to the dish for bottom steaming.
Tent with foil tightly. This setup cooks everything evenly without drying out.
Baking Timeline: Covered to Uncovered
Bake at 375°F covered for 25 minutes; peppers tenderize gently. Uncover for 10 more until cheese bubbles golden and beef hits 165°F inside. Rest 5 minutes; juices settle.
That final blast browns the top perfectly. Garnish with parsley and dig in.
Science of Crisp Cheesy Beef Stuffed Peppers
Moisture Control in Bell Pepper Baking
Osmosis from the salt rub extracts water pre-bake, while the water bath creates steam for tenderness. Evaporation ramps up uncovered, crisping edges without waterlogging. No-trick methods flood the filling; this balances it all.
Result? Peppers with bite and packed flavor.
Cheese Melting Dynamics for Golden Tops
Cheddar’s proteins stretch and fats ooze at high heat, creating that gooey pull. The last 10 minutes browns sugars for golden spots without burning. Therefore, you get melty perfection.
Avoiding Mistakes in Cheesy Beef Stuffed Peppers
Common Pitfalls: Overstuffing and Undraining
Overstuffing causes overflow and uneven cooking; fill just to the top. Skipping the salt rub means watery peppers every time. Also, high oven temps char tops before centers cook.
Stick to 375°F and prep right. Your dish stays flawless.
Filling Fixes: Blandness and Greasiness
If bland, bump cumin a pinch more during simmer. Too greasy? Drain fat twice. Use the right rice amount to avoid dryness.
These tweaks keep flavors bold and balanced.
Flavor Twists on Cheesy Beef Stuffed Peppers
Spice Level Upgrades and Cheese Swaps
Kick it up with chili flakes or swap cheddar for pepper jack heat. Go Mexican with cilantro and lime squeezes. Add diced onions or corn for veggie crunch and sweetness.
These keep the core cheesy beef vibe but add excitement.
Grain and Protein Variations
Swap rice for quinoa or cauliflower rice for low-carb. Try ground turkey or lentils for lighter protein. However, keep plenty of cheese on top.
Filling adapts easily while staying delicious.
Make-Ahead Guide for Cheesy Beef Stuffed Peppers
Prep and Storage Strategies
Assemble fully and fridge up to 2 days, or freeze stuffed peppers up to 3 months. Thaw overnight before baking. Make filling ahead too; it reheats great.
Perfect for weeknights. Just add 5 extra bake minutes if cold.
Reheating Without Texture Loss
Oven at 350°F with a splash of water revives steam best; microwave works but softens peppers more. From freezer, bake straight with extra foil time. Avoid sogginess by patting dry first.
Pairing Sides with Cheesy Beef Stuffed Peppers
Crisp Salads and Veggies
A cucumber-tomato salad cuts the richness with fresh crunch. Roasted zucchini or green beans add earthy balance. Simple sides let the peppers shine.
Round Out Your Meal
Here are a couple of fresh salad ideas that go well with your cheesy beef stuffed peppers.
- For a vibrant green addition, try this Harvest Kale and Apple Salad, featuring crisp apples that echo the sweetness often found in stuffed peppers.
- Complement the savory flavors with another take on the Harvest Apple and Walnut Salad, offering a satisfying crunch alongside your main course.
Grain and Bread Complements
Garlic bread soaks up those juices perfectly. Quinoa pilaf extends the meal. One pepper per person pairs right for balance.
Troubleshooting Cheesy Beef Stuffed Peppers
Why Are My Peppers Still Watery?
You likely skipped the salt rub or used small peppers that hold more water. Next time, rub generously and let drain fully 15 minutes. Pat extra dry too.
Filling Too Dry or Cheese Not Melting?
Dry filling means lean beef or over-drained fat; add tomato juice back. Cheese issues? Check oven temp and use freshly shredded. Preheat fully.
Peppers Tipping Over in the Dish?
Crumple foil into balls for supports. Use a snug dish so they lean on each other. Slice bases flat if needed.
How to Scale for Crowds?
Double everything for 8; use a 9×13 dish. Bake same time but check centers. Add water proportionally to avoid drying.
FAQ
How do I store leftover Cheesy Beef Stuffed Peppers?
Cool completely, then store in an airtight container in the fridge up to 3 days. They reheat well in a 350°F oven with a bit of water for 15-20 minutes. Freezing works great for up to 3 months; thaw overnight in fridge first, as rice holds texture better that way. Avoid microwaving long-stored ones to prevent mushiness.
Why did my stuffed peppers turn out soggy?
The most common issue is skipping the salt drain step; bell peppers release tons of water during baking without it. Make sure to rub salt inside generously, let sit 15 minutes cut-side down on paper towels, rinse briefly, and pat very dry. Also, use large firm peppers and don’t skip the foil cover initially for controlled steaming.
Can I substitute ingredients in Cheesy Beef Stuffed Peppers?
Yes, swap rice for quinoa or cauliflower rice (cook first for best texture). Use ground turkey instead of beef for lighter flavor, but brown it well. No cheddar? Monterey Jack melts similarly. Diced tomatoes can become canned with juice or fresh salsa, keeping that saucy bind. Avoid pork or alcohol entirely.
What’s the best way to reheat Cheesy Beef Stuffed Peppers without losing crispness?
Oven is king: 350°F for 15-20 minutes covered with foil and a tablespoon water per pepper revives steam and cheese melt. Microwave in short bursts with a damp paper towel over top, but expect softer peppers. From frozen, add 10 extra minutes and check internal temp hits 165°F.
How can I make Cheesy Beef Stuffed Peppers spicier?
Stir in 1/2 teaspoon chili flakes or cayenne with the cumin for heat that builds. Swap half the cheddar for pepper jack. For Mexican twist, add diced jalapeños to the filling and cilantro instead of parsley. Taste after simmering and adjust; spices bloom more during bake.
Can I make Cheesy Beef Stuffed Peppers ahead for a party?
Absolutely, assemble fully up to 2 days ahead and fridge, or freeze 3 months. Bake from chilled with 5 extra covered minutes. Prep filling separately a day early; it flavors even better. Scale up easily in larger dishes, just ensure water bath for even cooking. They’ll be the hit everyone raves about.
Cheesy Beef Stuffed Peppers
Course: Main CourseCuisine: AmericanDifficulty: medium4
servings20
minutes45
minutes450
kcal65
MinutesStuffed peppers always turn out watery and mushy? This recipe fixes it with a simple pre-bake drain trick that pulls out excess moisture from the peppers first, leaving them tender-crisp and the filling perfectly flavored every time.
Ingredients
4 large bell peppers (green and yellow)
1 pound ground beef
1 cup cooked rice
1 cup diced tomatoes (with juices)
2 cups shredded cheddar cheese, divided
1/4 cup chopped fresh parsley, plus more for garnish
1 teaspoon salt
1/2 teaspoon black pepper
1 teaspoon ground cumin
Directions
- Preheat oven to 375 degrees F. Slice tops off bell peppers and remove seeds and membranes. To banish sogginess forever, rub the inside of each pepper generously with salt, place cut-side down on a paper towel-lined plate, and let sit for 15 minutes. This draws out excess water. Rinse briefly, pat very dry with paper towels, then stand peppers upright in a baking dish.
- In a skillet over medium heat, cook ground beef until browned and crumbled, about 7 minutes. Drain fat. Stir in cooked rice, diced tomatoes with juices, cumin, salt, pepper, and 1 cup shredded cheddar. Simmer 5 minutes to blend flavors.
- Stuff filling evenly into prepared peppers. Top each with remaining 1 cup shredded cheddar.
- Pour 1/2 cup water into the baking dish around peppers for steaming. Cover tightly with foil and bake 25 minutes. Uncover and bake 10 more minutes until cheese is bubbly and golden. Garnish with chopped parsley. Serve hot.
Notes
- Use green and yellow bell peppers for color variety. The salt rub and draining step is key to preventing sogginess.