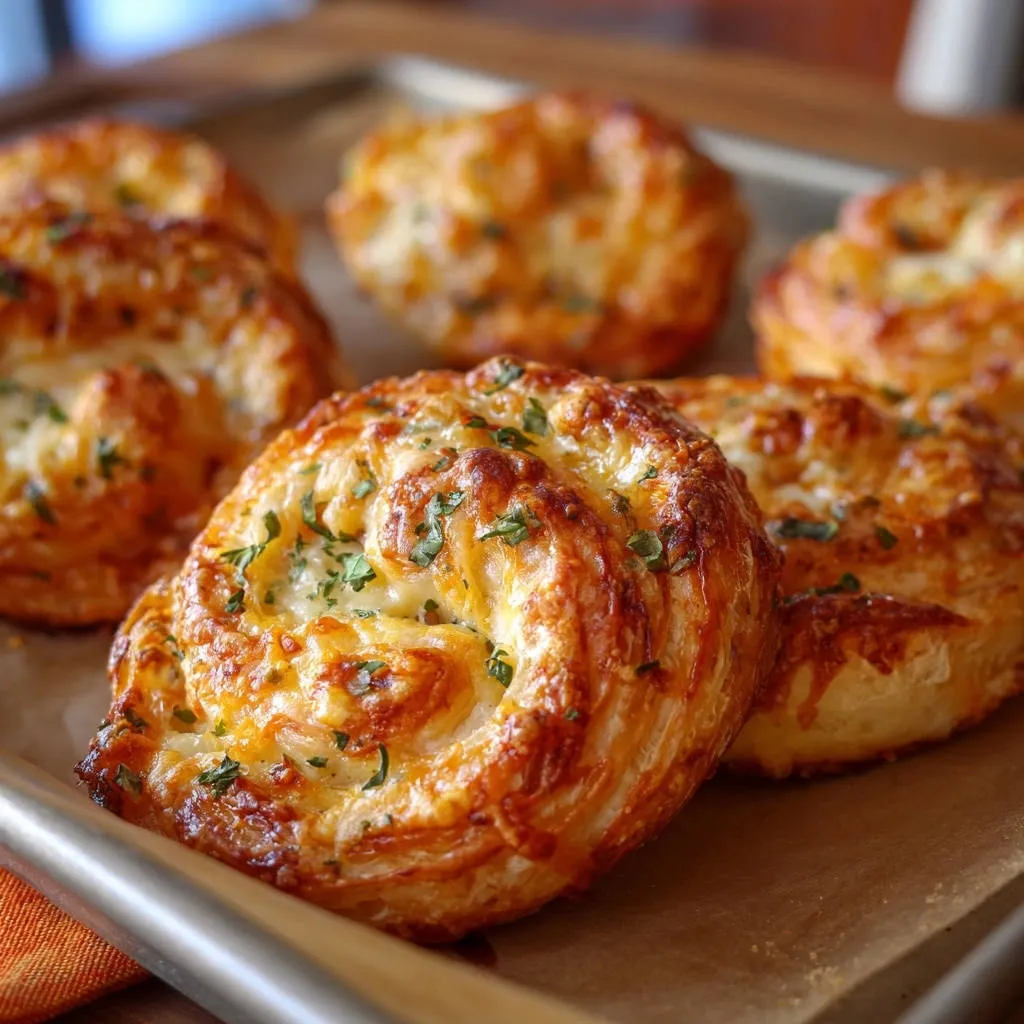
Ever tried making savory pastries only for them to turn out dense or uneven? I’ve certainly had my share of kitchen mishaps, but I’ve finally cracked the code to making these incredible Cheesy Garlic Swirls puff up beautifully every single time.
This recipe transforms simple ingredients into an airy, layered delight that’s anything but flat, ensuring a consistently flaky and utterly delicious result perfect for any occasion.
Beyond Basic: What Makes Our Cheesy Garlic Swirls Unforgettable?
The Secret to That Signature Flaky Puff
Our method guarantees an exceptionally airy, layered texture thanks to meticulous handling of the puff pastry, especially the crucial chilling step.
The high oven temperature also plays a vital role, creating that impressive separation of layers and a truly satisfying crispness in every bite.
Effortless Elegance for Any Occasion
Utilizing store-bought puff pastry makes these golden swirls surprisingly simple to prepare, yet they look and taste incredibly sophisticated.
They are perfect for impromptu guests, a quick appetizer, or an impressive side dish that comes together with minimal fuss.
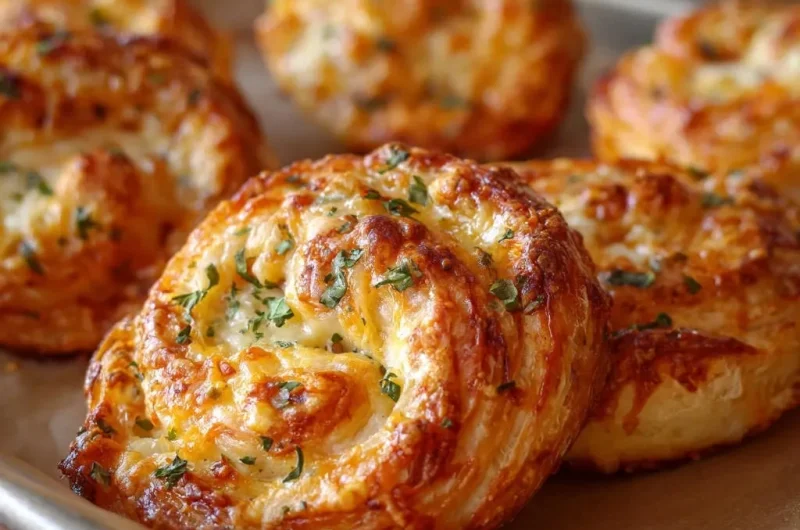
A Burst of Savory Garlic & Cheese in Every Bite
The combination of rich melted butter, aromatic garlic powder, and fresh parsley creates a deeply savory base that perfectly complements the gooey, bubbly cheese blend.
Each bite delivers an irresistible explosion of classic flavors, making these garlic cheese appetizers universally appealing.
The Flavor Foundation: Essential Ingredients for Perfect Swirls
Selecting quality ingredients is the first step towards culinary success. Here’s a breakdown of what makes our Cheesy Garlic Swirls shine.
Puff Pastry: The Unsung Hero
Puff pastry is our convenience champion, providing countless flaky layers without the effort of scratch-making.
The key is using it thawed but still cold; this ensures the butter within the pastry remains solid, creating maximum puff and distinct layers during baking.
The Cheesy Heart: Selecting Your Blend
A blend of mozzarella and cheddar offers the best of both worlds: mozzarella for its incredible melt and stretch, and cheddar for its sharp, comforting flavor.
Feel free to customize with your favorite melting cheeses like Gruyere or Monterey Jack for unique cheesy garlic swirl variations, ensuring they’ll create gooey perfection.
Aromatic Butter-Garlic Infusion
Melted unsalted butter acts as the perfect vehicle for distributing the garlic powder evenly, ensuring a burst of flavor in every section of the swirl.
Fresh chopped parsley not only adds a vibrant green color but also a fresh, herbaceous counterpoint that brightens the entire dish.
Achieving Golden Perfection: The Egg Wash
The simple egg wash, made with a whisked egg and a touch of water, is essential for a beautiful presentation.
It helps the puff pastry delight achieve that coveted deep golden-brown hue and contributes to a deliciously crisp exterior, elevating the visual appeal and texture.
Your Kitchen Arsenal: Tools for Effortless Cheesy Garlic Swirls
Having the right tools on hand makes the preparation process smooth and enjoyable.
Baking Essentials
You’ll need a reliable baking sheet to hold your delightful creations, paired with parchment paper for non-stick baking and effortless cleanup.
Precision & Prep Aids
A small bowl for mixing the butter-garlic spread and a pastry brush for even application are indispensable.
Crucially, a very sharp knife ensures clean cuts of the pastry log, leading to beautifully defined layers in your finished golden swirls.
Crafting Culinary Magic: A Detailed Guide to Cheesy Garlic Swirls
- Prepare Your Workspace & Oven:
Preheat your oven to 400°F (200°C) to ensure it’s ready for the pastry’s quick rise. Line a baking sheet with parchment paper; this prevents sticking and aids in easy cleanup.
- Whip Up the Aromatic Butter Mixture:
In a small bowl, combine the melted unsalted butter, garlic powder, and one tablespoon of chopped fresh parsley. This mixture forms the flavor base and helps the cheese adhere securely to the pastry.
- Unroll & Brush Your Cold Puff Pastry:
Carefully unroll the cold puff pastry sheet onto the prepared baking sheet. Using a pastry brush, evenly spread the butter mixture over the entire surface, ensuring edge-to-edge coverage for maximum flavor.
- Evenly Layer the Cheese:
Sprinkle the shredded cheese blend evenly over the buttered pastry. Leave a small, half-inch border along one long edge; this helps seal the roll later and prevents cheese from oozing out.
- Roll Tightly for Perfect Swirls:
Starting from the long edge opposite the border, tightly roll the pastry into a log. A firm, even roll is crucial for creating those distinct, beautiful layers when baked, ensuring your flaky bites hold their shape.
- Chill for Flawless Slicing:
Transfer the rolled log to the refrigerator for at least 15 minutes. This chilling step firms up the butter and pastry, making for clean, sharp cuts and helping the layers stay defined during baking.
- Slice & Arrange Your Swirls:
Once chilled, use a very sharp knife to slice the log into 12 equal rounds, each about 1 inch thick. Place them cut side up on your prepared baking sheet, leaving ample space between each swirl to allow for puffing.
- Apply the Golden Egg Wash:
Whisk together one large egg with one tablespoon of water to create an egg wash. Gently brush the tops and sides of each pastry swirl; this contributes to a gorgeous golden-brown color and a crisp finish.
- Bake to Golden Perfection:
Bake for 18-22 minutes, or until the pastries are wonderfully puffed, golden brown, and the cheese is bubbly and melted. The high oven temperature is key to helping the puff pastry layers separate and achieve maximum flakiness, creating perfect Cheesy Garlic Swirls.
For more airy baked goods, explore the secrets to flaky, airy bites.
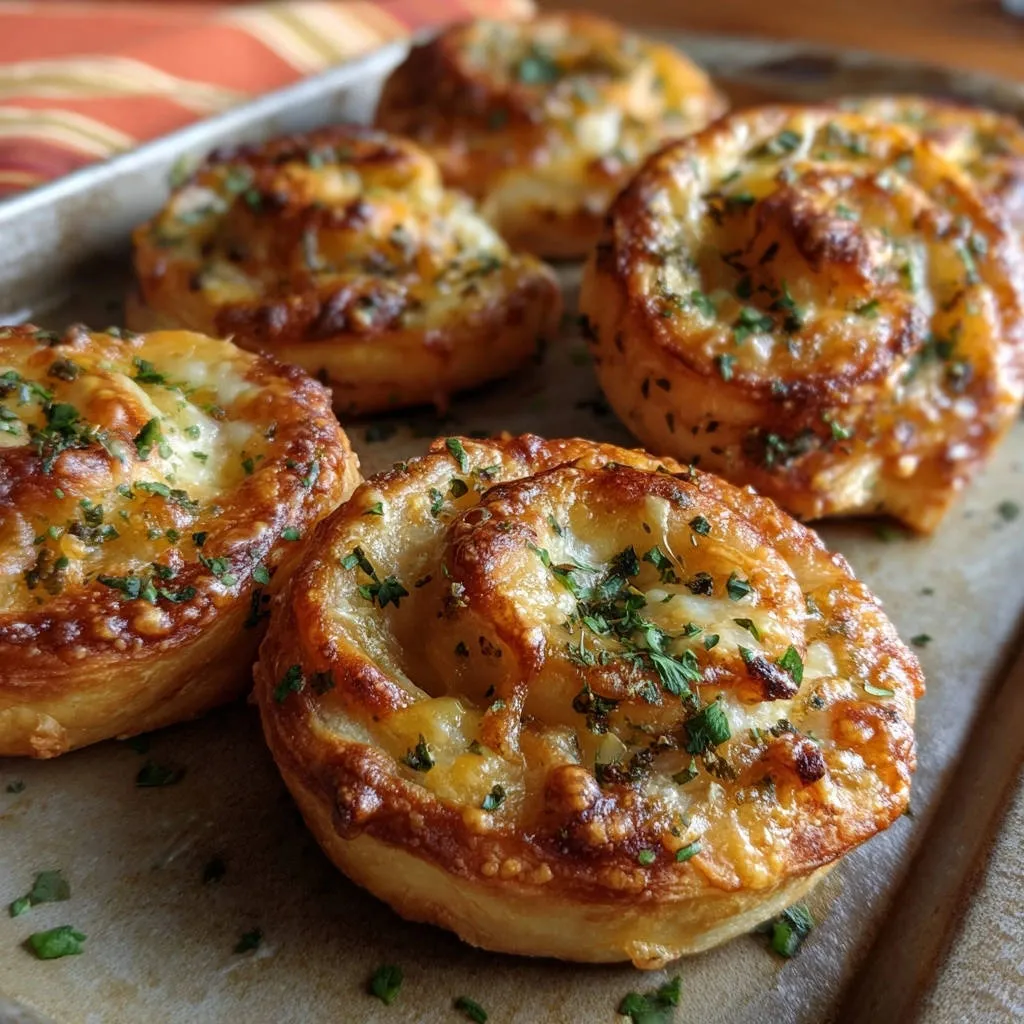
- Cool, Garnish, and Serve:
Remove the Cheesy Garlic Swirls from the oven and let them cool slightly on the baking sheet for a few minutes. Garnish with additional fresh chopped parsley before serving warm to enhance flavor and presentation.
Mastering the Swirl: Expert Tips for Flawless Results
Embrace the Chill Factor: Don’t skip or shorten the chilling step! Cold puff pastry and a firm log are the absolute secrets to clean cuts, defined layers, and the impressive puff you’re looking for in your savory pastries.
Roll with Purpose: When rolling the pastry log, aim for consistent tightness. A loose roll can lead to gaps or uneven layers, while an overly tight roll might inhibit puffing. Practice makes perfect for these easy baked snacks!
The Sharp Knife Advantage: A very sharp knife is your best friend for slicing the chilled log. Use a swift, decisive motion to cut rather than saw, which can compress the layers and prevent a good rise.
Don’t Overcrowd the Pan: Give your swirls room to breathe and expand on the baking sheet. Overcrowding can lead to uneven baking and prevent the sides from crisping up properly.
Parsley: Fresh is Best! While dried parsley can work in a pinch, fresh parsley adds a vibrant pop of color and a brighter, more aromatic flavor that truly elevates the dish, making your Cheesy Garlic Swirls visually stunning and delicious.
Solving Swirl Snafus: Common Issues and Quick Fixes
My Swirls Unraveled or Lost Shape!
This often happens if the pastry log wasn’t rolled tightly enough, or if it wasn’t chilled adequately before slicing. Ensure a firm, even roll and a solid 15-minute chill for best results, giving your flaky bites stability.
Why Aren’t My Swirls Puffing?
Several factors can cause this: your oven might not be hot enough, your puff pastry could be expired or too warm, or the swirls might have been overcrowded on the baking sheet. Always preheat thoroughly and check pastry freshness to ensure a good rise.
My Cheesy Garlic Swirls Are Dry or Hard!
Overbaking is the usual culprit here. Keep a close eye on them during the last few minutes of baking, pulling them out as soon as they’re golden and puffed. A generous egg wash also contributes to a tender crust.
The Cheese Melted Off the Sides!
If too much cheese is sprinkled near the edges or if the roll isn’t tight, cheese can ooze out. Remember to leave a small border when sprinkling the cheese and ensure a firm, even roll to contain that delicious cheesy goodness.
Maximizing Your Masterpiece: Serving Suggestions & Storage Solutions
Serving Inspiration
Cheesy Garlic Swirls are incredibly versatile! Serve them warm as an irresistible appetizer with a side of marinara or a creamy garlic dip, as a savory accompaniment to soups and salads, or alongside your favorite pasta dish.
They also make a fantastic addition to a brunch spread or a casual get-together, pairing beautifully with a classic homemade bread like this easy cheesy herb bread.
Storing Leftovers for Freshness
Allow any leftover golden swirls to cool completely before storing them in an airtight container at room temperature for up to 2 days, or in the refrigerator for up to 4 days.
Proper storage ensures they retain their flavor and texture for as long as possible.
Reheating for That “Just Baked” Feel
To revive their flaky texture, reheat the swirls in a preheated oven at 300°F (150°C) for about 5-8 minutes, or until warmed through and slightly re-crisped.
An air fryer also works wonderfully for a quick reheat, bringing back that fresh-from-the-oven quality.
Make-Ahead Magic: Prepare & Bake Later
You can prepare the entire log up to the chilling stage (step 6) and keep it tightly wrapped in the refrigerator for up to 24 hours. Slice and bake when ready for fresh-from-the-oven deliciousness, just like you might with puff pastry cheese rolls.
Demystifying the Delicious: Your Top Cheesy Garlic Swirls Questions
Can I use homemade puff pastry for this recipe?
Absolutely! If you’re feeling ambitious, homemade puff pastry will yield even more spectacular results, offering an incredibly rich flavor and texture.
However, store-bought ensures a quick and easy process for these savory pastries; just ensure it’s handled cold.
What other cheese blends work well in Cheesy Garlic Swirls?
Beyond mozzarella and cheddar, feel free to experiment with Gruyere, Parmesan, Monterey Jack, or even a hint of smoked Gouda for different flavor profiles.
For more cheesy appetizer inspiration, consider experimenting with different cheeses in dishes like crispy fried cheese bites to understand their melting properties.
Can I make these Cheesy Garlic Swirls gluten-free?
Yes, many brands now offer excellent gluten-free puff pastry sheets that can be used as a direct substitute. The results will be very similar, though always check the package directions for specific handling instructions.
How far in advance can I prepare the butter-garlic mixture?
The butter-garlic mixture can be prepared a few hours in advance and stored at room temperature. If it solidifies, gently re-melt it before brushing onto the pastry to ensure smooth application.
Can I freeze unbaked Cheesy Garlic Swirls?
Yes, you can! After slicing the chilled log (step 7), arrange the unbaked swirls on a parchment-lined baking sheet and freeze until solid.
Transfer them to a freezer-safe bag and bake from frozen, adding a few extra minutes to the baking time, for quick and easy garlic cheese appetizers any time.
Ready to Create Your Own Golden Swirls?
Now that you’re armed with the secrets to perfectly puffed, irresistibly cheesy, and garlic-infused swirls, it’s time to get baking!
Don’t be surprised when these become your new go-to for impressive yet effortless entertaining or simply a delightful family treat. These easy baked snacks are truly a crowd-pleaser.
We’d love to see your creations! Share your Cheesy Garlic Swirls masterpieces with us on social media and let us know how much your family and friends devoured them. Happy baking!
Cheesy Garlic Swirls
Course: PastryCuisine: InternationalDifficulty: easy4
12 swirls35
minutes18
minutes240
kcal55
minutesUnlock the secret to perfectly puffed, airy, and layered cheesy garlic swirls. This recipe guarantees beautifully flaky pastries every time, turning everyday ingredients into an irresistible treat.
Ingredients
1 sheet (approx. 9×14 inches) puff pastry, thawed but still cold
1 cup shredded cheese blend (like mozzarella and cheddar)
2 tablespoons unsalted butter, melted
1 teaspoon garlic powder
1 tablespoon fresh parsley, chopped, plus more for garnish
1 large egg, whisked with 1 tablespoon water (for egg wash)
Directions
- Preheat your oven to 400 degrees Fahrenheit. Line a baking sheet with parchment paper.
- In a small bowl, combine the melted butter, garlic powder, and the 1 tablespoon of chopped parsley.
- Carefully unroll your cold puff pastry sheet onto the prepared baking sheet or a lightly floured surface. Brush the butter mixture evenly over the entire surface of the pastry.
- Sprinkle the shredded cheese blend evenly over the buttered pastry, leaving a small border (about 1/2 inch) along one long edge.
- Starting from the long edge opposite the border, tightly roll the pastry into a log. The key here is a firm, even roll to ensure those beautiful, defined layers.
- Place the rolled log in the refrigerator for at least 15 minutes. This chilling step is essential for clean cuts and helps the layers stay distinct and flaky during baking.
- Once chilled, use a very sharp knife to slice the log into 12 equal rounds, each about 1 inch thick. Place them cut side up on your prepared baking sheet, leaving some space between each swirl.
- Brush the tops and sides of each pastry swirl with the egg wash. This helps them achieve that gorgeous golden-brown color and a crisp finish.
- Bake for 18-22 minutes, or until the pastries are puffed, golden brown, and the cheese is bubbly. The high heat helps the pastry layers separate and create that desired flakiness.
- Remove from the oven and let cool slightly on the baking sheet. Garnish with additional fresh parsley before serving warm.
Notes
- Chilling the pastry log is crucial for neat slices and distinct, flaky layers. Use a very sharp knife for best results.