For years, I struggled with thin, sad puddles when attempting to make classic peanut butter cookies, convinced the perfect bakery-style chew was impossible at home. This frustration ended when I developed this technique, which guarantees perfectly thick, irresistibly soft, Chewy Peanut Butter Cookies every single time.
The secret lies in two simple structural steps-extended creaming and a quick freezer shock-that prevent spreading and deliver the ultimate texture you crave.
The Secret to Success: Cookies That Never Spread Thin
The Anti-Spread Foundation: Extended Creaming
Extended creaming is crucial because it incorporates a significant amount of air into the butter, peanut butter, and sugar mixture before the flour is added.
For a similar chewy texture, consider glazed orange creamsicle cookies using a proven method.
This trapped air creates structure, acting as a skeleton for the dough. When the cookies bake, this air expands, providing vertical lift rather than spreading horizontally, which is the key to thickness.
The Critical Chilling Method (Immediate Freezer Blast)
The absolute guarantee against flat cookies is a rapid, intense chill right before they hit the hot oven.
Placing the scooped dough balls in the freezer for just 10 minutes ensures the butter is solid rock-hard immediately prior to baking, delaying its melting point and drastically limiting the initial spread in the oven’s high heat.
Why We Use Both Brown and White Sugar
We use granulated white sugar to promote spread around the edges and achieve a slight crispness on the exterior of the cookie.
Packed light brown sugar is essential for chewiness because of its higher moisture content from molasses; this ingredient helps the final treats retain a soft, moist center.
Flawless Flavor Profile: Essential Ingredients Breakdown
Selecting the Perfect Peanut Butter
Always use regular, processed, full-fat creamy peanut butter, such as Jif or Skippy, for this recipe.
Natural peanut butter, which separates oil, contains too much liquid fat. This excess fat can leak out during baking, causing the cookies to spread rapidly and become oily.
The Role of Baking Soda vs. Baking Powder
We specifically use baking soda (sodium bicarbonate) because it requires an acid to activate its leavening power.
The brown sugar in this recipe provides the necessary acidity via its molasses content, ensuring the baking soda creates the perfect lift and structure for these classic cookies.
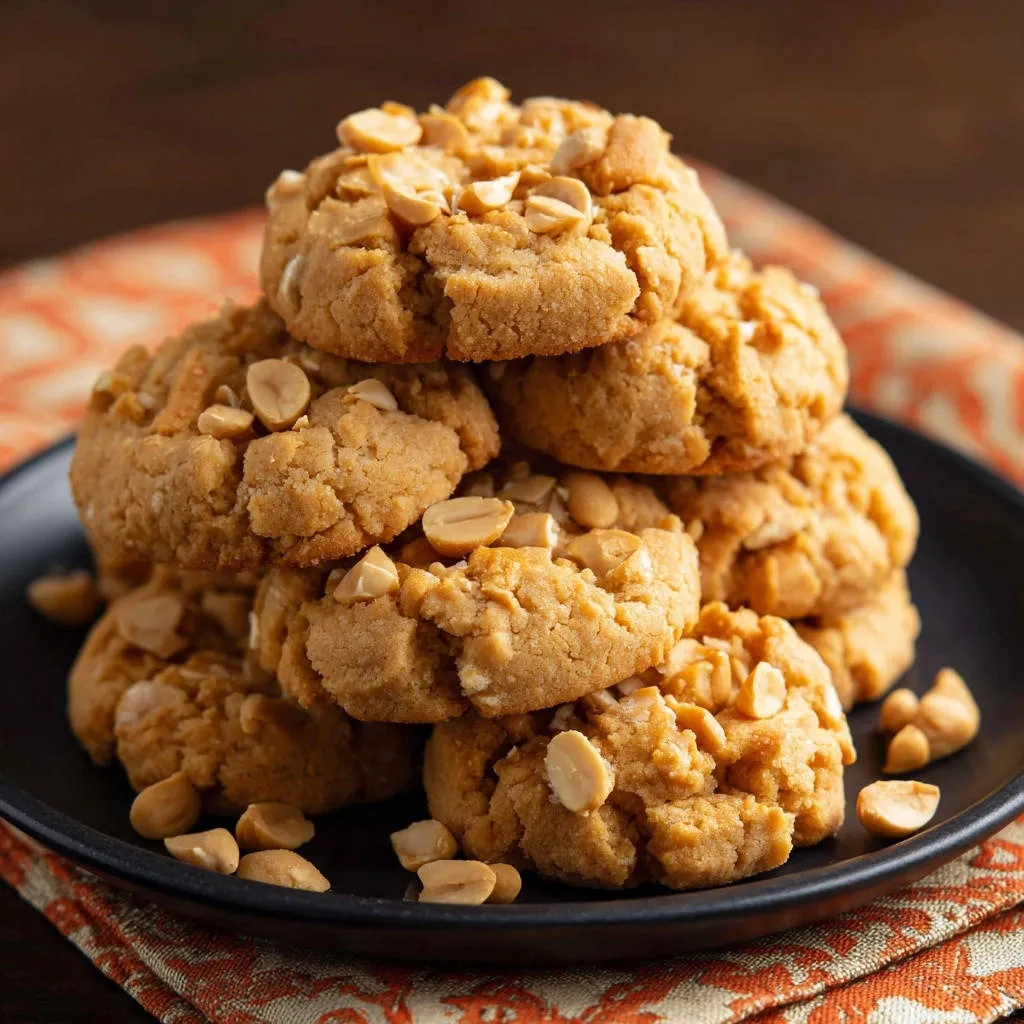
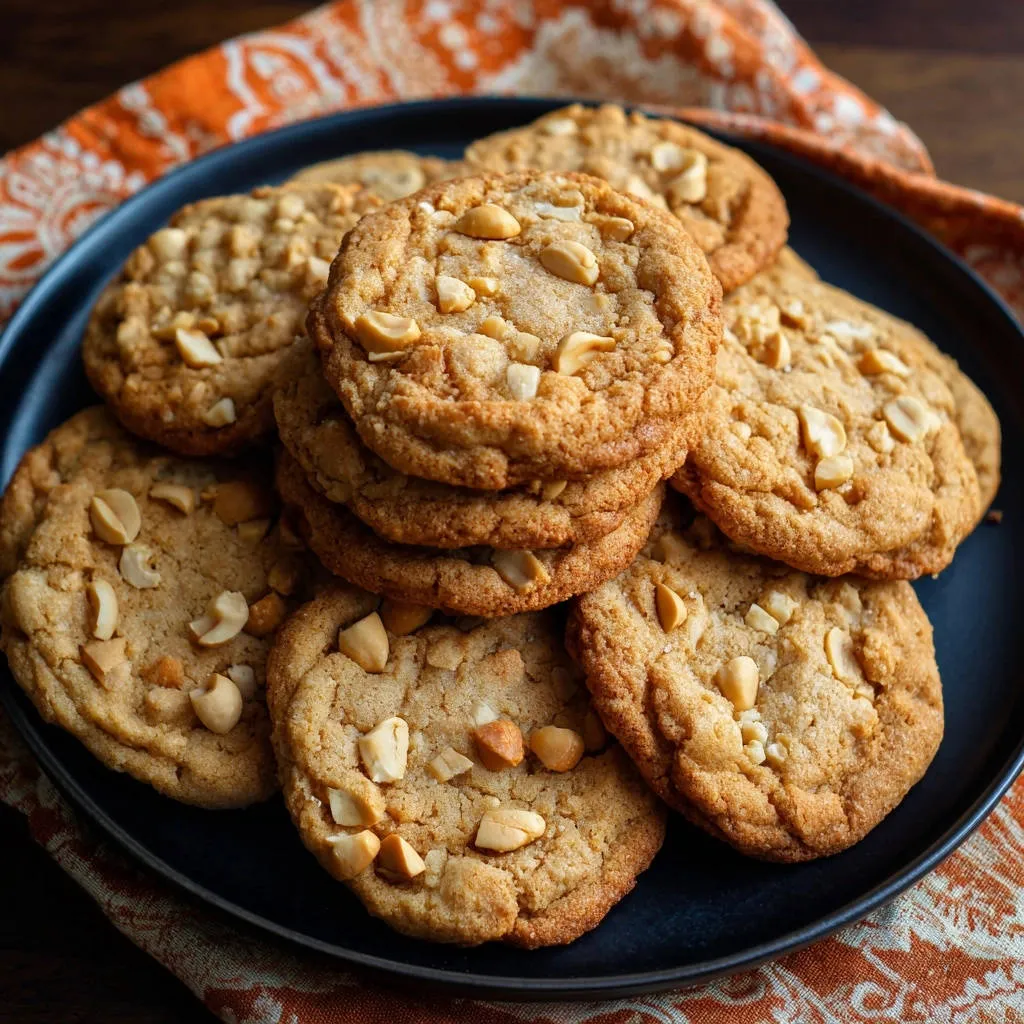
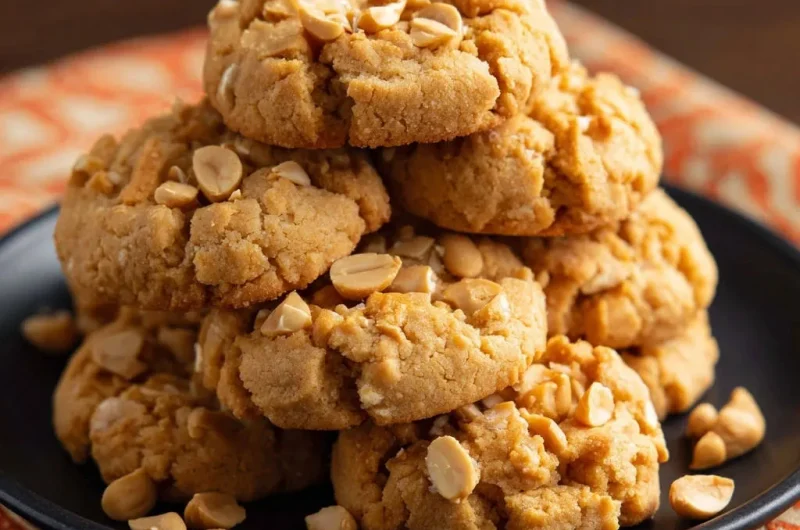
The Crunch Factor: Integrating Chopped Peanuts
While the peanut butter provides the base flavor, incorporating roasted, chopped peanuts adds an essential layer of texture and depth.
The small pieces deliver a satisfying textural contrast, elevating the final cookie from soft to perfectly chewy and crunchy.
For a similar melt-in-your-mouth texture, consider trying glazed raspberry thumbprint cookies next.
Gear Up: Essential Tools for the Perfect Cookie Bake
The Cookie Scoop (Consistency is Key): A 1 1/2 to 2-tablespoon cookie scoop ensures every dough ball is uniform in size, which guarantees even baking times across the entire batch.
Silicone Baking Mats or Parchment: Use these non-stick liners to prevent sticking and encourage steady, even heat distribution, resulting in consistent bottoms without burning.
A Sturdy Hand Mixer or Stand Mixer: An electric mixer is necessary to achieve the “light and fluffy” texture during the 3-4 minute extended creaming stage, which is difficult to accomplish by hand.
The Step-by-Step Blueprint: Achieving Peak Chewiness
Preparation and Oven Temperature
Preheat your oven to 350 degrees F (175 degrees C) and prepare two large baking sheets.
Line the sheets with parchment paper or silicone mats; this step is non-negotiable for easy release and reliable results.
Mastering the Extended Creaming Stage (The Anti-Spread Step)
In a large bowl, combine the slightly cool butter, creamy peanut butter, granulated sugar, and brown sugar.
Beat these ingredients on medium speed for a full 3 to 4 minutes until the mixture is visibly lighter in color and fluffy in texture, forming the structural foundation of your thick cookies.
Combining Wet and Dry Ingredients
Add the eggs one at a time, beating thoroughly after each addition to ensure full incorporation, then mix in the vanilla extract.
In a separate bowl, whisk together the flour, baking soda, and salt to evenly distribute the leavener.
Gradually add the dry mixture to the wet mixture, mixing only until just combined on low speed. Immediately fold in the 1/2 cup of chopped peanuts using a spatula to avoid overdeveloping the gluten, which creates tough cookies.
Shaping, Fork Marks, and the Freezer Shock
Using your scoop, roll the dough into tall, firm balls. The height of the ball helps prevent spread, so do not flatten them yet.
Place the dough balls onto the prepared baking sheets and gently press a fork onto the top of each ball to create the classic crosshatch pattern.
This fork pattern is not just aesthetic; it flattens the dome slightly and aids in even baking. Garnish the tops with a few extra chopped peanuts for visual appeal.
Place the entire baking sheet into the freezer for exactly 10 minutes-this brief, intense chill locks the shape in place and is your guarantee against thin cookies.
Baking and the Crucial Cooling Phase
Bake the chilled cookies for 10 to 12 minutes. Look for lightly golden brown edges while the centers still appear slightly pale and soft.
The cookies must look slightly underdone when removed from the oven. Leave them on the baking sheet for 5 minutes; this critical time allows the carryover heat to finish setting the centers without drying out the edges.
After 5 minutes, transfer the cookies to a wire rack to cool completely, resulting in that perfectly soft, chewy texture we are aiming for.
Baking Science Secrets: Troubleshooting and Perfecting Your Dough
Why Did My Chewy Peanut Butter Cookies Spread Too Much?
The primary causes for spreading are using butter that was too soft (melted) or skipping the mandatory 10-minute freezer quick chill.
Ensure your butter is slightly cool, not fully room temperature, and verify your oven temperature with a thermometer, as an underheated oven can cause excessive spread before the dough sets.
Achieving That Perfect Crosshatch Pattern
To prevent the fork from sticking, lightly dip the tines in granulated sugar before pressing down on the dough balls.
Press gently, applying only enough pressure to slightly flatten the dome, then repeat the press in the opposite direction to achieve the classic diamond pattern.
Substitutions and Adjustments for Dietary Needs
While this recipe works best with all-purpose flour, you can try a high-quality 1:1 gluten-free baking blend, though slight textural differences may occur.
Swapping granulated sugar for alternatives like coconut sugar will work but may reduce chewiness and deepen the color, requiring a slight adjustment in baking time.
Optimizing the Final Texture: Don’t Overbake
The most common mistake when seeking a chewy cookie is overbaking. If the entire surface of the cookie looks fully set and golden, it is already too late.
Pull the baking sheets when the edges are just barely set and the center still looks slightly raw or puffy; the residual heat will finish the baking process on the cooling rack, maintaining moisture.
Make-Ahead, Serving Suggestions, and Storage Tips
Freezing Cookie Dough for Future Cravings
After shaping and marking the dough balls, place them on the baking sheet and freeze until solid (about 1 hour).
Transfer the flash-frozen dough balls to a freezer-safe bag or container and store for up to three months. Bake them directly from frozen, adding 2-4 minutes to the total baking time.
How to Store Baked Cookies for Maximum Freshness
Ensure your Chewy Peanut Butter Cookies are completely cooled before storing them to prevent condensation, which can make them soggy.
Store the cookies in an airtight container at room temperature for up to one week. To keep them extra soft, place half a slice of sandwich bread inside the container; the cookies will absorb the bread’s moisture.
Unique Serving Pairings for Chewy Peanut Butter Cookies
These richly flavored treats pair exceptionally well with dark, bitter flavors.
Try turning them into ice cream sandwiches using vanilla bean or salted caramel ice cream, or serve them alongside a small bowl of melted dark chocolate ganache for dipping.
Frequently Asked Questions About Peanut Butter Cookies
Can I Use Crunchy Peanut Butter in This Recipe?
Yes, you can substitute crunchy peanut butter, but you should still fold in the extra chopped peanuts called for in the recipe to maintain optimal texture and prevent the cookies from tasting flat.
Do I Need to Sift the Flour Before Baking?
Sifting flour is generally not required for this recipe, provided you whisk the flour, baking soda, and salt together thoroughly in a separate bowl to eliminate clumps and aerate the dry ingredients.
Why is the Dough Crumbly or Too Sticky?
If the dough is too crumbly, you may have used too much flour, or your eggs were too small. If it’s too sticky, the butter might have been too warm or your peanut butter was an oily, natural variety.
A crumbly dough needs a tablespoon of milk added, mixed gently, while a sticky dough benefits from a 30-minute chill in the refrigerator to firm up the fats.
Ready to Impress? Share Your Chewy Peanut Butter Cookies Masterpiece!
You now hold the keys to baking perfectly thick, delightfully Chewy Peanut Butter Cookies every time, thanks to the precision of the extended creaming technique and the genius of the quick freezer chill.
What to Try Next
Round out your sweet baking with these other delightful treats.
- For a breakfast treat that echoes the comforting sweetness of your chewy peanut butter cookies, consider these Cinnamon French Toast Stacks, featuring warm spices.
- If you loved the chewy texture and sweet appeal of the cookies, you’ll enjoy these S’mores Pancakes for a fun, campfire-inspired flavor experience.
It’s time to move beyond thin, brittle cookies and share these guaranteed winners with your family and friends. Bake a batch today and savor the perfect balance of richness and softness!
Peanut Butter Cookies
Course: DessertCuisine: AmericanDifficulty: easy24
cookies20
minutes12
minutes240
kcal47
minutesThis recipe guarantees thick, bakery-style peanut butter cookies by utilizing a crucial quick-chill technique and an extended creaming process. Say goodbye to sad, flat cookies and hello to perfectly soft, chewy centers and slightly crispy edges.
Ingredients
1 cup unsalted butter, softened slightly but still cool
1 cup creamy peanut butter (use regular, full-fat variety)
1 cup granulated white sugar
1 cup packed light brown sugar
2 large eggs
2 teaspoons vanilla extract
2 1/2 cups all-purpose flour
1 teaspoon baking soda
1/2 teaspoon salt
1/2 cup chopped, roasted peanuts, plus extra for topping
Directions
- Prepare the Pan and Oven: Preheat your oven to 350 degrees F. Line two baking sheets with parchment paper or silicone baking mats.
- Cream the Fats and Sugars (The Anti-Spread Foundation): In a large mixing bowl, beat the slightly cool butter, peanut butter, granulated sugar, and brown sugar on medium speed until the mixture is light and fluffy, usually 3 to 4 minutes. This extended creaming step incorporates air which helps structure the dough and is key to stopping the spread.
- Add Wet Ingredients: Beat in the eggs one at a time, mixing well after each addition. Stir in the vanilla extract.
- Combine Dry Ingredients: In a separate bowl, whisk together the flour, baking soda, and salt.
- Mix and Fold: Gradually add the dry ingredients to the wet ingredients, mixing on low speed until just combined. Do not overmix. Fold in the 1/2 cup of chopped peanuts using a spatula.
- The Crucial Shaping and Chilling Step (Guaranteed Thickness): Scoop the dough using a 1 1/2 to 2-tablespoon scoop and roll them into tall, firm balls. Place the dough balls onto the prepared baking sheets. Lightly press a fork onto the top of each cookie in a crosshatch pattern (the classic peanut butter cookie mark). Top each ball with a few extra chopped peanuts for decoration.
- Immediate Quick Chill: Place the entire baking sheet, with the dough balls resting on it, directly into the freezer for 10 minutes. This quick, intense chill is the absolute guarantee that the butter stays solid and prevents the cookies from spreading too rapidly when they hit the heat.
- Bake: Bake the chilled cookies for 10 to 12 minutes, or until the edges are lightly golden brown but the centers still look slightly soft.
- Cool: Let the cookies cool on the baking sheet for 5 minutes before transferring them to a wire rack to cool completely. The centers will finish setting up during this time, resulting in a perfectly soft, chewy texture.
Notes
- The extended creaming of slightly cool butter and the quick 10-minute freezer chill prevent the cookies from spreading.