Ever bitten into a snickerdoodle, only to find it disappointingly dry or crumbly? I used to face that challenge too, until I discovered the simple trick for achieving truly soft, incredibly chewy snickerdoodles.
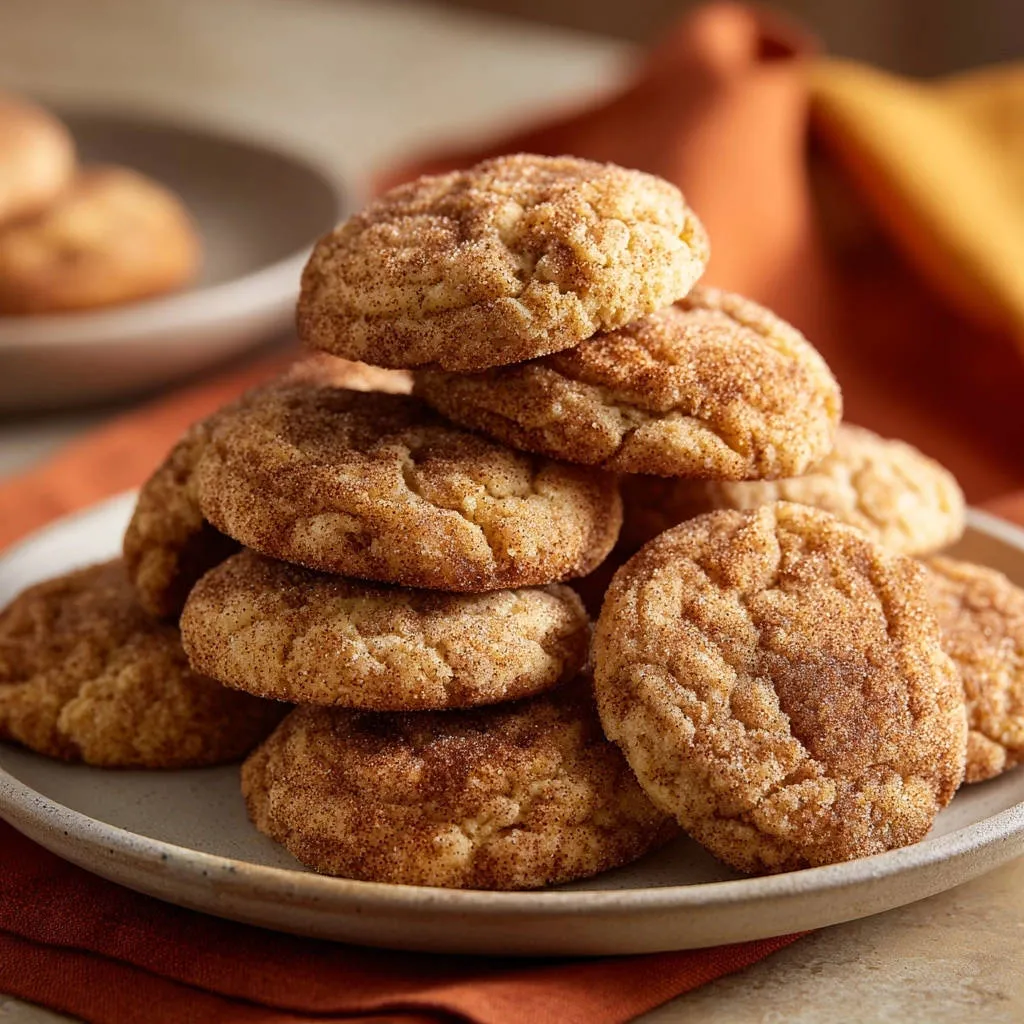
This recipe consistently delivers wonderfully moist cookies with those delightful, perfectly crinkled tops, just like your favorite bakery. Get ready to master the art of homemade chewy cookies and make these irresistible treats your signature bake!
Say Goodbye to Dry: The Secret to Our Wonderfully Moist Snickerdoodles
Many cookie recipes fall short, but our Chewy Snickerdoodles stand out for their exceptional texture and flavor. We’ve refined the process to guarantee a tender bite every time, eliminating dryness.
This recipe focuses on key techniques and ingredient balance that prevent the common pitfalls of overbaking and overmixing, ensuring a consistently delightful result.
Achieving That Perfect Soft and Chewy Texture
The secret to our superior texture lies in a few crucial steps: precise creaming of butter and sugar, minimal mixing of dry ingredients, and most importantly, careful baking. These elements work in harmony to create a cookie that is soft in the center and perfectly chewy at the edges.
We avoid dense, cakey cookies by preserving air in the dough and removing them from the oven at precisely the right moment.
The Delightful Crinkly Tops You Crave
Those iconic crinkly tops are a hallmark of a well-made snickerdoodle, and our recipe makes them effortless. This signature appearance comes from the interaction of cream of tartar with baking soda, which creates delicate air pockets, and the generous cinnamon-sugar coating.
As the cookies bake and spread, the coating cracks, forming those beautiful, irresistible crinkles we all adore.
Gather Your Goodies: The Building Blocks for Divine Snickerdoodles
Every great recipe begins with quality ingredients. Here’s what you’ll need, and why each component is essential for our perfect homemade snickerdoodles.
The Wet Ingredients: Richness and Moisture
These ingredients form the moist, tender base of your cookie dough, contributing to both flavor and texture.
Unsalted Butter, Softened: Crucial for richness and tenderness. Softened butter creams beautifully with sugar, incorporating air for a lighter cookie.
Granulated Sugar (1 1/2 cups): Provides sweetness and helps create that wonderful chewy texture. It also contributes to the cookie’s spread and crisping at the edges.
Large Eggs: Act as a binder, adding moisture and richness to the dough. Incorporating them one at a time helps create a stable emulsion.
Vanilla Extract: A flavor enhancer that adds warmth and depth to the overall cookie profile, complementing the cinnamon beautifully.
Dry Essentials: Structure and Signature Tang
These dry ingredients provide structure, lift, and the distinctive tangy flavor unique to snickerdoodles.
All-Purpose Flour: Forms the structural backbone of the cookie. Proper measurement is vital to prevent a tough cookie.
Cream of Tartar: The star ingredient for classic snickerdoodles! It gives them their characteristic tangy flavor, helps tenderize the dough, and contributes to those beautiful crinkly tops.
Baking Soda: A leavening agent that reacts with the cream of tartar to create lift, ensuring a soft, puffy cookie texture.
Salt: Essential for balancing the sweetness and enhancing all the other flavors in the cookie, making them more complex and delicious.
The Iconic Cinnamon-Sugar Coating
This simple combination transforms a basic cookie into a true snickerdoodle, offering both visual appeal and a burst of flavor.
Granulated Sugar (1/4 cup) & Ground Cinnamon (2 tablespoons): This generous coating is what gives snickerdoodles their signature spiced flavor and contributes significantly to their unique crinkled appearance as they bake.
If you enjoy this sweet cinnamon coating, you’ll also appreciate the rich chocolate of frosted dark chocolate cookies.
Essential Tools for Your Snickerdoodle Baking Adventure
Having the right equipment on hand streamlines your baking process and helps ensure consistent, delicious results.
Electric Mixer: Essential for properly creaming butter and sugar to achieve that light, fluffy dough base.
Large Mixing Bowls: You’ll need at least two: one for wet ingredients and another for whisking your dry ingredients.
Baking Sheets & Parchment Paper: Ensures even baking, prevents sticking, and makes cleanup incredibly easy.
Wire Cooling Rack: Crucial for allowing air to circulate around the cookies, preventing soggy bottoms and promoting even cooling.
Measuring Cups and Spoons: Accuracy is paramount in baking; use proper measuring tools for consistent results.
Rubber Spatula: Perfect for scraping down the sides of bowls and gently folding ingredients without overmixing.
Your Step-by-Step Guide to Irresistible Chewy Snickerdoodles
Follow these detailed instructions to bake perfectly soft and chewy snickerdoodles, from mixing to cooling.
Preparation is Key: Setting Up for Success
- Preheat Oven and Prep Pans:
Preheating your oven to 350°F (175°C) ensures a consistent baking environment from the moment your cookies enter. Lining baking sheets with parchment paper is essential for non-stick results and simplifies the post-baking cleanup.
- Mix Your Cinnamon-Sugar Coating:
In a small, shallow bowl, combine the extra 1/4 cup granulated sugar with 2 tablespoons of ground cinnamon. Stir well to ensure it’s evenly mixed; this coating is key for the snickerdoodle’s signature flavor and crinkly appearance.
The Art of Mixing: Creating the Perfect Dough Base
- Cream Butter and Sugar Until Fluffy:
In a large bowl, use an electric mixer to cream together the softened unsalted butter and 1 1/2 cups granulated sugar for 2 to 3 minutes. This step is incredibly important for incorporating air, which results in a light, tender, and ultimately chewy cookie texture.
Continue mixing until the mixture is visibly lightened in color and takes on a fluffy, airy consistency. This aeration prevents dense cookies.
- Add Eggs and Vanilla:
Beat in the eggs one at a time, mixing thoroughly after each addition until fully incorporated. This gradual addition helps emulsify the mixture, creating a smoother dough.
Once the eggs are blended, stir in the vanilla extract, ensuring its warm, aromatic flavor is evenly distributed throughout the dough.
- Whisk Dry Ingredients Separately:
In a separate medium bowl, whisk together the all-purpose flour, cream of tartar, baking soda, and salt. This pre-mixing step prevents lumps and ensures that the leavening agents are perfectly distributed for an even rise.
- Combine Wet and Dry Ingredients Carefully:
Gradually add the whisked dry ingredients to the wet mixture, mixing on low speed with your electric mixer just until combined. Stop as soon as no streaks of flour remain.
Be careful not to overmix the dough, as excessive mixing develops gluten, which can make your Chewy Snickerdoodles tough and dense instead of delightfully soft and chewy.
Forming and Coating: Getting Those Signature Snickerdoodle Looks
- Roll Dough into Balls:
Take approximately 1-inch portions of dough and gently roll them into smooth, uniform balls between your palms. Consistent sizing helps ensure even baking.
- Generously Coat in Cinnamon-Sugar:
Roll each dough ball in the prepared cinnamon-sugar mixture, ensuring it’s fully coated on all sides. This thick, sweet-spiced crust is essential for both the classic snickerdoodle flavor and those iconic crinkly tops.
- Arrange on Baking Sheets:
Place the coated dough balls about 2 inches apart on the prepared baking sheets. This spacing allows the cookies ample room to spread evenly without touching during baking.
Baking to Perfection: The Chewy Snickerdoodle Sweet Spot
- Bake for the Perfect Chewy Texture:
Bake for 9 to 11 minutes, or until the edges are just set and the centers still look slightly soft and puffed. This timing is the absolute key to achieving that perfect chewy texture.
Remember, cookies will continue to set as they cool; removing them when they still look a little underdone in the center is crucial to prevent dry, crumbly results. Do not overbake!
- Cool Before Transferring:
Remove the baking sheets from the oven and let the cookies cool on the sheets for 5 minutes. This vital step allows the cookies to firm up sufficiently, making them easier to handle without breaking.
After 5 minutes, carefully transfer them to a wire rack to cool completely. Cooling on a rack prevents steam from accumulating underneath, which could lead to soggy bottoms.
Chef’s Secrets: Elevating Your Snickerdoodle Baking Game
Beyond the recipe, these expert tips will ensure your Chewy Snickerdoodles are consistently outstanding.
Mastering the Creaming Process for Airiness
Don’t Rush Creaming: The initial step of creaming butter and sugar for 2-3 minutes is absolutely vital. It whips crucial air into the mixture, which directly translates to a lighter, fluffier, and ultimately more chewy cookie.
The Golden Rule: Don’t Overmix Your Dough
Mix Just Until Combined: Once you add the dry ingredients, mix on low speed only until no visible streaks of flour remain. Overmixing develops gluten, which can quickly transform your desired soft and chewy snickerdoodles into tough, dense ones.
The Power of the Chill: Why it Matters for Shape and Texture
Consider Chilling the Dough: While not strictly required for this specific recipe, chilling the dough for at least 30 minutes can work wonders. It helps prevent excessive spreading, deepens the flavors, and makes the dough much easier to handle and roll, especially in a warm kitchen.
Reading Your Oven: The “Do Not Overbake” Mantra
Watch for Visual Cues: Baking times are always approximate because every oven is different. Instead, look for cookies with slightly set, lightly golden edges and centers that still appear slightly soft and puffed. Trust your eyes over the timer for truly perfect snickerdoodles.
Common Snickerdoodle Challenges & Quick Fixes
Even experienced bakers encounter issues. Here are common problems with snickerdoodles and how to solve them.
Why Are My Snickerdoodles Spreading Too Much?
Cookies spreading excessively can stem from several factors, including butter that was too warm, inaccurate flour measurement, or an oven that isn’t at the correct temperature. Ensure your butter is softened but still cool to the touch, and measure your flour accurately.
Using an oven thermometer to verify your oven’s true temperature can be incredibly helpful. If spreading is still an issue, a 30-minute chill for the dough before baking can significantly improve shape retention.
My Cookies Are Dry and Crumbly, What Went Wrong?
Dry and crumbly cookies are almost always the result of overbaking. Snickerdoodles should be removed from the oven when their edges are just set and their centers still look slightly soft, as they will continue to cook as they cool.
For similarly shaped treats, consider how to prevent spreading in glazed raspberry thumbprint cookies.
Another common culprit is using too much flour. For best results, measure flour accurately, ideally by weight for precision.
Why Don’t My Cookies Have Crinkly Tops?
The signature crinkly tops are a delightful result of the chemical reaction between cream of tartar and baking soda, amplified by the cinnamon-sugar coating. Ensure both your cream of tartar and baking soda are fresh and active.
Generously coating your dough balls is also critical, and slightly underbaking (removing them when the centers are still soft) contributes to this desired texture and appearance as they cool.
More Sweet Treats
If you’re craving more cinnamon-sugar goodness after these chewy snickerdoodles, consider these recipes.
- For a breakfast twist on a favorite flavor, try these Cinnamon Sugar Churro Waffles, using a method that keeps them wonderfully crisp.
- If you prefer a lighter, crispier texture, these Cinnamon Sugar Waffles offer a satisfying crunch with every bite.
Serving Suggestions & Smart Storage for Your Treats
Once your Chewy Snickerdoodles are baked to perfection, here’s how to enjoy and keep them fresh.
Best Ways to Enjoy Your Freshly Baked Snickerdoodles
These chewy snickerdoodles are utterly divine on their own, especially when still slightly warm from the oven, perhaps with a tall glass of cold milk. They also make a comforting pairing with your morning coffee or afternoon tea.
For an extra indulgent treat, serve them alongside a scoop of vanilla bean ice cream or a dollop of whipped cream after dinner. They’re perfect for any occasion!
Keeping Them Fresh: Storage Tips
To maintain their exceptional chewiness and flavor, store your baked snickerdoodles in an airtight container at room temperature. They will remain wonderfully fresh for about 3 to 5 days.
If they begin to lose a little moisture, try placing a half-slice of plain bread in the container overnight; the cookies will absorb the moisture from the bread, softening them up again.
Make-Ahead Magic: Freezing Dough or Baked Cookies
These snickerdoodles are perfect for making ahead! Unbaked dough balls, already coated in cinnamon-sugar, can be frozen solid on a baking sheet, then transferred to an airtight freezer bag for up to 3 months. Bake from frozen, adding just a minute or two to the original bake time.
You can also freeze baked snickerdoodles in an airtight container for 2-3 months. Simply thaw them at room temperature, or gently warm them in the microwave for a just-baked taste and texture.
Your Chewy Snickerdoodle Questions Answered
Let’s address some common questions about this classic cookie.
Can I Use Margarine Instead of Butter?
While margarine can be used as a substitute for butter, it may slightly alter the final texture and flavor of your snickerdoodles. Butter contributes a richer taste and generally leads to a superior chewy texture due to its specific fat content and composition. For the absolute best results, we highly recommend sticking with unsalted butter.
What if I Don’t Have Cream of Tartar?
Cream of tartar is a signature ingredient for snickerdoodles, providing their characteristic tangy flavor and playing a crucial role in their chewy texture and distinct crinkly tops. If you don’t have it on hand, you can attempt a substitution.
Combine 1 teaspoon of baking powder with 1/4 teaspoon of baking soda to replace 1/2 teaspoon of cream of tartar and 1 teaspoon of baking soda in the recipe. However, be aware that the flavor and texture of your snickerdoodles will be noticeably different without the unique tang of cream of tartar.
Can I Make These Gluten-Free?
Yes, you can often adapt this Chewy Snickerdoodle recipe to be gluten-free. Simply substitute the all-purpose flour with a high-quality 1:1 gluten-free baking flour blend that already contains xanthan gum.
While you might notice a very subtle difference in texture, the results are generally very good. Many gluten-free flours work well for cookies, yielding delicious outcomes.
How Long Do Snickerdoodles Last?
When stored correctly in an airtight container at room temperature, homemade Chewy Snickerdoodles typically maintain their freshness and delightful chewiness for about 3 to 5 days. For longer storage options, be sure to check our freezing tips provided above.
Ready to Bake Your Best Snickerdoodles Yet?
Armed with these expert insights and our meticulously detailed guide, you are now perfectly equipped to bake a batch of Chewy Snickerdoodles that will truly impress everyone.
Say a final goodbye to dry, crumbly cookies and a warm hello to perfectly soft, wonderfully moist, and utterly irresistible treats! We can’t wait to see your crinkly-topped masterpieces; don’t forget to share your baking triumphs in the comments below or by tagging us on social media.
Snickerdoodles
Course: DessertCuisine: AmericanDifficulty: easy4
24-30 cookies20
minutes10
minutes350
kcal45
minutesWho else has bitten into a snickerdoodle only to find it disappointingly dry or crumbly? This recipe cracks the code to perfect, soft, chewy snickerdoodles with delightful crinkly tops, just like the bakery. Learn the simple trick for wonderfully moist results every time!
Ingredients
1 cup unsalted butter, softened
1 1/2 cups granulated sugar, plus 1/4 cup for rolling
2 large eggs
2 teaspoons vanilla extract
2 3/4 cups all-purpose flour
2 teaspoons cream of tartar
1 teaspoon baking soda
1/2 teaspoon salt
2 tablespoons ground cinnamon
Directions
- Preheat your oven to 350 degrees Fahrenheit. Line baking sheets with parchment paper.
- In a small bowl, combine the extra 1/4 cup granulated sugar with 2 tablespoons of ground cinnamon. Set aside for rolling.
- In a large bowl, using an electric mixer, cream together the softened butter and 1 1/2 cups granulated sugar until the mixture is light and fluffy, about 2 to 3 minutes. This step is crucial for incorporating air, which helps create a tender, chewy cookie.
- Beat in the eggs one at a time, mixing well after each addition. Stir in the vanilla extract.
- In a separate medium bowl, whisk together the flour, cream of tartar, baking soda, and salt.
- Gradually add the dry ingredients to the wet ingredients, mixing on low speed just until combined. Be careful not to overmix the dough, as overmixing can develop too much gluten and make your cookies tough, not chewy.
- Roll the dough into 1-inch balls. Generously roll each dough ball in the cinnamon sugar mixture until fully coated.
- Place the coated dough balls about 2 inches apart on the prepared baking sheets.
- Bake for 9 to 11 minutes, or until the edges are just set and the centers still look slightly soft and puffed. This is the absolute key to achieving that perfect chewy texture; they will continue to set as they cool. Do not overbake!
- Remove from the oven and let the cookies cool on the baking sheets for 5 minutes before transferring them to a wire rack to cool completely.
Notes
- The absolute key to achieving perfect chewy texture is not to overbake; cookies will continue to set as they cool.