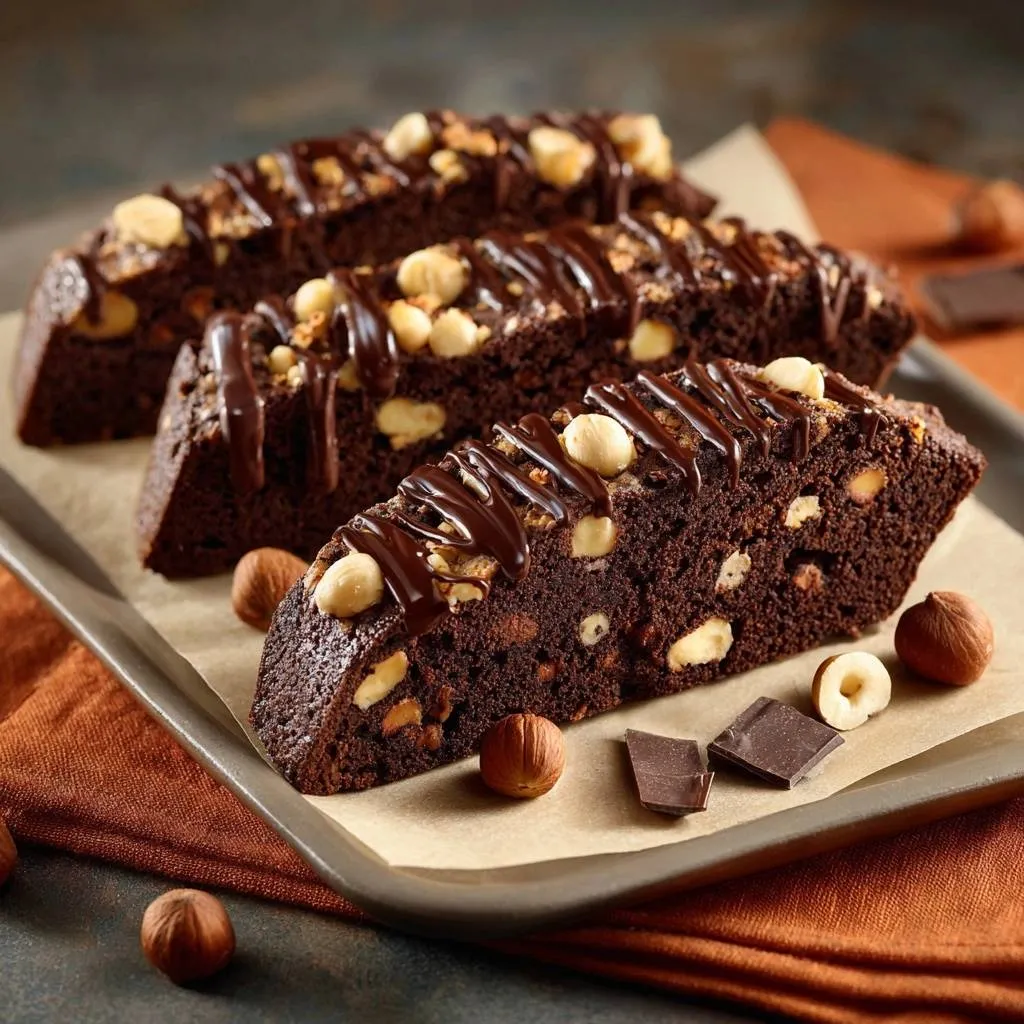
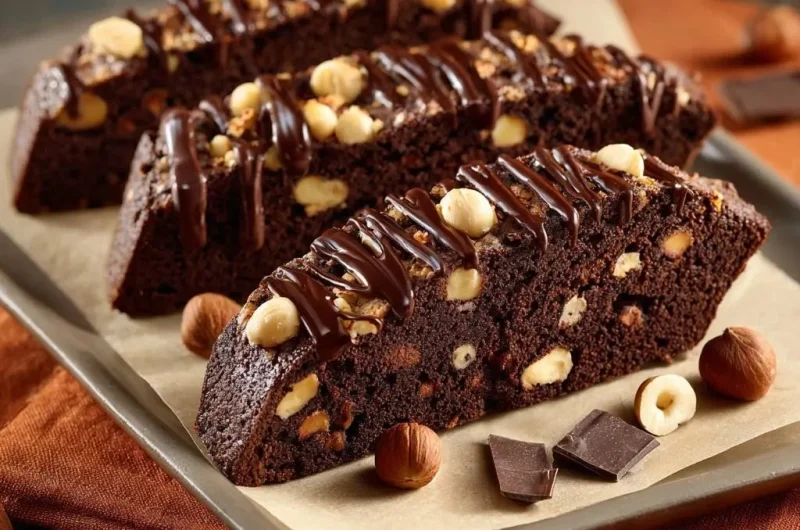
Why do homemade biscotti slices always crumble into a nutty mess? You’ve baked the logs perfectly, but one slice and they fall apart. This chocolate hazelnut biscotti recipe fixes that frustration with a simple cooling and slicing method that gives you clean, crisp cuts every time.
Therefore, you get that ideal twice-baked crunch packed with toasted hazelnuts and rich dark chocolate. No more wasted batches. In addition, the full chill and serrated knife technique set the structure so firmly that your slices hold up for dunking in coffee.
The secret lies in the complete cooling on the rack for at least one hour after the first bake. This lets the gluten relax fully, preventing any crumble when you slice. Trust me, it transforms chocolate hazelnut biscotti into bakery-worthy treats.
Key Ingredients for Chocolate Hazelnut Biscotti
You’ll need 2 cups all-purpose flour, 1/2 cup unsweetened cocoa powder, 1 teaspoon baking powder, and 1/4 teaspoon salt for the base. Then grab 3/4 cup granulated sugar, 1/2 cup softened unsalted butter, 2 large eggs, and 1 teaspoon vanilla extract. Finally, 1 cup toasted and chopped hazelnuts plus 1/4 cup whole for topping, and 4 ounces chopped dark chocolate, divided.
However, unsweetened cocoa powder keeps the bitterness balanced against the sweet chocolate hazelnut combo. Softened butter creams evenly for light texture. Toasted hazelnuts release their oils for deep nutty flavor, way better than raw.
In addition, dark chocolate brings intense richness without overpowering. All-purpose flour gives the perfect structure for twice-baking. For gluten-free, try almond flour, but add a bit of xanthan gum to hold it together.
Flour and Cocoa Powder Base
Flour builds the sturdy structure that survives the second bake in chocolate hazelnut biscotti. Therefore, all-purpose works best because it has just enough protein for chew without toughness.
Natural cocoa powder delivers deep color and flavor. Dutch-processed makes it milder, but stick to unsweetened to control the sugar. Whisk it well with baking powder and salt for even distribution.
Hazelnuts: Toasting and Chopping
Toast hazelnuts at 350°F for 8-10 minutes until fragrant, then rub off skins. Roughly chop most for texture contrast inside the dough. Press whole ones on top for that inviting look.
This step releases oils for nutty depth. Don’t skip it, or your chocolate hazelnut biscotti lacks punch. Chop to 1/4-inch pieces so they stay crunchy after baking.
Science of Twice-Baked Chocolate Hazelnut Biscotti
The first bake triggers the Maillard reaction for firmness and flavor in your logs. Then cooling evaporates moisture and relaxes gluten. The second bake crisps the edges perfectly.
Therefore, creaming sugar and butter aerates the dough for tenderness. Chilling firms proteins so slices cut clean. This sequence nails the crunch in chocolate hazelnut biscotti.
In addition, full cooling prevents crumbling by setting the structure solid. Skip it, and you’ll fight loose nuts and cracks. Science makes this foolproof.
First Bake: Building Structure
At 350°F, the logs firm up with a slightly cracked top after 25-30 minutes. This signals the structure has set without over-browning. Cool them right away on the sheet.
Therefore, you avoid sogginess. The heat develops that classic biscotti firmness for chocolate hazelnut slices.
Second Bake: Achieving Crisp Edges
Drop to 325°F for 15-20 minutes, flipping halfway. This evaporates just enough moisture for crispness without drying out centers. Edges turn golden and snappy.
Even heat from flipping ensures uniform crunch. Perfect for chocolate hazelnut biscotti dunking.
For a similarly satisfying dessert, consider this Nutella Tiramisu recipe.
Equipment Essentials for Flawless Biscotti
Grab a sharp serrated bread knife for clean sawing. Line sheets with parchment for easy release. Use a wire rack for air circulation during cooling.
Therefore, a digital scale weighs flour precisely, avoiding dense dough. A stand mixer creams butter fast, but a hand mixer works too. These tools prevent failures in chocolate hazelnut biscotti.
In addition, parchment stops sticking, and the rack speeds cooling. No guesswork means perfect results.
Sharp Serrated Knife Technique
Serrated edges mimic bread slicing for tear-free cuts. Use a gentle sawing motion at a slight angle. Sharpen it first with a rod for best results.
This guarantees stability on chilled logs. No crumbling in your chocolate hazelnut biscotti.
Step-by-Step: Forming Chocolate Hazelnut Biscotti Logs
Preheat oven to 350°F and line a sheet with parchment. Whisk dry ingredients in a medium bowl. Beat softened butter and sugar until light and fluffy, about 2 minutes.
Add eggs one at a time, beating well, then vanilla. Gradually mix in dry stuff until dough forms. Fold in chopped hazelnuts and 2 ounces chocolate gently.
Divide dough in half. Shape into 12-inch logs, flatten to 3/4-inch thick. Press whole hazelnuts on top, then bake 25-30 minutes until firm with cracks.
Creaming Butter and Sugar Properly
Beat 2 minutes for pale, fluffy creaming that traps air. Add eggs slowly to emulsify without curdling. This keeps chocolate hazelnut biscotti tender.
Room-temp eggs blend smooth. Scrape the bowl often.
Shaping Even Logs
Divide precisely with a scale. Wet hands shape smooth 12-inch logs. Space them 4 inches apart on the sheet.
Flatten evenly to 3/4-inch. Uniform size bakes consistently.
Cooling and Slicing: Crumble-Proof Method
Cool logs on the sheet 20 minutes, then rack for 1 hour until solid. Wrap and fridge-chill 30 minutes. This firms everything for slicing.
Preheat to 325°F. Saw 1/2-inch slices at an angle with a serrated knife. Place cut-side down on sheets.
Therefore, no loose nuts or cracks in chocolate hazelnut biscotti. If still crumbly, chill longer next time.
Full Cooling Timeline Explained
20 minutes on-sheet stops cooking gently. 1-hour rack cools fully, relaxing gluten. 30-minute fridge firms for cuts.
Slide parchment to rack easily. Patience pays off.
Slicing with Serrated Knife
Gentle back-and-forth sawing prevents tearing. Slight angle adds style. Hold log steady.
Avoid pressing down hard. Common error: rushing warm slices.
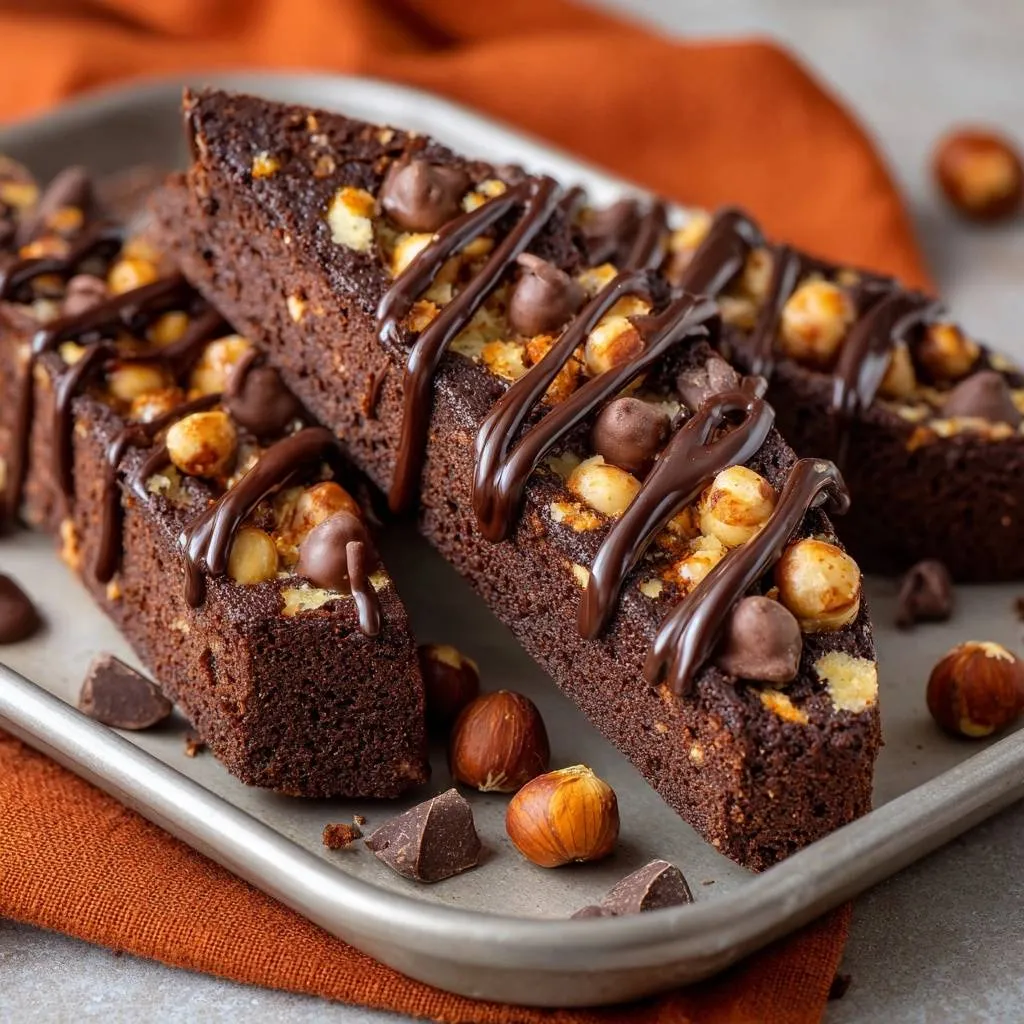
Second Bake and Chocolate Drizzle Finish
Bake slices 15-20 minutes at 325°F, flipping halfway for crisp edges. Cool fully. Melt 2 ounces chocolate in 20-second microwave bursts.
Drizzle over tops and let set. Yields about 40 pieces. Store airtight up to 2 weeks.
Pro tip: Space slices an inch apart. Rotate sheets midway for even baking.
Positioning Slices for Even Crispness
Place cut-side down, 1-inch apart. Flip at 10 minutes. Rotate sheets if oven heats unevenly.
This crisps both sides perfectly.
Melting and Drizzling Chocolate
Microwave in bursts, stir until smooth. Use a fork or bag for drizzle. Cool on rack to set fast.
Avoid overheating to prevent seizing.
Avoiding Pitfalls in Chocolate Hazelnut Biscotti
Don’t overmix dough, or it turns tough. Always cool fully to avoid crumbling. Use a sharp serrated knife, not a chef’s.
Underbake first round, and centers stay mushy. Bake until cracked and firm. Follow timelines exactly.
Therefore, your chocolate hazelnut biscotti comes out pro-level every time.
More Sweet and Savory Bites
Since you’re enjoying these chocolate hazelnut biscotti, consider these other treats that bring together sweet and savory elements.
- For a breakfast that echoes campfire flavors, try these fluffy S’mores Pancakes, perfect for a weekend treat.
- If you appreciate the combination of baked goods with savory additions, these Sausage Cheese Muffins offer a satisfying bite.
Overmixing Dough Fixes
Mix dry in gradually until just combined. Fold nuts gently by hand. Tough texture means you went too far.
Stop when no flour streaks remain.
Skipping Cooling Steps
Follow the full timeline: 20 min sheet, 1 hour rack, 30 min fridge. Test by pressing; it should feel rock-solid.
Warm slicing always crumbles.
Flavor Twists on Chocolate Hazelnut Biscotti
Swap hazelnuts for toasted pistachios or almonds, same quantity. Add 1 teaspoon espresso powder for depth. Orange zest brightens it up.
Try white chocolate drizzle or dip ends in melted dark. For vegan, use plant butter and flax eggs (2 tablespoons flax + 5 tablespoons water).
Keep the cooling method intact for crunch. Endless fun with chocolate hazelnut biscotti base.
Nut and Add-In Swaps
Toast alternatives same way, 350°F 8-10 minutes. Reduce quantity slightly if finer chop. Pistachios add green pop.
Espresso amps chocolate without liquid.
Pairing Ideas for Chocolate Hazelnut Biscotti
Dunk in strong espresso or drip coffee for classic bliss. Earl Grey tea cuts the richness nicely. Chai brings spice contrast.
Top with vanilla ice cream affogato-style. Add to cheese boards with brie. Perfect for holiday tins too.
For a different kind of delightful crunch, consider these crispy fried zucchini blossoms.
Storage and Make-Ahead for Biscotti
Store airtight at room temp up to 2 weeks; they stay crisp. Freeze sliced biscotti up to 3 months in bags. Thaw at room temp.
Make-ahead: Bake logs day 1, cool and chill. Slice and second-bake day 2. Freezes well after full process too.
Pro tip: Layer with parchment in containers to stack neatly.
Chocolate Hazelnut Biscotti Questions Answered
How do I store chocolate hazelnut biscotti and can it freeze?
Keep in an airtight container at room temperature for up to 2 weeks; the twice-baked crunch holds up great. Freeze slices in a single layer first, then bag for up to 3 months. Thaw on a rack; no need to rebake unless you want extra crisp.
Why are my chocolate hazelnut biscotti crumbly when slicing?
Most likely, you skipped the full cooling. Cool logs 20 minutes on the sheet, 1 hour on a rack, then 30 minutes in the fridge. This sets the structure solid. Also, use a sharp serrated knife with a gentle sawing motion, not a straight cut.
Can I make gluten-free chocolate hazelnut biscotti?
Yes, swap all-purpose flour for a 1:1 gluten-free blend or almond flour. Add 1/2 teaspoon xanthan gum if not included. Toast nuts the same; the cooling method still prevents crumbling. Texture stays close to original.
Can I use milk chocolate instead of dark?
Absolutely, but reduce sugar by 2 tablespoons since it’s sweeter. Milk chocolate makes milder chocolate hazelnut biscotti, great for kids. Dark keeps the bitter balance with cocoa. Chop finely either way for even melting.
Should I freeze before or after the second bake?
After the second bake and full cooling for best texture. Freeze logs after first bake if make-ahead, but slice post-thaw. Avoid freezing dough; it bakes unevenly. Thaw slices slowly to retain crispness.
Chocolate Hazelnut Biscotti
Course: DessertCuisine: ItalianDifficulty: medium4
40 biscotti30
minutes1
hour120
kcal120
MinutesHomemade biscotti often crumble during slicing, but this recipe uses a simple cooling and knife technique for perfect, clean cuts every time. Loaded with toasted hazelnuts and dark chocolate.
Ingredients
2 cups all-purpose flour
1/2 cup unsweetened cocoa powder
1 teaspoon baking powder
1/4 teaspoon salt
3/4 cup granulated sugar
1/2 cup unsalted butter, softened
2 large eggs
1 teaspoon vanilla extract
1 cup hazelnuts, toasted and roughly chopped (plus 1/4 cup whole for topping)
4 ounces dark chocolate, chopped (divided)
Directions
- Preheat oven to 350 degrees F. Line a baking sheet with parchment paper.
- In a medium bowl, whisk flour, cocoa powder, baking powder, and salt.
- In a large bowl, beat butter and sugar until light and fluffy, about 2 minutes. Add eggs one at a time, then vanilla. Gradually mix in dry ingredients until a dough forms. Fold in chopped hazelnuts and 2 ounces chopped chocolate.
- Divide dough in half. Shape each into a 12-inch log on the baking sheet, flattening slightly to 3/4-inch thick. Press whole hazelnuts on top.
- Bake 25 to 30 minutes until firm and slightly cracked on top. Remove from oven.
- Cool logs on baking sheet for 20 minutes, then transfer to a wire rack to cool completely, at least 1 hour. This full cool-down sets the structure solid, preventing any crumble.
- Wrap cooled logs in plastic and chill in fridge 30 minutes. This firms them up perfectly for slicing.
- Preheat oven to 325 degrees F. Using a sharp serrated knife, gently saw through each log at a slight angle into 1/2-inch slices. The chill plus serrated sawing motion guarantees clean cuts with no falling apart or loose nuts.
- Place slices cut-side down on baking sheets. Bake 15 to 20 minutes, flipping halfway, until edges are crisp. Cool completely.
- Melt remaining 2 ounces chocolate in microwave in 20-second bursts. Drizzle over cooled biscotti. Let set. Store in airtight container up to 2 weeks.
Notes
- Key to success: Full cooling on rack (1+ hour) after first bake, then fridge chill before slicing with serrated knife using gentle sawing motion. Stores airtight up to 2 weeks.