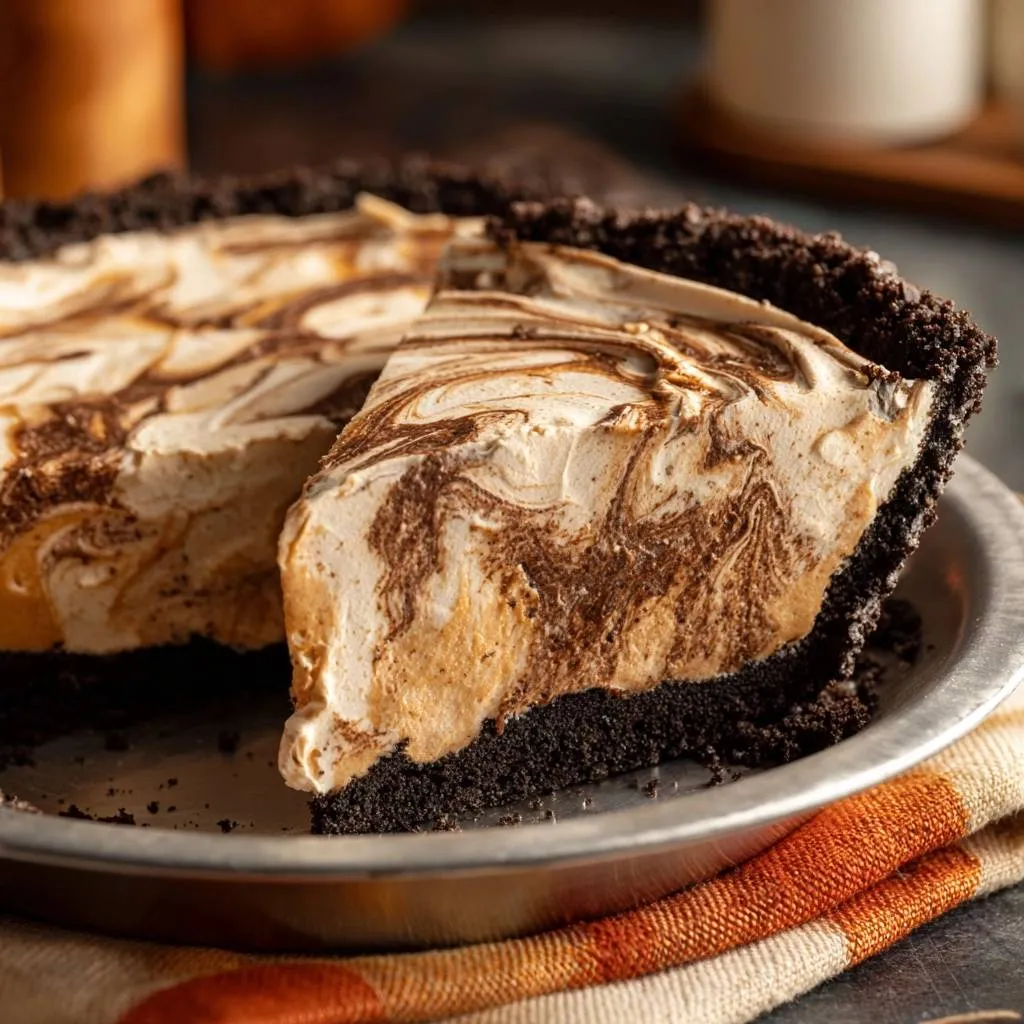
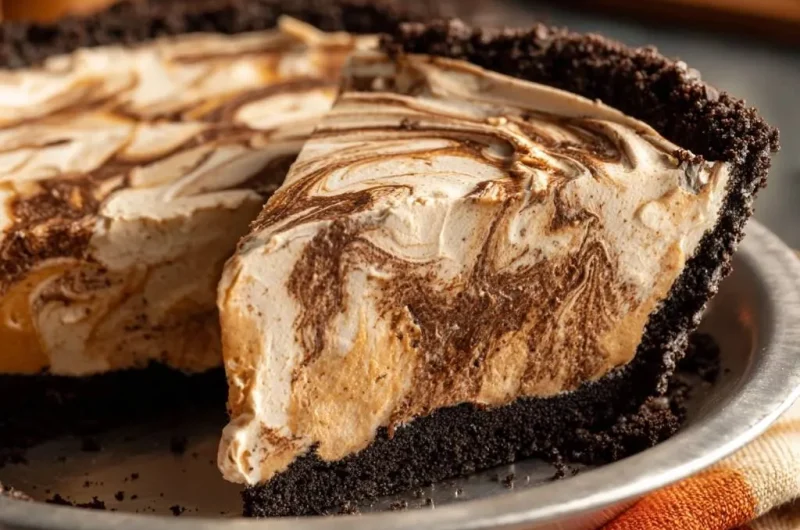
Why This Chocolate Peanut Butter Swirl Pie Stays Firm
Picture this: you pull your no-bake pie from the fridge, excited for that first slice, only to watch the filling slump and ooze across the plate. It’s happened to all of us, right? But this Chocolate Peanut Butter Swirl Pie changes everything. You’ll get clean, firm cuts that hold their shape like a bakery pro.
So why does it work so well? The trick lies in whipping the cream to ultra-stiff peaks and folding it gently into the peanut butter base. This method traps air bubbles perfectly, creating a structure that sets rock-solid in the fridge. No more runny disasters with this Chocolate Peanut Butter Swirl Pie.
Here’s the expertise booster: always test those stiff peaks by lifting your beaters straight up. They should stand tall and sharp, not flop over. That simple check guarantees your Chocolate Peanut Butter Swirl Pie delivers perfect slices every time.
Crust Components for Chocolate Peanut Butter Swirl Pie
You start with 24 chocolate sandwich cookies and 5 tablespoons of melted unsalted butter. Those cookies bring a bittersweet crunch that complements the creamy filling without stealing the show. In addition, pulsing them into fine crumbs ensures even texture, way better than manual crushing which leaves big chunks.
Unsalted butter controls the moisture just right, so the crust binds without getting greasy. Therefore, press it firmly into a 9-inch pie plate using the bottom of a glass. This creates compact layers up the sides that won’t crumble. Chill for 30 minutes first, and it stays crisp against the filling.
Choosing Cookies for Optimal Crunch
Chocolate sandwich cookies beat graham crackers or even Oreos here because their creamy filling adds cohesion without extra sugar. You get that ideal snap that holds up to the rich peanut butter. Plus, the chocolate flavor ties directly into the swirl.
Butter Melting Technique
Melt the butter gently on the stovetop over low heat, stirring constantly, or microwave in 10-second bursts. This prevents separation and keeps it smooth. Then pulse with crumbs until evenly moistened, like wet sand, for perfect binding.
Filling Ingredients in Chocolate Peanut Butter Swirl Pie
The heart is 1 cup creamy peanut butter, 8 ounces softened cream cheese, 1 cup powdered sugar, 1 teaspoon vanilla extract, and 2 cups very cold heavy whipping cream. Room-temp cream cheese blends lump-free for silkiness. Powdered sugar dissolves instantly, dodging any graininess from granulated.
Creamy peanut butter gives fluff without chunks, while vanilla amps up those nutty notes. However, the cold heavy cream is key; it whips faster and holds peaks better. Soften the cream cheese by letting it sit out for an hour, and chill your bowl for max volume.
Peanut Butter and Cream Cheese Balance
This 1:1 ratio delivers tangy nuttiness without heaviness. Beat them together on medium-high for 3 to 5 minutes until fluffy. Scrape the sides often to avoid dense pockets, ensuring every bite is light and dreamy.
Heavy Cream Temperature Impact
Chill your bowl and beaters in the fridge first. Cold cream incorporates air quicker, forming stable fat globules for stiff peaks. Warm cream flops flat, so this step makes all the difference in firmness.
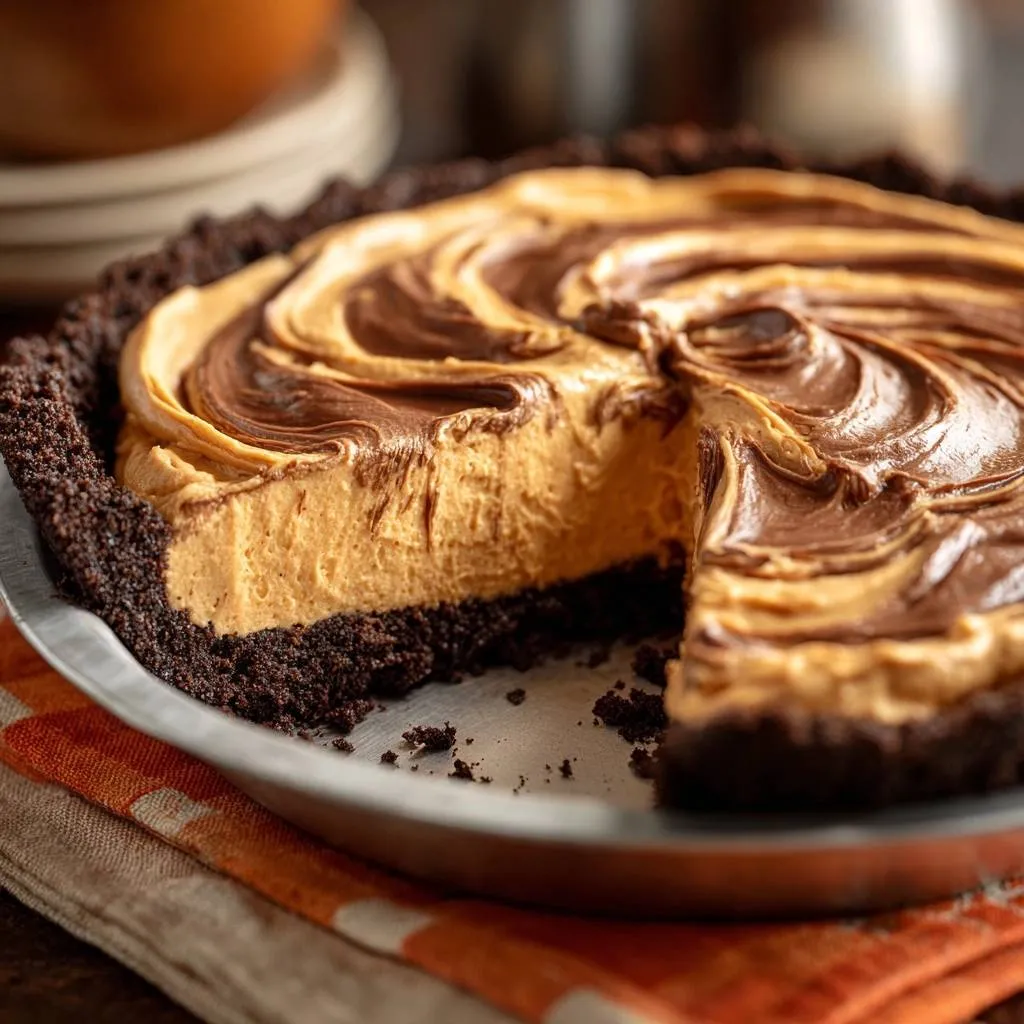
Swirl Element for Chocolate Peanut Butter Swirl Pie
Grab 4 ounces semi-sweet chocolate, chopped evenly, melted, and cooled slightly. Semi-sweet keeps bitterness in check, balancing the sweet peanut butter. Chop uniformly for smooth melting without hot spots.
Cool it for 5 minutes post-melt to avoid seizing or softening the filling. Drizzle and swirl for that marbled look. It adds rich pockets of chocolate goodness in every slice.
Science of Whipping Cream for Firm Pie Filling
Whipping cream’s magic comes from fat globules trapping air as proteins stabilize the bubbles. Beat cold cream on high from soft ripples to stiff peaks that hold sharp. This structure prevents collapse in your Chocolate Peanut Butter Swirl Pie.
If you enjoy this rich whipped cream topping, you’ll also want to try these Oreo peanut butter cheesecake bars for another decadent treat.
Test soft peaks by soft curls on the beater; stiff ones stand straight or pass the bowl-invert test. Overwhip to butter, and it’s grainy; underwhip, and it weeps. Therefore, stop at very stiff for no-runniness guaranteed.
Air incorporation gives loft, while chilling sets it firm. That’s why this Chocolate Peanut Butter Swirl Pie slices cleanly every time.
Stiff Peak Formation Stages
Start on medium for ripples, then high for soft peaks in 2 minutes. Continue 1 to 2 more minutes for stiff; peaks sharpen fast. Listen for the whir changing pitch as volume doubles.
Step-by-Step: Building Chocolate Peanut Butter Swirl Pie Crust
Pulse cookies to fine crumbs, add melted butter, and pulse until moist. Press into the pie plate bottom and sides with a glass for even density. You’ll feel it compact under pressure.
Chill 30 minutes; it firms up with a crisp snap when tapped. This prevents sogginess, so your crust stays sturdy under the filling.
Mastering the Fluffy Peanut Butter Base
Beat cream cheese, peanut butter, powdered sugar, and vanilla on medium-high 3 to 5 minutes. It turns ultra-light and smooth; scrape sides to aerate fully. Medium speed incorporates air without warming the mix.
Look for a fluffy, glossy sheen. This base provides the perfect canvas for folding in whipped cream.
Folding Technique for Stable Swirl Pie Filling
Add whipped cream in three parts to the peanut butter base. Use a spatula for slow bottom-to-top sweeps, rotating the bowl. This preserves precious air bubbles for firmness.
Stop when no streaks show; gentle folding keeps it lofty. Aggressive stirring deflates it, leading to runny results, so patience pays off here.
Fold until just combined, and it holds volume like a dream.
Figure-8 Swirling Motions
Spread half the filling in the crust, drizzle half the chocolate, and swirl lightly with a knife tip in figure-8s. Don’t dig deep to avoid crust mess. Repeat layers for even marbling throughout.
Chilling Process for Set Chocolate Peanut Butter Swirl Pie
Cover loosely and refrigerate 6 hours or overnight. Cold solidifies the whipped structure into sliceable perfection. Always cut straight from the fridge for firm holds.
Store covered up to 3 days. The chill enhances flavors too, making each bite even better.
Avoiding Common Mistakes in Swirl Pie Assembly
Overmixing deflates air, so fold gently. Warm cream won’t peak, causing collapse; always chill it. Uneven crust crumbles if not pressed firm, and hot chocolate seizes the filling.
Fix by re-chilling midway or remelting chocolate over hot water. These tweaks keep your Chocolate Peanut Butter Swirl Pie flawless.
Runny Filling Prevention Checklist
Whip to stiff peaks (beater test), fold in thirds gently, chill 6+ hours. Check peaks hold sharp, no streaks in mix. Follow this, and it sets perfectly.
Flavor Variations for Chocolate Peanut Butter Swirl Pie
Try chunky peanut butter for texture, or dark chocolate for deeper notes. Add banana slices between layers or crushed pretzels in the crust for salt. Nut-free? Sunflower butter swaps seamlessly.
Make minis in muffin tins, or go vegan with coconut cream. These twists keep the firm set while boosting fun.
Make-Ahead Guide for Swirl Pie Prep
Prep crust a day ahead and chill. Mix filling base and whip cream separately; fold just before assembling. Freeze full pie up to 1 month, wrapped tightly in plastic then foil.
Thaw overnight in fridge for best texture. It retains firmness beautifully this way.
Pairing Suggestions with Chocolate Peanut Butter Swirl Pie
Coffee cuts the richness perfectly, while cold milk balances sweetness. Top with extra whipped cream or chopped nuts for crunch. Fresh raspberries add tart pop, or bananas echo the peanut vibe.
Seasonal fruits enhance the chocolate-peanut harmony. Simple contrasts make every bite shine.
Expert Answers on Chocolate Peanut Butter Swirl Pie
Can I use a springform pan for Chocolate Peanut Butter Swirl Pie?
Yes, a 9-inch springform works great for easier slicing. Press the crust 1.5 inches up the sides for stability. Chill well, and it releases cleanly without crust damage.
Are there gluten-free crust options for Chocolate Peanut Butter Swirl Pie?
Swap in gluten-free chocolate sandwich cookies or crisp gluten-free chocolate wafers. Pulse and press the same way; add an extra tablespoon butter if needed for binding. It holds firm just like the original.
Why didn’t my Chocolate Peanut Butter Swirl Pie filling set?
Usually underwhipped cream or overmixing during folding. Whip to very stiff peaks (they stand straight), fold gently in thirds, and chill 6+ hours. Test peaks by inverting the bowl; if it holds, you’re set.
How long can I freeze Chocolate Peanut Butter Swirl Pie?
Freeze up to 1 month wrapped tightly in plastic and foil. Thaw in fridge overnight; texture stays firm. Avoid refreezing thawed pie to prevent weepiness.
What are dairy-free substitutions for Chocolate Peanut Butter Swirl Pie?
Use full-fat coconut cream for whipping (chill cans first) and dairy-free cream cheese. Sweeten the same; it whips to stiff peaks and sets firmly. Coconut adds subtle flavor that pairs well with chocolate.
Chocolate Peanut Butter Pie
Course: DessertCuisine: AmericanDifficulty: easy8
servings30
minutes550
kcal360
MinutesNo more heartbreak slicing into a no-bake pie that oozes everywhere. Our foolproof stiff-peak whipping and gentle folding technique locks in perfect firmness for clean slices every time.
Ingredients
Crust:
24 chocolate sandwich cookies
5 tablespoons unsalted butter, melted
Filling:
1 cup creamy peanut butter
8 ounces cream cheese, softened to room temperature
1 cup powdered sugar
1 teaspoon vanilla extract
2 cups heavy whipping cream, very cold
Swirl:
4 ounces semi-sweet chocolate, melted and slightly cooled
Directions
- Make the crust: Pulse cookies in a food processor to fine crumbs. Add melted butter and pulse until evenly moistened. Press firmly into bottom and up sides of a 9-inch pie plate using the bottom of a glass for even, compact layers. Chill crust 30 minutes to firm up.
- Prepare the filling base: In a large bowl, beat softened cream cheese, peanut butter, powdered sugar, and vanilla with an electric mixer on medium-high speed for 3 to 5 minutes until ultra-light, fluffy, and completely smooth. Scrape sides often. This extended beating eliminates any density or graininess for superior texture.
- Whip the cream to stiff peaks: In a separate chilled bowl, beat cold heavy cream on high speed until soft peaks form, then continue 1 to 2 more minutes to very stiff peaks. Test by lifting beaters straight up, peaks should hold tall and sharp without curling. Or invert the bowl, cream should not slide. This is the key step that guarantees no runniness, trapping air for firm structure.
- Fold gently: Add whipped cream to peanut butter mixture in three additions. Use a spatula to fold each time with slow, sweeping strokes from bottom up, turning bowl as you go. Stop when just combined and no streaks remain. Overmixing deflates air, so gentle is crucial for the firm set.
- Assemble and swirl: Spread half the filling into chilled crust. Drizzle half the melted chocolate in lines, then swirl lightly with a knife tip in figure-8 motions for marbled effect without disturbing crust. Add remaining filling, drizzle and swirl chocolate again.
- Chill to set: Cover loosely and refrigerate at least 6 hours or overnight. The cold rest solidifies the whipped structure completely. Slice cold for perfect, firm pieces that hold shape. Store covered in fridge up to 3 days.
Notes
- Chill crust for 30 minutes, then filling for at least 6 hours or overnight. Store covered in fridge up to 3 days. Whip cream to very stiff peaks for no-runny results.