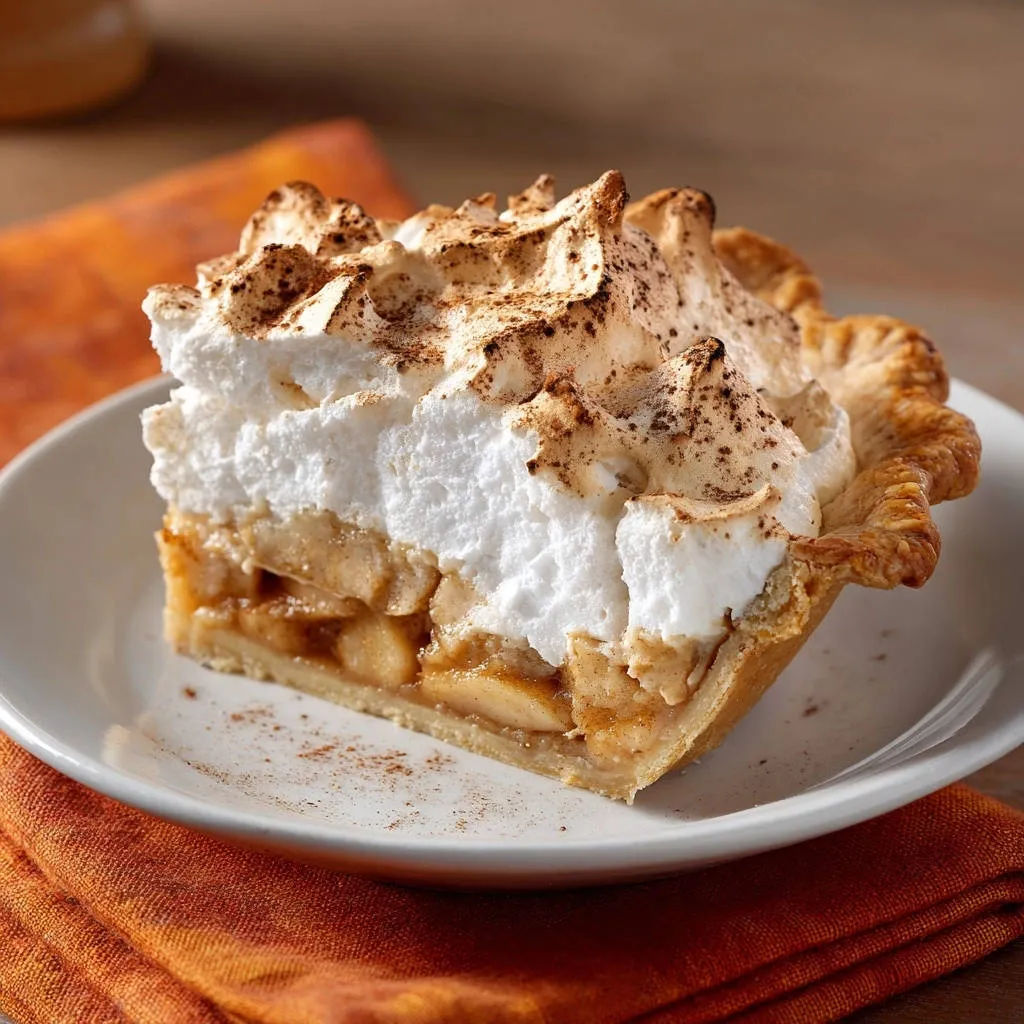
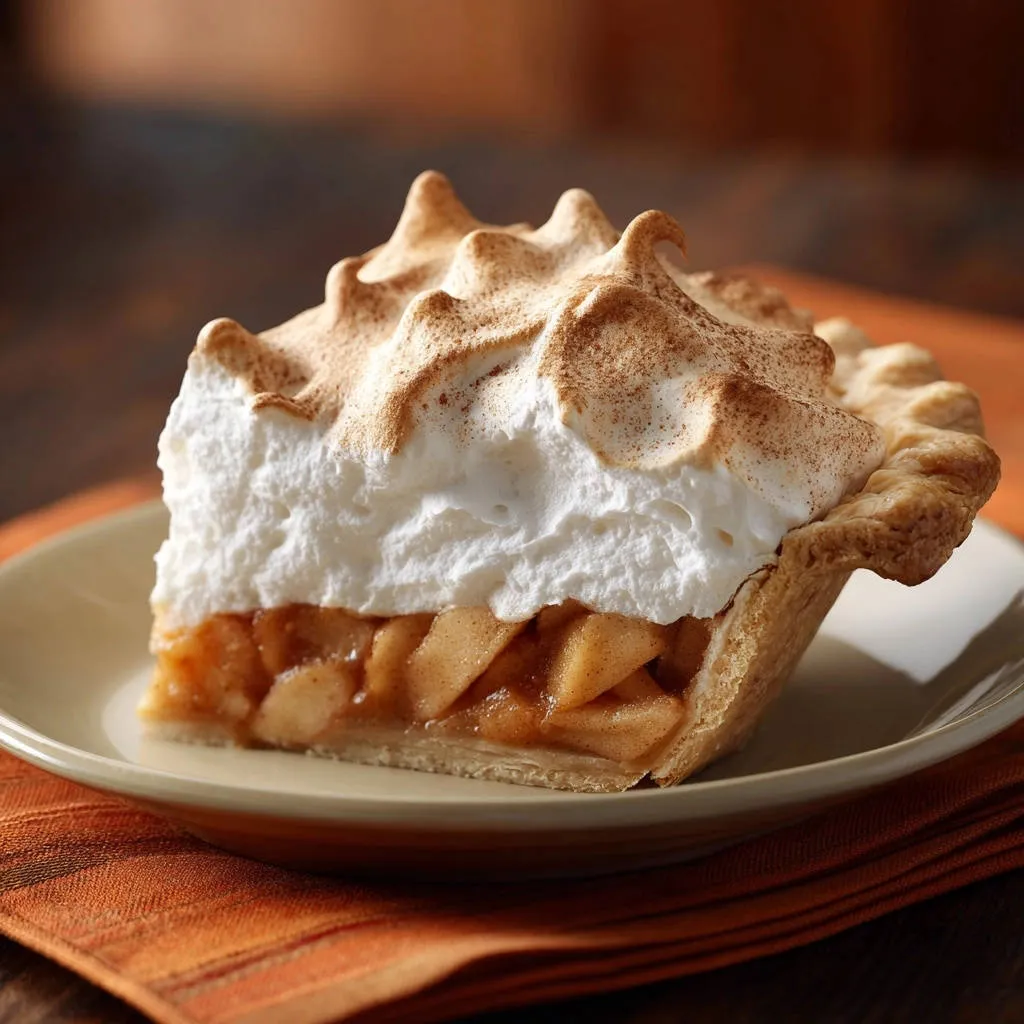
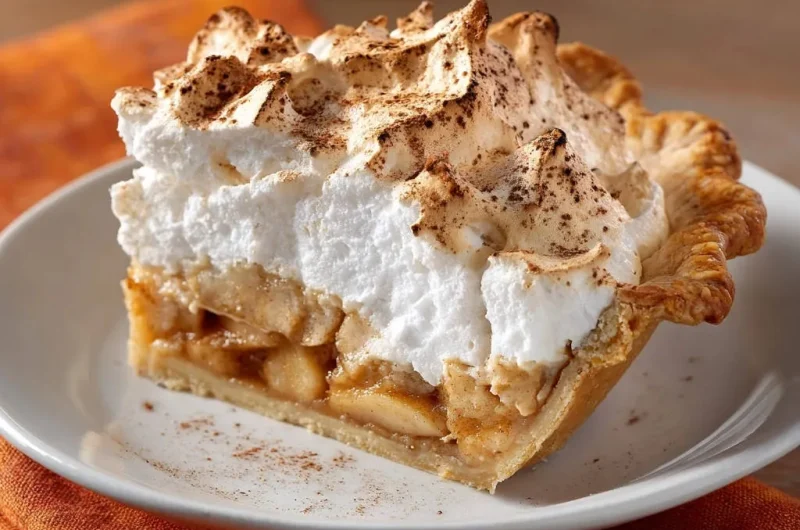
There is nothing more frustrating than dedicating time to a stunning Classic Apple Meringue Pie only to watch that beautiful meringue weep syrupy tears an hour later. After years of testing, I perfected a dual-action stabilization method that permanently solves this disaster, locking the moisture in the filling where it belongs.
This recipe combines two powerful stabilizers and a critical application technique to deliver a towering, cloud-like meringue that holds its structure and guarantees a perfect slice every time.
Why This Classic Apple Meringue Pie Never Weeps (The Scientific Edge)
Weeping occurs when moisture from the hot filling condenses and travels up into the meringue, or when the sugar in the meringue dissolves due to humidity or improper baking.
This method attacks both issues by strengthening the egg white proteins internally and creating an immediate barrier at the crust/meringue interface.
The Dual Power of Cornstarch and Cream of Tartar
Traditional meringue relies solely on air and sugar, which makes it delicate. We stabilize our meringue by incorporating two essential ingredients.
Cream of tartar, an acidic salt, helps the egg white proteins denature and tighten quickly, allowing them to trap maximum air and maintain a stiff, resilient structure during whipping.
Crucially, cornstarch acts as a moisture binder. When mixed with the sugar and beaten into the egg whites, it absorbs any ambient moisture during baking and cooling, preventing the sugar from dissolving into a syrupy mess.
The Critical “Hot Seal” Technique Explained
The final, most important step is applying the meringue immediately to the piping hot pie filling, known as the “hot seal.”
The intense heat from the filling instantly cooks the bottom layer of the raw egg white proteins, creating a protective, impermeable barrier.
This cooked layer prevents the moisture vapor rising from the filling from reaching the bulk of the meringue, effectively blocking the primary cause of weeping.
Assembling the Ingredients: From Flaky Crust to Zesty Filling
Quality ingredients and precise preparation are necessary to achieve the desired balance of tartness in the filling and sweetness in the meringue.
Using a prebaked 9-inch deep-dish pie crust saves time and ensures a flaky, fully cooked base that stands up well to the juicy apple filling.
For pie crust perfection, explore glazed cherry pie bars techniques.
Selecting the Right Apples for Texture and Flavor
The best apples for pie hold their structure under high heat and provide a necessary tart contrast to the sugary meringue.
Granny Smith apples are classic for their tartness and firm texture. Honeycrisp or Fuji can be blended in for added sweetness without sacrificing structural integrity.
For a similar fruit-forward experience, consider exploring the classic strawberry rhubarb lattice pie.
Avoid apples that turn mushy quickly, like Red Delicious, as they will result in a soupy filling that increases the risk of a wet pie.
The Foundation: Key Components of the Apple Filling
- The Role of Flour:
All-purpose flour is mixed directly with the sugar, cinnamon, and nutmeg. This flour thickens the apple juices released during baking, binding the liquid into a cohesive, sliceable filling.
- Balancing Acidity:
Lemon juice is essential for two reasons. First, its acidity brightens the heavy sweetness of the sugar and meringue. Second, it aids in breaking down the apple’s pectin, encouraging the slices to soften while maintaining their shape.
Essential Ingredients for a Foolproof Meringue
For maximum volume, your four large egg whites must be separated and brought to room temperature before whipping.
The combination of granulated sugar and cornstarch is carefully whisked together before integration. Do not skip this step, as it ensures even distribution of the stabilizer.
The cream of tartar is the initial stabilizer added right at the start of the whipping process, guaranteeing the egg foam forms correctly.
The Right Tools for a Standout Meringue
A good meringue relies on clean tools and efficient mixing power. Investing in the correct equipment ensures your stabilization efforts are successful.
Stand Mixer or Hand Mixer: Necessary for achieving the speed and duration required to build stiff, glossy peaks. Hand-whisking is highly discouraged for this large quantity.
Glass or Stainless Steel Bowl: These materials are non-porous and easy to clean of grease residue. Avoid plastic bowls, as they often retain trace amounts of fat that ruin egg white volume.
Kitchen Torch (Optional but Recommended): Provides perfect control over browning the meringue peaks without risking over-baking or drying out the pie filling.
Rubber Spatula: Key for applying the meringue and ensuring it completely seals around the inner edge of the crust, which is critical for the hot seal technique.
Mastering the Method: Your Guide to Pie Perfection
Following the correct sequence and temperatures is vital for creating a balanced filling and a stable meringue topping for your Classic Apple Meringue Pie.
Preparing the Flavorful Apple Filling and Crust
-
Tossing and Coating:
Ensure the apples are evenly coated with the flour and sugar mixture. This is the first critical step in ensuring the filling is not too watery.
-
The Butter Dot Secret:
Dotting the top of the filling with small pieces of butter adds richness and helps the filling bubble beautifully and evenly while baking. The butter prevents the surface from drying out before the apples fully soften.
The Crucial Baking Stages
-
The Two-Temperature Bake:
Preheat the oven to 400°F (205°C) and bake for 15 minutes to quickly set the crust and activate the starch in the filling. Then, reduce the heat to 350°F (175°C) and continue baking for 35 to 45 minutes.
The pie is done when the filling is visibly bubbly around the edges and center, and the apple slices yield easily to a small paring knife or fork.
The Anti-Weeping Method: Whipping Stabilized Meringue
-
Starting the Whip (The Foam Stage):
Begin whipping the room temperature egg whites and cream of tartar on medium speed until the mixture is foamy, resembling soap suds. Room temperature eggs whip to a greater volume because the proteins are more relaxed.
-
The Stabilizer Integration:
Gradually add the pre-mixed sugar and cornstarch into the egg whites, one tablespoon at a time, while the mixer is running on high speed. This slow integration ensures the stabilizer dissolves correctly and binds water effectively, which is the heart of the anti-weeping technique.
-
Achieving Stiff, Glossy Peaks:
Continue beating until the meringue is incredibly stiff and glossy. The meringue should hold its shape perfectly when the whisk is lifted, and the peak should stand upright without drooping.
Beat in the vanilla extract just until combined. The final meringue must be used immediately while the filling is hot.
Immediate Application and The Final Toast (The Hot Seal)
Timing and technique during this final stage are paramount to prevent weeping and ensure structural stability.
-
The High-Stakes Seal:
Immediately remove the pie from the oven and apply the meringue to the hot filling. Working quickly is essential, as the heat cooks the egg proteins instantly at the base, creating a seal that blocks moisture transfer.
Use a spatula to spread the meringue, ensuring it touches and seals completely around the entire inner perimeter of the crust. This seal locks in the filling’s moisture and prevents the meringue from shrinking or sliding.
-
Finishing the Meringue:
Return the pie to the 350°F (175°C) oven for 10 to 12 minutes, or until the peaks are beautifully golden brown and lightly toasted. Alternatively, use a kitchen torch for better control over the color without risking the pie filling overheating.
Chef’s Secrets: Troubleshooting and Elevating Your Pie
Even expert bakers encounter hiccups. Here are quick fixes for common problems when making apple pie and meringue.
More Apple Delights
To continue enjoying apple flavors, consider these recipes.
- For a different take on baked apples, explore this caramelized apple upside-down cake, featuring tender apples and rich caramel.
- If you appreciate a good brioche and fruit combination, try the ricotta stuffed brioche French toast, offering a delightful texture and sweet filling.
Why Are My Apples Still Crunchy? (Filling Fixes)
The Tinfoil Tent: If your crust is browning too fast but the apples are still firm, loosely tent the pie with foil and continue baking until the apples are fully tender. This redirects heat to the interior without burning the edges.
Pre-Cooking Alternative: For absolute confidence in apple tenderness, lightly sauté the sliced apples in butter for 5 minutes before mixing them with the flour and sugar and adding them to the crust. This jump-starts the softening process.
Meringue Disaster: Dealing with Limp Peaks or Weeping
The Grease Check: Even a tiny drop of yolk, fat, or oil residue will prevent egg whites from whipping to volume. If your peaks won’t form, stop, discard the whites, and meticulously re-wash and dry your bowl and whisk attachments.
Overwhipping Warning: Stability is key, but stop immediately once glossy, stiff peaks are formed. Overwhipping can cause the protein structure to separate, resulting in a coarse, dry meringue that is more likely to crack and weep.
Achieving the Perfect Golden Toast
Use the Torch Safely: If you are using a kitchen torch, hold the flame 3-4 inches away from the meringue and move continuously and quickly. Avoid holding the flame in one spot for too long, which can cause scorching instead of uniform golden toasting.
Serving Suggestions, Storage, and Make-Ahead Notes
Proper handling after baking is just as important as the stabilization techniques used during preparation.
The Critical Cooling Step (Why 3 Hours is Non-Negotiable)
The pie must cool completely at room temperature for at least 3 hours before slicing. This long, slow cool-down allows the internal steam and moisture in the filling to fully stabilize and dissipate.
If you slice the pie while it is still warm, the steam escaping from the filling will condense rapidly against the cooler meringue, virtually guaranteeing that weeping will occur.
Storage Guidelines for Leftovers
Refrigeration vs. Counter: Unlike many fruit pies, meringue pies must be stored in the refrigerator due to the egg white content, especially after 24 hours.
The Cover Technique: When storing in the fridge, tent the pie loosely with foil or place it under a dome. Do not cover tightly with plastic wrap, which traps moisture and will speed up the meringue’s degradation.
Make-Ahead Tips
The apple filling can be prepared, tossed with the sugar and flour mixture, and refrigerated up to 24 hours in advance. This saves prep time.
However, the meringue must always be made and applied immediately before the final bake. Stabilized meringue loses its structural integrity quickly and cannot be made ahead.
Classic Apple Meringue Pie FAQs: Expert Answers to Your Baking Questions
What is the difference between this stabilized meringue and traditional meringue?
Traditional French meringue is simply egg whites and sugar, which relies on technique alone and is highly prone to weeping and shrinking. This stabilized recipe incorporates cornstarch, a moisture binder, and uses the critical hot seal method to physically lock the structure in place and prevent the inevitable breakdown.
Can I make this pie without Cream of Tartar?
While possible, Cream of Tartar (an acid) greatly assists in denaturing the proteins, allowing them to whip up higher and hold their structure longer than without an acidic component. Use 1 teaspoon of fresh lemon juice as a substitution if necessary, adding it when the egg whites are foamy.
What is the best way to slice a meringue pie cleanly?
Ensure the pie is fully cooled, ideally chilled for maximum firmness. For ultra-clean slices, run a thin, sharp knife under piping hot water, wipe it completely dry, and slice quickly. The hot blade will melt the sugar slightly, allowing a clean cut, but you must repeat the heating and drying process for every cut.
Ready to Impress? Share Your Stable Classic Apple Meringue Pie Masterpiece!
You now possess the trade secrets-the dual stabilizers and the critical hot seal-that elevate a challenging dessert into a guaranteed showstopper. Say goodbye to watery tears and hello to towering, fluffy peaks that hold their shape for days.
Baking is a science and an art, and applying this expert technique to your next Classic Apple Meringue Pie ensures professional-grade results. Enjoy the compliments, and don’t forget to share your beautifully stable creation!
Apple Meringue Pie
Course: DessertCuisine: AmericanDifficulty: medium1
(9-inch) Deep Dish Pie20
minutes1
hour450
kcal240
minutesSay goodbye to syrupy, watery meringue. This recipe uses the critical anti-weeping method, incorporating cornstarch and a hot application seal, to guarantee a stable, firm meringue structure every time.
Ingredients
For the Pie Crust:
1 prebaked 9-inch deep dish pie crust
For the Apple Filling:
6 medium apples peeled, cored, and sliced (Granny Smith or Honeycrisp recommended)
3/4 cup granulated sugar
1/4 cup all purpose flour
1 teaspoon ground cinnamon
1/4 teaspoon ground nutmeg
1 tablespoon lemon juice
2 tablespoons unsalted butter cut into small pieces
For the Meringue (The Anti-Weeping Method):
4 large egg whites room temperature
1/4 teaspoon cream of tartar (CRITICAL stabilization ingredient)
1/2 cup granulated sugar
2 tablespoons cornstarch (CRITICAL stabilization ingredient)
1/2 teaspoon vanilla extract
Directions
- Prepare the Apple Filling: In a large bowl, toss the sliced apples with sugar, flour, cinnamon, nutmeg, and lemon juice until evenly coated. Pour the mixture into the prebaked pie shell. Dot the top of the filling with the small pieces of butter.
- Bake the Pie: Preheat oven to 400 degrees F. Bake for 15 minutes, then reduce the heat to 350 degrees F and continue baking for 35 to 45 minutes, or until the apples are tender and the filling is bubbly.
- Prepare the Stabilized Meringue (The Weeping Solution): While the pie is finishing its bake, prepare the meringue. Ensure your mixing bowl and whisk attachments are perfectly clean and grease-free. In a stand mixer, combine the room temperature egg whites and cream of tartar. Beat on medium speed until the mixture is foamy.
- Integrate Stabilizers: In a separate small bowl, whisk together the 1/2 cup sugar and the 2 tablespoons of cornstarch. This sugar/starch mixture is the secret weapon to prevent weeping.
- Whip and Stabilize: Gradually add the sugar and cornstarch mixture into the egg whites, beating on high speed until stiff, glossy peaks form (the meringue should hold its shape when the whisk is lifted). Beat in the vanilla extract just until combined.
- The Hot Seal Technique (Immediate Application): This is the final and most important weeping prevention step. Immediately remove the pie from the oven once the filling is cooked and the pie is still piping hot. Working quickly, dollop the stabilized meringue mixture onto the hot filling. Use a spatula to spread the meringue, making sure it seals completely around the entire inner edge of the crust. The hot filling will immediately start cooking the bottom layer of the meringue, locking in moisture and structure.
- Finish and Toast: Return the pie to the 350 degree F oven for 10 to 12 minutes, or until the meringue peaks are beautifully golden brown and lightly toasted. Alternatively, use a kitchen torch to toast the meringue until golden.
- Cool Properly: Let the pie cool completely at room temperature for at least 3 hours before slicing. The long, slow cool down allows the meringue to fully set without condensing internal moisture, guaranteeing a clean, stable slice.
Notes
- Ensure your egg whites are at room temperature for the most stable meringue. Don’t overmix the meringue once stiff peaks form, as this can also contribute to weeping.