For years, I wrestled with the heartbreak of cutting into a seemingly perfect pie only to find a pool of thin, watery apple filling soaking the bottom crust.
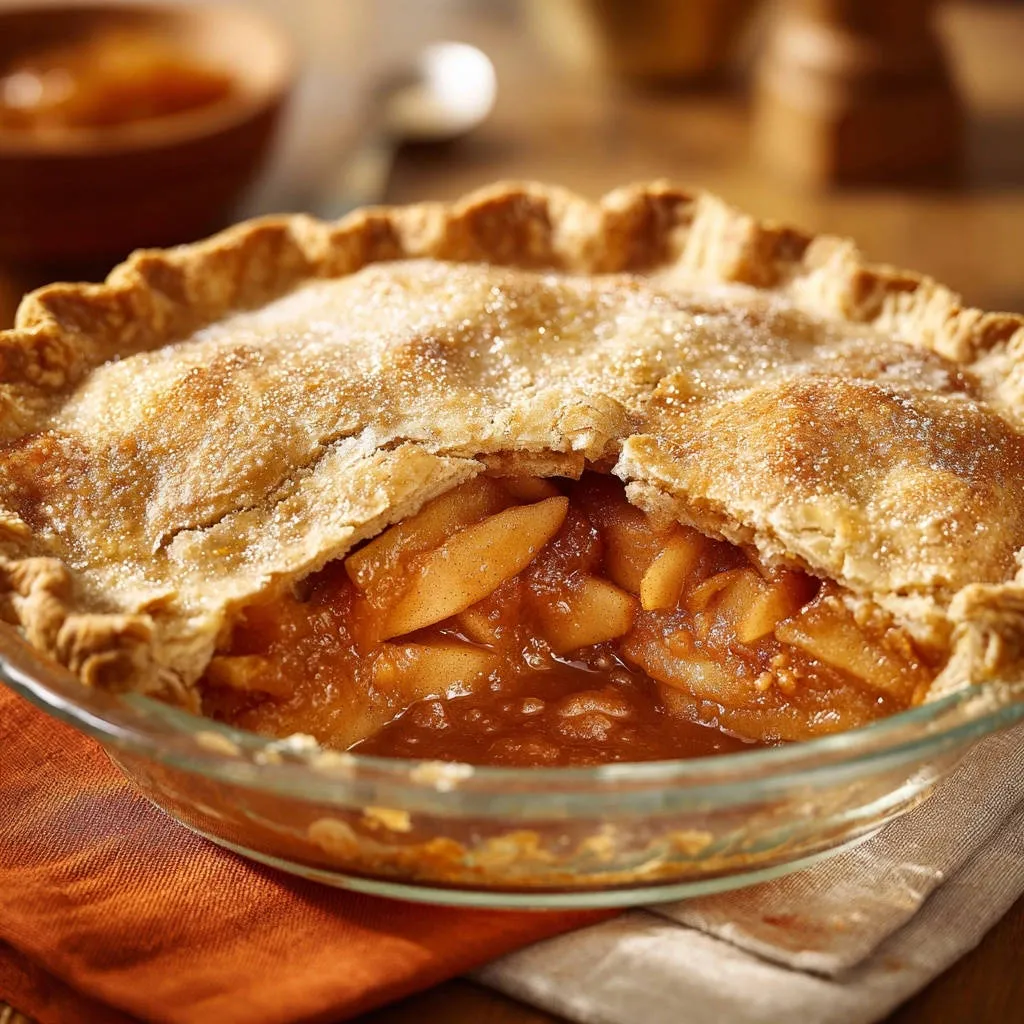
This recipe for Classic Apple Pie Perfection finally cracked the code, utilizing the critical steps of moisture release and a specific thickener that guarantees a thick, beautifully glossy filling every time, banishing the soggy bottom forever.
Trust this method, and you’ll achieve the iconic dessert you’ve always dreamed of-sliceable, aromatic, and deeply satisfying.
Say Goodbye to Watery Pie: Why This Classic Apple Pie Perfection Method Works
The Critical Pre-Bake Rest: Drawing Out Excess Moisture
The biggest challenge in apple pie is controlling the natural moisture released by the fruit when it hits the heat. If that liquid isn’t dealt with beforehand, it boils over or creates soup.
Allowing the sliced apples to rest for 30 minutes after coating them with sugar and spices is a non-negotiable step. The sugar acts as an osmotic agent, pulling excess water out of the cells of the apples.
This pre-baking moisture release ensures that the tapioca has time to absorb the liquid at room temperature, rather than trying to thicken a massive amount of steam and liquid while baking.
Instant Tapioca vs. Flour: Choosing the Ultimate Thickener
While cornstarch and flour are common thickeners, they can sometimes leave a cloudy or pasty texture, especially when used in large quantities needed for apples.
Instant tapioca is the key to this recipe’s success. It absorbs the moisture drawn out by the sugar during the rest period and then completely dissolves when heated, creating a thick, gorgeously glossy, and perfectly clear filling.
Unlike flour, tapioca maintains the bright flavor and visual appeal of the fruit while delivering unparalleled structural integrity for that perfect slice.
The Power of the Dual-Temperature Bake
Achieving a golden-brown top crust while simultaneously ensuring the dense apple filling is fully cooked requires a specific technique: the dual-temperature bake.
Starting the oven high at 425°F for the first 15 minutes forces the butter in the crust to firm up quickly, setting the structure and preventing the edges from slumping.
Reducing the temperature to 375°F allows the pie to continue baking gently. This lower heat permits the apples to slowly tenderize and the tapioca to fully activate without burning the delicate top crust.
The Essential Ingredients for Perfect Classic Apple Pie Perfection
Choosing the Right Apples: Balancing Sweetness and Structure
A successful pie filling requires a blend of apple varieties. Using only sweet apples results in a bland, mushy texture, while using only tart can be overwhelmingly sharp.
We recommend a mix of firm, tart Granny Smith (for flavor structure) and sweet, crisp Honeycrisp (for balanced sweetness and texture).
Ensure your apples are uniform in thickness-about 1/4 inch-so they cook down evenly, preventing some pieces from being hard while others are soft.
Crust Excellence: Starting with the Best Foundation
The crust must be sturdy enough to contain the substantial, heavily spiced apple filling and its beautiful juices.
Whether you choose a reliable store-bought crust for convenience or tackle a homemade all-butter crust, ensure it is placed cold into the pie dish to maintain its flakiness.
Sweeteners and Spices: Achieving Depth of Flavor
Using both granulated sugar and packed light brown sugar achieves a complexity that single-sugar pies lack. Granulated sugar provides sweetness, while brown sugar adds a subtle molasses note and moisture.
The combination of ground cinnamon and nutmeg is essential for that unmistakable classic apple pie aroma and warmth.
Never omit the 1/4 teaspoon of salt; it doesn’t make the pie taste salty, but rather sharpens and balances the sweetness of the fruit and spices.
The Crucial Finishing Touches: Egg Wash and Turbinado Sugar
The egg white wash (beaten with a touch of water) acts as the glue for the sugar and helps the crust develop a rich, deep golden color and a beautiful sheen.
Sprinkling the top liberally with coarse turbinado sugar adds an incredible textural contrast, creating a caramelized crunch that is deeply satisfying.
Tools of the Trade: Preparing for Your Classic Pie Adventure
Why a Glass Pie Dish is Recommended
Using a glass pie dish is highly recommended because it is a poor conductor of heat, meaning it heats up slowly but retains heat very well.
Crucially, glass allows you to visibly check the color of the bottom crust, ensuring it is properly baked and not soggy before removing the pie from the oven.
Essential Prep Equipment
Wire Rack: Necessary for the cooling process to allow air circulation underneath, preventing condensation and a soggy bottom crust after baking.
Sharp Knife and Peeler: Required for efficient and uniform peeling and slicing of the six cups of apples.
Baking Sheet: Essential for placing the pie dish on while baking; this catches any inevitable bubbling-over filling and makes for easier cleanup.
Rolling Pin: Needed for working with a homemade crust or smoothing out store-bought discs.
Mastering the Method: A Step-by-Step Guide to Classic Apple Pie Perfection
Phase 1: Moisture Control and Flavor Infusion (Steps 1 & 2)
- Slice and Coat the Apples:
Ensure apples are sliced evenly, ideally 1/4 inch thick, to promote uniform cooking. Thicker slices will remain crunchy.
Thoroughly toss all filling ingredients, including both sugars, spices, lemon juice, and especially the instant tapioca, to ensure full coverage.
- The Mandatory 30-Minute Rest:
Do not skip this step! It is the foundation of preventing a watery pie by forcing the moisture out of the apples pre-bake.
While the apples rest, the oven should be preheated to 425°F, and the bottom crust should be placed into the pie dish.
For a perfectly set filling in your classic apple pie, consider how the apples are prepped.
Phase 2: The Critical Draining and Assembly (Steps 3 & 4)
- The Secret Step: Draining Excess Liquid:
After the rest, gently tilt the bowl and drain off any significant pooled liquid that the tapioca has not yet absorbed. This is the single most crucial step for a perfectly set filling.
Transfer the apple mixture directly into the bottom pie crust, mounding them slightly in the center.
- Dotting with Butter and Sealing:
Dot the top of the apples evenly with the small cubes of butter. The melting butter adds essential richness and helps the spices bloom into the filling.
Place the top crust, trim, and ensure the edges are tightly crimped to prevent the precious filling from escaping during the hot bake.
Cut several adequate vent slits into the top crust using a sharp knife; this releases steam and prevents the crust from ballooning.
Phase 3: Achieving Golden Glory (Steps 5 & 6)
- The Egg Wash and Sugar Dusting:
Brush evenly with the egg wash for a beautiful shine and rich color, then use turbinado sugar for that signature sweet crunch.
- Executing the Dual-Temperature Bake:
Place the pie on a baking sheet. Start hot at 425°F for 15 minutes to set the crust, creating structure and flakiness.
Immediately reduce the temperature to 375°F and continue baking for 35 to 45 minutes, or until the filling is visibly bubbling thickly and the crust is deep golden.
Phase 4: The Mandatory Wait (Step 7)
- Patience is Key: The 3-Hour Cooling Rule:
The pie must cool completely for at least three hours on a wire rack-do not rush this step.
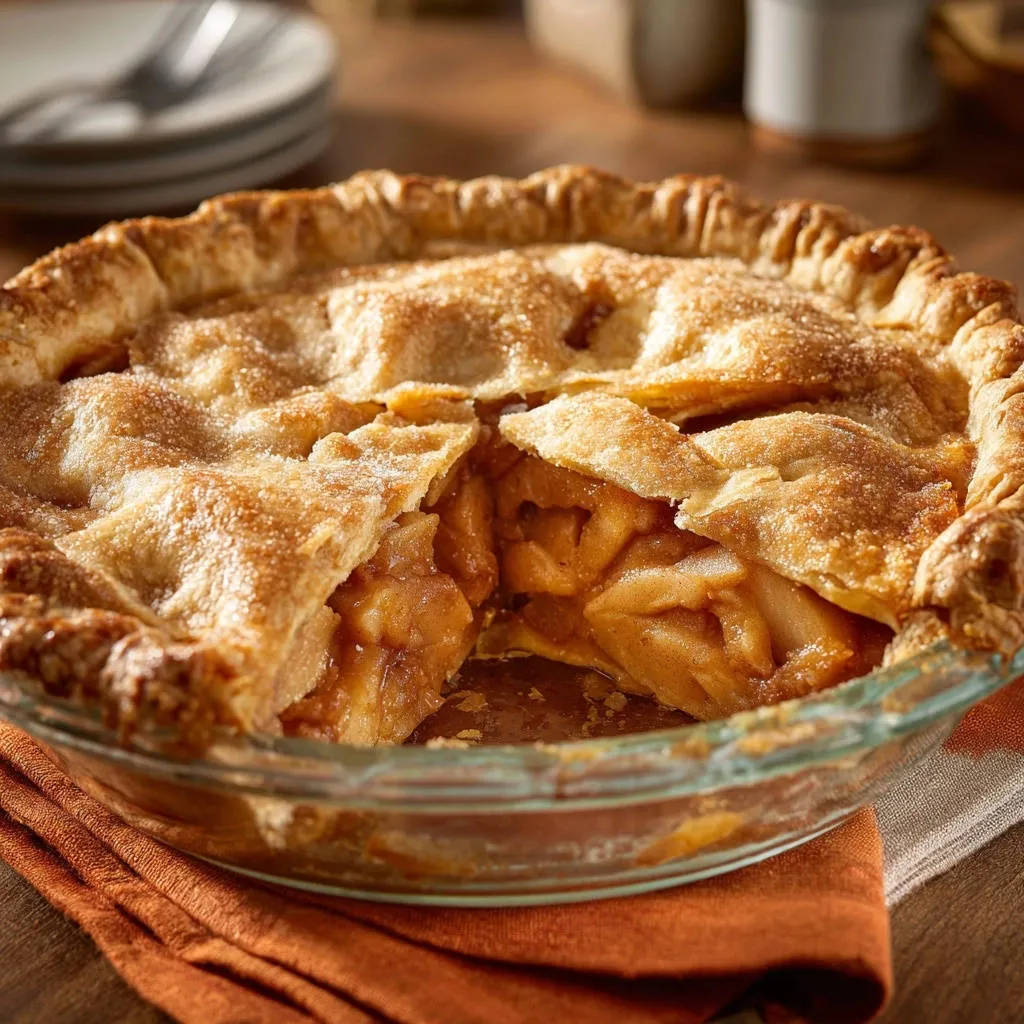
This long cooling window allows the instant tapioca to finish its activation and fully set the filling, guaranteeing a clean, sliceable wedge of Classic Apple Pie Perfection.
Chef’s Secrets: Elevating and Troubleshooting Your Apple Pie Game
Foil Shields for Edge Protection: If the pie edges begin to brown too quickly, lightly wrap the circumference of the crust with strips of aluminum foil halfway through the 375°F bake. This diverts heat and prevents burning.
Testing for Doneness (Beyond Color): While color is important, listen for a vigorous bubbling sound coming from the center vents, indicating the filling has reached the proper temperature (around 200°F or 93°C) and the thickener is fully active.
Avoiding the “Gummy” Filling: If you must substitute tapioca with flour or cornstarch, always toss it thoroughly with the sugar and spices first, before adding it to the apples, to prevent the thickener from clumping when wet.
The Best Slicing Technique: After the mandated cooling period, use a large, thin-bladed, sharp knife. Dip the knife in hot water and wipe it clean between each slice for the cleanest cuts.
Frequently Asked Questions About Classic Apple Pie Perfection
Can I substitute a different thickener for instant tapioca?
While you can use flour or cornstarch (using 1/3 cup), instant tapioca is strongly recommended for this specific recipe.
Tapioca works seamlessly with the pre-draining step, absorbing the liquid without creating a gummy texture, and results in the superior glossy, clear filling this recipe promises.
How do I prevent the bottom crust from becoming soggy?
First, executing the pre-drain step is critical to reducing moisture.
Second, use a glass pie dish for better heat transfer to the bottom, and always place the pie on a preheated baking sheet during the first 15 minutes of high-heat baking.
Can I make this Classic Apple Pie Perfection ahead of time?
Yes, you can assemble the pie fully, including the egg wash, and then chill it for up to 24 hours before baking.
For a baked pie, it can be kept covered at room temperature for up to two days, but refrigeration is best if keeping it longer (up to 4 days).
Preparing Ahead and Storing Your Classic Apple Pie
Freezing an Unbaked Pie
Assemble the pie completely in a disposable aluminum dish (or one safe for freezing). Do not apply the egg wash or sugar yet.
Wrap the pie tightly in plastic wrap, followed by a layer of aluminum foil, and freeze for up to three months.
When ready to bake, apply the egg wash and sugar, and bake directly from frozen, adding approximately 15-25 minutes to the total baking time.
Keeping Leftovers Fresh and Flavorful
Store any leftover baked pie slices tightly covered in the refrigerator. Always ensure the pie is completely cool before covering it, or condensation will create a soggy crust.
To reheat, wrap individual slices lightly in foil and warm in a 350°F (175°C) oven for about 10-15 minutes, which helps crisp the crust while warming the filling.
Serving Suggestions: The Perfect Accompaniment to Classic Apple Pie
Beyond Vanilla: Exploring Different Ice Cream Pairings
While vanilla is traditional, elevate your serving by pairing the warm spiced apples with complementary flavors.
Consider salted caramel ice cream for a salty-sweet contrast, or a scoop of cinnamon or pecan ice cream to enhance the depth of the pie’s spice blend.
Sauces and Toppings for Extra Decadence
A drizzle of homemade bourbon caramel sauce adds a sophisticated warmth that complements the nutmeg beautifully.
For a traditional New England pairing, serve the slice slightly warmed with a thin wedge of sharp cheddar cheese on the side; the tang cuts through the richness of the pie perfectly.
Ready to Bake Your Best Pie Yet?
The quest for truly set, sliceable apple pie ends here. By mastering the simple techniques of pre-draining, utilizing instant tapioca, and respecting the mandatory cooling time, you ensure structural success every time.
This recipe for Classic Apple Pie Perfection offers both incredible flavor and foolproof reliability. Gather your apples and spices-it’s time to create the ultimate comforting dessert your family will request for years to come.
Apple Pie
Course: DessertCuisine: AmericanDifficulty: medium1
(9-inch) Pie / 8 Servings45
minutes1
hour450
kcal60
minutesThis recipe solves the age-old problem of watery apple pie filling by controlling moisture before baking. Utilizing the power of instant tapioca and a crucial 30-minute rest, you draw out excess liquid, ensuring a beautifully thick and glossy filling. Follow the dual-temperature baking process for perfect crust color and a pie that sets flawlessly every time.
Ingredients
2 prepared 9-inch pie crusts (homemade or store-bought)
6 cups mixed baking apples, peeled, cored, and sliced 1/4 inch thick (like Granny Smith and Honeycrisp)
3/4 cup granulated sugar
1/4 cup light brown sugar, packed
1/4 cup instant tapioca (this is the key thickener)
1 tablespoon lemon juice
1 teaspoon ground cinnamon
1/2 teaspoon nutmeg
1/4 teaspoon salt
2 tablespoons unsalted butter, cut into small cubes
1 egg white, beaten with 1 teaspoon water (for egg wash)
1 tablespoon coarse turbinado sugar (for dusting)
Directions
- Prepare the Apple Mix and Release Moisture: In a large bowl, combine the sliced apples, granulated sugar, brown sugar, instant tapioca, lemon juice, cinnamon, nutmeg, and salt. Toss gently until the apples are thoroughly coated. Let this mixture stand for 30 minutes at room temperature. This crucial step allows the sugar to draw excess moisture out of the apples, which is then absorbed by the instant tapioca before baking.
- Preheat and Prep: Preheat your oven to 425 degrees F. Place one prepared pie crust in a 9-inch glass pie dish.
- Drain Excess Liquid (The Secret Step): After the 30-minute rest, you may notice some liquid pooling at the bottom of the bowl. Gently tilt the bowl and drain off any significant excess liquid. Do not rinse the apples. Transfer the apple mixture directly into the bottom pie crust. Dot the top of the apples evenly with the small cubes of butter.
- Assemble and Seal: Place the second pie crust over the filling. Trim and crimp the edges tightly to seal. Cut several vent slits into the top crust using a sharp knife.
- Egg Wash and Bake Prep: Brush the entire top crust with the egg white wash, then sprinkle generously with the coarse turbinado sugar.
- Baking Technique (Prevents Edge Burning): Place the pie on a baking sheet to catch any drips. Bake at 425 degrees F for 15 minutes. Then, reduce the oven temperature to 375 degrees F and continue baking for another 35 to 45 minutes, or until the crust is golden brown and the filling is bubbling thickly in the center vents. If the edges begin to brown too quickly, lightly wrap them with aluminum foil.
- Set the Filling: Transfer the pie to a wire rack and let it cool completely for at least 3 hours before slicing. This mandatory cooling time ensures the instant tapioca finishes its thickening process and the filling sets up into that perfect, sliceable consistency promised in the title.
Notes
- Mandatory cooling for at least 3 hours ensures the instant tapioca fully sets the filling for perfect slicing.