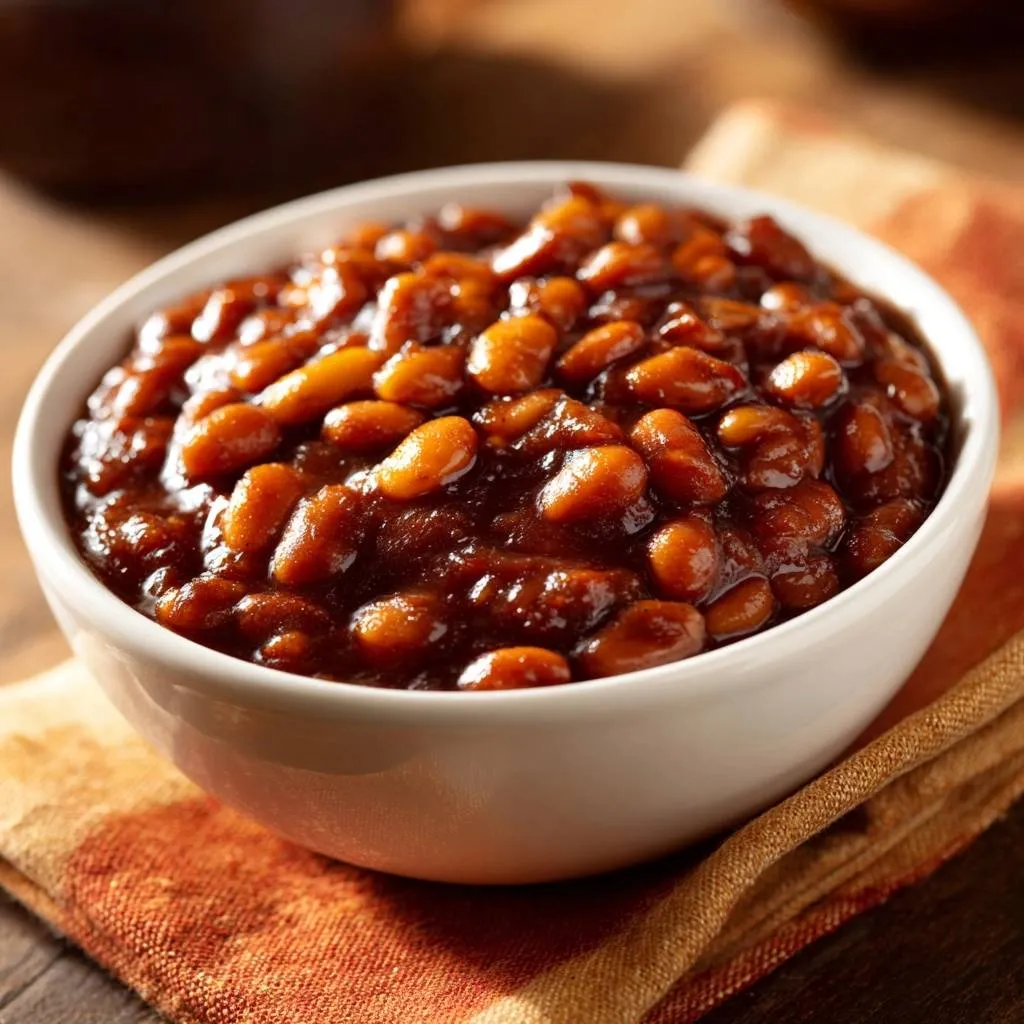
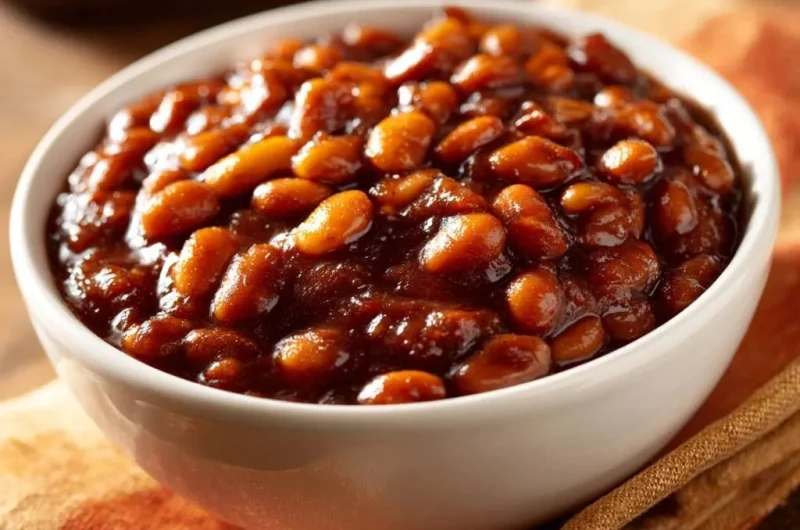
Nothing ruins a backyard BBQ faster than baked beans drowning in watery sauce. You’ve scooped them out, only to watch the thin liquid pool on your plate. This recipe fixes that forever with a simple upfront drain and a low-and-slow uncovered bake.
Therefore, you get that perfect thick, glossy coating that clings to every bean. No cornstarch or complicated thickeners needed. The one-hour bake caramelizes the sugars just right, turning pantry staples into something crave-worthy.
Here’s the expertise kicker: drain and rinse those canned navy beans thoroughly first. That step alone ditches up to 80% of the starchy canning liquid that’s behind most soupy disasters. Oh man, the difference hits you in the first bite, all shiny and sticky-sweet.
Roots of Classic Baked Beans
From Colonial Kettles to Modern Ovens
Native Americans introduced bean porritch to Puritan settlers in 17th-century New England. Those early versions simmered slowly with maple syrup. Settlers adapted it, skipping the salt pork for modern tastes.
In addition, Boston baked beans gained fame during the rum trade era. That’s when molasses stepped in as the star sweetener. Today, we bake them in ovens for that same deep flavor without all-day tending.
However, the cultural pull remains strong at summer gatherings. These beans evoke communal warmth, no fire pit required. You’ll smell that sweet, smoky hint wafting through your kitchen.

Why Navy Beans Define the Classic
Navy beans shine with their small size and creamy texture. High starch content soaks up sauce perfectly during long bakes. They hold shape better than pintos, which can turn mushy.
Great Northern beans work too, but navies absorb more flavor. Canning adds starchy liquid, so draining is key. Rinse under cold water until clear to avoid soupiness.
Therefore, you end up with tender beans in glossy sauce. Freshly rinsed, they coat evenly and taste brighter.
Sauce Components for Classic Baked Beans
Ketchup and Molasses Balance
Ketchup brings tomato acidity and umami as the base. Molasses adds deep bittersweet notes, echoing old maple traditions. Together, they balance sweet and tangy without overpowering.
Use light molasses for milder color and thickness. Blackstrap amps bitterness, so stick to lighter for classic shine. No molasses? Try an equal mix of honey and brown sugar.
The one-cup ketchup to half-cup molasses ratio prevents cloying sweetness. Whisk smooth, and you’ll see it thicken naturally as it bakes.
Brown Sugar, Mustard, Vinegar Layers
Brown sugar’s moisture helps create that glossy finish. Yellow mustard adds emulsifying sharpness for even coating. Apple cider vinegar cuts through with bright acidity.
Smoked paprika and garlic powder deliver subtle smoke, no bacon needed. Add salt last; canned beans pack sodium already. Taste before baking to fine-tune pepper.
Pro tip: the vinegar lowers pH, speeding caramelization safely. Your sauce will gleam after cooling.
For another comforting bake, check out this classic apple crumble that’s always perfectly baked.
Draining Navy Beans Thoroughly
Rinse four cans of navy beans well under cold water. This removes 80% of starchy canning liquid that causes watery messes. Drain in a colander, shaking gently.
Pat dry if you want extra insurance against excess moisture. You’ll notice the beans look cleaner and firmer. Therefore, sauce clings better from the start.
Low-and-Slow Baking Technique
Preheating and Sauce Mixing
Preheat your oven to 325°F. This gentle heat evaporates moisture slowly without scorching sugars. Start whisking with wet ingredients like ketchup, molasses, and vinegar.
Add brown sugar, mustard, and spices next for a smooth emulsion. Whisk until no lumps remain; it should look glossy and uniform. Smell that tangy-sweet aroma building.
Coating Beans Evenly
Fold drained beans into the sauce gently. Vigorous stirring mashes them, so use a spatula for even coating. Every bean should glisten with sauce.
This preserves texture for the bake. You’ll get uniform flavor and caramelization. Pro tip: taste a sauced bean here; adjust seasoning if needed.
Choosing the Right Baking Dish
A 9×13-inch glass dish spreads shallow for max evaporation. Metal conducts heat faster, risking scorched edges. Glass gives even reduction.
Pour mixture in and smooth evenly. Surface area matters for thick sauce.
Uncovered Bake for Thick Sauce
Bake uncovered for one hour at 325°F. Initial moisture releases, then sugars caramelize. Stir halfway for evenness; you’ll see sauce thickening.
Maillard reaction on sugars creates glossy cling. Uncovered beats foil, which traps steam. Check at 30 minutes: sauce should bubble gently, not boil.
At 60 minutes, pull when thickened and shiny. It sets more as it cools. Perfect beans every time.
Science of Thick Classic Baked Beans Sauce
Evaporation vs. Starchy Thickening
Low 325°F temp steams off water steadily without boiling sugars away. Cornstarch thickens gummy; evaporation yields natural silkiness. Molasses pectin helps it gel.
Therefore, sauce reduces by half, coating beans thickly. No fillers needed. Watch it transform from loose to clingy.
Caramelization During Uncovered Bake
Brown sugar breaks into glucose and fructose around one hour, shining up the sauce. Vinegar aids by lowering pH safely. Cooling firms it further.
You’ll smell deep caramel notes filling the air. That’s your cue it’s ready.
Avoiding Watery Classic Baked Beans
Skipping Canning Liquid Traps
Not rinsing doubles liquid volume, leading to soup. Rinsed beans bake thick; un-rinsed stay thin. Always drain first.
Test it yourself next time. The difference is night and day.
Oven Temp and Stir Errors
400°F+ dries edges unevenly. Stick to 325°F. Skip mid-stir, and you get clumps.
In humid kitchens, add 10 minutes. Stir gently halfway fixes most issues.
Make-Ahead Classic Baked Beans Guide
Prep and Storage Timeline
Assemble sauce and beans a day ahead; flavors meld. Bake fresh for best gloss. Fridge stores up to 5 days airtight.
Reheat covered at 300°F with a splash of water. Keeps that shine.
Freezing Thickened Portions
Cool fully, then portion in freezer bags. Lasts 3 months. Thaw overnight, re-bake 20 minutes at 325°F.
Avoid refreezing to prevent mush. Revives like fresh.
Pairing Sides with Classic Baked Beans
Grilled Vegetables Complement
Charred corn and zucchini balance the sweet sauce. Pickled onions add acid to cut richness. Grill veggies simply with oil and salt.
Toss corn with lime post-grill. Perfect foil.
Bread and Protein Matches
Cornbread soaks up sauce perfectly. Coleslaw brings crunch. Pair with veggie burgers or grilled tofu for a full BBQ plate.
Seasonal and satisfying every time.
Flavor Twists on Classic Baked Beans
Spicy Chipotle Variation
Swap smoked paprika for chipotle powder. Dice and sauté onion first, mix in. Heat builds during bake.
Kicks the classic up without overpowering.
Maple Coffee Infusion
Halve molasses, add brewed coffee and maple syrup. Bitterness tempers sweet for New England vibes. Bake as usual.
Rich and complex twist.
Classic Baked Beans FAQ
Can I Use Dry Navy Beans?
Yes, soak overnight, then simmer until tender, about 1-2 hours. Drain well and use 6 cups cooked for four cans. Pros: fresher taste; cons: more time. Sauce may need slight thinning with water.
Why Is My Sauce Still Thin?
Usually under-drained beans or covered baking traps steam. Fix by extending bake 15 minutes uncovered on higher rack. Next time, rinse extra thorough and stir halfway.
How to Scale for Crowds?
Double ingredients for 12 servings, use two 9×13 dishes or one larger pan. Add 15 minutes bake time. Portion extras for freezing in bags up to 3 months.
Vegetarian or Bean Swap Options?
Recipe’s already vegetarian. Swap for cannellini for creamier texture. Check ketchup for gluten-free if needed; most are fine.
Reheating Without Drying Out?
Best: covered low oven at 300°F with water splash, 20 minutes. Stovetop simmer low with lid works too. Microwave last resort on medium power, stir often.
Baked Beans
Course: Side DishCuisine: AmericanDifficulty: easy8
servings15
minutes1
hour280
kcal60
MinutesSick of baked beans swimming in thin, soupy sauce? This foolproof method drains excess liquid upfront and bakes low-and-slow uncovered to evaporate just enough moisture for that perfect thick, glossy coating every time. No cornstarch or fuss needed.
Ingredients
4 cans (15 oz each) navy beans, drained and rinsed well
1 cup ketchup
1/2 cup molasses
1/2 cup brown sugar, packed
2 tablespoons yellow mustard
1 tablespoon apple cider vinegar
1 teaspoon smoked paprika
1/2 teaspoon garlic powder
Salt and black pepper to taste
Directions
- Preheat oven to 325 degrees F. In a large bowl, whisk together ketchup, molasses, brown sugar, mustard, vinegar, smoked paprika, garlic powder, salt, and pepper until smooth.
- Add drained and rinsed beans to the sauce. Stir gently to coat evenly. The thorough draining and rinsing here removes up to 80% of the canning liquid that’s the root of watery beans.
- Pour mixture into a 9×13-inch baking dish. Spread evenly.
- Bake uncovered for 1 hour, stirring once halfway through. This low-temp, uncovered bake slowly evaporates excess moisture while the sugars caramelize into a thick, clingy sauce that coats every bean perfectly without drying out.
- Remove from oven when sauce is glossy and thickened (it will set more as it cools). Serve warm. Stores in fridge up to 5 days.
Notes
- Stores in fridge up to 5 days. Thorough draining and rinsing removes up to 80% of canning liquid to prevent watery sauce.