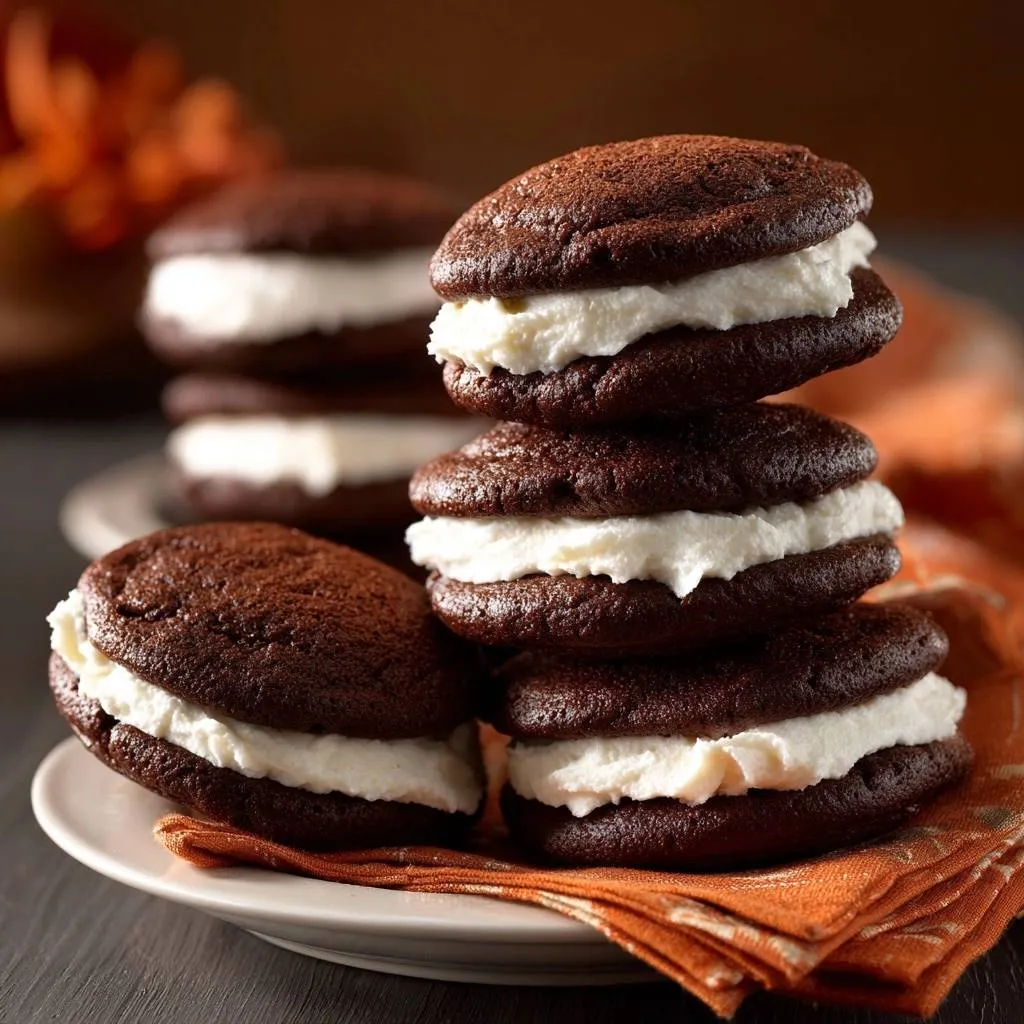
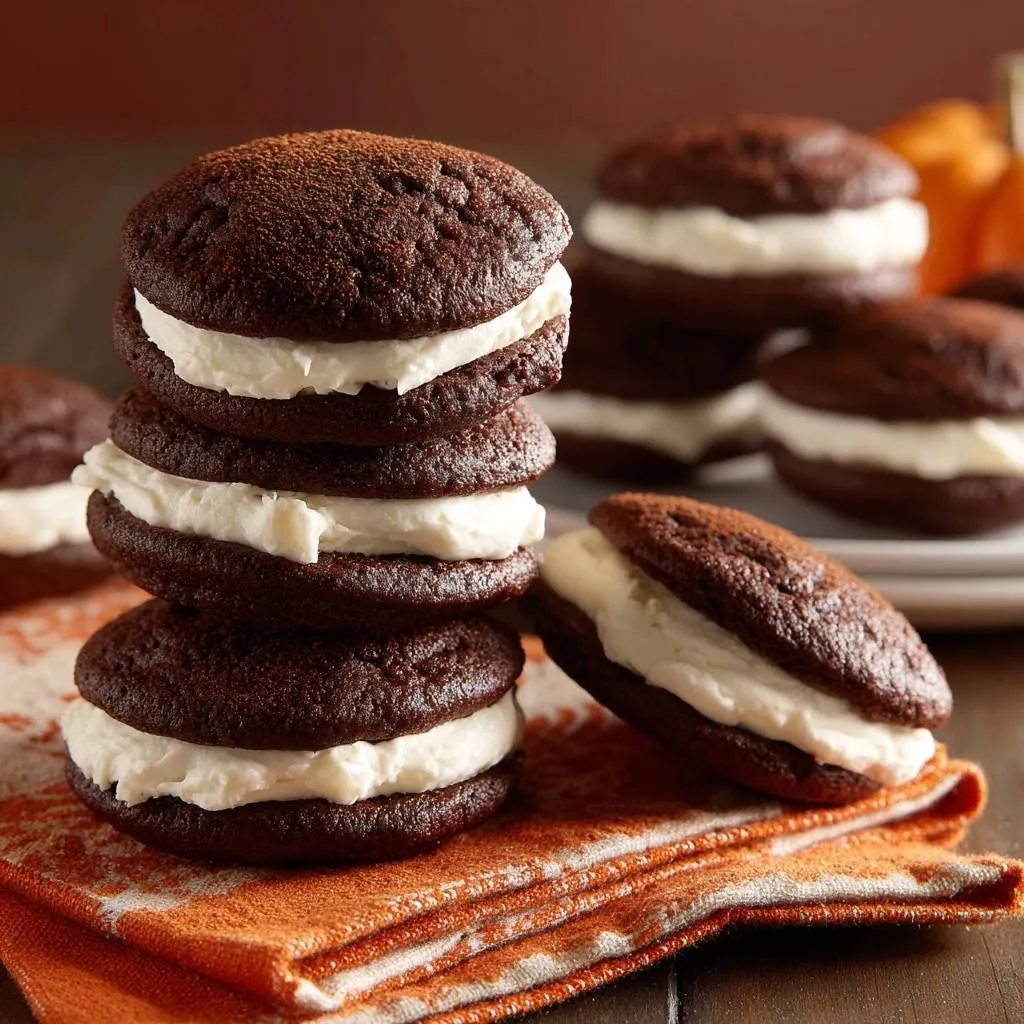
The Classic Chocolate Whoopie Pie is a legendary treat with deep roots in New England and Pennsylvania Dutch country. These handheld sandwiches represent the perfect marriage between a soft, pillowy cake and a creamy, cloud-like center. However, most home bakers face one major frustration: the “filling slide.” You take a bite, and the entire center squishes out the back, leaving you with a mess and a lopsided dessert.
This recipe solves that structural nightmare once and for all. By focusing on the science of aeration and temperature control, we can create a stable, marshmallow-like center that stays exactly where it belongs. You get that nostalgic, tender texture without the structural failure that plagues so many other versions.
The secret lies in a specific chilling and aeration technique that transforms the filling from a soft frosting into a resilient, “grippy” mousse. When you combine this with a cocoa-rich cake base, you achieve a professional-grade result that holds its shape from the first bite to the last. It’s the ultimate fix for a classic dessert problem.
For similar creamy fillings that hold their shape, explore red velvet cheesecake cookies.
Essential Components for Classic Chocolate Whoopie Pies
To get that deep, mahogany color and rich flavor, your choice of cocoa powder is paramount. While natural cocoa works, Dutch-processed cocoa powder offers a darker hue and a smoother, less acidic chocolate profile. This recipe relies on the chemical reaction between the acidic buttermilk and the alkaline baking soda to create a light, airy crumb that doesn’t feel heavy.
For more chocolate goodness, don’t miss our moist chocolate bundt cake recipe.
For more ideas on creating wonderfully fluffy baked goods, check out these marbled chocolate orange muffins.
Using room temperature buttermilk is a non-negotiable step for success. Cold liquids can cause the softened butter in your batter to seize, leading to a curdled appearance and an uneven bake. When the buttermilk is at room temperature, it emulsifies perfectly with the fats, ensuring the baking soda activates immediately upon hitting the oven’s heat.
Furthermore, we use packed brown sugar instead of standard white granulated sugar. Brown sugar contains molasses, which adds a subtle caramel note and, more importantly, attracts moisture. This ensures your cakes remain soft and chewy for days rather than drying out into crumbly biscuits. Freshly sifted powdered sugar for the filling is also vital to prevent any gritty texture in your smooth center.
The Role of Fat in Cake Texture
This recipe utilizes softened unsalted butter for the cake base to provide a rich, dairy-forward flavor that shortening simply cannot match. While shortening is great for height, butter offers a superior mouthfeel that melts at body temperature. The acidity in the buttermilk works to tenderize the gluten, ensuring the cake remains soft despite the use of butter.
Why Vegetable Shortening is Vital for Filling Stability
While we love butter for flavor, vegetable shortening is the secret weapon for structural integrity in the filling. Shortening has a much higher melting point than butter, which means it won’t liquefy as soon as it sits on a kitchen counter. It provides the “grip” and body needed to hold the marshmallow fluff in place.
By blending a small amount of shortening with the butter, you create a hybrid fat base. This base is strong enough to support the weight of the top cake shell without sacrificing the creamy taste. It is the only way to ensure your whoopie pies survive a summer picnic or a warm room without the centers turning into a puddle.
The Science of the Non-Squish Marshmallow Center
Creating a stable center is all about the aeration process. When you beat the butter, shortening, and marshmallow fluff for a full five minutes, you are forcing tiny air bubbles into the fat molecules. This creates a voluminous, stable foam that can support the weight of the chocolate cakes without collapsing.
The “Secret Step” is the 20-minute refrigeration period before assembly. This allows the fats to firm up around the air bubbles you just created. Once chilled, the filling develops a structural set. This set acts like a gasket, allowing you to take a clean bite through the sandwich without the filling escaping through the sides.
Step-by-Step: Mixing the Chocolate Cake Base
Start by creaming your softened butter and brown sugar for at least three minutes. You are looking for a pale, fluffy texture that looks significantly lighter than when you started. This stage is where you build the foundation for the cake’s rise, so don’t rush the process or settle for a gritty mixture.
When adding your ingredients, use the “alternating” method: start with a third of the dry ingredients, add half the buttermilk, and repeat. This technique prevents the batter from breaking and limits gluten development. If you overmix at this stage, your whoopie pies will turn out tough and rubbery instead of tender and cake-like.
The final batter should be thick and glossy. It should hold its shape on a spoon—much thicker than a standard boxed cake mix but softer and more scoopable than a traditional chocolate chip cookie dough. If it feels too runny, let it sit for five minutes to allow the flour to fully hydrate before scooping.
Precision Scooping for Uniform Sandwiches
Consistency is key when making sandwich treats. Use a mechanical cookie scoop to ensure every mound of batter is the exact same size. This ensures that every “top” has a matching “bottom” of the same diameter. Space them at least two inches apart, as these cakes will spread and puff significantly in the oven.
Baking and Cooling for the Perfect Dome
Bake the cakes until the tops feel springy. If you press the center lightly with your finger, it should bounce back immediately. If the indentation remains, they need another minute or two. Be careful not to overbake, as the small cakes can dry out quickly once the moisture evaporates.
Transfer the cakes to a wire rack immediately after they are firm enough to move. If you leave them on the hot baking sheet, the bottoms will continue to cook and may become tough. Air circulation is essential to prevent steam from being trapped underneath, which would otherwise result in a soggy, sticky bottom.
Assembling Your Classic Chocolate Whoopie Pies
For the most professional look, use a piping bag with a large round tip to apply the filling. Start in the center of the flat side of a cake and spiral outward, leaving a small border at the edge. When you place the top cake on, use a gentle, even pressure-point technique to push the filling to the very edge.
Once assembled, place the pies in the refrigerator for another 30 minutes. This final chill allows the moisture from the filling to slightly migrate into the cake crumb. This creates a “grip” between the two components, ensuring the entire sandwich acts as a single, cohesive unit when you finally take that first bite.
Troubleshooting Common Whoopie Pie Failures
If your cakes spread too thin and look like flat pancakes, your oven might be too cool, or you may have over-creamed the butter until it was too warm. Ensure your butter is “cool-room temperature”—it should yield to a finger press but still feel slightly firm. If the batter feels too warm, chill it for 15 minutes before baking.
Grainy filling is almost always caused by skipping the sifting step for the powdered sugar. Even small clumps of sugar won’t fully dissolve into the fat base during mixing. Always sift your sugar through a fine-mesh sieve to ensure a velvety, professional mouthfeel that mimics the best bakeries.
Sticky tops are a common issue in humid environments. If your cakes feel tacky to the touch, a light dusting of cocoa powder acts as a moisture barrier and adds a sophisticated matte finish. If the filling feels like it is melting during assembly, it simply hasn’t chilled long enough. Return it to the fridge until it feels firm and holds its shape.
Storage and Make-Ahead Strategies
Whoopie pies actually taste better on the second day. The flavors have time to meld, and the cake softens slightly from the filling. Store them in an airtight container in the refrigerator for up to five days. If you prefer to eat them at room temperature, take them out 15 minutes before serving, but keep them away from direct heat.
For long-term storage, these freeze beautifully. Wrap each individual pie in parchment paper and then place them in a heavy-duty freezer bag. This prevents them from sticking together and protects the delicate cake from freezer burn. They will stay fresh for up to three months; just thaw them in the fridge overnight before enjoying.
Expert Tips for Flavor Variations
Once you master the base recipe, you can experiment with sophisticated flavor profiles. Adding a teaspoon of espresso powder to the dry ingredients won’t make the cakes taste like coffee; instead, it intensifies the chocolate notes and adds a wonderful depth. It is a classic baker’s trick for any chocolate-based dessert.
More Sweet Treats to Try
If you enjoyed these chocolate whoopie pies, you might like these other baked goods.
- For a breakfast treat with similar campfire flavors, consider S’mores Pancakes, perfect for a sweet start.
- If you’re in the mood for another handheld chocolate delight, whip up these Chocolate Sprinkle Donuts for a bakery-style finish at home.
For a holiday twist, swap the vanilla extract in the filling for peppermint extract and roll the edges in crushed candy canes. If you love a sweet-and-salty combo, swirl a tablespoon of thick salted caramel into the marshmallow filling just before piping. These variations keep the structural integrity of the recipe while offering a totally different experience.
Frequently Asked Questions
Can I substitute the buttermilk?
You can make a quick substitute by adding one tablespoon of lemon juice or white vinegar to a cup of whole milk and letting it sit for five minutes. However, real buttermilk is thicker and more acidic, which provides a much better rise and a distinct tang that balances the sweet filling. Use the real stuff if you can find it.
Why did my cakes turn out dry?
Dry cakes are usually the result of over-baking or over-measuring the flour. If you scoop your measuring cup directly into the flour bag, you likely packed it down, resulting in too much flour. Use the “spoon and level” method or a kitchen scale. Also, check your cakes at the 10-minute mark; even two extra minutes can dry them out.
How do I get a perfectly smooth filling?
The key to a smooth filling is the duration of the whipping process and sifting your sugar. You must beat the fats and marshmallow fluff until they are completely homogenous before adding the sugar. If you add the sugar too early or don’t sift it, you will end up with tiny lumps that are impossible to beat out later.
Can I make these without a stand mixer?
Yes, you can use a standard electric hand mixer. However, keep in mind that hand mixers are generally less powerful than stand mixers. You will likely need to increase the beating time for the filling by an extra 2 or 3 minutes to achieve the same level of aeration and stability required to prevent the “squish” effect.
Chocolate Whoopie Pies
Course: DessertCuisine: AmericanDifficulty: medium12
sandwiches25
minutes12
minutes340
kcal37
MinutesA chocolate sandwich cookie cake featuring a stable, marshmallow-like center. This version solves the common problem of filling sliding out by using a specific aeration and chilling method.
Ingredients
For the Cakes:
2 cups all-purpose flour
1/2 cup unsweetened cocoa powder (plus extra for dusting)
1 1/4 teaspoons baking soda
1 teaspoon salt
1 cup buttermilk, room temperature
1 teaspoon vanilla extract
1/2 cup unsalted butter, softened
1 cup packed brown sugar
1 large egg
For the Stable Filling:
1/2 cup unsalted butter, softened
1/4 cup vegetable shortening (essential for structural stability)
1 1/2 cups marshmallow fluff
1 1/2 cups powdered sugar, sifted
1 teaspoon vanilla extract
1/4 teaspoon salt
Directions
- Preheat your oven to 350 degrees F and line two large baking sheets with parchment paper.
- In a medium bowl, whisk together the flour, cocoa powder, baking soda, and salt. In a separate small bowl, stir the vanilla into the buttermilk.
- In a large bowl, cream the butter and brown sugar until light and fluffy (about 3 minutes). Add the egg and beat until well combined.
- Alternate adding the dry ingredients and the buttermilk to the butter mixture, beginning and ending with the dry ingredients. Mix until just combined; do not overmix or the cakes will be tough.
- Drop rounded tablespoons of batter onto the prepared sheets, spacing them 2 inches apart. Bake for 10 to 12 minutes until the tops spring back when touched. Let them cool completely on a wire rack.
- To solve the squishing filling problem, prepare the center by beating the butter, shortening, and marshmallow fluff together for a full 3-5 minutes until very pale and voluminous. Gradually add the powdered sugar, salt, and vanilla. Beat for another 2 minutes until stiff peaks form.
- The secret step: Place the finished filling in the refrigerator for 20 minutes before assembly. This firms up the fats and creates a structural set that prevents the “squish” effect.
- Pipe or spoon a generous amount of the chilled filling onto the flat side of half the cakes. Top with the remaining cakes and press gently.
- Visual Finish: Using a fine-mesh sieve, lightly dust the tops of the assembled whoopie pies with extra cocoa powder to achieve the matte, professional finish shown in the image.
- Store in the fridge for 30 minutes before serving to allow the filling to fully grip the cake. Keep leftovers refrigerated.
Notes
- The secret to the non-squish filling is the combination of shortening and a 20-minute chill time before assembly. Store in the refrigerator to maintain structural integrity.