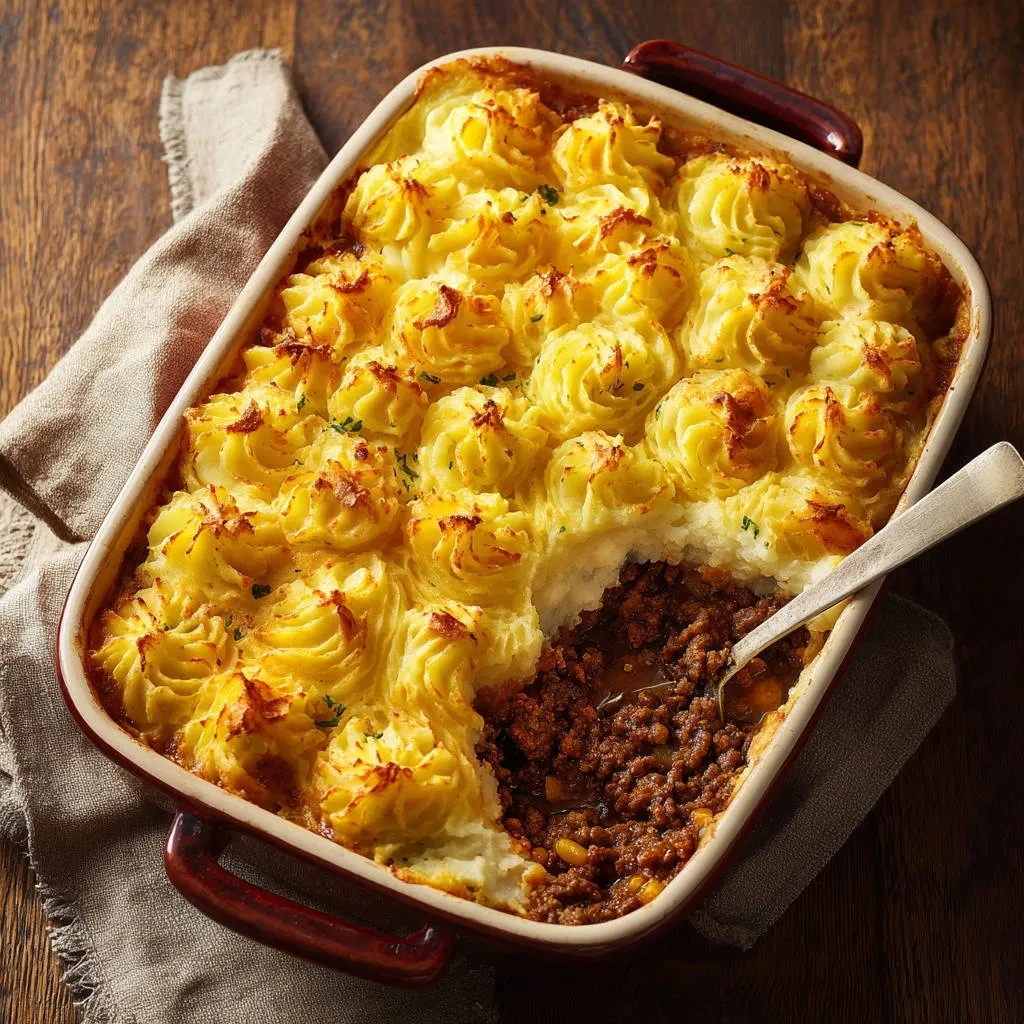
For years, my quest for the ultimate Classic Cottage Pie was a battle against soggy fillings and, most frustratingly, a gluey mashed potato topping. It’s a common culinary heartbreak, transforming a beloved comfort food into something less than stellar.
But through trial and error, I uncovered the game-changing secrets to achieving that perfect, airy potato crown and a rich, deeply flavorful beef filling. This recipe is the culmination of that journey, ensuring every spoonful is pure, unadulterated comfort.
Why This Classic Cottage Pie Belongs in Your Recipe Box
This isn’t just another Classic Cottage Pie recipe; it’s a meticulously crafted guide designed to deliver perfection every time. It addresses common pain points with clever, simple techniques.
The “No More Gluey Mash” Promise
The star of this dish, beyond its savory filling, is undoubtedly the potato topping. We tackle the dreaded watery or gluey mash head-on with a critical moisture-removal step.
This technique guarantees a light, fluffy, and golden brown crust that holds its beautiful piped shape and adds incredible texture without being heavy.
Flavorful Filling, Every Time
Our filling is built on layers of robust flavors, starting with perfectly browned ground beef and a classic mirepoix. A touch of tomato paste and aromatic thyme deepen its savory profile.
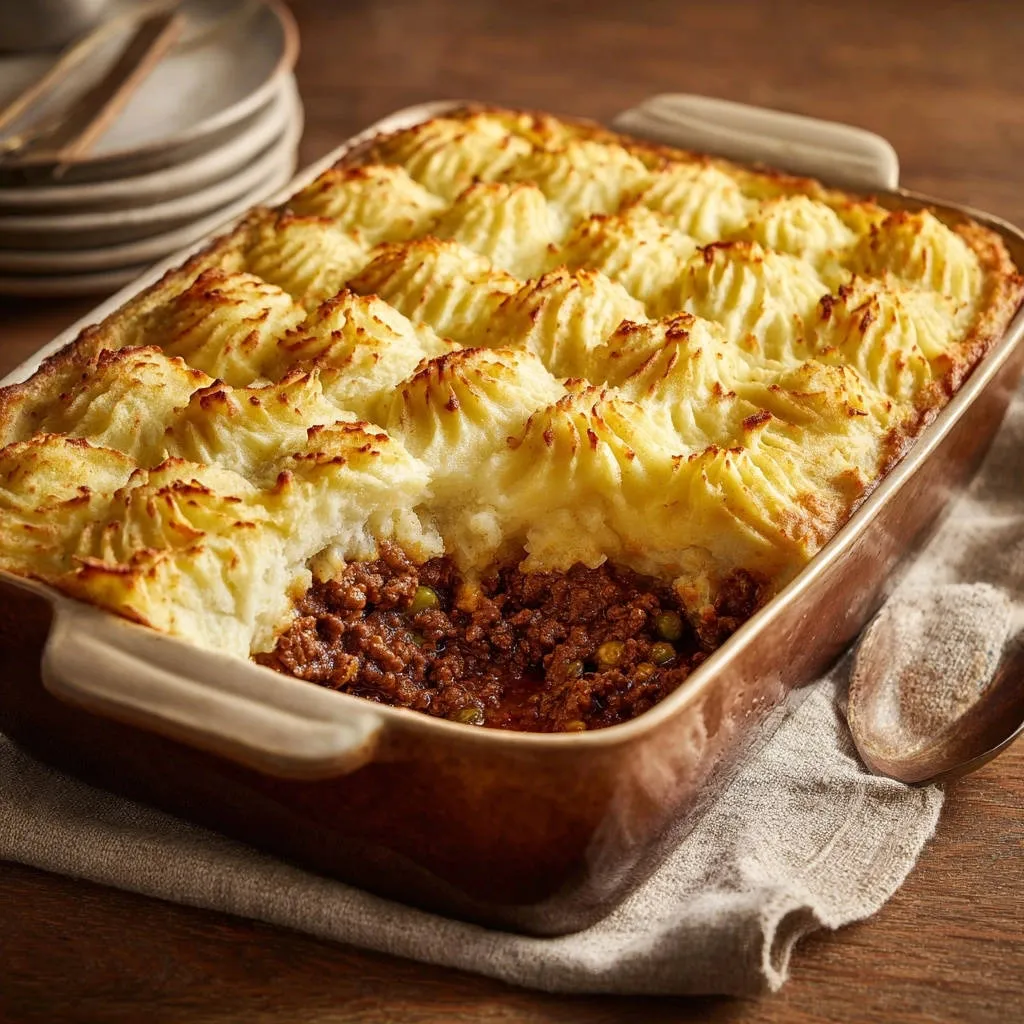
The result is a rich, satisfying base that beautifully complements the creamy potatoes, making every bite of this classic comfort food truly memorable.
Family-Friendly Comfort, Elevated
Classic Cottage Pie is the quintessential family meal, hearty and universally loved. This recipe elevates that experience, offering gourmet-level taste with straightforward steps.
It’s the ideal dish for cozy evenings, feeding a crowd, or preparing ahead for busy weeknights, delivering warmth and satisfaction with ease.
Gathering Your Ingredients for Classic Cottage Pie Excellence
Quality ingredients are the foundation of any great dish. Here’s a closer look at what you’ll need and why each component is crucial for our Classic Cottage Pie.
For the Rich, Savory Filling
Ground Beef: Opt for lean ground beef (85-90%) to minimize excess fat. A good browning is essential for deep flavor, creating those delicious, caramelized bits.
Aromatics (Onion, Carrots, Celery, Garlic): These are the flavor backbone, known as mirepoix. Dice them evenly so they cook down consistently and infuse the filling with sweetness and depth.
Tomato Paste: This concentrated paste adds umami and richness, contributing to a savory, well-rounded flavor profile. Don’t skip the brief cooking step to deepen its flavor.
Beef Broth & Thyme: Good quality beef broth provides liquid and flavor, while dried thyme offers a classic, earthy aroma that pairs perfectly with beef and vegetables.
Frozen Corn & Peas: These add a pop of color, sweetness, and extra texture, making the filling more vibrant and appealing.
The Secret to Heavenly Potato Topping
Russet Potatoes: These starchy potatoes are perfect for mashing because they break down easily, resulting in a fluffy texture. Avoid waxy varieties like Yukon Golds for this recipe.
For another hearty potato dish, try this loaded cheesy beef & potato bake.
Unsalted Butter: Softened butter incorporates smoothly, adding essential richness and a silky texture to the mash. Unsalted allows you to control the overall saltiness.
Warm Whole Milk or Half & Half: Warm dairy mixes more easily into hot potatoes without cooling them down, preventing a gluey texture. Whole milk offers creamy richness.
Egg Yolk (Optional, but Recommended): This is the secret for incredible richness and helps the topping achieve that gorgeous golden-brown finish and sturdy structure in the oven. It’s a small addition with a big impact on your Classic Cottage Pie.
Essential Tools for Your Classic Cottage Pie Journey
Having the right tools makes the cooking process smoother and ensures the best results. These items will be invaluable for crafting your perfect Classic Cottage Pie.
Must-Haves for the Filling
Large Oven-Safe Skillet or Dutch Oven: Ideal for browning the meat and building the filling all in one pot, minimizing cleanup. If not oven-safe, a 9×13 inch casserole dish will be needed.
Sturdy Spoon or Spatula: Essential for breaking up ground beef and stirring the vegetables evenly.
Achieving the Perfect Mash
Large Pot: For boiling your potatoes. Ensure it’s large enough to prevent overflow once the potatoes are added and covered with water.
Potato Ricer or Sturdy Masher: A ricer creates the absolute lightest, fluffiest mash. If using a masher, choose one with a wide, flat head for efficient mashing and avoid overworking the potatoes.
Piping Bag with Star Tip (Optional): For that classic, professional-looking ridged potato topping. A large Ziploc bag with a corner snipped off works just as well for a rustic piped finish.
Step-by-Step: Crafting Your Classic Cottage Pie
Preparing the Hearty Beef Base
Preheat your oven to 400°F (200°C) to get ready for baking. Heat two tablespoons of olive oil in a large oven-safe skillet or Dutch oven over medium-high heat.
Add the ground beef, breaking it up with your spoon, and cook until it’s thoroughly browned and no pink remains. This browning is crucial for developing deep, savory flavor.
Once browned, carefully drain off any excess fat to prevent a greasy filling, then set the cooked meat aside in a separate bowl for later.
Building Layers of Flavor
Reduce the heat to medium in the same skillet. Add the diced onion, carrots, and celery, cooking them until they soften, which usually takes about 5 to 7 minutes.
Stir in the minced garlic and tomato paste, cooking for just one minute until fragrant. This brief cooking step mellows the garlic and intensifies the flavor of the tomato paste.
Return the browned ground beef to the skillet. Pour in the beef broth and sprinkle in the dried thyme.
Bring the mixture to a gentle simmer and let it cook for about 5 minutes, allowing the liquid to slightly reduce and thicken, creating a rich sauce.
Finally, stir in the frozen corn and peas mixture, season the filling generously with salt and pepper, and remove the skillet from the heat. If your skillet isn’t oven-safe, transfer the entire filling to a 9×13 inch casserole dish.
The Critical Potato Prep: Drying for Fluffiness
Place the peeled and quartered Russet potatoes in a large pot and cover them generously with cold, salted water. Bring to a boil and cook until the potatoes are easily pierced with a fork, approximately 15 to 20 minutes.
This next step is the game-changer for a non-watery, fluffy mash. Drain the potatoes completely in a colander, shaking vigorously to remove as much water as possible.
Immediately return the hot, drained potatoes to the empty, hot pot (removed from the heat). Place the pot back on the burner set to very low heat and shake the potatoes constantly for 2 to 3 minutes.
This vital process evaporates the trapped moisture within the potatoes, guaranteeing a light, airy mash that will absorb the dairy without becoming gluey or watery – the true secret to this Classic Cottage Pie.
Mashing to Perfection (No Gumminess!)
Remove the pot from the heat. Pass the dried potatoes through a potato ricer directly into a large bowl for the silkiest texture, or mash them thoroughly with a sturdy masher.
Add the softened butter, warm milk, salt, pepper, and the optional egg yolk to the mashed potatoes. The egg yolk adds richness and helps with browning.
Gently fold everything together until just combined and smooth. Be careful not to overmix, as this will activate the potato starches and result in an undesirable gummy texture.
Assembling and Baking Your Masterpiece
Transfer the mashed potatoes into a large piping bag fitted with a star tip for an elegant finish, or simply use a spoon to dollop it onto the filling. Spread the mash evenly over the cooled meat, ensuring the edges are sealed tightly against the dish.
Bake the Classic Cottage Pie in your preheated oven for 20 to 25 minutes, or until the savory filling is bubbling hot and the potato topping is beautifully golden brown and slightly crisp on top.
Once baked, let the pie rest for 5 to 10 minutes before serving. This allows the filling to set and prevents it from being too runny when scooped.
Unlock the Secrets: Expert Tips for Your Best Cottage Pie
Even with a great recipe, a few expert tips can elevate your Classic Cottage Pie from delicious to unforgettable. These are the small details that make a big difference.
Mastering the Moisture-Free Mash
The key to fluffy mashed potatoes lies in removing as much moisture as possible after boiling. The “drying in the pot” technique is non-negotiable for this recipe.
Don’t rush it; those few minutes of shaking over low heat truly transform the texture, ensuring a light and absorbent base for your butter and milk without gumminess.
Flavor Enhancers for Your Filling
Consider adding a splash of Worcestershire sauce or a teaspoon of Dijon mustard to your beef filling during the simmering stage for an extra layer of savory depth. These ingredients subtly enhance the umami without overpowering the classic flavors.
For an even richer flavor, you might want to try making your own fantastic homemade beef broth, which adds incredible depth to many dishes, including your Classic Cottage Pie.
Presentation Matters: Piping or Spreading
For that iconic look, a piping bag with a star tip creates beautiful ridges that brown perfectly and add a satisfying textural contrast. If you don’t have one, a sturdy freezer bag with a corner snipped off works wonders.
Alternatively, a fork can be used to create rustic peaks and swirls on the surface of the mash. These ridges catch the heat, resulting in more crispy, golden spots.
Don’t Rush the Rest!
Allowing your Classic Cottage Pie to rest for 5-10 minutes after baking is crucial. This step lets the hot filling settle and thicken slightly, preventing it from running all over the plate when you serve it.
It also allows the flavors to meld beautifully, making for a more enjoyable eating experience.
Troubleshooting Common Cottage Pie Conundrums
Even experienced cooks encounter hiccups. Here are solutions to common Classic Cottage Pie problems, ensuring your dish is always a success.
“Why is my mash watery?”
The most common culprit is insufficient drying of the potatoes after boiling. Ensure you thoroughly drain them and then perform the crucial step of shaking them over low heat in the empty pot for 2-3 minutes.
This process evaporates excess moisture, preventing a thin or gluey mash. Also, make sure your milk/half-and-half is warm, not cold, to avoid cooling the potatoes and making them gummy.
“My filling is too runny!”
A runny filling typically means it hasn’t simmered long enough to reduce. Next time, allow the filling mixture to simmer a bit longer (an additional 5-10 minutes) until it thickens to a consistency similar to a stew, coating the back of a spoon.
If already assembled, you can try returning the casserole dish to the oven for a few extra minutes, allowing more liquid to evaporate. Alternatively, before assembly, a cornstarch slurry (1 tbsp cornstarch mixed with 1 tbsp cold water) can be stirred in and simmered for 1 minute to thicken.
“The topping isn’t browning properly.”
This could be due to a few factors. Ensure your oven is fully preheated to the correct temperature. The egg yolk in the mash is a great helper for browning, so don’t skip it if you want that golden crust.
If the pie is cooked through but lacks color, a quick blast under the broiler for 1-2 minutes (watch carefully to prevent burning!) will achieve that beautiful golden-brown finish.
Serving, Storing, and Make-Ahead Magic
Maximize the enjoyment and convenience of your delicious Classic Cottage Pie with these practical tips.
Delightful Serving Suggestions
Classic Cottage Pie is a complete meal on its own, but it pairs wonderfully with a simple, crisp green salad dressed with vinaigrette to cut through its richness. Consider a simple green salad that stays perfectly crispy for a balanced meal.
Steamed or roasted seasonal vegetables, such as asparagus or green beans, also make excellent accompaniments, adding freshness and extra nutrients to your plate.
Storing Leftovers Like a Pro
Leftover Classic Cottage Pie stores beautifully. Once cooled, cover the dish tightly with plastic wrap or aluminum foil and refrigerate for up to 3-4 days. For individual portions, transfer scoops into airtight containers.
To reheat, cover and warm in a 350°F (175°C) oven until heated through, or microwave individual servings until hot. A quick broil at the end can revive that crispy topping.
Freezer-Friendly Classic Cottage Pie
Cottage pie is an excellent make-ahead meal. Assemble the entire pie, but do not bake it. Once assembled, wrap the unbaked pie tightly with two layers of plastic wrap and one layer of aluminum foil.
Freeze for up to 2-3 months. To bake from frozen, remove foil and plastic, cover loosely with foil, and bake at 350°F (175°C) for about 60-75 minutes, then uncover and bake for another 20-30 minutes until golden and bubbling.
Your Burning Questions Answered: Classic Cottage Pie FAQs
Can I use different meats?
Absolutely! While ground beef is traditional for Classic Cottage Pie, you can certainly experiment. Ground lamb makes it Shepherd’s Pie (its close cousin), offering a distinct, rich flavor.
You could also use ground turkey or chicken for a lighter version, though you might want to add a bit more seasoning and perhaps some crispy bacon bits for extra flavor. For more inspiration on working with beef, check out our guide to hearty beef stew recipes.
What about vegetarian options?
Yes, a vegetarian cottage pie is delicious! Replace the ground beef with a hearty mix of sautéed mushrooms, lentils, finely diced root vegetables (like parsnips or sweet potatoes), and a rich vegetable broth. Cook down similarly to the beef filling for a robust vegetarian alternative.
Can I make the filling ahead of time?
Yes, the filling is perfect for making ahead. Prepare the entire beef and vegetable filling, let it cool completely, then store it in an airtight container in the refrigerator for up to 2 days. When ready to assemble, simply warm it gently before topping with fresh mashed potatoes and baking.
Is an egg yolk necessary for the topping?
While optional, the egg yolk adds a wonderful richness and helps the potato topping achieve a beautiful golden-brown color and a slightly sturdier texture. If you omit it, your mash will still be delicious, but it might be a little less vibrant in color and slightly softer.
Ready to Impress? Share Your Classic Cottage Pie Masterpiece!
You now possess all the secrets to crafting a truly exceptional Classic Cottage Pie with that coveted fluffy, golden topping and a deeply satisfying, savory filling. This isn’t just a recipe; it’s your new go-to guide for a beloved comfort food.
Gather your ingredients, follow these proven steps, and prepare to delight your family and friends. Don’t forget to savor every warm, comforting bite!
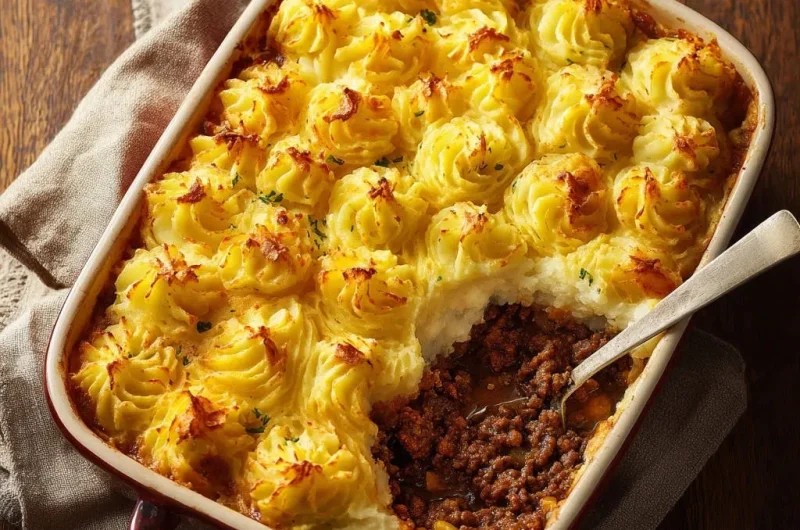
Cottage Pie
Course: Main CourseCuisine: BritishDifficulty: medium6
servings25
minutes1
hour650
kcal85
minutesThis Classic Cottage Pie recipe guarantees airy, golden potato peaks and a rich, savory ground beef filling every time. Discover the simple secret to achieving a perfectly fluffy, non-watery mash that elevates this comforting dish. Say goodbye to dense, gluey potatoes and enjoy a family favorite perfected.
Ingredients
For the Filling:
2 tablespoons olive oil
1.5 pounds ground beef
1 large yellow onion, diced
3 carrots, diced
2 celery stalks, diced
3 cloves garlic, minced
1 tablespoon tomato paste
1 cup beef broth
1 teaspoon dried thyme
1/2 cup frozen corn and peas mixture
Salt and pepper to taste
For the Potato Topping:
3 pounds Russet potatoes, peeled and quartered
4 tablespoons unsalted butter, softened
1/2 cup warm whole milk or half and half
1/2 teaspoon salt
1/4 teaspoon pepper
1 egg yolk (optional, for extra richness and browning)
Directions
- Prepare the Filling: Preheat oven to 400 degrees F. Heat the olive oil in a large oven-safe skillet or Dutch oven over medium-high heat. Add the ground beef and cook, breaking it up with a spoon, until browned. Drain off any excess fat and set the meat aside.
- Build the Flavor Base: Reduce the heat to medium. Add the diced onion, carrots, and celery to the pan. Cook until softened, about 5 to 7 minutes. Add the minced garlic and tomato paste and cook for 1 minute until fragrant.
- Finish the Filling: Stir the ground beef back into the skillet. Add the beef broth and thyme. Bring the mixture to a simmer and cook for 5 minutes, allowing the liquid to slightly reduce and thicken. Stir in the frozen corn and peas mixture, season with salt and pepper, and remove from heat. Transfer the filling to a 9×13 inch casserole dish if you used a skillet that is not oven-safe. Cook until no pink remains and it reaches 160°F (71°C).
- Boil the Potatoes: Place the peeled and quartered potatoes in a large pot and cover with cold, salted water. Bring to a boil and cook until the potatoes are easily pierced with a fork, about 15 to 20 minutes.
- The Fluffy, Non-Watery Fix: This is the most critical step. Drain the potatoes completely, then immediately return them to the empty, hot pot (off the heat). Place the pot back on the burner set to low and shake the potatoes constantly for 2 to 3 minutes. This crucial step dries out the excess moisture trapped in the potatoes, ensuring a light, fluffy mash that absorbs the dairy without becoming gluey or watery.
- Mash and Enrich: Remove the pot from the heat. Pass the potatoes through a ricer or mash thoroughly. Add the softened butter, warm milk, salt, pepper, and the optional egg yolk. Gently fold everything together until just combined. Overmixing will cause gumminess.
- Assemble the Pie: Transfer the mashed potatoes into a large piping bag fitted with a star tip (or just use a spoon to dollop). Pipe or spread the mash evenly over the cooled meat filling, sealing the edges tightly against the dish.
- Bake: Bake for 20 to 25 minutes, or until the filling is bubbling hot and the potato topping is beautifully golden brown. Let rest 5 to 10 minutes before serving.
Notes
- The crucial potato drying step prevents a watery mash and ensures a light, fluffy topping. Avoid overmixing the mashed potatoes to maintain texture.