The search for the perfect, pillowy cinnamon roll often ends in frustration-with dry, crusty edges dominating the baking experience.
After years of perfecting this beloved treat, I finally cracked the code with one simple moisture-locking technique that transforms the roll’s structure entirely.
This is the definitive recipe for truly gooey and soft Classic Cream Cheese Cinnamon Rolls, guaranteeing a bakery-quality result at home.
For another delightful take on this classic, explore glazed pecan cinnamon rolls.
The “Never Dry” Secret: Why This Recipe Guarantees Ultra-Fluffy Rolls
Unlike standard recipes, our method incorporates one critical, step-seven addition that ensures a moist, bakery-soft texture every single time.
This section explains the science behind our fluffiness guarantee and the unique technique used to achieve it.
Addressing Common Frustrations: The Tough, Crusty Roll Problem
Dry rolls usually stem from insufficient fat content in the dough or, most commonly, over-baking, which allows too much internal moisture to escape before the gluten structure sets.
This recipe combats that moisture loss by proactively introducing a liquid barrier and a reserve of fat directly into the baking pan, preserving the soft interior.
The Role of Heavy Cream vs. Milk in Baking Moisture
Heavy cream is far superior to regular milk for the critical soak technique because its high-fat content (typically 36% or more) acts as an insulator and tenderizer.
When poured over the rolls, this fat layer absorbs into the dough’s base as it bakes, preventing the crust from forming prematurely and locking in moisture.
Texture vs. Flavor: What the Cream Soak Achieves
The heavy cream soak technique is designed purely for exceptional texture, achieving that famously gooey center and irresistibly soft bottom layer.
Because the cream is added post-rise and pre-bake, it infuses the rolls with richness and moisture without diluting the highly concentrated flavor of the brown sugar and cinnamon filling.
Essential Components: The Building Blocks of Your Classic Rolls
Mastering the ingredients means understanding how each component functions to support the final, delicate dough structure.
Foundation of the Dough: Temperature and Ratio Insights
Milk Temperature: The precise range of 105°F to 115°F is scientifically proven to activate active dry yeast efficiently without thermal shocking the culture.
The small amount of granulated sugar acts as the initial food source for the yeast, helping it bloom quickly and creating a strong foundation for the dough.
We use cooled melted butter, rather than soft butter, because it blends seamlessly into the mixture without interfering with the early stages of gluten development or shocking the yeast.
The inclusion of one large egg adds essential richness and provides necessary structure for the exceptionally fluffy soft dough.
The Perfectly Spiced Filling: Cinnamon and Brown Sugar Balance
Using packed brown sugar is non-negotiable as the naturally occurring molasses adds depth of flavor and crucial moisture to the filling, helping it melt beautifully.
The specified ratio of packed brown sugar to ground cinnamon provides a pronounced, warm spice without the astringent bitterness that can occur with too much cinnamon.
For those who appreciate rich spice, you might also enjoy the old-fashioned gingerbread cake.
Crafting the Signature Cream Cheese Frosting
The key to light, fluffy cream cheese frosting is ensuring both the cream cheese and butter are perfectly softened at cool room temperature, never warm or greasy.
This ideal temperature allows the fat and cream cheese to incorporate maximum air volume during the beating process, resulting in an airy finish.
The whole milk is added gradually, adjusting the consistency until the frosting is easily spreadable but still holds its shape, creating a thick, glossy glaze.
Equipment Checklist: Setting Up Your Cinnamon Roll Station
Stand Mixer (Optional but Recommended): Speeds up the kneading process significantly, ensuring the five to seven minutes of work results in a uniform and smooth, elastic dough without overheating it.
Digital Thermometer: Essential for checking the milk temperature to guarantee optimal yeast proofing and prevent wasting ingredients due to inactivity.
9×13 Inch Baking Pan: The ideal size for 9 to 12 large rolls, allowing enough space for the critical second rise without crowding them, which ensures even baking.
Dental Floss (Unflavored): The secret tool for cutting perfect, non-compressed rolls; it slides between the layers of the log without squashing the delicate structure.
Mixing, Kneading, and Rising: Mastering the Dough Structure
Creating the perfect dough involves precision in temperature and timing, particularly during the initial activation and subsequent rising periods.
Activating the Yeast: The Foamy Test
Proofing should yield a bubbly, thick layer of foam after 5 to 10 minutes, indicating that the yeast is alive and active.
If you don’t see substantial foam, your milk was either too hot or too cold, and you must start the dough preparation over to ensure a proper rise.
The Goldilocks Zone: Achieving Proper Dough Elasticity (The Kneading Process)
Kneading for exactly five to seven minutes develops the necessary gluten for structure, resulting in a smooth, soft, but not sticky, elastic dough.
Avoiding over-kneading is vital, as excessive gluten development incorporates too much air and makes the finished cinnamon rolls tough and chewy.
The First Rise: Signs of Success and Finding a Warm Spot
The ideal warm environment-often near an oven or in a slightly warmed, turned-off oven-allows the dough to double in size within 60 to 90 minutes.
This increase in volume during the first rise is absolutely essential for achieving the necessary light, airy internal structure of the final product.
Shaping Perfection: From Rectangle to Tightly Rolled Log
Uniform shaping ensures all the Classic Cream Cheese Cinnamon Rolls bake evenly and look visually stunning.
Achieving the Ideal 12×18 Inch Rollout
Aim for a consistent thickness across the entire dough rectangle to guarantee all parts of the roll bake at the same rate.
Using a measuring tape or ruler periodically helps maintain the desired 12-by-18-inch dimension, which results in standard-sized bakery rolls.
Distributing the Filling Evenly
Use the back of a spoon or an offset spatula to spread the softened butter completely across the dough, ensuring full coverage up to the specified one-inch border.
That one-inch border, left free of filling, is crucial for securely pinching the log shut and preventing the cinnamon sugar mixture from leaking out during the rise and bake.
Tips for Clean Cutting: Floss Versus Knife
Using unflavored dental floss provides the cleanest slice because it cuts through the tight layers of the dough without compressing them.
To use it, slide the floss under the log at your desired mark, cross the ends over the top, and pull sharply in opposite directions to achieve a perfectly round cut.
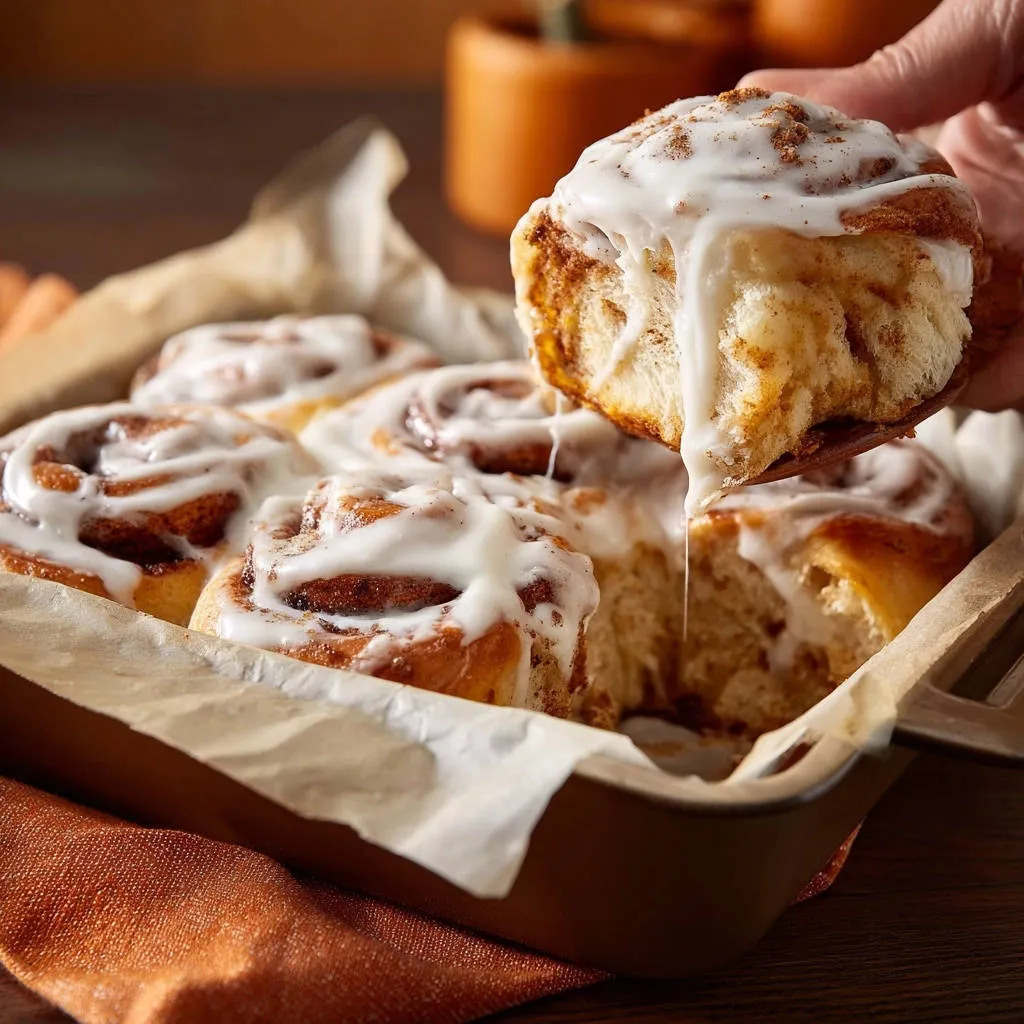
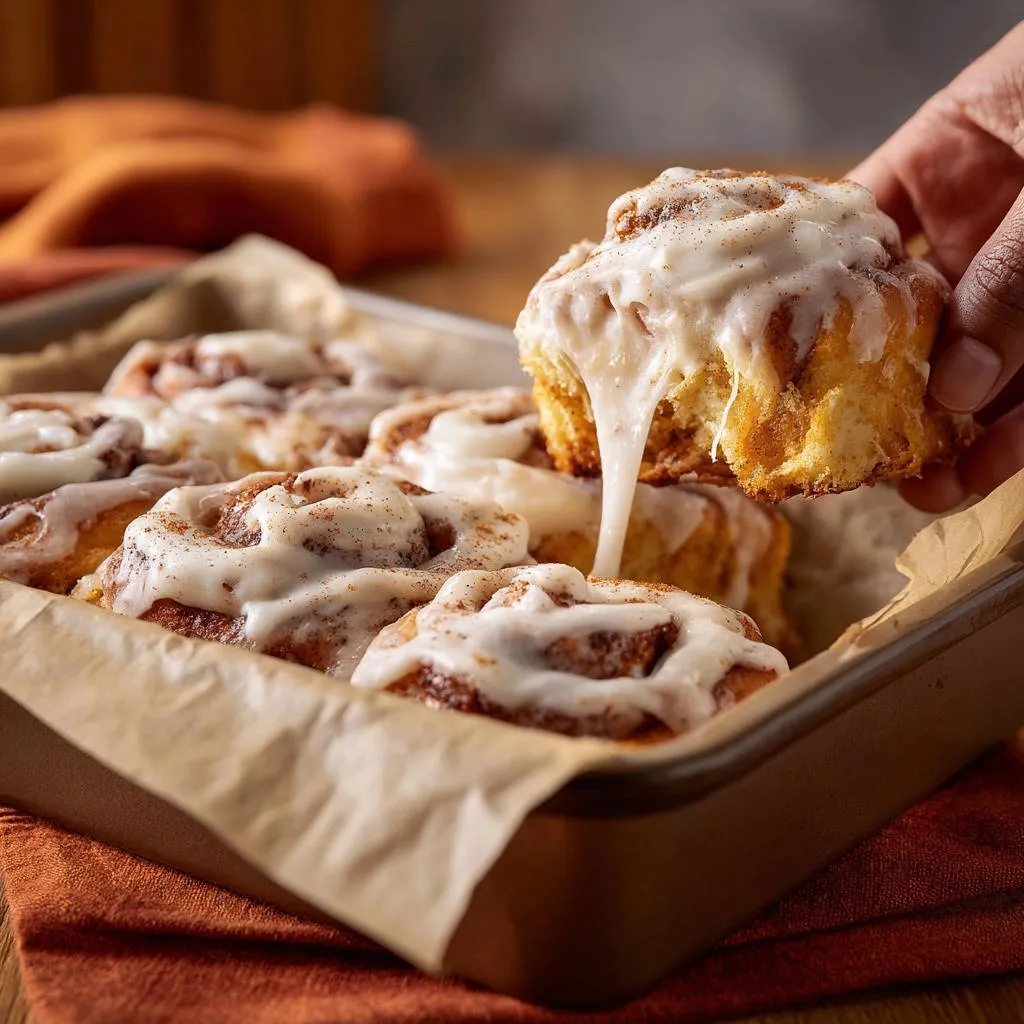
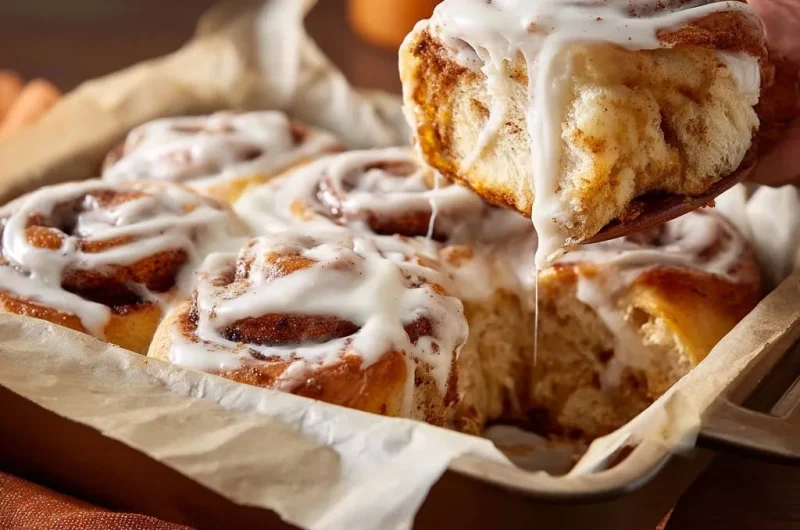
The Fluffiness Guarantee: Baking with the Heavy Cream Soak Technique
This is the unique step that separates merely good cinnamon rolls from truly outstanding, gooey ones.
The Second Rise: Don’t Rush This Step (Puffy and Nearly Doubled)
The 30 to 45 minute second rise, or proofing, allows the shaped rolls to fully recover their airiness before hitting the heat.
The rolls must look noticeably puffy and almost doubled again; rushing this step results in dense, smaller rolls.
Pouring the Cream: When and How Much?
The 1/2 cup of heavy cream must be poured slowly and evenly over the rolls just before the pan enters the preheated oven.
This critical heavy cream soak immediately sinks to the bottom, where it is absorbed as the dough bakes, guaranteeing maximum internal moisture and an unbelievably gooey bottom layer.
Visual Cues: Knowing When the Rolls Are Perfectly Baked
Bake at 375°F for 20 to 25 minutes until the rolls are golden brown around the edges but still appear slightly pale in the center.
Crucial Warning: Avoid a deep, dark brown color, which indicates over-baking and will compromise the signature soft texture of these Classic Cream Cheese Cinnamon Rolls.
The Final Touch: Whipping Up Irresistible Cream Cheese Frosting
Achieving the right glaze consistency is the perfect finale to the baking process.
Temperature Matters: Cream Cheese and Butter Preparation
If the cream cheese or butter are too warm, they will result in a thin, runny glaze that separates and runs right off the warm roll.
The goal is cool room temperature ingredients, which allows for proper aeration and stability when combining them with the powdered sugar.
Achieving a Smooth, Lump-Free Glaze
Sift the powdered sugar if your bag has been sitting for a while, and incorporate it gradually while mixing on a low speed to prevent lumps and clouds of sugar dust.
Adjust the whole milk one tablespoon at a time until the mixture reaches a light, fluffy, yet easily spreadable consistency.
Glazing Warm Rolls: Why Timing Is Essential for the Melt Factor
Allowing the rolls to cool for only five minutes post-bake keeps them warm enough to slightly melt the cream cheese frosting upon application.
This short cooling period ensures the glaze seeps gorgeously into the crevices, creating a deeply satisfying, glossy layer.
Chef’s Toolkit: Troubleshooting and Advanced Baking Tips
Addressing these common issues ensures a flawless final product every time you bake.
My Dough Is Too Sticky to Knead
If your dough is excessively sticky, add flour one tablespoon at a time until it cleans the sides of the bowl.
Be cautious not to add too much, as incorporating too much flour will inevitably lead to tough, dry rolls later on.
The Filling Spilled Out During Baking
Ensure your log was rolled very tightly from beginning to end and that the final seam was completely pinched shut to create tension.
Also, make sure the rolls were placed snugly but not squished into the pan, as too much space can allow the filling to melt and ooze before the dough sets.
Handling High-Altitude Baking Adjustments
At higher altitudes, atmospheric pressure is lower, meaning liquid evaporates faster and yeast rises more quickly than at sea level.
Consider reducing the yeast slightly and increasing the moisture (milk/egg) by a tablespoon or two, and significantly shorten the initial rising times to prevent over-fermentation.
Preparing Ahead: Storage and Make-Ahead Solutions
These tips are essential for serving fresh rolls without waking up before dawn.
Freezing Unbaked Rolls (Overnight Prep)
Prepare the rolls completely through the shaping stage (Step 5) and place them in the baking pan, but halt before the second rise.
Cover the pan tightly with plastic wrap and then aluminum foil, and freeze for up to one month.
To bake, thaw them overnight in the refrigerator, allow them to sit at room temperature for the second rise (about 2-3 hours), perform the heavy cream soak, and bake as directed.
Storing Leftover Baked Rolls
Store leftover baked, frosted rolls in an airtight container at room temperature for up to two days, or refrigerate them for up to five days.
Always reheat baked rolls before serving to reactivate the butter and cinnamon sugar mixture, restoring that soft, gooey texture.
Creative Serving Suggestions (Beyond Breakfast)
These irresistible treats make a stunning, decadent addition to any holiday brunch buffet or weekend celebration.
Complementary Recipes
To round out your sweet cinnamon roll experience, consider these dishes that offer different but equally satisfying flavors.
- If you’re in the mood for something savory and creamy, give this Gooey Shrimp Spinach Dip a try, perfect for dipping or enjoying on its own.
- For a rich dessert, this Moist Chocolate Bundt Cake offers a decadent chocolate finish that pairs well with the sweetness of cinnamon rolls.
For an elevated dessert experience, serve them warm alongside strong coffee, espresso, or lightly sprinkled with toasted walnuts or pecans.
Quick Answers: Common Questions About Classic Cream Cheese Cinnamon Rolls
Can I substitute a different fat for butter in the dough or filling?
While you can use vegetable shortening in the dough to achieve softness, butter offers significantly superior flavor and mouthfeel that is noticeable in the finished roll.
We strongly recommend sticking to high-quality unsalted butter for both the filling and the dough to maintain the promised richness of the Classic Cream Cheese Cinnamon Rolls.
What is the best way to reheat cinnamon rolls without drying them out?
Reheat individual rolls loosely wrapped in aluminum foil in a 300°F oven for about 10 to 15 minutes.
This foil method creates steam, preventing moisture loss and preserving the internal softness far better than direct microwaving.
Can I make these rolls dairy-free?
This specific recipe relies heavily on dairy for the optimal texture, particularly the heavy cream soak technique and the rich cream cheese frosting.
While plant-based milks and vegan butter can be used, the final flavor and gooey texture will differ significantly from the specialized “Classic Cream Cheese Cinnamon Rolls” promise.
Ready to Impress? Share Your Classic Cream Cheese Cinnamon Rolls Masterpiece!
We hope this definitive guide helps you master the art of soft, gooey cinnamon rolls forever.
Once you incorporate the heavy cream soak technique, dry, crusty edges will be a frustrating memory of the past.
Bake a batch of these truly Classic Cream Cheese Cinnamon Rolls this weekend and share your baking triumphs with us!
Happy baking!
Cinnamon Rolls
Course: DessertCuisine: AmericanDifficulty: medium4
9 to 12 rolls30
minutes20
minutes550
kcal180
minutesThis recipe guarantees bakery-style rolls that are ultra-fluffy and moist. The secret technique involves adding heavy cream just before baking, ensuring a gooey bottom layer and preventing dryness. Finish these perfect treats with a tangy, sweet cream cheese frosting.
Ingredients
For the Dough:
1 cup warm milk (105 to 115 degrees F)
2 and 1/4 teaspoons active dry yeast (one packet)
1/4 cup granulated sugar
1/2 teaspoon salt
1 large egg
1/4 cup unsalted butter, melted and cooled
3 cups all-purpose flour
For the Filling:
1/2 cup unsalted butter, softened
1/2 cup brown sugar, packed
2 tablespoons ground cinnamon
For the Secret Fluffiness (The Technique Ingredient):
1/2 cup heavy cream (or whole milk)
For the Cream Cheese Frosting:
4 ounces cream cheese, softened
1/4 cup unsalted butter, softened
2 cups powdered sugar
1 teaspoon vanilla extract
2 tablespoons whole milk
Directions
- Prepare the Dough: In a large mixing bowl, combine the warm milk, yeast, and 1 teaspoon of the granulated sugar. Let it sit for 5 to 10 minutes until foamy. Add the remaining sugar, salt, egg, and cooled melted butter to the mixture. Stir until combined. Gradually add the flour, mixing until a shaggy dough forms.
- Knead and Rise: Turn the dough out onto a lightly floured surface. Knead for 5 to 7 minutes until the dough is smooth and elastic. Do not over-knead; the dough should still be soft. Place the dough in a greased bowl, cover loosely, and let rise in a warm place for 1 to 1.5 hours, or until doubled in size.
- Shape the Rolls: Punch down the risen dough gently and turn it out. Roll the dough into a large rectangle, approximately 12 by 18 inches.
- Add Filling: Spread the softened butter evenly over the dough rectangle. In a small bowl, mix the brown sugar and cinnamon. Sprinkle the mixture evenly over the buttered dough, leaving a 1-inch border on the long edge opposite you.
- Roll and Cut: Starting with the long edge closest to you, tightly roll the dough into a log. Using a sharp, non-serrated knife or dental floss, slice the log into 9 to 12 equally sized rolls. Place the rolls in a lightly greased 9×13 inch baking pan, leaving a slight gap between them (they will expand).
- Second Rise: Cover the pan loosely with plastic wrap or a kitchen towel. Let the rolls rise again in a warm spot for about 30 to 45 minutes. They should look puffy and nearly doubled again. Preheat the oven to 375 degrees F.
- The Fluffiness Technique: This is the critical step for guaranteeing maximum moisture. Just before placing the rolls into the preheated oven, slowly and carefully pour the 1/2 cup of heavy cream evenly over the top and sides of the rolls. The cream will pool slightly in the bottom of the pan and soak into the dough during baking, preventing the rolls from drying out and creating an ultra-soft, gooey bottom layer.
- Bake: Bake for 20 to 25 minutes, or until the rolls are golden brown on the edges and the center rolls are baked through.
- Prepare Frosting: While the rolls are baking, beat the cream cheese and softened butter together until smooth. Add the powdered sugar, vanilla, and milk. Beat until light and fluffy.
- Glaze and Serve: Allow the rolls to cool in the pan for 5 minutes before spreading the cream cheese frosting generously over the warm rolls. Serve immediately.
Notes
- The key to this recipe is the addition of heavy cream poured over the rolls just before baking; this locks in moisture and creates a gooey texture.