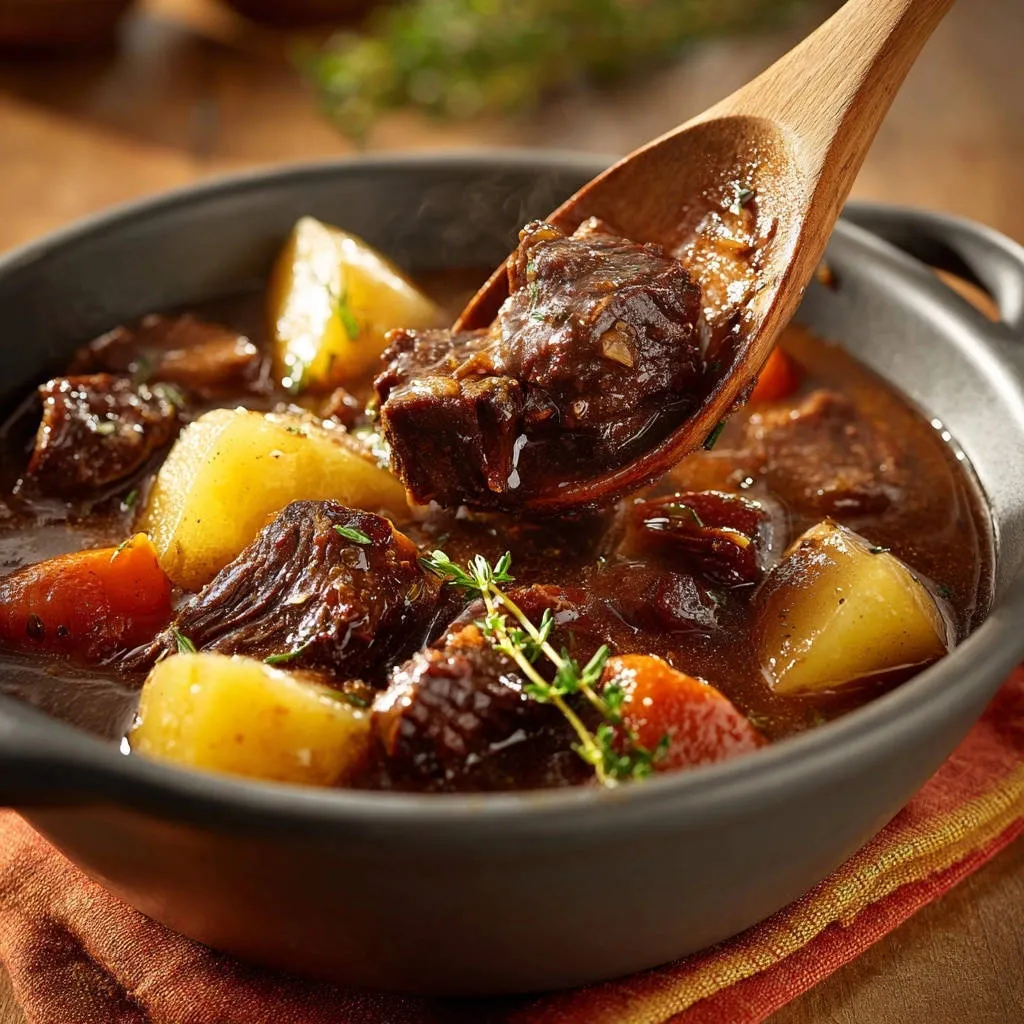
The biggest disappointment when crafting a cozy winter meal is tough, chewy beef. This recipe delivers the ultimate comfort food experience-a truly Classic Hearty Beef Stew-by leveraging critical searing and slow-simmering techniques that guarantee the beef is unbelievably tender, melting in your mouth every single time.
As an expert recipe developer, I’ve perfected this method to ensure you achieve consistent, deeply flavored results, positioning this dish as essential cold-weather cooking.
The Non-Negotiable Secret: Achieving Melt-in-Your-Mouth Beef Every Time
Achieving perfect tenderness relies on two fundamental cooking processes that cannot be skipped. By understanding the science behind browning and braising, you elevate this stew from good to genuinely exceptional.
For even more tender results with slow braising, explore how to achieve slow braised beef short ribs.
Why Patting the Beef Dry is a Critical Foundation
Moisture is the enemy of a deep, flavorful sear. If the surface of the beef is damp, the heat energy must first evaporate that water before browning can begin.
This steaming process drastically lowers the surface temperature, hindering the Maillard reaction-the chemical process responsible for that rich, complex, crusty flavor.
Always pat your beef cubes completely dry with paper towels and season generously before they ever hit the hot pan.
The Power of Low and Slow: Breaking Down Connective Tissues
Beef chuck is naturally tough because it is rich in connective tissue called collagen, which requires specific conditions to break down.
If the stew liquid is allowed to boil aggressively, the meat proteins seize up and immediately toughen, often becoming drier even after hours of cooking.
The culinary secret is a very gentle simmer, just below boiling, where the collagen slowly transforms into luscious, tender gelatin, giving the sauce body and the meat its signature pull-apart texture.
Essential Gear and Prep Steps for a Seamless Stew Experience
Proper preparation and equipment are foundational to successful slow cooking. Taking the time to set up your station will make the actual cooking steps effortless.
Choosing the Right Vessel: The Dutch Oven Advantage
A heavy-bottomed Dutch oven is indispensable for making the best stew. Its high mass holds and transfers heat incredibly well, which is essential for achieving the intense searing required for deep flavor.
More importantly, the even heat distribution prevents hot spots, ensuring your required low simmer remains truly gentle and consistent throughout the long cooking period.
The Art of Mise en Place: Preparing for Success
Mise en place, or having all ingredients prepped and measured before you start, simplifies the cooking process and prevents rushed mistakes during key transitions like thickening the sauce.
Ensure all root vegetables are cut into roughly the same size, about 1-inch pieces, so they cook and become perfectly tender at the exact same rate.
The Building Blocks of Flavor: Inside Your Classic Hearty Beef Stew
Every ingredient in a hearty stew serves a crucial purpose, contributing either to texture, foundational savoriness, or complex depth.
Selecting the Perfect Cut: Beef Chuck vs. Stew Meat
While pre-cut stew meat is convenient, choosing a whole beef chuck roast allows you to control the size and shape of the cubes, ensuring even cooking and better searing coverage.
Beef chuck is ideal because it contains excellent marbling and a high amount of collagen, both necessary for rich flavor and that desired fork-tender result after a long braise.
For more tender results, consider how slow-braised beef short ribs benefit from similar low-and-slow cooking.
The Essential Aromatics: Onion, Garlic, and Tomato Paste
The combination of onion and garlic forms the classic savory foundation that characterizes any great stew.
Tomato paste adds a crucial layer of deep, concentrated umami flavor and slight acidity, which provides necessary balance against the richness of the beef and broth.
The Liquid and Thickener Strategy: Broth and Flour
Always select low-sodium beef broth; since the liquid reduces over several hours, the salt concentrates significantly, giving you maximum control over the final seasoning adjustments.
Flour serves a dual purpose: it helps create the superior dark crust during the initial searing and acts as the initial thickening agent for the rich sauce base when the broth is added.
Mastering the Method: A Step-by-Step Guide to the Perfect Stew
Follow these phases closely, focusing especially on the low heat settings, to guarantee outstanding results for your Classic Hearty Beef Stew.
Phase 1: Deep Searing and Flavor Development
Dredge and Sear in Batches: Dredging the dry beef lightly in flour immediately before searing achieves a superior crust and contributes to a smooth, thick sauce later.
Crowding the pan causes the temperature to drop instantly, resulting in steamed meat rather than a deep, crusty sear, completely undermining the flavor foundation.
Achieving That Dark Crust: Let the beef sit untouched for the full time specified (about 3 minutes) until a dark, crusty brown fond develops; this action locks in moisture and maximizes flavor depth.
Phase 2: Building the Rich Sauce Base
Scraping the Fond: Reduce the heat and add the onions. As they soften, use their moisture and a wooden spoon to scrape up every bit of the browned residue (the fond) from the pot bottom-this is pure concentrated beef flavor.
Bloomed Tomato Paste and Broth: Cook the tomato paste with the onions and garlic for one minute; this crucial step “blooms” the flavor, intensifying its savory and umami notes.
Sprinkle in the remaining flour, cook briefly, then pour the beef broth in slowly while constantly stirring to ensure the flour incorporates smoothly and prevents any lumps from forming in the sauce base.
Phase 3: The Critical Low-and-Slow Transformation
The Gentle Simmer Rule: Once the beef, herbs, and liquid are returned to the pot, bring the stew barely to a boil, then immediately reduce the heat to the absolute lowest setting to achieve a “barely perceptible bubble.”
If the stew is boiling rapidly, the meat fibers tighten, and all efforts to make it tender will be undone. This very low temperature is the heart of the tenderness secret.
The Long Wait: Cover the pot tightly to maintain consistent temperature and trap steam, allowing the long, slow, 1 hour and 45 minute cook time to patiently break down the tough connective tissue.
Phase 4: Finishing and Seasoning
Adding the Root Vegetables: Potatoes and carrots must be added only after the initial long simmer to prevent them from becoming completely disintegrated mush during the extended cook time.
Testing for Doneness: The stew is ready when a piece of beef offers zero resistance when pressed with a fork and the potatoes are easily pierced but still hold their shape.
Remove the bay leaves and emphasize adjusting seasoning only after the stew has finished cooking, as the reduction concentrates the saltiness; garnish with fresh thyme just before serving.
Chef’s Secrets: Elevating the Depth of Flavor in Your Stew
These professional tips add extra layers of complexity to transform the flavor profile of your hearty beef stew.
The Red Wine Depth Trick: Use 1/2 cup of dry red wine (like Cabernet or Pinot Noir) to deglaze the pot immediately after the onions and garlic are softened, but before adding the flour and broth. This reduction adds complex tannic richness.
Umami Boost from the Pantry: Stir in a tablespoon of Worcestershire sauce or a teaspoon of Marmite/Vegemite right before the final simmer to deepen the savory, meaty notes without changing the core flavor profile.
Fresh Herb Finishing Power: While dried thyme provides foundational flavor during the braise, adding fresh parsley, chives, or rosemary alongside the fresh thyme garnish brightens and lifts the overall dish significantly just before serving.
Serving Suggestions, Storage, and Make-Ahead Strategies
This robust meal pairs beautifully with simple sides and is famously excellent when prepared in advance.
The Best Sidekicks for Your Classic Hearty Beef Stew
Because this stew is so rich and satisfying, you need pairings that can easily soak up the flavorful sauce or cut the richness.
Perfect complements include crusty artisan bread for dipping, creamy mashed potatoes or polenta, or a bright, slightly acidic green salad to cleanse the palate between savory bites.
Complementary Dishes to Consider
To round out your meal, consider these fresh and vibrant chicken dishes.
- For a bright and savory addition, try the Garlic Herb Grilled Chicken Salad, offering a refreshing contrast to your hearty stew.
- If you prefer something with more greens, the Grilled Chicken Kale and Cabbage Power Salad provides a satisfying blend of textures and flavors.
Can You Make Beef Stew Ahead? (Hint: Yes, it’s Better)
Stew is an ideal make-ahead dish; the deep flavors marry and deepen considerably overnight as the ingredients settle into the sauce.
Cool the stew rapidly by transferring it to shallow containers before refrigerating. Always reheat gently on the stovetop to maintain the meat’s tenderness and prevent scorching.
Safe Storage and Freezing Guidelines
Leftovers can be safely stored in an airtight container in the refrigerator for 3 to 4 days.
For longer storage, freeze the cooled stew in portion-sized containers for up to 3 months. Note that potato texture might become slightly softer upon thawing, but the flavor remains excellent.
Troubleshooting and FAQs for Classic Hearty Beef Stew
Address common obstacles that may arise during the cooking process to ensure foolproof results.
Help! My Stew is Too Thin (How to Fix the Consistency)
If the stew is too thin, the easiest fix is to create a slurry by mixing equal parts cornstarch and cold water (about 1 tablespoon each) and stirring it into the simmering stew until thickened.
Alternatively, remove the lid and allow the stew to simmer uncovered for the last 30 minutes, which lets excess moisture evaporate naturally while thickening the sauce.
My Beef is Still Tough After 3 Hours! What Went Wrong?
If the beef is still tough after extended cooking, the primary culprit is almost always that the heat was consistently too high, causing the collagen proteins to seize instead of converting to gelatin.
The only solution is continued patience: reduce the heat to the absolute minimum and continue cooking until the meat releases without resistance. Do not try to rush this transformation.
Do I Need to Skim the Fat While Simmering?
Skimming fat is optional and depends on the amount of marbling on your initial beef cut. Excessive surface fat can sometimes make the final dish feel overly heavy or greasy.
The easiest method is to refrigerate the stew overnight; the fat will solidify into a disc on the surface, allowing you to easily scrape it off with a spoon before reheating the next day.
Can I Use Different Vegetables?
Yes, root vegetables like parsnips, rutabaga, celery, or mushrooms make excellent additions to this comforting dish.
Ensure you consider density: harder vegetables like parsnips should be added simultaneously with the potatoes and carrots, while softer items like mushrooms or green beans can be added closer to the final cook time.
Ready to Impress? Share Your Classic Hearty Beef Stew Masterpiece!
This recipe transforms a simple meal into an unforgettable experience by focusing on technique and quality ingredients.
Mastering the deep sear and the incredibly low-and-slow simmer is the key to creating a truly authentic, melt-in-your-mouth Classic Hearty Beef Stew. Try these expert tips, and share your masterpiece with those you love!
Beef Stew
Course: Soups-StewsCuisine: AmericanDifficulty: medium6
servings20
minutes2
hours550
kcal180
minutesThis is the definitive recipe for truly fork-tender beef stew. By focusing on deep browning and a low, slow simmer, you ensure the meat melts in your mouth and the sauce is rich and thick. Comfort food perfection in a bowl.
Ingredients
2 pounds beef chuck or stew meat, cut into 1 1/2 inch cubes
2 tablespoons olive oil
1 large onion, roughly chopped
3 cloves garlic, minced
1/4 cup all-purpose flour
4 cups beef broth (low sodium)
2 tablespoons tomato paste
1 teaspoon dried thyme
2 bay leaves
1 pound russet or Yukon Gold potatoes, peeled and quartered
4 medium carrots, cut into 1 inch pieces
Salt and pepper to taste
Fresh thyme for garnish
Directions
- Preparation is Key: Pat the beef cubes completely dry using paper towels. Season them generously with salt and pepper. This step is non-negotiable for achieving deep flavor and tenderness.
- The Browning Technique (Solving the Pain Point): In a large Dutch oven or heavy-bottomed pot, heat the olive oil over high heat until shimmering. Dredge half of the dried beef lightly in flour, shaking off the excess. Sear the beef pieces in a single layer without crowding the pan. Let them sit untouched for 3 minutes until a dark, crusty brown develops. Flip and sear the remaining sides, about 2 minutes more. Remove browned beef to a separate bowl and repeat with the remaining beef (dredging and browning the second batch). This deep crust is essential to lock in moisture during the long cook time.
- Build the Base: Reduce the heat to medium. Add the chopped onion to the pot and cook until softened, scraping up any browned bits (fond) from the bottom of the pot. Stir in the garlic and tomato paste and cook for 1 minute until fragrant.
- Deglazing and Thickening: Sprinkle any remaining flour into the pot with the onions and cook for 1 minute. Slowly pour in the beef broth, stirring constantly to prevent lumps and incorporating all the fond from the bottom. This immediately creates a rich sauce base.
- Simmer Low and Slow: Return all the browned beef and any accumulated juices to the pot. Add the bay leaves and dried thyme. Bring the liquid just to a boil, then immediately reduce the heat to the absolute lowest setting possible. The stew should only be at a gentle bubble, not a rolling boil. Cover tightly and simmer for 1 hour and 45 minutes. This low, slow temperature is the key to breaking down the tough connective tissue without drying out the meat.
- Add Vegetables: Add the potatoes and carrots to the stew. Stir gently, ensuring everything is submerged in the liquid.
- Finish the Cook: Return the pot to the low simmer, covered, and continue cooking for an additional 45 to 60 minutes, or until the potatoes are tender and the beef is completely fork-tender and pulls apart easily with zero resistance.
- Serve: Remove the bay leaves. Taste and adjust seasoning with salt and pepper. Garnish with fresh thyme and serve immediately.
Notes
- Ensure the beef is completely dry and seared in batches on high heat to develop a dark crust; this is essential for flavor and moisture retention.