For years, I struggled to replicate the perfect, luxurious texture of a high-end restaurant curry, often ending up with a sauce that was thin, oily, or slightly broken. The real secret to a restaurant-quality, Classic Indian-Style Creamy Curry lies not just in the spices, but in how you treat the tomatoes and fats early on.
This foolproof technique ensures a gorgeous, velvety sauce base that never breaks, locking in deep flavor and resulting in the most irresistible homemade curry you’ll ever make.
The Secret to a Seamless Sauce: Why This Classic Indian-Style Creamy Curry Works
Achieving a truly seamless, rich sauce requires attention to thermal stability and careful flavor layering. This recipe addresses the most common failures-acidity, lumpiness, and splitting-before they even occur.
For an even richer sauce, learn how to achieve that perfect velvet in creamy butter chicken.
The Yogurt Marinade: More Than Just Flavor
The acidic yogurt in the marinade serves a dual purpose beyond simply imparting flavor into the chicken.
The lactic acid begins to gently tenderize the protein, breaking down the muscle fibers and ensuring the chicken pieces remain incredibly moist as they cook.
It also provides a subtle but essential tang that balances the richness of the butter and cream in the final sauce, creating complexity.
The Velvety Texture Lock-In: Caramelizing the Tomato Base
This is arguably the most critical step for achieving a velvety texture: cooking the tomato paste directly on the hot pan surface, surrounded by the cooking fat.
This process concentrates the tomato flavor and caramelizes its sugars, significantly reducing the harsh acidity which is often the cause of a broken sauce later on.
When the tomato paste visibly darkens and deepens in color, you have locked in a stable, rich base that can handle the heat and richness of the finishing cream.
Why Blending is Non-Negotiable for Restaurant Consistency
After the base is cooked, blending is mandatory for achieving that signature smooth, luxurious mouthfeel characteristic of restaurant-quality curry.
It completely homogenizes the aromatics-the fibrous strands of ginger and onion pieces-which could otherwise make the sauce feel grainy or uneven.
Blending the base ensures a professional, lump-free result before the temperature-sensitive heavy cream is introduced.
For an even smoother finish on your chicken, explore creamy butter chicken with a velvet texture.
Building Blocks of Flavor: A Closer Look at the Classic Ingredients
High-quality ingredients and specific preparation methods are essential when constructing such a rich, complex sauce.
The Core Proteins: Choosing Chicken Thighs vs. Breast
We recommend using boneless, skinless chicken thighs due to their higher fat content, which keeps them incredibly tender and forgiving during the long simmer.
Chicken breast is leaner and will cook faster, but it runs a higher risk of drying out if overcooked, though it absorbs the yogurt marinade well.
The Aromatics and The Fat Base (Butter and Oil Ratio)
Using a combination of butter and vegetable oil is essential; butter provides unparalleled richness and flavor, while the oil elevates the overall smoke point.
This prevents the butter from burning during the searing and initial sautéing stages, ensuring a clean, sweet flavor base.
Garlic and ginger should only cook for one minute until fragrant; cooking them longer can turn them bitter and detract from the delicate balance of the curry.
Mastering the Spice Blend: Bloom Time and Depth
The blend of garam masala, cumin, coriander, and chili powder creates the warm, aromatic heart of this buttery curry.
The technique of ‘blooming’ these spices involves stirring them directly into the hot fat and cooked tomato paste for a very short duration (30 seconds).
This process extracts their fat-soluble flavor compounds immediately, dramatically amplifying their intensity and resulting in a much deeper flavor profile than simply adding them to liquid.
Step-by-Step Guide: Achieving Classic Indian-Style Creamy Curry Perfection
- Prep & Marinate for Maximum Tenderness (Step 1):
Ensure your chicken pieces are cut into uniform 1-inch cubes for even cooking. The minimum 30-minute marinade time is crucial for both flavor infusion and initiating the moisture retention process.
For the most flavorful outcome and superior texture, marinating for 4 hours or even overnight is highly recommended.
- Searing the Chicken (Step 2):
Heat the oil and butter until shimmering over medium-high heat. Sear the chicken in small, uncrowded batches, aiming for a deep golden-brown crust on all sides.
Crowding the pan will dramatically lower the temperature, causing the chicken to release liquid and steam rather than developing the necessary browned flavor, known as fond.
- Building the Velvety Base (Steps 3 & 4):
After removing the chicken, reduce the heat and add the remaining fat. Cook the finely diced onion until it is completely softened, translucent, and sweet (5 to 7 minutes).
Once the ginger and garlic are fragrant, push the mixture aside and add the tomato paste directly to the hot base of the pan. Cook the paste, stirring constantly, until it deepens to a rich brick color-this is the Velvety Texture Lock-In step that prevents future acidity.
- Bloomin’ Good Spices (Step 5):
Stir the dry spice mix (garam masala, cumin, coriander, chili) into the cooked tomato paste and fat mixture.
Cook for precisely 30 seconds; this short bloom time maximizes flavor release. Do not exceed 60 seconds, or the spices will burn and become acrid and bitter.
- Reduction and Concentration (Step 6):
Combine the onion mixture and spiced paste. Add the water and sugar, aggressively scraping up all the browned bits (fond) from the pan bottom to incorporate them into the sauce.
Simmer the base for about 5 minutes until it visibly thickens. The key visual cue here is seeing the oil start to ‘float’ or separate slightly around the edges; this signals a fully cooked, rich sauce base.
- The Ultimate Smoothness Check (Step 7):
Turn off the heat before blending. Transfer the hot sauce base carefully into a high-speed blender or use an immersion blender directly in the pot.
Blend until the sauce is absolutely smooth and homogenous. When blending hot liquids, always remember to fill the container only halfway and place a cloth over the vented lid to prevent steam pressure buildup.
- Final Simmer and Cream Incorporation (Steps 8 & 9):
Return the blended sauce and seared chicken to the pan. Bring the mixture to a very gentle simmer (low heat) and cook for 10 to 15 minutes until the chicken is cooked through.
Remove the pan completely from the heat source before stirring in the heavy cream and the final tablespoon of butter. This essential step prevents the dairy proteins from scorching or curdling, guaranteeing a beautiful, smooth finish for your restaurant-quality curry.
Troubleshooting & Pro Tips: Solving Common Creamy Curry Challenges
Even experienced cooks face hurdles when aiming for perfection. These tips will help you manage common issues and customize your dish.
What to Do If Your Sauce Breaks or Separates
Sauce separation usually happens if the heat is too high after adding the cream, or if the initial tomato base was too acidic.
If separation occurs, immediately remove the pan from the heat. Try stirring in a splash of cold water or cold heavy cream, then transfer a small portion of the split sauce to a blender and blend until emulsified.
Stir the emulsified portion back into the main pot vigorously; sometimes a quick blending of the entire sauce with an immersion blender can successfully bring it back together.
Tips for Customizing Spice Heat Levels
The heat level is entirely controlled by the amount and type of chili powder used.
For a mild curry with intense color, substitute standard chili powder with Kashmiri chili powder, which provides a deep, vibrant red hue with very little heat.
If you prefer a fiery dish, consider adding a finely minced green chili along with the ginger and garlic during the base building stage.
Achieving the Deepest, Non-Acidic Flavor
Never underestimate the small amount of sugar added in Step 6; it’s a non-negotiable ingredient that balances the residual acidity from the yogurt and tomato paste.
The time spent caramelizing the tomato paste is the single biggest contributor to deep flavor-a rich base built on cooked fats and caramelized tomato will always outperform a base made by simply stirring ingredients together.
Why You Should Never Boil After Adding Cream
Boiling a dairy-rich sauce, especially one containing cream, causes the dairy proteins (casein) to denature and clump together, resulting in visible curdling or separation.
Always incorporate the cream off the heat, or only allow the curry to reach a very gentle simmer after it is added, ensuring the finished product remains smooth and luxurious.
Serving Your Masterpiece: Pairings and Creative Variations
Complementing your creamy curry with the right sides elevates the entire dining experience.
What to Try Next
Complement your creamy curry with these dishes.
- For a rich potato experience, serve with Creamy Spiced Potatoes, which shares a similar velvety texture.
- Add a refreshing contrast with the Onion Bell Pepper Raita, offering a cool, crisp element.
The Essential Sides: Naan, Rice, and Beyond
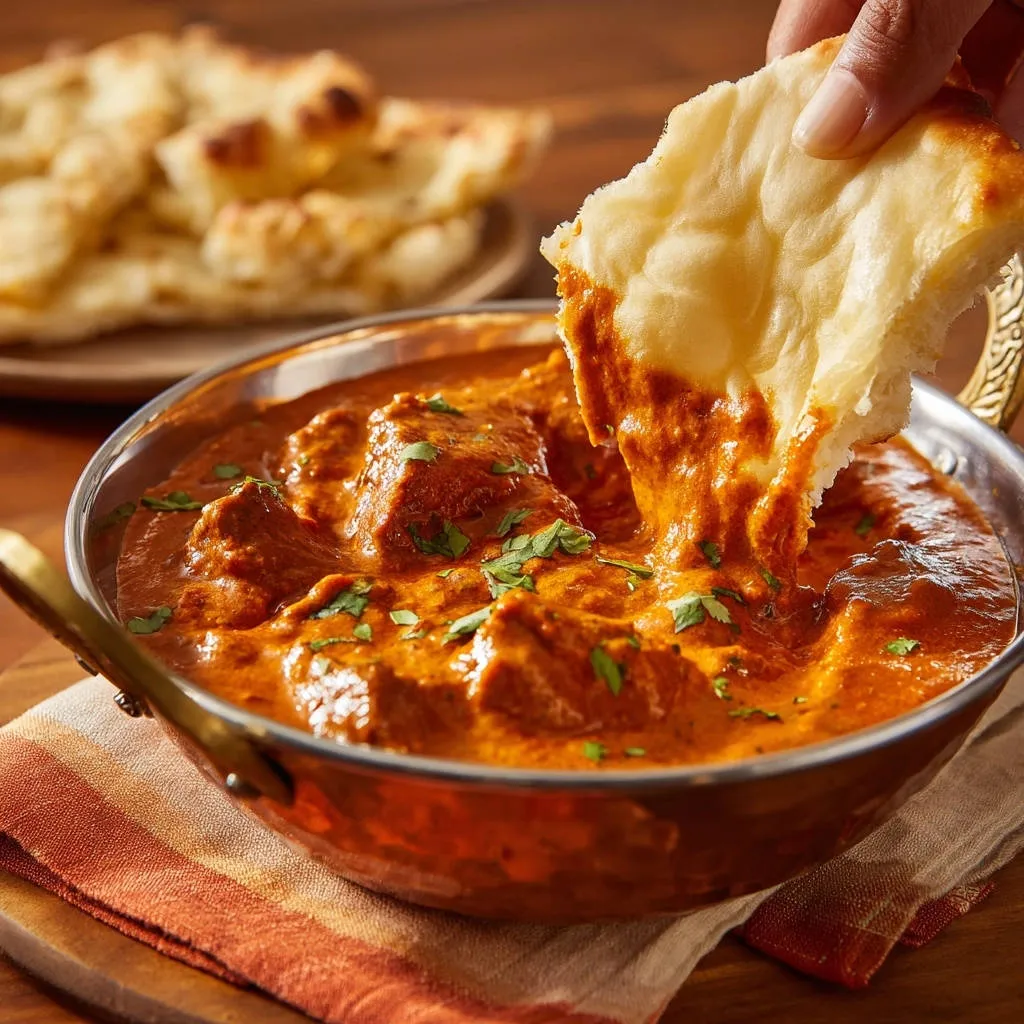
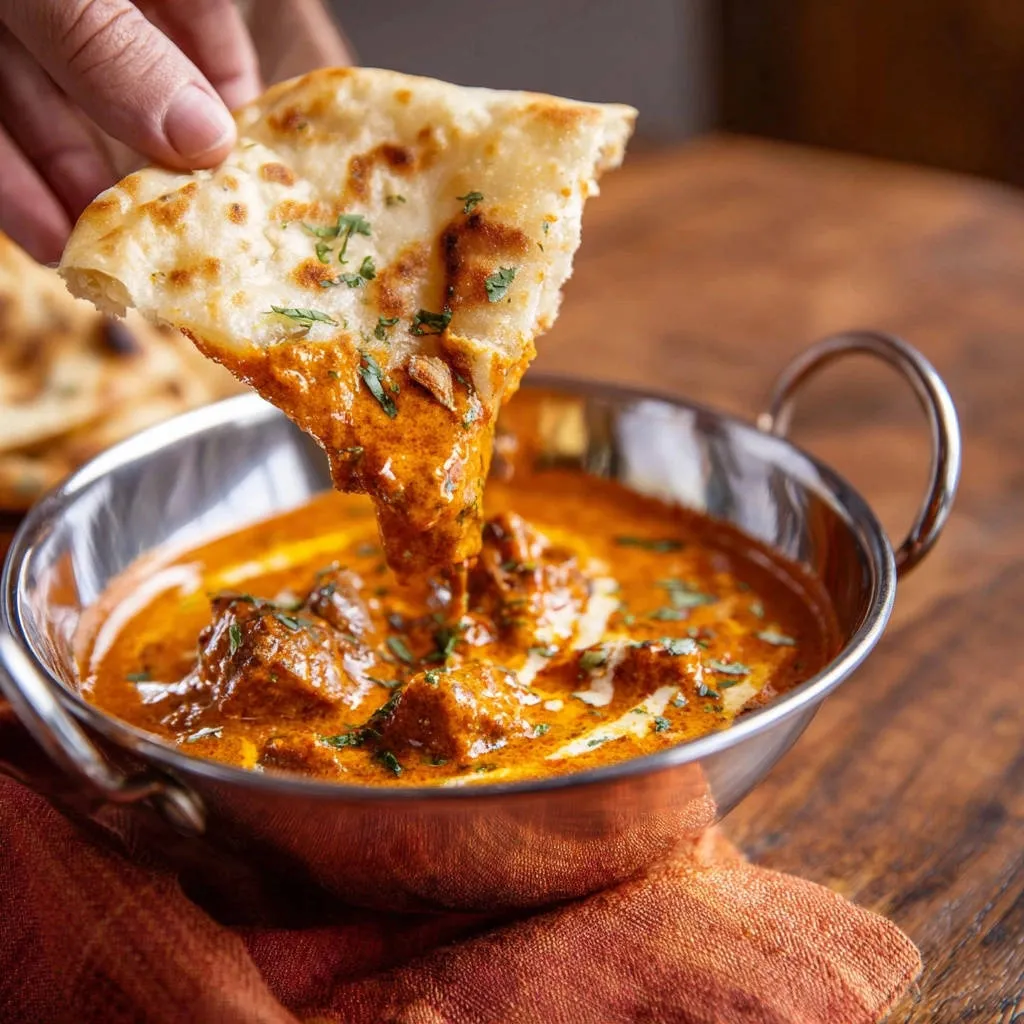
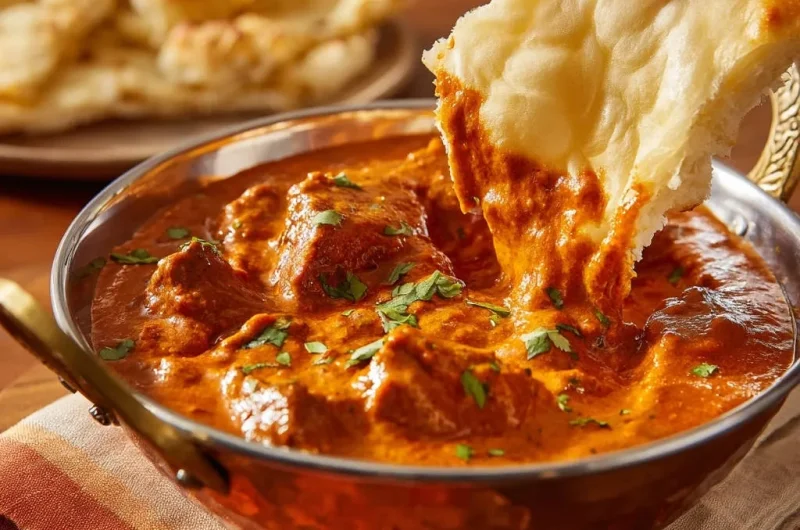
Warm, pillowy Naan bread is essential for soaking up every last drop of the rich sauce. Serve with fragrant Basmati rice, perhaps subtly flavored with saffron strands for a touch of elegance.
Offer cooling condiments on the side, such as mint raita (yogurt with cucumber) or sweet mango chutney, to provide a delightful contrast to the warmth of the spices.
Making it Vegetarian or Vegan: Protein Substitutions
This recipe translates beautifully to a vegetarian dish using firm paneer, pressed tofu, chickpeas, or substantial vegetables like cauliflower and potatoes.
To make the Classic Indian-Style Creamy Curry vegan, substitute the yogurt marinade with plain coconut milk or a plant-based yogurt and use coconut oil instead of butter.
For the finishing cream, heavy cashew cream offers the most similar texture, while full-fat coconut milk provides richness but will slightly alter the final flavor profile.
Can I Use Pre-Made Ginger/Garlic Paste?
While convenient, pre-made pastes often contain preservatives or may have a metallic or overly sharp flavor compared to fresh aromatics.
If you must use jarred paste, be sure to cook it for only about 30 seconds before moving on, as it has a higher tendency to burn quickly and become bitter.
Make Ahead & Storage: Planning for Next-Day Perfection
Curries often taste even better the day after they are made, once the flavors have had time to meld.
How Long Does Classic Indian-Style Creamy Curry Keep in the Fridge?
When stored in an airtight container, the prepared curry can be safely kept in the refrigerator for 3 to 4 days.
Note that the sauce will thicken considerably upon cooling due to the butter and heavy cream content.
Can I Freeze the Sauce Base?
Yes, the sauce base freezes exceptionally well, but only before you add the heavy cream and final tablespoon of butter (Steps 8 and 9).
Freeze the smooth, blended sauce base in an airtight container for up to 3 months. To finish, thaw completely in the fridge, reheat gently, add the reserved chicken, and then stir in the cream off the heat as directed.
Best Practices for Reheating Leftovers
The preferred method for reheating is gently on the stovetop over very low heat.
Add a splash of water or milk to loosen the sauce as it heats, stirring constantly until warmed through.
Avoid microwaving, which can heat unevenly and cause the cream component to separate, resulting in an oily texture.
Common Questions About Creamy Curry Technique (FAQ)
Why Did I Use Tomato Paste Instead of Canned Tomatoes?
Tomato paste is highly concentrated, providing intense flavor and deep color without introducing excess moisture to the pan.
Using paste allows us to achieve that necessary reduction and caramelization much faster, contributing directly to the ultimate rich and quick velvety result.
What is Garam Masala and Can I Substitute It?
Garam masala is a blend of warming spices, typically including cardamom, cinnamon, cloves, nutmeg, and black pepper, used toward the end of cooking to enhance aroma.
It is difficult to substitute authentically, but a mix of equal parts allspice, coriander, and cumin could be used in a pinch, though the delicate aromatic notes will be less pronounced.
Does the Marinating Time Really Matter?
Marinating for 30 minutes provides minimal surface flavor and basic tenderizing.
A longer marinade (4 hours or more) significantly deepens the flavor saturation within the chicken and ensures superior moisture retention, yielding a much more tender and flavorful result.
Ready to Create Your New Favorite Weeknight Meal?
This recipe transforms a complex dish into a simple, reliable process by focusing on critical culinary steps like proper tomato caramelization and off-heat cream incorporation.
Once you master this technique, you will consistently achieve that desired smooth, rich, and intensely flavored Classic Indian-Style Creamy Curry.
Gather your ingredients, trust the process, and share your cooking success-we know this will quickly become your family’s new favorite weeknight comfort food.
Creamy Curry
Course: Main CourseCuisine: IndianDifficulty: medium4
servings15
minutes50
minutes550
kcal60
minutesThis recipe uses a critical technique—cooking the tomato paste and blooming the spices—to lock in a deeply rich flavor base and guarantee a velvety, restaurant-quality sauce. Marinated chicken is simmered in the smooth, spiced base and finished with cream and butter for ultimate richness. Serve this irresistible curry with warm naan bread.
Ingredients
For the Marinade and Chicken:
1.5 pounds boneless chicken (thighs or breast), cut into 1-inch cubes
1 cup plain yogurt
1 teaspoon turmeric powder
1 teaspoon salt
For the Sauce:
2 tablespoons vegetable oil
4 tablespoons butter, divided
1 large yellow onion, finely diced
3 cloves garlic, minced
1 inch ginger, grated
1 (6 ounce) can tomato paste (or 15 ounces tomato puree)
1 teaspoon garam masala
1 teaspoon ground cumin
1 teaspoon ground coriander
1/2 teaspoon chili powder (adjust to heat preference)
1/2 cup water
1/2 cup heavy cream
1 teaspoon sugar
Salt to taste
Fresh cilantro, chopped, for garnish
Naan bread, for serving
Directions
- Marinate the Chicken: In a medium bowl, combine the cubed chicken, yogurt, turmeric, and salt. Mix well, cover, and refrigerate for at least 30 minutes or up to 4 hours.
- Sear the Chicken: Heat 1 tablespoon of oil and 1 tablespoon of butter in a large skillet or deep pan over medium-high heat. Remove the chicken from the marinade (leaving excess marinade behind) and sear in batches until browned on all sides, about 4 to 5 minutes per batch. Do not crowd the pan. Set the seared chicken aside.
- Build the Base: Reduce the heat to medium. Add the remaining 1 tablespoon of oil and 2 tablespoons of butter to the pan. Add the diced onion and cook until softened and translucent, about 5 to 7 minutes. Add the minced garlic and grated ginger and cook for 1 minute until fragrant.
- The Velvety Texture Lock-In Method: Push the onion mixture to the side and add the tomato paste directly to the hot pan surface. Cook the tomato paste, stirring constantly, for 3 to 4 minutes until it darkens slightly and caramelizes. This reduces acidity and deepens the flavor base.
- Bloom the Spices: Stir in the garam masala, cumin, coriander, and chili powder directly into the cooked tomato paste and fat mixture. Cook for exactly 30 seconds, stirring constantly, until the spices are highly fragrant. This step is critical for flavor depth.
- Combine and Reduce: Stir the onion mixture and the spices/tomato paste together. Add the 1/2 cup of water and sugar. Bring the sauce to a simmer, scraping up any browned bits from the bottom of the pan. Cook this sauce base for 5 minutes until it thickens noticeably and you see the oil start to separate slightly around the edges. This separation indicates a well-cooked, rich base.
- Blend for Smoothness: Turn off the heat. Carefully transfer the sauce base to a high-speed blender or use an immersion blender and blend until perfectly smooth and lump-free. Return the blended sauce to the pan.
- Finish the Curry: Add the reserved seared chicken pieces to the smooth sauce. Bring the curry to a gentle simmer (low heat) and cook for 10 to 15 minutes, or until the chicken is fully cooked through and tender.
- Cream and Serve: Remove the pan completely from the heat source. Stir in the final 1/2 cup of heavy cream and the last 1 tablespoon of butter until fully incorporated and the sauce turns a beautiful, even color. Taste and adjust salt if necessary. Garnish generously with fresh cilantro and serve immediately with warm Naan bread.
Notes
- For a deeper flavor, let the chicken marinate for at least 30 minutes, or even overnight in the refrigerator. When browning the chicken, avoid overcrowding the pan to ensure a nice sear rather than steaming.