Why Chilling Transforms Classic Peanut Butter Cookies
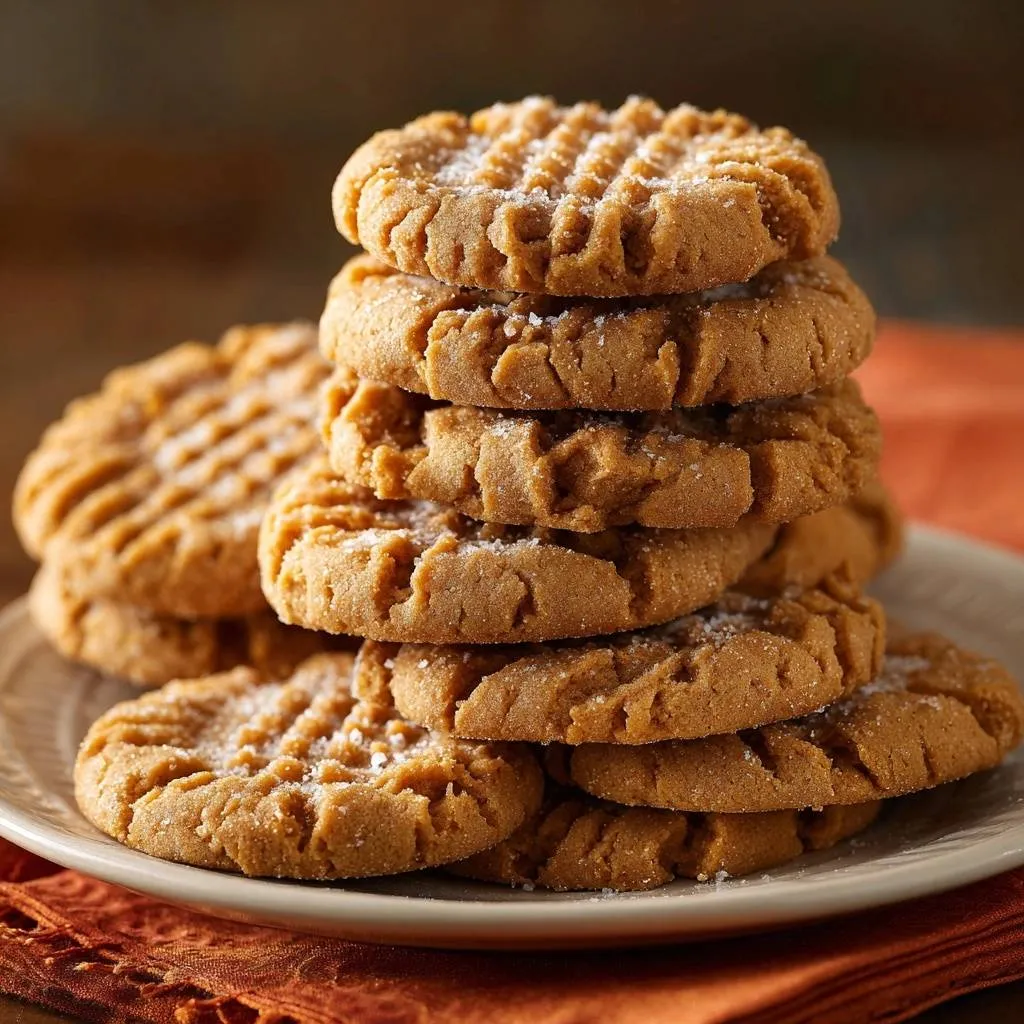
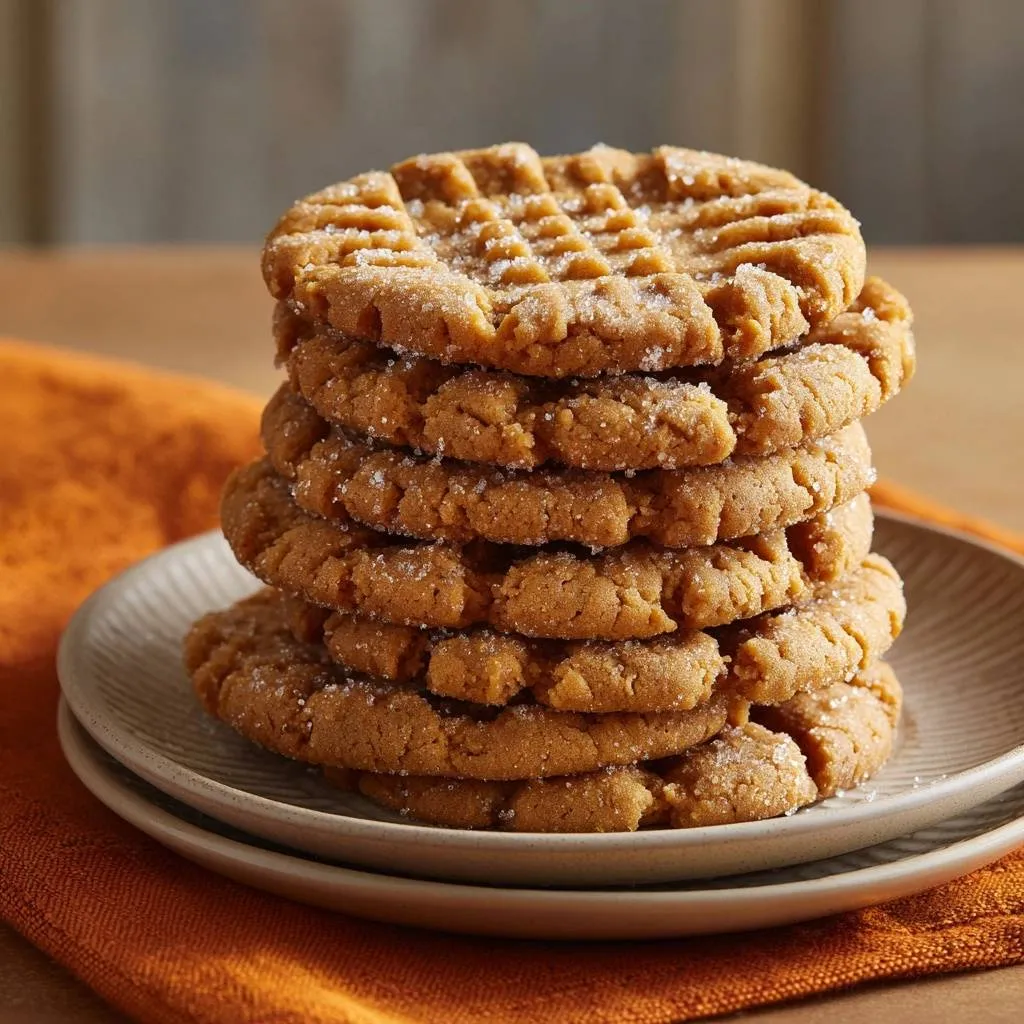
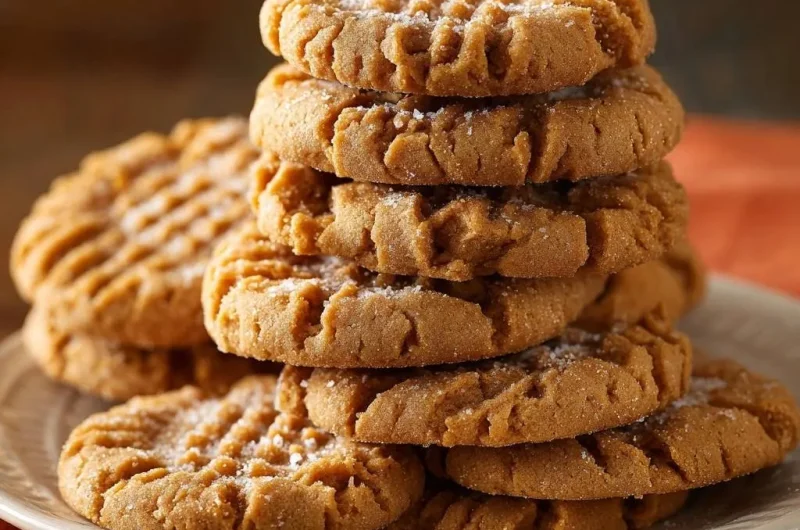
Picture this: you pull bakery-style peanut butter cookies from the oven, thick and chewy with those perfect crisscross ridges. No more flat, greasy disappointments that spread into puddles. In addition, our 30-minute chill locks in that height and texture every time.
However, most home bakers skip this step, and their cookies lose shape fast. That’s why chilling matters so much. It firms up the fats, so you get reliable results without the frustration.
Here’s the expertise boost: chill the dough right after mixing, covered tightly. This simple move crystallizes the peanut butter oils and butter, preventing oven meltdown for standout cookies.
For a similar texture, explore the orange creamsicle cookies.
Common Pitfalls Without Proper Chilling
Room-temperature dough hits the oven and spreads into thin, greasy pools. The edges crisp up unevenly, and centers turn tough from overexposure. Therefore, you end up with sad, shapeless cookies instead of chewy perfection.
Chilled dough, on the other hand, holds its form beautifully. You’ll notice tall centers and golden edges that stay soft. Plus, that signature peanut butter flavor shines without greasiness.
Timeline for Effortless Baking Success
Start to finish takes about 45 minutes, including the chill. Mix in 10 minutes, chill for 30, then bake in batches. It’s perfect for busy days when you crave classic peanut butter cookies fast.
Therefore, no hours of waiting. You get fresh-baked treats quicker than a store run.
Key Ingredients for Flawless Classic Peanut Butter Cookies
Creamy peanut butter forms the base, delivering rich flavor and stability. It emulsifies smoothly with butter for even texture. In addition, unsalted butter, softened to room temp, creams perfectly without excess saltiness.
Granulated sugar adds crisp edges through browning, while brown sugar keeps things chewy with its moisture. The egg binds everything, and vanilla lifts the nutty taste. Meanwhile, flour, baking soda, and salt create structure and lift.
Measure flour by spooning and leveling, not scooping, to avoid dense cookies. Store peanut butter in the pantry; it stays fresh for months. However, keep brown sugar in an airtight container to prevent hardening.
Peanut Butter and Butter Duo Dynamics
Creamy peanut butter holds shape better than crunchy, which can make cookies crumbly. Softened unsalted butter melts evenly, dodging the greasiness of salted versions. Together, they create that ideal tender bite.
Therefore, room-temp butter creams light and fluffy. It traps air for lift without pooling fats.
Sugars and Leaveners Breakdown
Granulated sugar promotes spread control and crunch, while brown sugar’s molasses retains moisture for chew. Baking soda reacts with peanut butter’s acidity for gentle rise. In addition, salt balances sweetness without overpowering.
This combo ensures no excess spreading. You’ll love the perfect contrast in every bite.
For a different twist on no-spread cookies, explore glazed raspberry thumbprint cookies.
Science of No-Spread Classic Peanut Butter Cookies
Fats in peanut butter and butter emulsify during creaming, trapping air bubbles. Chilling solidifies them, so they resist melting too fast in the oven. Meanwhile, the Maillard reaction browns edges beautifully for flavor.
Gluten develops minimally with gentle mixing, keeping texture soft. However, 30 minutes chills just enough; longer risks cracking. Think of it like setting Jell-O: firm but not rock-hard.
Baking soda releases CO2 right on cue, lifting centers post-chill. Therefore, you get thick, chewy cookies that don’t flatten out.
Fat Solidification During Chill Phase
Refrigeration crystallizes the oils in peanut butter and butter. This resists the oven’s heat, holding dough balls tall. In addition, centers stay soft while edges set perfectly.
Baking Soda Activation Mechanics
Acidic peanut butter triggers baking soda after chilling firms things up. CO2 bubbles expand controlledly for lift. Therefore, no wild spreading, just even rise.
Step-by-Step: Mixing Classic Peanut Butter Cookie Dough
Beat peanut butter, softened butter, and sugars until creamy, about 2 minutes. You’ll see it turn pale and fluffy, smelling sweet and nutty. Then add the egg and vanilla; mix just until combined.
Whisk dry ingredients separately. Gradually beat them into the wet mix until a shaggy dough forms. However, stop there; overmixing toughens the cookies.
Use a paddle attachment on medium speed for best aeration. The dough should hold together but feel slightly sticky. This sets you up for success.
Creaming for Airy Texture Base
Cream fats and sugars 2 minutes until light. Paddle beats in more air than a whisk. Look for pale, fluffy volume that doubles in size.
Combining Wet and Dry Precisely
Add dry ingredients gradually on low speed. Dough looks shaggy when done. Therefore, no smooth ball; that’s overmixing.
Chilling and Shaping Classic Peanut Butter Cookies
Cover the dough and fridge it for 30 minutes. It firms up noticeably, easy to handle. Then scoop tablespoon balls and roll in granulated sugar for sparkle.
Place 2 inches apart on parchment-lined sheets. Gently press each with a fork in a crisscross for ridges. In addition, even pressure prevents thin spots.
Pro tip: wet the fork slightly if dough sticks. This keeps patterns crisp without deflating the balls.
Fork Press for Iconic Ridges
Press gently at a 90-degree angle twice. Light pressure imprints without squishing air pockets. Therefore, ridges stay defined and pretty.
Baking and Cooling for Chewy Results
Preheat to 350°F. Bake 9 to 11 minutes; edges set but centers stay soft and doughy. They’ll firm as they cool, staying chewy.
Let sit on the sheet 5 minutes; this finishes setting structure. Then transfer to a rack. Yields about 24 cookies; double for crowds.
Parchment prevents sticking and browning issues. Cool fully before storing to avoid sogginess.
Spotting Perfect Doneness
Edges golden, centers pale and soft to touch. Slight dome means chew ahead. Therefore, pull them early; overbaking crisps everything.
Avoiding Classic Peanut Butter Cookie Mistakes
Overmixing builds gluten for tough bites; mix just until combined. Skipping chill causes spread; always fridge 30 minutes. Cold butter leads to greasy pools, so soften it first.
Overbaking dries them out; watch cues closely. Fixes include extra chill for soft dough or underbaking for moisture. Therefore, prevention beats repair every time.
Fixing Dough Too Soft or Sticky
Chill longer, up to 45 minutes. Add 1 tablespoon flour if needed, but sparingly to keep flavor. However, chilling usually solves it best.
Flavor Variations on Classic Peanut Butter Cookies
Stir in chocolate chips for gooey pockets. Honey-roasted peanut butter adds caramel depth. Sprinkle sea salt on top before baking for sweet-salty pop.
Swap for almond butter if you want variety. For nut-free, try sunflower seed butter. Keep add-ins under 1/2 cup to maintain shape.
More Sweet Treats to Try
After enjoying these classic peanut butter cookies, you might be in the mood for more baked delights. Consider these recipes that share a similar focus on comforting flavors and satisfying textures.
- For a delightful breakfast or brunch option, explore these fluffy pumpkin spice pancakes, perfect for a cozy morning.
- If you appreciate warm, spiced flavors, you’ll enjoy making cinnamon French toast stacks with their inviting aroma.
Pro tip: fold chips in last to avoid melting during chill. These tweaks keep no-spread magic intact.
Chocolate and Nut Add-Ins
Use chunks, not melted chips, for texture. Limit to 1/2 cup per batch. Therefore, cookies hold form with bursts of flavor.
Storage and Make-Ahead for Classic Peanut Butter Cookies
Store in an airtight container at room temp up to 5 days. They stay chewy with a slice of bread inside to retain moisture. Freeze baked cookies up to 3 months; thaw overnight.
Make-ahead dough freezes great. Portion balls first for easy baking later. However, refresh chill post-thaw for best shape.
Freezing Dough Balls Directly
Flash-freeze balls on a sheet, then bag. Bake from frozen, adding 1-2 minutes. No spreading issues.
Perfect Pairings for Classic Peanut Butter Cookies
Cold milk cuts richness perfectly. Hot coffee enhances nutty notes. In addition, tea balances sweetness gently.
Pair with fresh fruit or vanilla ice cream for desserts. Great for snack platters or gifting. They shine at any gathering.
Frequently Asked Questions About Classic Peanut Butter Cookies
Can I Skip the Chilling Step?
No, it prevents spreading by firming fats. Without it, cookies flatten and turn greasy. If rushed, add 2 tablespoons extra flour, but chilling’s best for texture.
Gluten-Free Classic Peanut Butter Cookies Possible?
Yes, swap with 1:1 gluten-free flour blend. Add 1/2 teaspoon xanthan gum if not included for binding. They’ll hold shape just like originals.
Why Do My Cookies Spread?
Warm butter, no chill, or overmixing causes it. Ensure butter’s softened not melted, always chill 30 minutes, and mix minimally. That fixes most issues.
How to Store for Maximum Freshness?
Airtight container at room temp for 5 days. Avoid fridge humidity; it softens them. Freeze for longer with parchment layers between cookies.
Why Are My Cookies Tough?
Overmixing develops gluten. Mix dry ingredients in gradually on low speed until just combined. Shaggy dough means stop; it’ll come together in the chill.
Can I Use Natural Peanut Butter?
It’s trickier due to oil separation, leading to spread. Stick with creamy stabilized brands for reliability. If using natural, chill longer, up to 45 minutes.
Peanut Butter Cookies
Course: DessertCuisine: AmericanDifficulty: easy24
cookies15
minutes11
minutes150
kcal56
MinutesSay goodbye to flat, greasy peanut butter cookies that lose their shape in the oven. Our simple 30-minute chill trick locks in perfect thickness and chewy texture for bakery-style results every single time.
Ingredients
1 cup creamy peanut butter
1/2 cup unsalted butter, softened
1/2 cup granulated sugar
1/2 cup packed brown sugar
1 large egg
1 teaspoon vanilla extract
1 1/4 cups all-purpose flour
1 teaspoon baking soda
1/4 teaspoon salt
1/4 cup granulated sugar (for rolling)
Directions
- In a large bowl, beat peanut butter, softened butter, 1/2 cup granulated sugar, and brown sugar until smooth and creamy, about 2 minutes. Add egg and vanilla; beat until combined.
- In a separate bowl, whisk flour, baking soda, and salt. Gradually mix dry ingredients into wet until a dough forms. Do not overmix.
- Cover dough and chill in the refrigerator for 30 minutes. This crucial step prevents spreading by firming the peanut butter and butter, ensuring your cookies hold height and shape during baking.
- Preheat oven to 350 degrees F. Line baking sheets with parchment paper.
- Scoop tablespoon-sized balls of dough, roll in the 1/4 cup granulated sugar to coat, and place 2 inches apart on sheets. Gently press each with a fork twice in a crisscross pattern to create ridges.
- Bake 9 to 11 minutes until edges are set and centers are still soft. Cookies will firm as they cool. Let sit on sheets 5 minutes before transferring to a wire rack. Store in an airtight container.
Notes
- Chilling the dough for 30 minutes is crucial to prevent spreading and ensure cookies hold their height and shape.