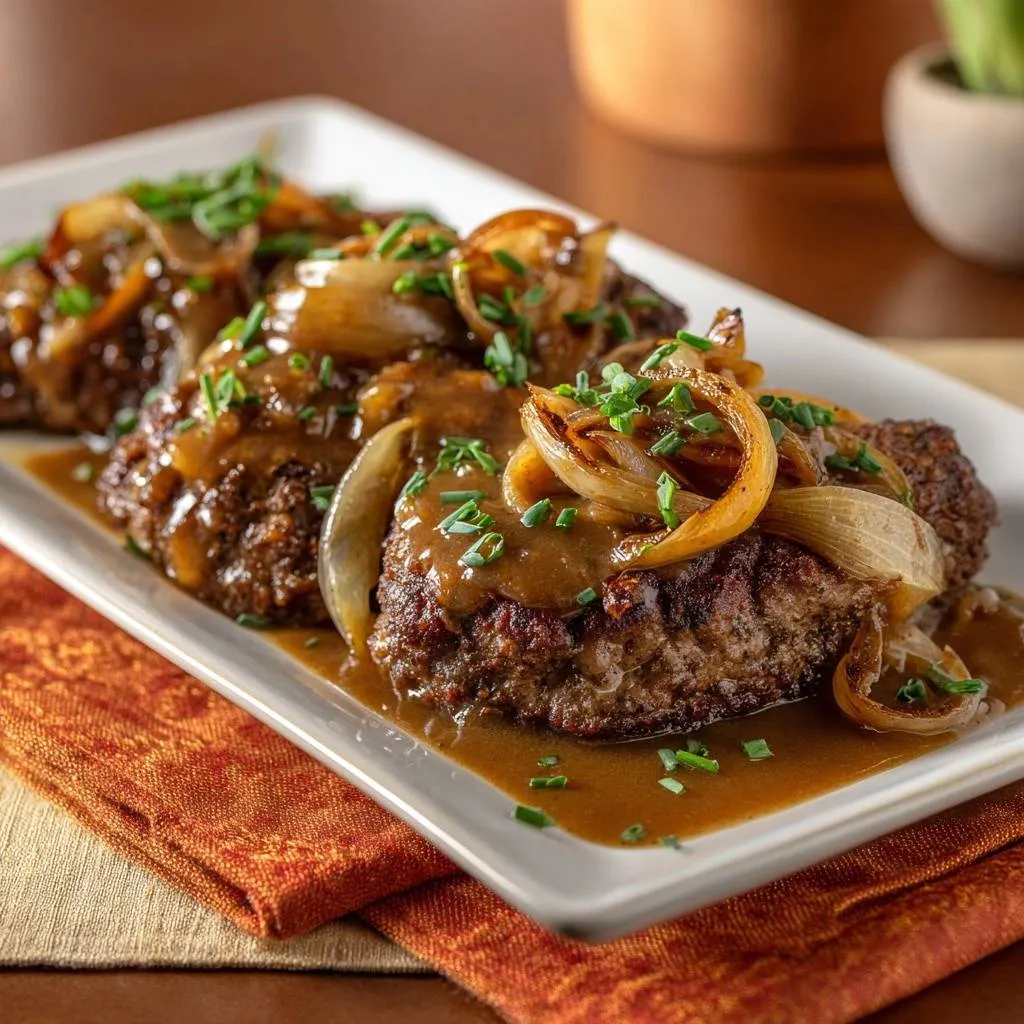
Forget those sad, rubbery meat discs you remember from the school cafeteria. A truly great Salisbury steak should feel like a warm hug on a plate, offering the soul-satisfying comfort of a home-cooked meal with the refined flavors of a French bistro. It’s the ultimate bridge between a juicy burger and a tender steak, smothered in a gravy so rich you’ll want to eat it with a spoon.
The biggest frustration most home cooks face is watching their beautiful, hand-shaped patties shrink into tight, dry balls the moment they hit the heat. It’s disappointing when your dinner loses its shape and its juice all at once. However, you can easily fix this with a simple “No-Shrink” secret that keeps your meat flat, tender, and ready to soak up every drop of that savory onion sauce.
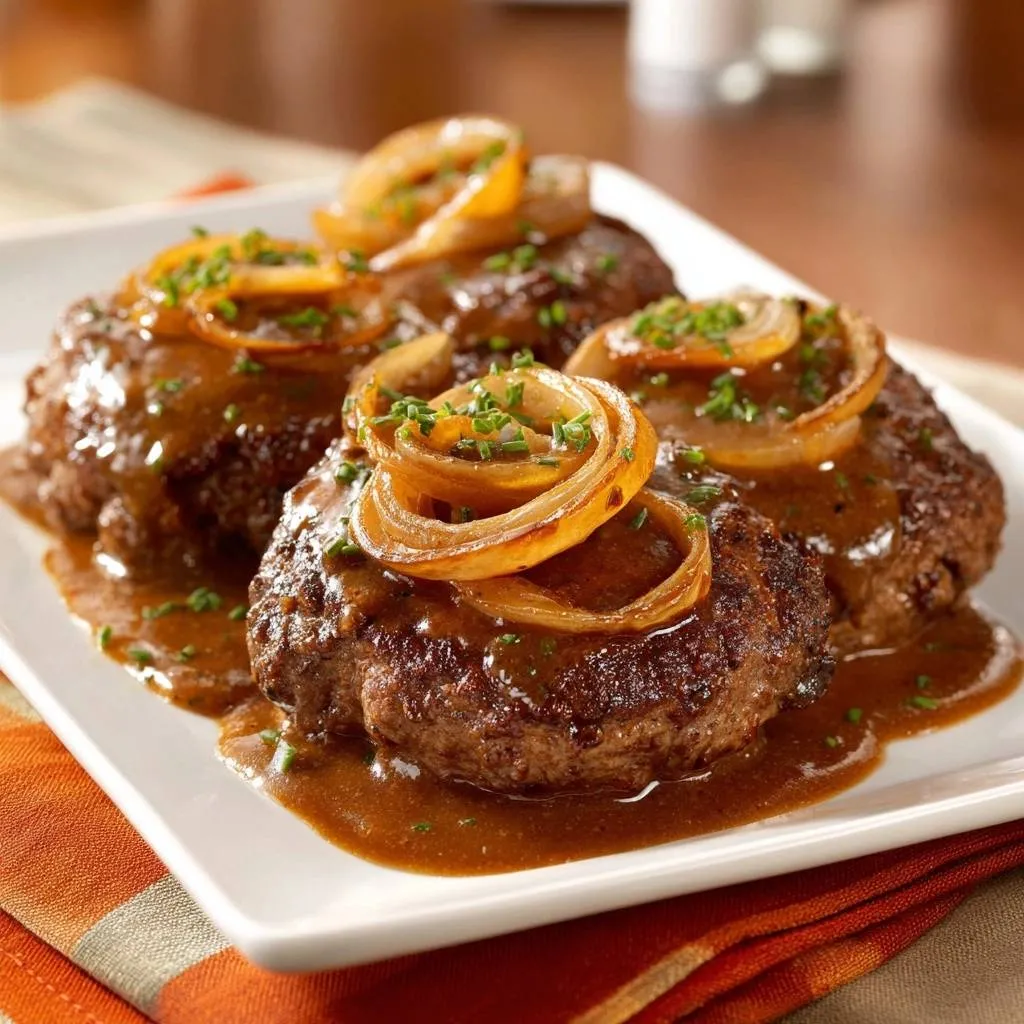
The secret lies in the “dimple” technique. By pressing a shallow indentation into the center of each patty before searing, you counteract the natural tendency of meat fibers to tighten and bulge. This small adjustment ensures your steaks cook evenly and maintain that classic oval shape, providing the perfect surface area for the caramelized onions to rest upon.
The Science of the No-Shrink Patty Secret
When you apply high heat to ground beef, the proteins—specifically myosin and collagen—begin to contract and squeeze out moisture. This process is why a flat patty often transforms into a rounder, thicker shape in the pan. Because the edges cook faster than the center, the outer ring of meat tightens first, forcing the middle to puff upward like a dome.
By creating a dimple in the center, you’re essentially giving the meat “room to grow” inward. As the proteins tighten, the indentation levels out instead of bulging, resulting in a perfectly flat steak. This isn’t just about looks; a flat patty ensures more surface area stays in contact with the hot skillet, creating a better crust and more flavor.
Using an 80/20 fat ratio is equally vital for this science to work. Leaner blends lack the necessary fat to lubricate those tightening protein strands. The fat acts as a buffer, keeping the meat supple and juicy even as it sears. If you go too lean, the proteins bond too tightly, and you end up with that dreaded rubbery texture.
Essential Components for Classic Salisbury Steak with Onion Gravy
Quality ingredients are the foundation of this dish, and it starts with the beef. I always recommend a fresh 80/20 ground chuck because the fat content provides the moisture needed to survive the two-stage cooking process. Since we are searing the meat and then simmering it in gravy, lean beef would dry out long before the onions are ready.
To elevate the flavor from “hamburger” to “steak,” we use umami boosters like Dijon mustard and Worcestershire sauce. The mustard adds a subtle tang that cuts through the richness of the beef, while the Worcestershire provides a deep, salty complexity. These ingredients work together to mimic the savory profile of a high-end cut of meat.
When it comes to the binder, stick with plain breadcrumbs. While seasoned crumbs are tempting, they often contain dried herbs that can burn during the high-heat sear or clash with the onion gravy. Using plain crumbs allows you to control the salt levels perfectly, ensuring the final dish is seasoned exactly to your liking.
Choosing the Right Aromatics and Liquids
Yellow onions are the MVP of this gravy because they have a high sugar content that leads to beautiful caramelization. White onions can be a bit too sharp, and red onions turn a muddy color when simmered. The yellow variety softens into a jammy, sweet consistency that balances the salty beef broth.
Always reach for unsalted butter when starting your gravy base. This gives you total control over the seasoning, especially since beef broth and Worcestershire sauce already pack a salty punch. A high-quality beef broth is essential here; it mingles with the “fond”—those dark, flavorful bits stuck to the bottom of your pan—to create a professional-grade sauce.
Step-by-Step: Preparing the Beef and Shaping Patties
When you’re ready to mix your beef, remember the golden rule: be gentle. You want to combine the breadcrumbs, egg, and seasonings until they’re just incorporated. If you overwork the meat with your hands, you’ll warm up the fat and smash the protein fibers together, which creates a dense, tough steak.
Shape the mixture into four large ovals, roughly three-quarters of an inch thick. Use your thumb to press a shallow well into the center of each one. You aren’t making a hole; you’re just creating a slight dip. This ensures that when the meat expands, it fills that gap rather than tightening into a ball.
Make sure your patties are uniform in thickness so they cook at the same rate. If one side is significantly thicker than the other, you’ll end up with a steak that is overdone on the edges and raw in the middle. Consistency is the key to a juicy result every single time.
Mastering the Sear: Achieving a Deep Crust
The Maillard reaction is your best friend in this recipe. This is the chemical reaction between amino acids and reducing sugars that gives browned food its distinctive, savory flavor. To achieve this, your skillet needs to be shimmering hot before the meat ever touches the surface.
Once you place the patties in the oil, leave them alone. It’s tempting to poke or flip them early, but you need a solid four minutes of undisturbed contact to develop a dark brown crust. This crust isn’t just for texture; it provides the base flavor for the entire gravy later on.
If the meat is sticking to the pan, it’s usually telling you it isn’t ready to be flipped yet. Once that beautiful crust forms, the meat will naturally release from the skillet. Flip them carefully and sear the other side until you see that same deep, mahogany color across the surface.
Building the Rich Onion Gravy Base
After removing the steaks, don’t you dare wipe out that pan! Those browned bits are liquid gold. Melt your butter directly into the rendered beef fat and toss in your sliced onions. You’re looking for a deep caramelization here, which takes about 8 to 10 minutes of frequent stirring.
The onions should transform from translucent white to a rich, golden brown. Once they reach that stage, sprinkle the flour over them. This creates a roux-like base. You must cook the flour with the onions for at least two minutes to toast the starch; otherwise, your gravy will have a dusty, raw flour aftertaste.
This step is where the magic happens. The flour coats the onions and absorbs the fat, ensuring your gravy will be thick and glossy rather than greasy. Keep the heat at a steady medium so you don’t burn the flour before the next step.
Deglazing and Simmering for Maximum Flavor
Slowly pour in your beef broth while whisking constantly. Use a wooden spoon to scrape the bottom of the pan vigorously. This process, called deglazing, incorporates all that flavorful fond into the liquid. You’ll see the broth transform from a thin liquid into a velvety, dark sauce almost instantly.
Once the gravy is simmering and thickened, nestle the patties back into the pan. Spoon the onions and sauce over the top of the meat to keep it moist. This final simmer allows the flavors to meld and ensures the steaks are cooked through while remaining incredibly tender.
Avoiding Common Mistakes with Ground Beef Steaks
If your patties are falling apart in the pan, you likely didn’t use enough binder or your egg was too small. The egg and breadcrumbs act as the “glue” that holds the meat together during the high-heat sear. Ensure you measure your breadcrumbs accurately to maintain the right structural balance.
Lumpy gravy is another common pitfall. This usually happens if you dump all the broth in at once. To keep it smooth, add the liquid in a slow, steady stream while whisking. If you do end up with lumps, a vigorous whisking session over medium heat usually smooths things out before the meat goes back in.
Finally, watch your simmer time. While the gravy needs to thicken, overcooking the meat at this stage will turn it dry. As soon as the gravy is glossy and the meat is firm to the touch, take it off the heat. The residual heat will finish the job without sacrificing the juices.
Optimal Pairings for Salisbury Steak and Gravy
Since this dish is heavy and savory, you need sides that can handle the richness. Buttery mashed potatoes are the classic choice for a reason—they are the perfect vessel for soaking up every last drop of that onion gravy. If you want something lighter, a cauliflower mash offers a similar experience with fewer carbs.
For a similarly satisfying side, explore creamy green beans with crispy topping.
To balance the plate, add something bright and acidic. Steamed green beans with a squeeze of lemon or a simple vinegar-based slaw can cut through the fat of the beef and butter. The contrast between the deep, earthy gravy and a crisp, bright vegetable makes the whole meal feel much more balanced.
Egg noodles are another fantastic option if you prefer pasta over potatoes. The wide, flat noodles catch the sliced onions beautifully. Whatever you choose, make sure it’s something that won’t get lost under the bold flavors of the Salisbury steak.
Make Ahead, Storage, and Reheating Instructions
This is an excellent meal-prep dish because the flavors actually improve after a day in the fridge. Store your leftovers in an airtight container for up to three days. The gravy will thicken significantly as it cools, so don’t be alarmed if it looks like jelly the next morning.
When reheating, avoid the microwave if possible, as it can make the beef rubbery. Instead, place the steaks and gravy in a small skillet over medium-low heat. Add a splash of water or extra beef broth to loosen the sauce and cover the pan with a lid. This steams the meat gently, keeping it moist and tender.
You can also freeze the cooked patties in the gravy for up to two months. Thaw them overnight in the refrigerator before reheating on the stovetop. I don’t recommend freezing the raw patties with the onions, as the texture of the onions suffers once thawed and cooked.
Expert Tips for Customizing Your Gravy
If you want to take this gravy to the next level, try adding a cup of sliced cremini mushrooms along with the onions. This creates a “Forestiere” style sauce that adds an extra layer of earthiness. The mushrooms soak up the beef broth and become little flavor bombs in every bite.
For a more sophisticated depth, stir in a teaspoon of balsamic vinegar or a splash of Worcestershire right at the end. This adds a “bright” note that wakes up the heavy flavors. You can also toss in fresh thyme or rosemary during the onion caramelization phase to infuse the fat with herbal aromas.
Troubleshooting Your Salisbury Steak
Why is my gravy too thin?
If your gravy isn’t coating the back of a spoon, it likely needs more time to reduce. Let it simmer for an extra few minutes without the lid. If you’re in a hurry, you can mix a teaspoon of cornstarch with a tablespoon of cold water and whisk it into the simmering sauce for an instant fix.
Can I use ground turkey or chicken?
You can, but you’ll need to add a little extra fat. Since poultry is much leaner than 80/20 beef, the patties can become very dry. I recommend adding an extra tablespoon of butter to the meat mixture or using dark meat ground turkey to maintain a similar moisture level.
Why did my patties puff up despite the dimple?
This usually happens if the heat is too high or the patties are too thick. If the outside cooks instantly, it traps the steam inside, causing the meat to expand outward. Ensure your patties are no more than 3/4 inch thick and keep your heat at a steady medium-high.
How do I know when the meat is perfectly cooked without a thermometer?
Use the firmness test. Press the center of the patty with your finger; it should feel firm but have a slight spring to it. If it feels soft or squishy, it needs more time. If it feels hard and rigid, it’s likely overcooked. The goal is a juicy medium-well.
Can I make this in a slow cooker?
Yes, but you cannot skip the searing step. You must sear the patties and caramelize the onions in a skillet first to develop the flavor. Once that’s done, transfer everything to the slow cooker and cook on low for 3-4 hours. This results in an incredibly tender steak, though the gravy may need a quick thickening at the end.
Salisbury Steak
Course: Main CourseCuisine: AmericanDifficulty: easy4
servings15
minutes25
minutes550
kcal40
MinutesA classic comfort food dish featuring seasoned ground beef patties seared to perfection and smothered in a savory, homemade onion gravy. The recipe utilizes a unique dimple technique to ensure patties stay flat and juicy.
Ingredients
1.5 lbs ground beef (80/20 blend for moisture)
1/2 cup plain breadcrumbs
1 large egg, beaten
1 tablespoon Worcestershire sauce
1 teaspoon garlic powder
1/2 teaspoon onion powder
1 teaspoon Dijon mustard
Salt and black pepper to taste
2 large yellow onions, sliced into thick half-moons
2 cups beef broth
2 tablespoons all-purpose flour
2 tablespoons unsalted butter
1 tablespoon vegetable oil
Fresh chives, chopped for garnish
Directions
- In a large bowl, combine the ground beef, breadcrumbs, egg, Worcestershire sauce, mustard, garlic powder, onion powder, salt, and pepper. Mix gently with your hands until just combined. Do not overwork the meat, as this leads to a tough, rubbery texture.
- Shape the mixture into 4 large oval patties. Use your thumb to press a shallow dimple into the center of each patty. This is the key to the No-Shrink Patty Secret; it allows the meat to expand inward rather than tightening into a ball.
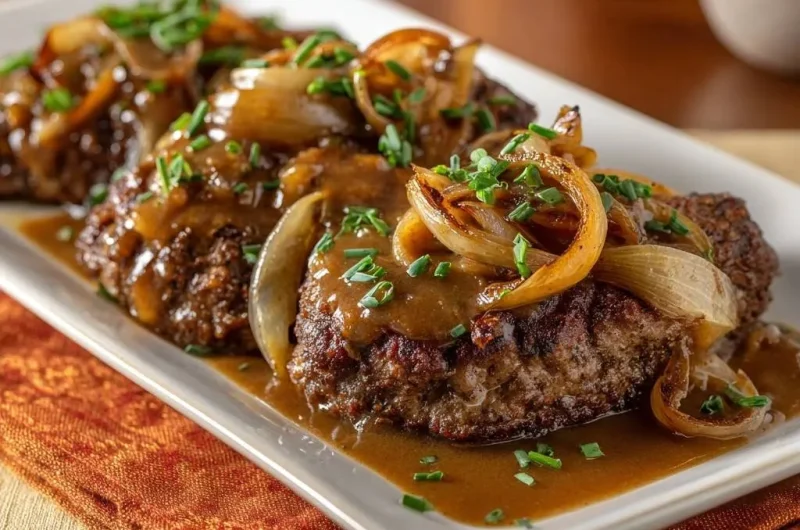
- Heat the vegetable oil in a large skillet over medium-high heat. Once the pan is shimmering hot, add the patties. Sear for 4 minutes per side until a deep, dark brown crust forms (as seen in the image). Remove the patties from the pan and set aside on a plate.
- In the same skillet, melt the butter. Add the sliced onions and cook for 8 to 10 minutes over medium heat, stirring frequently, until they are soft and deeply caramelized.
- Sprinkle the flour over the onions and stir for 1 to 2 minutes to coat the onions and cook out the raw flour taste.
- Slowly whisk in the beef broth, scraping the bottom of the pan with a wooden spoon to release all the flavorful browned bits (fond). Bring the gravy to a gentle simmer until it begins to thicken.
- Place the patties back into the skillet, nestling them into the onions. Spoon the thick gravy and onions over the top of each steak. Lower the heat to medium-low and simmer for 5 to 7 minutes until the meat is cooked through and the gravy is glossy and rich.
- Garnish generously with fresh chopped chives and serve immediately.
Notes
- The ‘dimple’ technique is the secret to preventing the meat from tightening into a ball. Do not overwork the meat to ensure a tender texture.