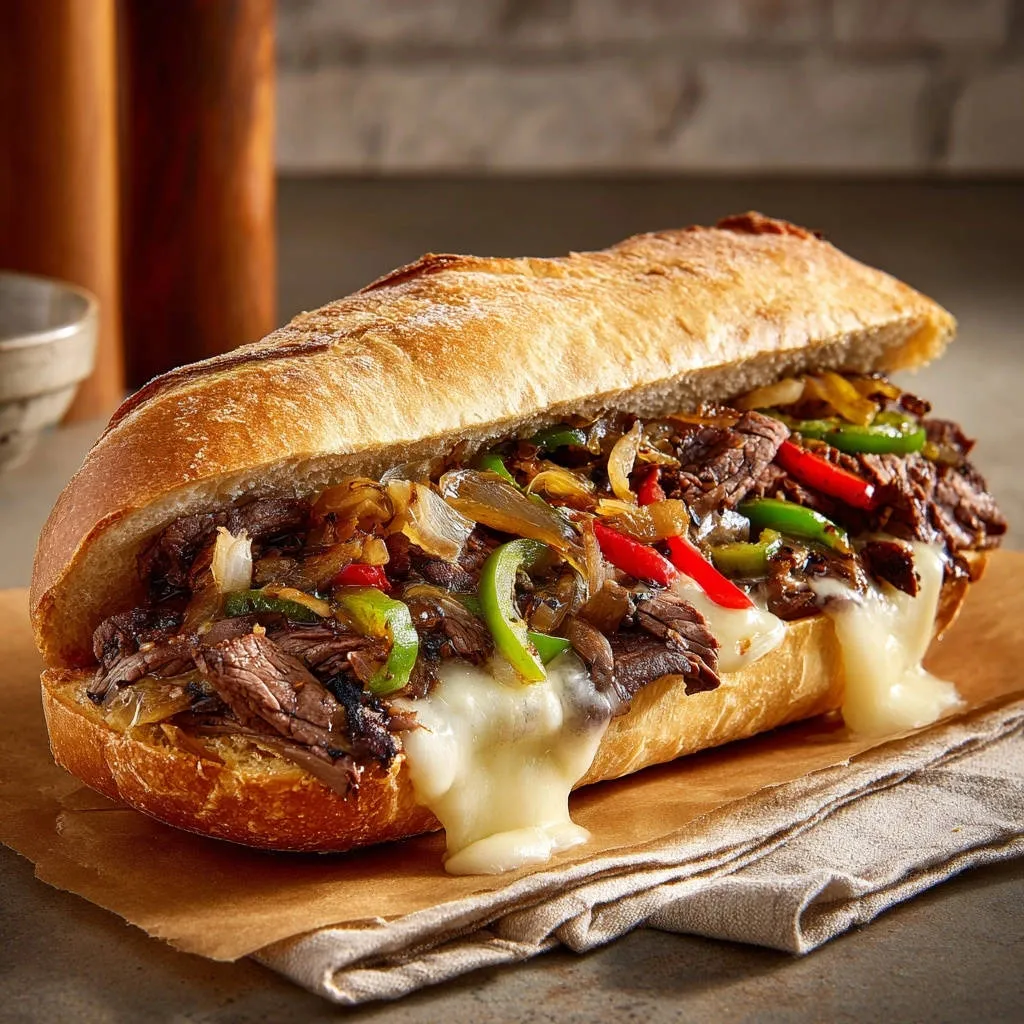
I spent years perfecting the steak sandwich, constantly frustrated by juicy fillings that inevitably turned my crusty sub roll into a soggy, embarrassing mess. This Classic Shredded Beef and Pepper Sub recipe solves that critical problem with one simple, genius technique-guaranteeing incredible flavor and texture every single time.
What makes this recipe special is the focus on building a literal waterproof barrier in the bread, ensuring the melt-in-your-mouth shredded beef filling stays perfectly contained while delivering maximum moisture and deep flavor.
For more ideas on achieving a satisfying texture, check out how to engineer the perfect crunch in ultimate beef patty melts.
Flavor Foundation: Selecting and Preparing the Best Components
Choosing Your Cut: Why Chuck Roast is King
Beef chuck roast is the ideal cut for slow-cooked shredded beef because of its generous marbling.
For a different take on tender beef sandwiches, explore this Philly cheesesteak recipe.
This internal fat slowly breaks down during the long cook time, resulting in incredibly tender, flavorful strands that are easy to shred.
Its robust structure holds up beautifully against the slow-cooker environment, preventing it from turning into mush while retaining essential moisture.
The Pepper Power: Balancing Sweetness and Heat
The combination of green and red bell peppers provides both color and a necessary balance of flavor complexity.
While the savory beef is rich and deep, the slow sautéing process coaxes out the natural sugars in the peppers and onions, creating a sweet counterpoint that brightens the entire filling.
Broth and Seasoning Ratios for Maximum Depth
The beef broth serves a dual purpose: it creates a moist environment for the chuck roast to tenderize and forms the flavorful liquid used to re-moisturize the shredded beef.
Always season the roast generously with salt and pepper before cooking; this initial heavy seasoning ensures the flavor penetrates deep into the meat fibers.
Bread Selection: The Unsung Hero of the Sub
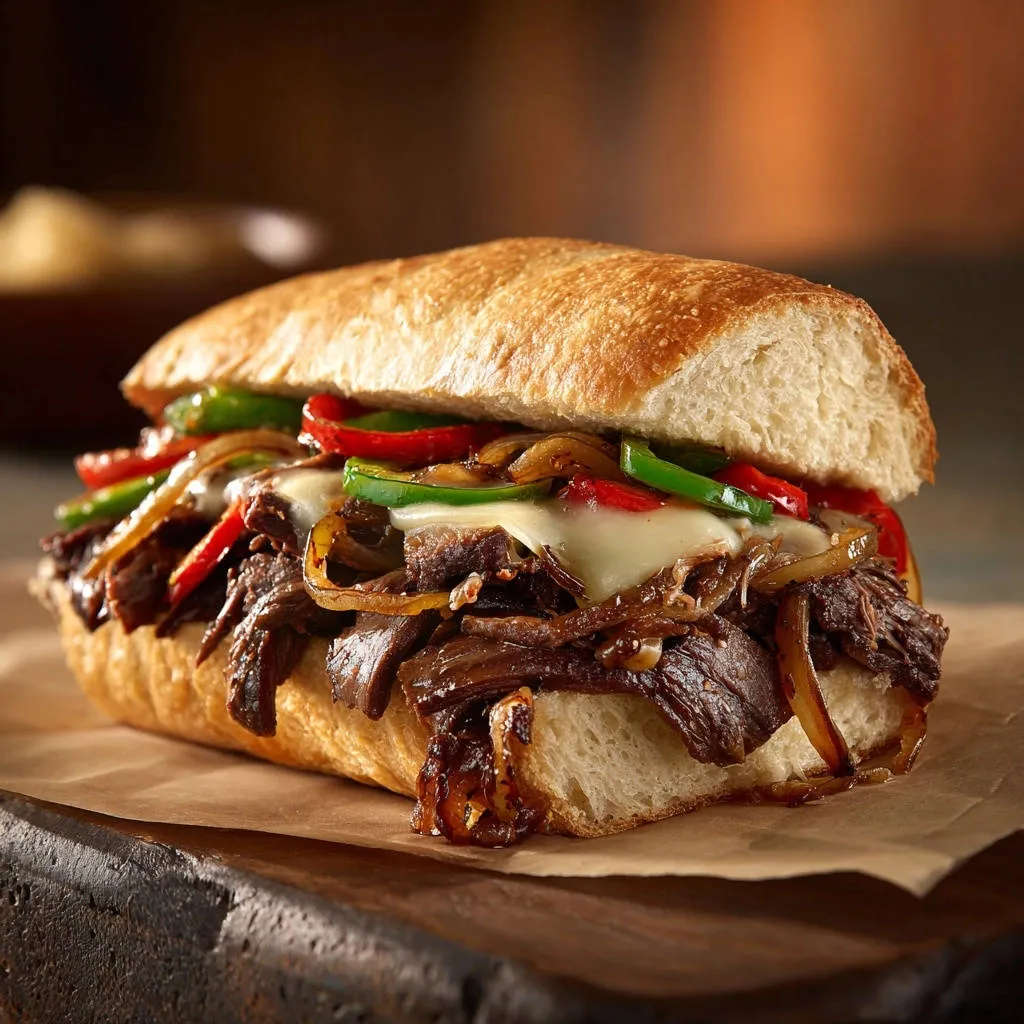
A successful sub requires a French or baguette-style roll that possesses a thin, crisp crust and a relatively soft interior.
Soft sandwich buns or standard hoagie rolls simply won’t survive the amount of moisture present in the filling, meaning they lack the structural integrity needed for this hearty Classic Shredded Beef and Pepper Sub.
Essential Gear: Setting Up for Slow-Cooker Success
The Perfect Slow Cooker for Shredded Beef
A 3 to 6-quart slow cooker is perfect for managing a 3-pound chuck roast, ensuring it cooks evenly and is submerged enough in the cooking liquid.
If you make shredded beef often, consider using a programmable model that automatically switches to the ‘Keep Warm’ setting after the cycle finishes.
Skillets and Tools for Sautéing and Assembly
Large Skillet: Use a large, heavy-bottomed skillet-stainless steel or cast iron-to provide consistent, high heat necessary for properly caramelizing the onions and peppers.
Two Forks: The fastest, most efficient way to achieve perfectly shredded meat is using two standard dinner forks, pulling the meat apart in opposite directions.
Baking Sheet: A rimmed baking sheet is essential for the crucial broiling steps; it provides a stable platform for the sub rolls.
Mastering the Method: Detailed Steps for Fork-Tender Beef
-
Preparation and Slow Cooking the Roast:
Before introducing heat, take the time to press the salt and pepper firmly into the beef chuck roast on all sides.
Place the roast in the cooker, pour the beef broth over it, and set it on low. The goal is a texture so tender that the meat resists only slightly before completely giving way when pierced with a fork.
-
The Crucial Shredding and Re-Moisturizing Step:
Once tender, remove the beef and shred it completely. Do not discard the liquid remaining in the slow cooker; this is pure flavor gold.
Returning the shredded beef to the reserved liquid allows the meat fibers to reabsorb moisture, guaranteeing the shredded beef is succulent and remains flavorful while you tackle the vegetable prep.
-
Caramelizing the Vegetables:
Slice your onions and peppers thinly and sauté them over medium heat in olive oil. This step cannot be rushed.
Proper caramelization is achieved when the vegetables soften significantly, collapsing slightly, and the edges begin to brown and sweeten-this contrast is vital for the Classic Shredded Beef and Pepper Sub.
-
Combining the Filling: Moist, But Not Wet:
When transferring the shredded beef, lift it from the liquid with tongs, allowing any heavy excess broth to drip off before adding it to the vegetables.
The final filling should be moist and juicy, but not so wet that liquid is pooling in the skillet. Reduce the heat to low immediately to keep the filling piping hot for assembly.
Anti-Soggy Mastery: The Secret Weapon of the Perfect Sub Roll
The Waterproof Barrier: Why Butter and Broiling Works
The secret to a non-soggy sub lies in creating a physical, fat-infused barrier on the interior of the bread before adding the filling.
Spreading softened butter and then briefly broiling the roll’s interior surface toasts the bread fibers and seals them using the fat.
This creates a stable, crispy shell that resists liquid absorption from the juicy filling, ensuring the sub maintains its structural integrity until the last bite.
Precision Broiling: Avoiding the Burn
The broiler must be preheated to high, and vigilance is absolutely required during this 60 to 120-second window.
Place the rolls face-up and watch constantly; the goal is a lightly toasted, barely golden interior-not a charred, dark brown crust-before pulling them out.
The Provolone Foundation: Layering for Leak Protection
In this recipe, the provolone cheese acts as a secondary, flexible moisture barrier directly on top of the toasted bread.
Placing the cheese down first ensures that as the hot beef mixture is added, the cheese melts instantly and completely adheres to the bread surface, sealing any microscopic gaps and preventing juice seepage.
Chef’s Tips and Tricks to Elevate Your Classic Shredded Beef and Pepper Sub
Boosting the Flavor: A Splash of Vinegar
A small splash (about 1 teaspoon) of red wine vinegar added right after combining the beef and peppers helps balance the richness.
The acidity cuts through the heavy fat and savory depth of the beef, adding a bright finish that makes the overall flavor profile more complex and addictive.
Make it Spicy: Introducing Heat
If you prefer heat, thinly slice mild banana peppers or integrate a small amount of red pepper flakes early in the sautéing process.
This allows the spice to bloom in the oil and infuse evenly throughout the shredded beef mixture.
Achieving the Ultimate Cheese Drip
To get that perfect, bubbly, dripping cheese pull, make sure your filling is extremely hot when assembled, and place the finished subs back under the broiler on the top rack.
Watch carefully for the moment the cheese is fully melted and barely starting to bubble before serving immediately.
Troubleshooting Common Beef Sub Challenges
Problem: My Shredded Beef is Too Dry
The solution is almost always found in the slow cooker liquid. Ensure you reserved it after cooking.
If the beef seems dry when combining with the peppers, add back 1 to 2 tablespoons of the reserved broth until the meat glistens but is not pooling in liquid.
Problem: The Rolls Burned Under the Broiler
The broiler is intense and unforgiving. Ensure your rack is not set to the highest level, and most critically, never walk away.
Broiling the rolls should take no more than 60 to 90 seconds, and they should be removed the instant they achieve a light gold color.
Beyond the Recipe: Pairing, Storage, and Prep
Perfect Side Dishes and Wine Pairings
Crispy Oven Fries or Seasoned Kettle Chips
What to Serve Alongside
Complement your shredded beef and pepper subs with these lighter, refreshing options.
- For a crisp and fruity addition, consider the Harvest Apple and Walnut Salad, bringing a touch of sweetness and crunch.
- Add a pleasant crunch with the Crispy Fried Onion Strings, offering a satisfying texture.
A Simple Tangy Coleslaw or Garden Salad
Beverage Recommendation: A robust, yet smooth, Merlot or an American Pale Ale.
Make-Ahead and Storage Solutions
The shredded beef and pepper filling can be prepared up to three days in advance and stored tightly sealed in the refrigerator. Reheat the filling thoroughly in a skillet before moving on to Step 5 (The Anti-Soggy Roll Secret).
Do not assemble the subs until just before serving, as this guarantees the roll stays crisp and fresh.
Frequently Asked Questions About Classic Shredded Beef and Pepper Subs
Can I make this Classic Shredded Beef and Pepper Sub in an Instant Pot instead?
Yes, you can easily adapt this recipe. Season the beef, sear it on all sides using the Sauté function, then add the broth.
Pressure cook on High for 50-60 minutes, followed by a natural pressure release for 10 minutes before manually venting.
Is there a good non-dairy or vegan cheese option that melts well?
For those avoiding dairy, seek out specialized provolone-style vegan slices, often made from cashew or coconut bases.
Ensure you use a high-quality brand specifically marketed for melting, as results can vary widely.
Can I use different types of peppers or add mushrooms?
Absolutely. While the classic combination uses red and green bell peppers, you can incorporate thinly sliced portobello mushrooms for an earthy depth or substitute mild yellow banana peppers for a brighter flavor.
Keep the total volume of vegetables consistent to maintain the filling’s structure.
Ready to Impress? Share Your Classic Shredded Beef and Pepper Sub Masterpiece!
After mastering the crucial anti-soggy technique, you are ready to create a truly flawless Classic Shredded Beef and Pepper Sub that rivals any deli.
We hope this expert guide helps you deliver juicy flavor without the disappointment of a compromised crust. Don’t forget to share your experience and any successful variations with us!
Shredded Beef and Pepper
Course: Main CourseCuisine: AmericanDifficulty: easy4
servings15
minutes8
hours950
kcal480
minutesThis recipe solves the universal problem of the dreaded soggy sub roll. Slow-cooked chuck roast is shredded and combined with caramelized peppers and onions. The secret lies in a quick broil of the buttered rolls, creating a crucial moisture barrier before loading them with cheesy, juicy filling.
Ingredients
3 pound beef chuck roast
1 cup beef broth
1 tablespoon olive oil
1 large yellow onion, thinly sliced
1 large green bell pepper, thinly sliced
1 large red bell pepper, thinly sliced
1 teaspoon salt, plus more for seasoning
1/2 teaspoon black pepper, plus more for seasoning
4 French or sub rolls (baguette style)
2 tablespoons butter, softened
8 slices provolone cheese (or your favorite melting cheese)
Directions
- Prepare the Beef: Season the chuck roast generously with salt and pepper. Place the roast in a slow cooker and pour the beef broth over the top. Cook on Low for 6 to 8 hours, or until the beef is fork-tender and easily shredded.
- Shred the Beef: Once cooked, remove the beef from the slow cooker (reserve the liquid). Use two forks to shred the beef entirely. Place the shredded beef back into the cooking liquid to keep it moist and flavorful.
- Cook the Vegetables: While the beef is finishing, heat the olive oil in a large skillet over medium heat. Add the sliced onions, green pepper, and red pepper. Season lightly with salt and pepper. Saute for 8 to 10 minutes, stirring often, until the vegetables are softened and caramelized.
- Combine Filling: Drain the shredded beef slightly (you want it moist, but not soaking wet) and add it to the vegetable mixture in the skillet. Stir gently to combine and heat through. Reduce the heat to low to keep warm.
- The Anti-Soggy Roll Secret (Crucial Step): Preheat your broiler to high. Slice the four sub rolls lengthwise but do not cut all the way through. Spread a thin layer of softened butter on the inside surfaces of the rolls. Place the open rolls face-up on a baking sheet and broil for 1 to 2 minutes. Watch constantly, removing them as soon as the inside surfaces are lightly toasted and barely golden. This creates a waterproof barrier that prevents the bread from absorbing the juices.
- Assemble the Subs: Lay two slices of provolone cheese inside each toasted roll, right on top of the toasted, buttered surface. Scoop the hot shredded beef and pepper mixture liberally over the cheese.
- Melt and Serve: Place the assembled sandwiches back under the broiler for 1 minute, or just until the cheese is bubbling and completely melted, ensuring that cheesy drip every time. Serve immediately.
Notes
- To prevent sogginess, ensure you toast the buttered rolls under the broiler until lightly golden to create a waterproof barrier.