Why This Classic Walnut Baklava Recipe is a Game-Changer
This isn’t just another baklava recipe; it’s a meticulously crafted guide designed to deliver exceptional results. We focus on techniques that eliminate common pitfalls, ensuring your efforts are always rewarded with perfection. Prepare to impress everyone with this standout dessert.The “No More Soggy Baklava” Promise
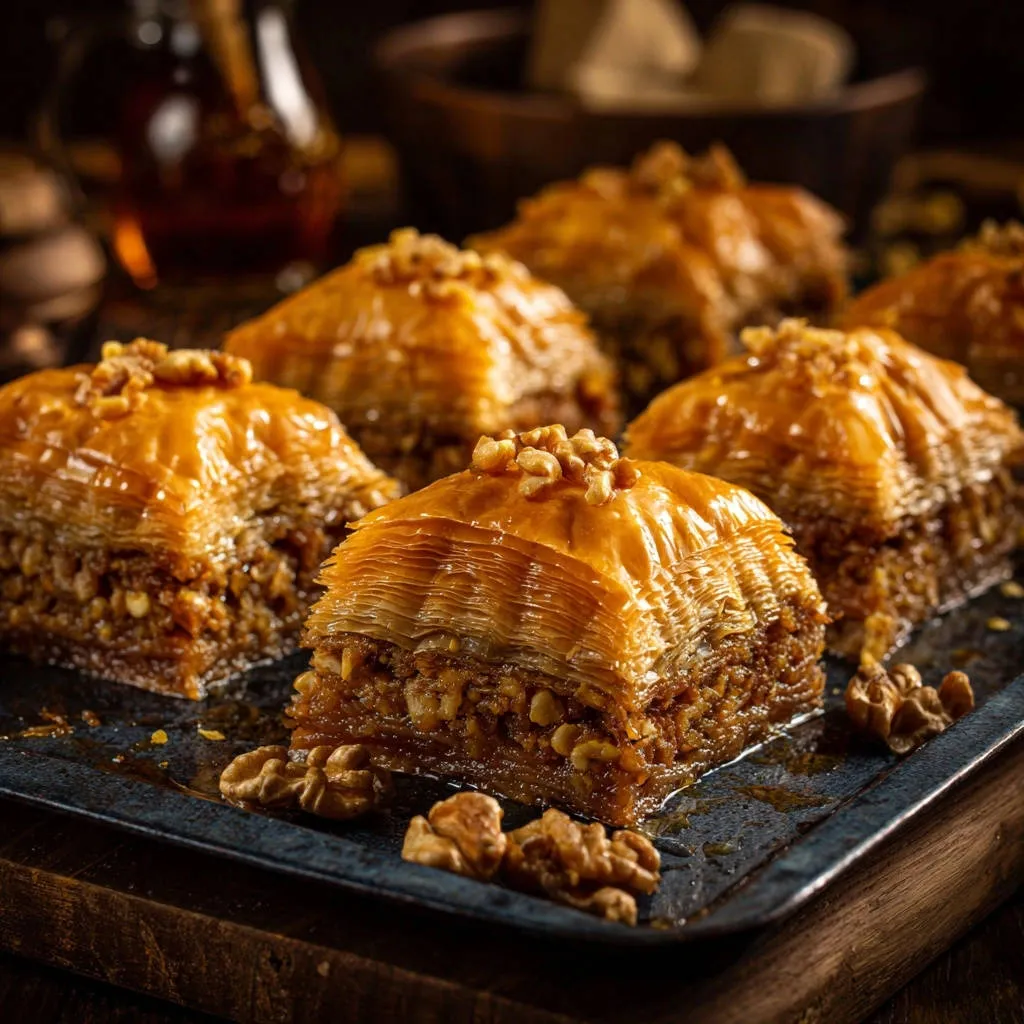
The most common complaint with homemade baklava is a lack of crispness, resulting in a dense, chewy texture. This recipe specifically addresses that challenge head-on. By understanding the critical temperature difference between the baked pastry and the syrup, we guarantee a light, airy, and audibly crisp finish. Our precise instructions on baking duration and syrup preparation are designed to eliminate any hint of sogginess. You’ll achieve that irresistible crunch with every bite, a hallmark of truly outstanding Classic Walnut Baklava.Unlocking Authentic Mediterranean Flavors at Home
Classic Walnut Baklava is more than just a dessert; it’s a culinary journey steeped in rich tradition. This recipe captures the essence of this beloved pastry, balancing sweet, nutty, and subtly spiced notes. It demystifies the process, making authentic flavors accessible to the home baker. The combination of fragrant walnuts, delicate phyllo pastry, and a citrus-kissed syrup creates a harmonious taste profile. You’ll savor a dessert that feels both comforting and wonderfully exotic.Gathering Your Ingredients for Baklava Bliss
Selecting quality ingredients is the foundation for an exceptional baklava. Each component plays a vital role in achieving the desired flavor and texture. Pay attention to these details for the best outcome.The Star: Phyllo Dough Pointers
Use one pound of frozen phyllo dough, ideally thawed overnight in the refrigerator. Before assembly, let it come to room temperature for about an hour to prevent cracking. Always keep unused phyllo sheets covered with a damp cloth or plastic wrap to maintain pliability.Nuts About Walnuts (and Optional Spices)
Finely chopped walnuts provide the perfect texture and rich, earthy flavor for our Classic Walnut Baklava. Avoid over-processing them into a powder; you want distinct small pieces. A touch of ground cinnamon is optional but highly recommended, as it adds a warm, aromatic depth that complements the walnuts beautifully.Butter: The Golden Bridge Between Layers
Unsalted butter is paramount, allowing you to control the overall sweetness and saltiness of your baklava. Melted butter is brushed between each phyllo layer, creating the distinct separation and contributing to the golden-brown crust. It’s the secret to those flaky, tender layers.Crafting the Essential Citrus-Kissed Syrup
The syrup is a simple mixture of granulated sugar, water, and fresh lemon juice. The lemon juice is crucial; it prevents the sugar from crystallizing, ensuring a smooth, clear syrup. It also adds a bright, subtle tang that perfectly balances the baklava’s sweetness.Essential Tools for Your Baklava Baking Journey
Having the right tools on hand streamlines the baklava-making process. These simple gadgets ensure precision and ease, making your baking experience much more enjoyable. Gather these before you begin.Must-Have Kitchen Gadgets
A sharp knife is essential for cleanly cutting the baklava before baking, ensuring even syrup distribution. A good quality pastry brush is indispensable for generously buttering the delicate phyllo sheets. You’ll also need a medium saucepan for the syrup and mixing bowls for the nut filling.Preparing Your Baking Pan
A 9×13 inch baking pan is the ideal size for this Classic Walnut Baklava recipe. Lightly greasing the pan ensures your baklava doesn’t stick and releases easily after baking. This step also contributes to the beautiful golden crust on the bottom.Step-by-Step Guide to Crafting Perfect Classic Walnut Baklava
Follow these detailed steps closely, paying special attention to the nuanced techniques for guaranteed success. Each instruction is designed to build layers of flavor and texture, leading to an exquisite final product.- The Crucial Syrup Prep: Cool for Crispness
In a medium saucepan, combine 2 cups of granulated sugar, 1 1/2 cups of water, and 1 tablespoon of fresh lemon juice. Bring the mixture to a boil over medium heat, stirring continuously until all the sugar has completely dissolved.
Reduce the heat to low and let the syrup simmer gently for exactly 10 minutes without stirring. This simmering time develops the syrup’s flavor and consistency.
Immediately remove the syrup from the heat and allow it to cool completely to room temperature. This step is non-negotiable for achieving crispy baklava; a hot syrup on hot pastry will lead to a soggy result.
- Preheating and Pan Preparation
Preheat your oven to 325°F (160°C). This moderate temperature ensures the phyllo bakes slowly to a golden crisp without burning.
Lightly grease a 9×13 inch baking pan with some melted butter. This prevents sticking and promotes even browning on the bottom layers.
- Preparing the Nut Filling
In a medium bowl, combine the 3 cups of finely chopped walnuts with 1/2 cup of granulated sugar and the optional 1 teaspoon of ground cinnamon. Mix these ingredients thoroughly until well combined.
Ensure the walnuts are finely chopped, not pulverized, for the best texture in your Classic Walnut Baklava. This creates a satisfying, even filling that distributes well between the layers.
- Assembling Your Layers: A Delicate Dance
Carefully unroll your thawed phyllo dough. Phyllo is delicate, so handle it with gentle hands.
Always keep the unused phyllo covered with a damp cloth or plastic wrap while you work. This prevents the thin sheets from drying out and becoming brittle, which makes them prone to cracking.
- Building the Base Layers
Place 8 to 10 sheets of phyllo dough in the bottom of your prepared pan. For each individual sheet, brush it generously with melted unsalted butter before placing the next one on top.
If your phyllo sheets are slightly larger than the pan, allow them to extend slightly up the sides; these will be trimmed later if desired. These initial layers form a sturdy, crisp base for your Classic Walnut Baklava.
- Spreading the First Walnut Layer
Evenly spread half of the prepared walnut mixture over the buttered phyllo base. Distribute it to cover the entire surface, ensuring every bite gets a taste of the nutty filling.
- Adding the Middle Phyllo Sheets
Layer another 5 to 6 sheets of phyllo dough over the nut mixture. Just like the base, brush each sheet thoroughly with melted butter before adding the next one.
These middle layers provide structure and additional crispness within the baklava, creating that signature multi-layered texture.
- Distributing the Remaining Nuts
Spread the remaining half of the walnut mixture evenly over these middle phyllo layers. Ensure uniform coverage for a balanced flavor throughout your Classic Walnut Baklava.
- Capping with the Top Layers
Top the remaining nut mixture with the final 8 to 10 phyllo sheets. Continue to brush each sheet generously with melted butter before stacking.
Make sure the very top sheet is particularly well-buttered, as this will be the most visible layer and contribute significantly to the golden-brown crust.
- Precision Cutting: Diamonds or Squares?
Using a very sharp knife, carefully cut the baklava into your desired diamond or square shapes. It is crucial to cut all the way through the layers down to the bottom of the pan at this stage.
Cutting before baking allows the hot butter to penetrate between the pieces, ensuring even cooking. More importantly, it creates channels for the cooled syrup to seep into every layer, preventing sogginess and maximizing crispness.
- Baking to Golden Perfection
Bake your baklava for 50 to 60 minutes, or until the top is a deep golden brown and the edges appear crisp and slightly puffed. The extended baking time at a moderate temperature ensures the phyllo layers are fully cooked and achieve their desired crunch.
- The Grand Finale: Syrupping the Hot Baklava
Once baked, immediately remove the hot baklava from the oven. This timing is critical for the crispness of your Classic Walnut Baklava.
Evenly pour the completely cooled syrup over the entire hot baklava. The thermal shock created by the cold syrup hitting the hot pastry is a key secret; it helps prevent sogginess and allows the baklava to absorb the syrup beautifully while retaining its crisp texture.
- Patience is Key: Resting for Optimal Flavor and Texture
Let the baklava cool completely to room temperature for several hours, or ideally, overnight, before serving. This patience is paramount.
During this resting period, the syrup is fully absorbed, and the layers set properly. This ensures perfect crispness and allows the flavors to meld beautifully, delivering the best possible Classic Walnut Baklava experience.
For similar crispness, explore the secrets behind Sweet Pistachio Phyllo Swirls.
Chef’s Secrets: Elevate Your Baklava Beyond Basic
Achieving truly exceptional baklava goes beyond just following steps; it’s about mastering techniques and understanding the ingredients. These expert tips will help you refine your skills and produce a baklava that stands out.Mastering Phyllo: Handling & Keeping it Pliant
Phyllo dough works best when it’s cold from the fridge for thawing, then brought to room temperature right before use. Work quickly and keep unused sheets well-covered with a damp towel to prevent them from drying and cracking.
Don’t panic if a sheet tears; simply patch it with another piece and brush with butter. The layers are forgiving.
Buttering Techniques for Even Browning
Apply butter evenly with a soft pastry brush, ensuring all parts of each sheet are lightly coated but not drenched. Pay attention to the edges, as they tend to dry out faster.
Generous buttering, especially on the top layer, is what helps achieve that gorgeous, uniform golden-brown crust.
The Synergy of Hot Baklava, Cold Syrup
This temperature contrast is the most critical element for a crispy baklava. The hot phyllo creates steam when the cold syrup is poured over it, preventing the layers from becoming gummy.
The cold syrup won’t immediately soften the hot, crisp phyllo, allowing it to absorb the sweetness while maintaining its delicate crunch. This is the secret to avoiding soggy results.
Flavor Variations to Explore
While walnuts are traditional, feel free to experiment with other nuts like pistachios, almonds, or a mix. Adding a teaspoon of orange blossom water or rosewater to the cooling syrup imparts an exquisite floral aroma.
For those who enjoy exploring different sweet pastries, you might also love our recipe for foolproof honeycomb bites that never stick, offering another delightful texture and flavor adventure.
Troubleshooting Common Baklava Blunders
Even experienced bakers encounter challenges. Knowing how to troubleshoot common issues can save your baklava and boost your confidence. Here’s how to address typical problems.Why is My Baklava Soggy?
The most frequent culprit for soggy baklava is warm syrup on warm pastry. Always ensure your syrup is completely cool before pouring it over the hot, freshly baked baklava. Another cause can be underbaking; make sure the baklava is deeply golden brown and crisp throughout.Dry or Crumbly Phyllo Issues
Phyllo dries out quickly when exposed to air. To prevent this, always keep unused sheets covered with a damp cloth or plastic wrap. If your phyllo is already dry and brittle, you might need to increase the amount of butter slightly or work even faster.Uneven Browning Woes
Uneven browning can be caused by inconsistent buttering or oven hotspots. Ensure you brush each phyllo sheet thoroughly and evenly with butter, especially the top layer. Rotating your baking pan halfway through the baking time can help achieve a uniform golden color.Serving, Storage & Make-Ahead Tips
Proper serving, storage, and preparation in advance can elevate your baklava experience. These practical tips ensure your Classic Walnut Baklava remains delicious and convenient.Presentation Matters: How to Serve
After cooling completely, baklava can be garnished beautifully. A light sprinkle of additional finely chopped walnuts, a dusting of cinnamon, or even a few fresh lemon zest curls add visual appeal. Serve individual pieces with a small fork alongside coffee or tea.Keeping Your Baklava Fresh & Crisp
Store your Classic Walnut Baklava in an airtight container at room temperature. It will retain its crispness and fresh flavor for up to 1-2 weeks. Avoid refrigerating baklava, as the moisture can soften the delicate phyllo layers and dull its crisp texture.Can I Prepare Baklava in Advance?
Yes, baklava is an excellent make-ahead dessert. You can assemble the entire baklava, cut it, and then wrap it tightly and freeze it unbaked for up to 1 month. Bake directly from frozen, adding about 15-20 minutes to the baking time. Alternatively, bake it, cool it completely, then wrap and freeze before pouring the syrup. Thaw, warm gently, and then pour the cooled syrup. Pairing Classic Walnut Baklava with a savory main course creates a wonderful meal, and our lemon herb roast chicken is an excellent choice for a balanced spread.Classic Walnut Baklava FAQs
We’ve gathered answers to common questions about Classic Walnut Baklava, helping you confidently tackle this exquisite dessert.Can I use different nuts instead of walnuts?
Absolutely! While walnuts are traditional, pistachios are another popular choice, offering a vibrant color and distinct flavor. Almonds or pecans can also be used, though they will result in a slightly different taste and texture profile.Is phyllo dough gluten-free?
Traditional phyllo dough is not gluten-free, as it is made from wheat flour. However, some specialty stores may carry gluten-free phyllo alternatives, though their texture and handling may differ slightly from the traditional variety.How long does homemade baklava last?
When stored properly in an airtight container at room temperature, homemade baklava will remain fresh and delightfully crisp for 1 to 2 weeks. Its high sugar content acts as a natural preservative.What’s the best way to cut baklava after baking?
The best practice is to cut the baklava before baking, as instructed in step 10. Cutting after baking can be challenging, often resulting in cracked layers and uneven pieces due to the hardened, crisp phyllo. If you’re looking for more delightful baked goods that always impress, our perfect cheesecake recipe promises a smooth, crack-free dessert every time.Share Your Classic Walnut Baklava Masterpiece!
Now that you have the secrets to achieving perfectly crisp Classic Walnut Baklava, it’s time to put your skills to the test. This recipe promises a rewardingly delicious and impressive dessert that will become a staple in your repertoire. We can’t wait to see your beautiful creations! Tag us on social media or leave a comment below sharing your baklava journey.
Baklava
Course: DessertCuisine: MediterraneanDifficulty: medium24
pieces45
minutes50
minutes350
kcal95
minutesTransform delicate phyllo into a show-stopping Classic Walnut Baklava. This recipe reveals the secrets to achieve ultimate crispness, combining buttery layers with a spiced walnut filling and a fragrant lemon syrup. A truly satisfying and impressive homemade dessert.
Ingredients
1 pound phyllo dough, thawed
1 1/2 cups unsalted butter, melted
3 cups walnuts, finely chopped
1/2 cup granulated sugar (for nut mixture)
1 teaspoon ground cinnamon (optional)
2 cups granulated sugar (for syrup)
1 1/2 cups water (for syrup)
1 tablespoon fresh lemon juice (for syrup)
Directions
- Prepare the syrup: In a medium saucepan, combine 2 cups granulated sugar, 1 1/2 cups water, and the lemon juice. Bring to a boil over medium heat, stirring until the sugar dissolves. Reduce heat and simmer gently for 10 minutes without stirring. Remove from heat and let it cool completely to room temperature. This step is crucial for crisp baklava.
- Preheat your oven to 325 degrees F (160 degrees C). Lightly grease a 9×13 inch baking pan.
- Prepare the nut filling: In a medium bowl, combine the finely chopped walnuts, 1/2 cup granulated sugar, and optional ground cinnamon. Mix well.
- Assemble the baklava: Carefully unroll the thawed phyllo dough. Keep the phyllo covered with a damp cloth or plastic wrap while you work to prevent it from drying out.
- Place about 8 to 10 sheets of phyllo in the bottom of the prepared pan, brushing each individual sheet generously with melted butter before adding the next. Ensure the phyllo extends slightly up the sides if needed.
- Evenly spread half of the walnut mixture over the buttered phyllo layers.
- Layer another 5 to 6 sheets of phyllo over the nuts, again brushing each sheet thoroughly with melted butter.
- Spread the remaining walnut mixture over these phyllo layers.
- Top with the remaining phyllo sheets, brushing each sheet with melted butter, using about 8 to 10 layers for the top. Make sure the very top sheet is also generously buttered.
- Using a sharp knife, carefully cut the baklava into diamond or square shapes, cutting all the way through the layers down to the bottom of the pan. This allows the syrup to penetrate evenly.
- Bake for 50 to 60 minutes, or until the top is golden brown and the edges are crisp.
- Once baked, immediately remove the hot baklava from the oven. Evenly pour the completely cooled syrup over the entire hot baklava. The temperature difference helps prevent sogginess and allows the baklava to absorb the syrup beautifully while staying crisp.
- Let the baklava cool completely to room temperature for several hours or overnight before serving. This allows the syrup to be fully absorbed and the layers to set, ensuring perfect crispness.
Notes
- Ensure syrup is completely cool and baklava is hot when combined for best crispness.