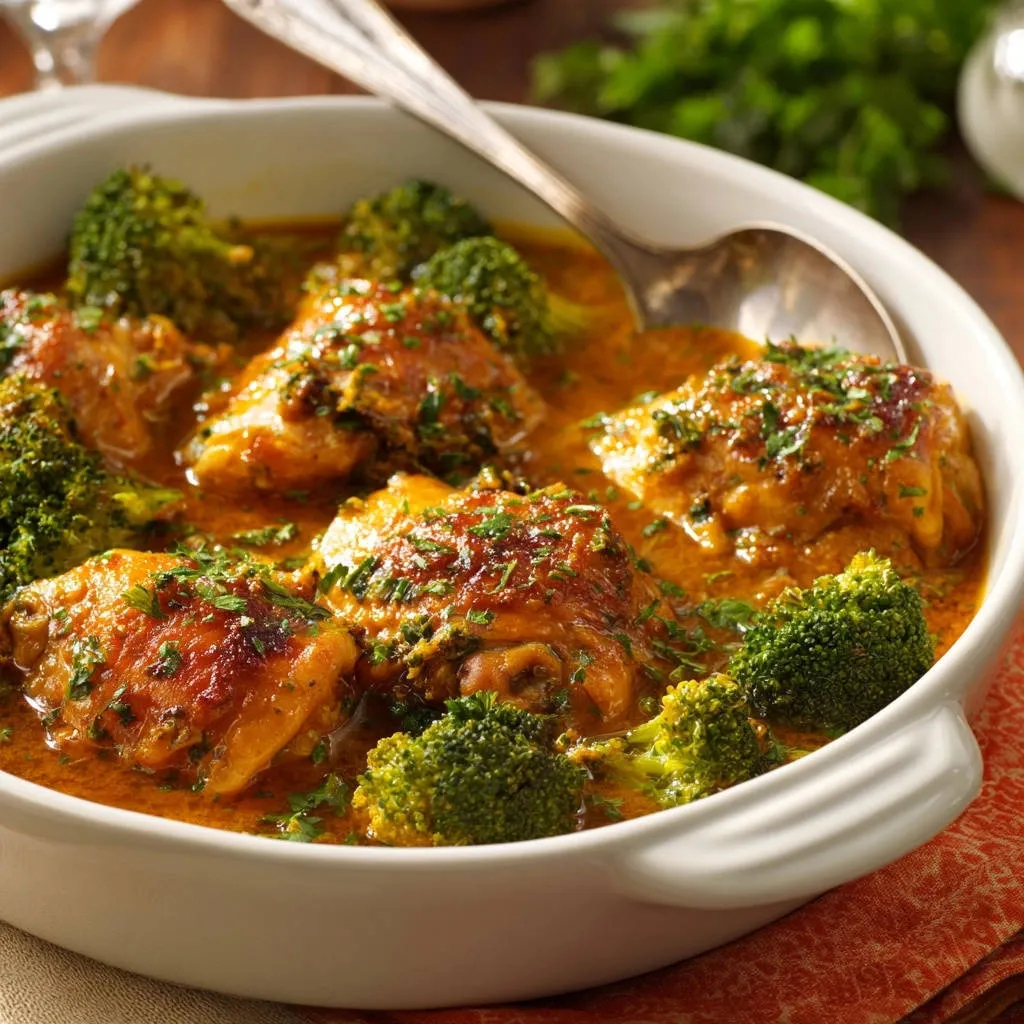
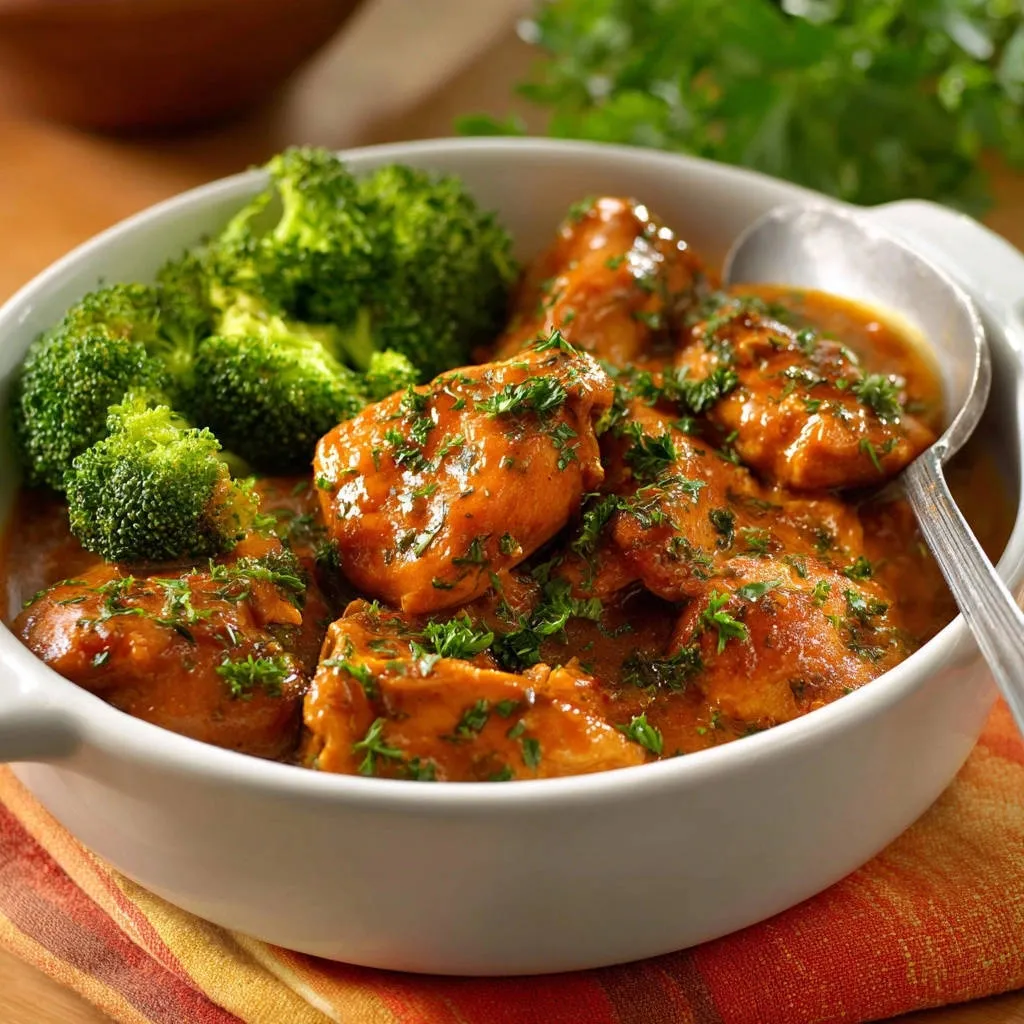
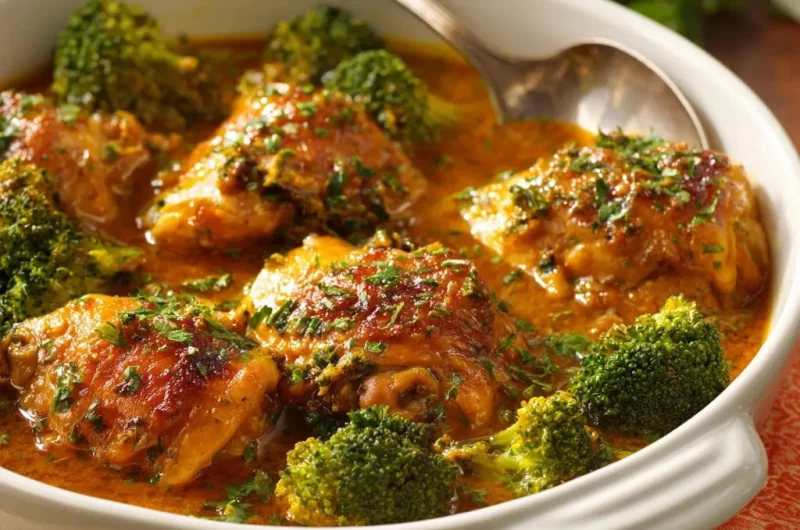
Too often, one-pot chicken dishes disappoint by separating into a thin, watery liquid, regardless of flavor. I’ve perfected a simple two-step process that guarantees a rich, thick, velvety sauce for this incredible Comfort Chicken and Broccoli Braise. This method ensures deep, concentrated flavor and a luxurious texture that clings perfectly to every forkful of chicken and broccoli.
Beyond Basic: Why This Comfort Chicken Braise Gets Rave Reviews
This recipe moves beyond basic casserole textures by utilizing specialized techniques that build flavor from the ground up, resulting in a rich, deeply satisfying meal. The combination of intense searing and a specialized thickening method delivers a guaranteed creamy chicken braise every time.
For a different kind of flavor depth, explore the golden coconut curry noodle soup.
The Two-Step Texture Fix That Guarantees a Velvety Sauce
The first critical step involves intensely reducing the chicken broth early in the cooking process, before the creamy elements are added. This concentrates the foundational flavors and removes excess moisture that would otherwise thin the final sauce.
For a different take on creamy chicken, explore the vibrant flavors of yellow chicken curry.
The second step is the cold cornstarch slurry, introduced just after the coconut milk reaches a simmer. This instant stabilizer ensures the velvety sauce thickens beautifully without ever separating, even when reheated.
Flavor Depth: The Importance of Curry, Turmeric, and Tomato Paste
We leverage a toasted blend of curry powder and turmeric to provide a complex, warming depth and a gorgeous golden hue to the sauce. This subtle, aromatic profile elevates the braise far beyond a simple chicken and broth dish.
Cooking the tomato paste briefly with the aromatics creates a savory foundation, known as the pince technique. This step adds necessary umami and a slight acidity that perfectly balances the richness of the coconut milk.
Essential Ingredients: Building the Richness and Creaminess
The Chicken: Choosing Bone-In, Skin-On Thighs for Maximum Juiciness
Choosing bone-in, skin-on chicken thighs is essential for achieving maximum flavor complexity in a long braise. The bones leach natural gelatin and flavor compounds directly into the sauce as they cook, enhancing mouthfeel.
The skin provides the necessary fat layer to render during the initial sear, resulting in a crucial flavor base and a crispy element that contrasts the smooth braising liquid.
The Dairy-Free Base: Full-Fat Coconut Milk and Stabilization
It is non-negotiable to use full-fat canned coconut milk, as its high saturated fat content contributes most significantly to the desired rich texture. Light coconut milk will yield a noticeably thinner and less satisfying result.
The cornstarch slurry works in conjunction with the coconut milk to create stability, preventing the final sauce from separating or developing a grainy texture, even under low heat.
The Aromatics and Braising Liquid
Yellow Onion & Garlic: Building the foundational sweetness and savory base during the sauté process. Ensure the onion is fully softened before adding the garlic to prevent burning.
Broth Quality: Using low-sodium chicken broth is critical because we are intentionally reducing and concentrating the liquid. This allows for precise control over the final seasoning and salt content.
The Preparation Blueprint: Your Path to Braising Perfection
-
Mastering the Crispy Skin Sear: Patting the thighs dry is non-negotiable for achieving deep color and rendering fat before the braise.
Heat the oil over medium-high heat and sear the skin side down for a full 6 to 8 minutes; do not disturb them during this time. This patient step develops the intense golden-brown fond necessary for the curry chicken recipe’s deep flavor.
-
Building the Highly Concentrated Flavor Base: The sequential cooking of aromatics, spices, and tomato paste.
After softening the onion, add the garlic and spices, cooking for 60 seconds until fragrant. Immediately follow with the tomato paste and cook it for one minute, stirring constantly, to ensure its raw, metallic flavor is cooked off and color is deepened.
-
The Critical Broth Reduction Step: Simmering to scrape the fond and reduce the liquid.
Pour in the low-sodium broth and bring it to a vigorous simmer, immediately scraping up the caramelized brown bits (the fond) from the bottom of the pan. This process deglazes the pan, concentrating the broth flavor while ensuring you aren’t adding excess moisture that will thin the final sauce.
-
Introducing Cream and the Instant Thickeness: The careful combination of coconut milk and cornstarch slurry.
Whisk the cornstarch with cold water until perfectly smooth-this is key for preventing lumps. Pour in the coconut milk, bring it to a gentle bubble, and immediately pour in the slurry while continuously stirring for 30 seconds until the sauce visibly thickens and stabilizes.
-
The Low-and-Slow Braise and Broccoli Integration: Finishing the chicken and timing the vegetable addition.
Return the seared chicken, making sure the crispy skin remains completely above the liquid line for the best texture. Cover and simmer gently on low heat for 15-20 minutes, allowing the moisture and flavor to penetrate the bone-in meat.
Stir in the broccoli florets only during the final 5 minutes, replacing the lid immediately. This brief steaming period ensures the broccoli is fork-tender yet still retains a vibrant green color and slight structural bite, crucial for braising perfection.
Chef’s Secrets: Elevating Your Comfort Chicken and Broccoli Braise Game
Why You Should Never Skip Deglazing (Step 3)
The ‘fond’ refers to the flavorful, caramelized brown bits stuck to the pan after searing and sautéing. Scraping these up immediately with the hot broth is crucial for integrating their deep, savory, roasted flavor directly into your sauce base.
Achieving the Perfect Broccoli Crunch
To prevent mushy, faded broccoli, ensure the florets sit mostly above the sauce line so they are steamed by the hot vapors rather than fully submerged. This method preserves their structural integrity and vibrant color.
The Final Seasoning Check: Acidity and Salt Balance
Braised dishes, especially those with rich coconut milk, often benefit from a final lift. A tiny splash of fresh lemon juice or rice vinegar added just before serving cuts through the richness and brightens all the underlying spice notes.
Troubleshooting Your Braise: Common Challenges and Quick Fixes
Help! My Sauce Is Too Thin or Watery
This typically occurs if the critical broth reduction step was rushed, adding too much initial moisture, or if the cornstarch slurry was added to a non-simmering sauce.
To fix this, remove the chicken, bring the sauce back to a simmer, and quickly whisk together 1 teaspoon of cornstarch with 1 tablespoon of cold water. Stir this secondary slurry into the sauce until the desired thickness is reached.
My Chicken Skin Went Flabby During the Braise
Flabby skin is a sign that the chicken pieces were partially submerged under the braising liquid. If this happens, remove the cooked chicken at the end of the braise and place the pieces skin-side up on a foil-lined baking sheet.
Broil them under high heat for 60 to 90 seconds (watching constantly!) right before serving. This will instantly re-crisp the skin, providing a delightful textural contrast to the creamy chicken braise.
Complementary Dishes
To build a complete meal around your creamy chicken and broccoli, consider these recipes.
- For a bright counterpoint to the rich braise, serve with Bright Lemon Herb Rice for a zesty finish.
- If you’re in the mood for more chicken, explore a different preparation with Crispy Pan-Seared Chicken Curry, combining familiar flavors in a new way.
Serving Suggestions and Flavor Pairings
The Best Starches to Soak Up That Velvety Sauce
Basmati or Jasmine Rice: A classic pairing that complements the Indian-inspired spices perfectly and absorbs the complex sauce beautifully.
Garlic Mashed Potatoes: For ultimate comfort, the potatoes provide a neutral, fluffy base that works wonderfully beneath the heavy, rich sauce.
Crusty Bread: Ideal for dipping and ensuring zero velvety sauce goes to waste; French bread or warm naan are excellent choices for scooping.
Make-Ahead and Storage Guidance
Store leftovers in an airtight container in the refrigerator for up to four days. Note that the sauce will thicken considerably upon cooling due to the cornstarch and coconut fat.
When reheating, use the stovetop on low heat, stirring frequently. If the sauce is too thick, stir in a splash of water or low-sodium broth until the original velvety consistency returns.
Frequently Asked Questions About This Comfort Chicken and Broccoli Braise
Can I Use Boneless, Skinless Chicken Thighs or Breasts?
You can substitute boneless cuts, but the flavor will be less rich and the texture may be slightly drier. If using breasts or boneless thighs, reduce the final braise time to 10-12 minutes maximum to prevent them from drying out in the rich sauce.
Is Cornstarch Necessary for the Sauce?
The slurry is necessary to guarantee the stable, thick texture and prevent separation, which can be a common issue when braising with coconut milk. Alternatives like arrowroot powder or tapioca starch can be used successfully in the exact same ratio.
Can I Make This Braise Gluten-Free?
Yes, this Comfort Chicken and Broccoli Braise recipe is naturally gluten-free when using cornstarch or arrowroot powder as the thickener. Always confirm that your chosen chicken broth is certified gluten-free to ensure full compliance.
Ready to Impress? Share Your Comfort Chicken and Broccoli Braise Masterpiece!
Mastering this simple two-step thickening method means you never have to worry about a thin, watery sauce again when making a creamy chicken braise. This technique provides deep flavor and texture stability that truly defines comfort food.
Try this method tonight and prepare for the compliments! We encourage you to try the recipe, rate it, and share your results or modifications in the comments below.
Chicken and Broccoli Braise
Course: Main CourseCuisine: InternationalDifficulty: medium4
servings15
minutes45
minutes550
kcal60
minutesThis recipe solves the common problem of watery casseroles by employing a critical two-step technique to ensure a perfectly thick and velvety curry sauce. Seared chicken thighs are braised in a rich sauce infused with curry and turmeric, finished with tender crisp broccoli. If you love a substantial sauce that clings perfectly to every bite, this comforting meal is a guaranteed success.
Ingredients
4 skin-on, bone-in chicken thighs
1 large head of broccoli, cut into medium florets
1 tablespoon vegetable oil
1 yellow onion, chopped
3 cloves garlic, minced
1 tablespoon tomato paste
2 teaspoons curry powder
1 teaspoon turmeric powder
1 teaspoon salt, plus more for seasoning
1/2 teaspoon black pepper
1 cup chicken broth, low sodium
1 (13.5 oz) can full-fat coconut milk
1 tablespoon cornstarch or arrowroot powder
2 tablespoons cold water
Fresh parsley, chopped for garnish
Directions
- Prep the Chicken and Sear: Pat the chicken thighs completely dry with paper towels and season heavily with salt and pepper. Heat the vegetable oil in a large oven-safe skillet or Dutch oven over medium-high heat. Place the chicken skin-side down and sear for 6 to 8 minutes until deeply golden brown and crispy. Remove the chicken and set aside, reserving the fat in the pan.
- Build the Flavor Base: Reduce the heat to medium. Add the chopped onion to the skillet and cook until softened, about 5 minutes. Stir in the garlic, curry powder, turmeric, and tomato paste. Cook for 1 minute until fragrant.
- Reduce the Liquid (The Texture Fix Start): Pour in the 1 cup of chicken broth. Bring the mixture to a simmer and scrape up any browned bits from the bottom of the pan. Allow this liquid to simmer and reduce slightly for about 3 minutes. This step is critical for removing excess moisture early and concentrating the flavor before the creamy elements are added.
- Create the Slurry and Introduce Cream: In a small bowl, whisk together the cornstarch (or arrowroot) and 2 tablespoons of cold water until smooth. Pour in the full can of coconut milk into the skillet. Stir well to combine. Bring the sauce to a gentle bubble. Immediately pour in the cornstarch slurry while stirring continuously. This will instantly stabilize and thicken the sauce, ensuring it never separates or becomes thin.
- Simmer and Finish: Return the seared chicken thighs to the skillet, nestling them into the sauce skin-side up (keep the skin above the liquid line if possible to maintain some texture). Reduce the heat to low, cover the skillet, and simmer gently for 20 minutes, or until the chicken registers 165 degrees F internal temperature.
- Add Broccoli: Stir in the broccoli florets during the last 5 minutes of cooking. Re-cover and steam the broccoli in the sauce until they are bright green and fork-tender but still have a slight crispness.
- Serve: Taste the sauce and adjust seasonings if necessary. Garnish generously with fresh chopped parsley and serve immediately.
Notes
- The key to the velvety sauce is the early liquid reduction combined with the late cornstarch slurry, ensuring a non-separated, thick result.