I spent years battling spongy, weeping custard, pulling beautiful tarts out of the oven only to have them deflate into a lumpy mess. But this technique-focused entirely on low, slow baking and the crucial art of tempering-guarantees a flawlessly smooth, decadent slice every time.
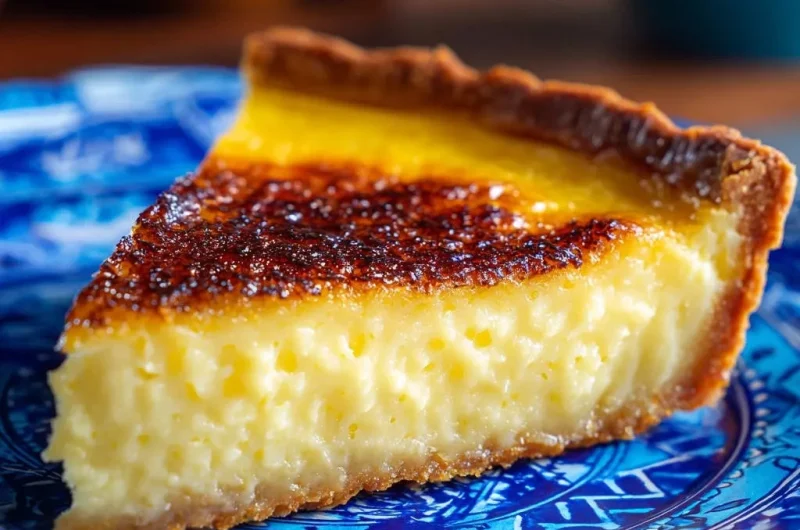
This is the definitive recipe for the perfect Creamy Baked Custard Tart, solving all the common pitfalls associated with delicate baked fillings.
Tired of Curdled Custard? Why This Recipe Works Every Time
Creating a truly silky baked custard requires precision and respect for the ingredients, especially the delicate egg proteins. This recipe incorporates specific, mandatory steps that professional kitchens use to ensure structural integrity and flawless texture.
For intensely rich results, explore fudgy cocoa brownies secrets.
The Bubble-Free, Silky Guarantee
Our two-pronged approach uses gentle heating to slowly warm the eggs (tempering) followed by mandatory straining. This technique ensures that every potential bubble, stray bit of cooked egg, or chalaza is removed before baking.
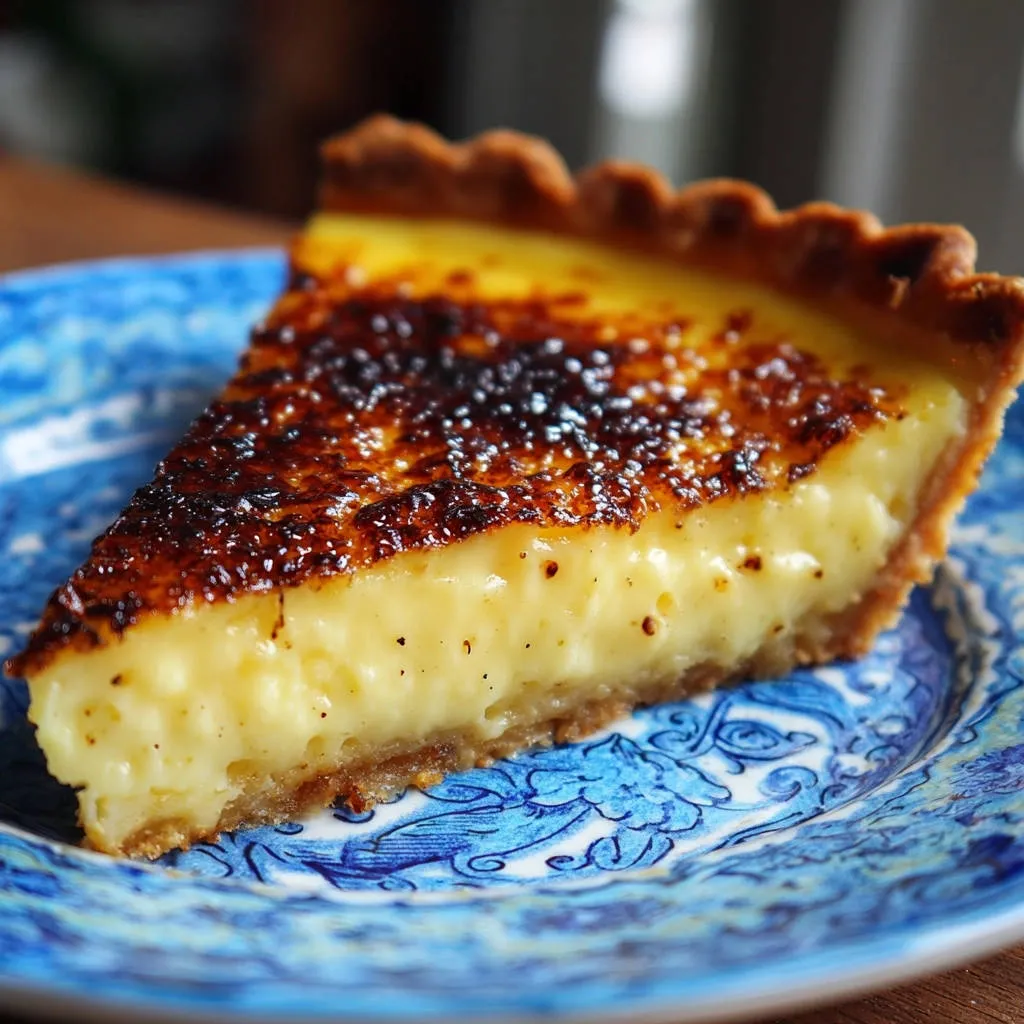
The result is a velvety, uniform texture that melts in your mouth without any sponge or granularity, defining a truly exceptional custard tart.
Achieving a Perfectly Tender, Golden Crust
Starting with properly cold ingredients is paramount to developing a short, flaky dough structure that resists moisture absorption. We use a thorough blind-baking process, complete with weights and a second bake, to achieve a sturdy but shortbread-like shell.
This golden foundation is essential, preventing the base from becoming soggy when flooded with the liquid custard filling.
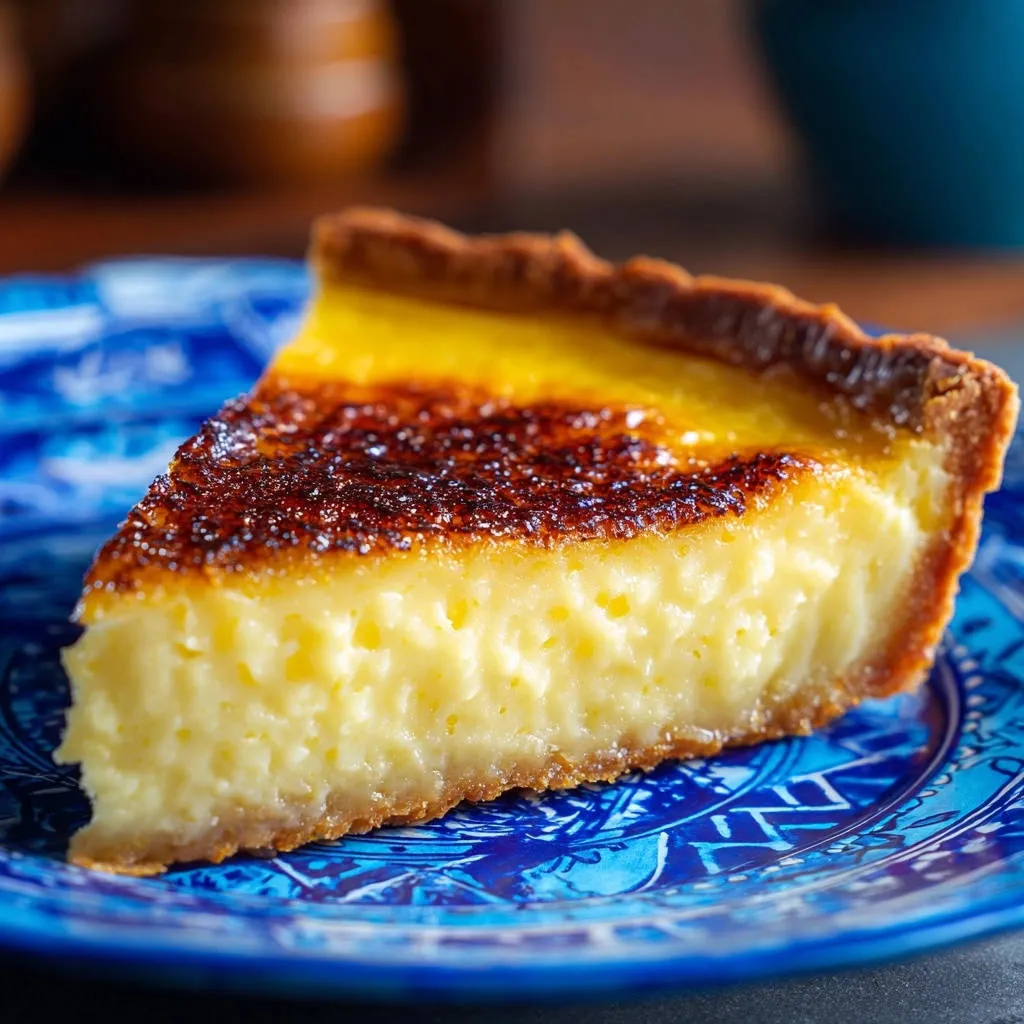
The Professional Touch: Finishing with a Crisp Caramel Top
The final layer of granulated or turbinado sugar is quickly caramelized using a kitchen torch or broiler just before serving. This creates the classic crackle and subtle bitterness of a proper crème brûlée.
This hard, amber shell provides a thrilling textural and flavor contrast to the soft, creamy filling underneath, making the dish complete.
Gather Your Elements: Ingredients and Essential Tools
Sourcing high-quality dairy and paying attention to the temperature of your crust ingredients are foundational to the success of this delicate dessert.
Building the Tart Shell Foundation: Flour and Fat Science
The secret to a tender crust is minimizing gluten development by keeping the butter and liquid ice-cold throughout the mixing process. Cold butter creates small pockets of steam during baking, which results in a flaky texture rather than a tough, bready one.
Ice water only binds the dough; it must be added slowly and mixing must stop the moment the dough just holds together.
The Custard Core: Balancing Eggs, Cream, and Sweetness
We use a mixture of four egg yolks and two whole eggs to maximize richness and binding power for the Creamy Baked Custard Tart. The high-fat content from the extra yolks contributes significant decadence and superior stability to the final custard base.
Using heavy cream alongside whole milk delivers a thick, luxurious mouthfeel that is far superior to using lower-fat dairy products alone.
The Non-Negotiable Tools for Custard Success
-
9-Inch Tart Pan with Removable Bottom:
This specific pan style makes unmolding the delicate, chilled tart simple and protects the crust edges during the baking process.
-
Fine-Mesh Sieve:
Absolutely mandatory for straining the tempered custard, ensuring a flawless, bubble-free, and silky smooth final product.
-
Kitchen Torch (Recommended):
The most reliable tool for rapidly caramelizing the sugar without heating the custard filling beneath it, preserving the cold texture.
-
Large Roasting Pan (Bain-Marie):
Necessary to hold the tart pan and water for the crucial gentle steam bath during the critical baking period.
The Master Method: Step-by-Step Creamy Baked Custard Tart Instructions
Follow these detailed steps carefully, paying special attention to temperature control and whisking technique for optimal results.
Phase 1: Preparing and Blind Baking the Crust
-
The No-Fuss Dough:
Combine flour, cold cubed butter, sugar, and salt in a food processor, pulsing until the mixture resembles coarse crumbs, like small peas.
Add the ice water one tablespoon at a time, mixing just until the dough gathers into a shaggy mass; stop immediately to avoid over-activating the gluten.
-
Chill, Roll, and Freeze:
Chilling the dough disc for at least 30 minutes relaxes the gluten, preventing the dough from shrinking when it bakes.
After fitting the dough into the tart pan, freeze the shell for 15 minutes; this critical freeze maintains the crust’s sharp edges during the initial heat exposure.
-
The Importance of Blind Baking:
Line the frozen shell with parchment and weights, baking first to set the structure.
Remove the weights and bake briefly for another five to seven minutes until the base is lightly golden, ensuring it is fully cooked and ready for the liquid filling.
Phase 2: Mastering the Custard Base and Tempering Technique
-
Warming the Dairy:
Gently heat the heavy cream and whole milk in a saucepan until the mixture is just steaming around the edges, but never allow it to boil.
Scalding the dairy can damage the flavor and destabilize the proteins necessary for a smooth set.
-
The Silky Secret: Tempering:
Whisk the eggs, yolks, sugar, and vanilla until pale and creamy in a separate large bowl.
Slowly stream the warm cream mixture into the egg mixture while continuously whisking; this gradual acclimation prevents the eggs from scrambling.
For a similar creamy texture, check out these creamy lemon crumble bars.
-
Straining for Perfection:
Pour the entire combined custard mixture through a fine-mesh sieve into a clean bowl.
This essential step captures any small pieces of chalaza or egg that may have clumped during the tempering process, guaranteeing the signature silky finish.
Phase 3: The Water Bath: Gentle Baking for a Smooth Set
-
Assembling the Bain-Marie:
Place the blind-baked tart shell, containing the strained custard filling, inside a larger baking pan or roasting dish.
-
Filling and Placement:
Carefully transfer the assembled pan into the preheated oven.
Then, pour hot tap water into the larger pan until the water level reaches about halfway up the sides of the custard tart pan.
-
Baking for the Wobble:
Bake at 325°F for 40 to 50 minutes until the custard is mostly set but still exhibits a soft, two-inch wobble in the very center.
This slight movement indicates perfect doneness, as the residual heat will finish setting the Creamy Baked Custard Tart as it cools.
Phase 4: Cooling, Chilling, and The Caramelized Finish
-
The Cooling Process:
Carefully remove the tart from the water bath immediately after baking to stop the cooking process.
Allow the tart to cool completely on a wire rack at room temperature before moving it to refrigeration.
-
Overnight Chilling is Best:
Chill the tart for a minimum of 4 hours, though ideally, leave it overnight.
This duration allows the delicate internal structure of the custard to fully firm up, making clean slicing possible.
-
Executing the Brûlée Top:
Evenly sprinkle the chilled custard surface with sugar just before serving.
Use a kitchen torch for the best result, or use a preheated broiler for 30 to 60 seconds MAXIMUM, watching constantly until an amber, crisp shell forms.
More Sweet & Savory Ideas
Round out your meal with these complementary dishes that echo the richness of the custard tart.
- For a savory contrast, consider these buttery beef pelmeni, offering a satisfying texture alongside the smooth tart.
- If you enjoyed the baked element of the tart, you might also like these cinnamon sugar churro waffles for a sweet, crispy treat.
Beyond the Basics: Unlocking the Three Secrets to Ultra-Silky Custard
Achieving a professional-grade custard texture is based on these three technical pillars. Understanding the science behind them guarantees consistent results.
Tempering: Why the Slow Pour is Non-Negotiable
Tempering is the process of gradually raising the temperature of the egg mixture so the proteins do not seize up instantly. If you dump the hot cream directly into the eggs, the rapid thermal shock causes the protein bonds to tighten immediately, resulting in scrambled eggs and a lumpy, unusable custard.
Continuous, fast whisking while slowly streaming the warm dairy ensures the heat is perfectly dispersed across the yolks, setting them up for a smooth bake.
The Straining Requirement: Achieving a Bubble-Free Texture
The chalazae are the opaque, rope-like structures that anchor the yolk within the egg; these structures will not dissolve during the baking process.
Straining the custard mixture through a high-quality fine-mesh sieve is the only way to capture these imperfections, guaranteeing a truly smooth, velvety mouthfeel without any granules.
The Magic of the Bain-Marie (Water Bath)
The water bath limits the maximum temperature the exterior of the custard can reach because water cannot heat above 212°F (100°C).
This controlled, gentle environment prevents the high-protein edges from overcooking, which is the leading cause of spongy, rubbery custard and the subsequent weeping (syneresis). The result is uniform texture from the center to the edge.
Troubleshooting Your Tart: Solutions for Common Custard Concerns
Even experienced bakers face challenges with delicate custard; here are solutions to the most common issues.
“My Custard Set Too Quickly on the Edges and is Spongy”
This almost always means your oven temperature was significantly too high, or the water bath was either skipped or insufficiently shallow. The edges cooked too fast, causing the proteins to tighten and squeeze out moisture.
Ensure your oven thermometer is accurate and that the hot water bath reaches at least halfway up the sides of the tart pan before baking.
“The Crust Shrank and Slipped Down the Sides”
The butter in your dough was likely too warm when handled, or you skipped the crucial final 15-minute freeze step before baking.
Always work with cold ingredients and let the dough relax fully after shaping by chilling, which prevents the butter from melting and the dough from pulling back during baking.
“The Caramel Top Burned Before the Sugar Melted”
This usually happens when using a broiler that is too close to the heat source or if the sugar layer was too thick or unevenly spread.
Use the middle rack for broiling, watch constantly, and consider using turbinado sugar which has a slightly larger crystal structure that can resist burning slightly better than fine granulated sugar.
Serving and Storing Your Homemade Custard Tart
Proper presentation and storage ensures your baking efforts pay off in enjoyment and longevity.
Optimal Serving Temperatures and Pairings
A Creamy Baked Custard Tart is best served chilled or slightly cool, straight from the refrigerator. Serving it cold accentuates the density and richness of the filling.
Pair it simply with a very light dusting of fresh grated nutmeg or a small handful of tart fresh berries to perfectly cut through the custard’s richness.
Make-Ahead Tips and Refrigeration Duration
The fully baked and chilled tart will last beautifully in an airtight container in the refrigerator for up to 3 days.
Crucially, do not apply the caramelized sugar topping until 15 minutes before serving, as the caramel will soften over time. The blind-baked crust can be prepared entirely up to a day ahead and stored at room temperature.
Frequently Asked Questions About Baking Custard Tarts
Addressing common queries helps refine your technique and build confidence.
Can I use whole eggs instead of just yolks?
Using all whole eggs will significantly increase the protein content relative to the fat in the mixture. This change will result in a firmer, less decadent custard that has a higher risk of turning spongy.
The extra yolks are necessary to provide the creamy, rich mouthfeel and superior stability that defines this specific Creamy Baked Custard Tart recipe.
What is the difference between a tart and a pie?
Tarts are typically made in shallow pans, often with fluted edges and removable bottoms, using a rich, shortbread-like dough.
Pies are generally baked in deeper, sloping dishes and usually feature a higher ratio of filling to crust, sometimes utilizing a full top crust or lattice.
Can I make this recipe gluten-free?
Yes, you can substitute the all-purpose flour with a high-quality 1:1 gluten-free baking blend that contains xanthan gum for structure.
Ensure the GF crust is baked thoroughly during the blind-baking phase, as these crusts can sometimes remain doughy if not cooked long enough to fully set.
Why did my caramel topping turn soft after chilling?
Caramel is hygroscopic, meaning it absorbs moisture from the surrounding air and the custard itself once chilled.
To maintain that signature crunchy snap, the finishing step of torching or broiling the sugar must be done immediately before serving the Creamy Baked Custard Tart.
Ready to Impress? Share Your Creamy Baked Custard Tart Masterpiece!
Mastering the Creamy Baked Custard Tart is all about patience and precision, especially with the critical steps of tempering and the water bath.
Trust the process, look for that perfect center wobble, and you will achieve a dessert that looks and tastes straight out of a professional pâtisserie.
Now go forth and enjoy the silkiest, most impressive custard tart you have ever made!
Baked Custard Tart
Course: DessertCuisine: InternationalDifficulty: medium1
nine-inch tart45
minutes1
hour750
kcal300
minutesBiting into a perfect slice of baked custard doesn’t have to be a struggle. This recipe guarantees a silky, perfect texture by employing tempering and a water bath (bain-marie) to prevent scrambling or weeping. Finished with a crisp, caramelized sugar top, this tart is a classic dessert success.
Ingredients
For the Crust:
1 1/2 cups all-purpose flour
1/2 cup cold unsalted butter, cubed
1/4 cup granulated sugar
1/4 teaspoon salt
3 tablespoons ice water
For the Filling:
1 1/2 cups heavy cream
1/2 cup whole milk
4 large egg yolks
2 large whole eggs
1/2 cup granulated sugar
1 teaspoon vanilla extract
1/4 teaspoon salt
For the Caramelized Top:
2 tablespoons granulated sugar (or turbinado sugar)
Directions
- Prepare the Crust: In a food processor or large bowl, combine the flour, cold butter, sugar, and salt until the mixture resembles coarse crumbs. Slowly add the ice water, 1 tablespoon at a time, mixing just until the dough comes together. Do not overmix. Flatten the dough into a disc, wrap, and chill for at least 30 minutes.
- Blind Bake the Shell: Preheat oven to 375 degrees F. Roll the chilled dough and fit it into a standard 9-inch tart pan with a removable bottom. Trim the edges. Freeze the shell for 15 minutes. Line the crust with parchment paper and fill with pie weights or dried beans. Bake for 15 minutes. Remove the weights and paper, then bake for another 5 to 7 minutes until the crust is lightly golden. Reduce the oven temperature to 325 degrees F.
- Prepare the Custard Base: In a medium saucepan, gently heat the heavy cream and milk until just steaming, but do not boil. Remove from heat. In a separate bowl, whisk the egg yolks, whole eggs, granulated sugar, vanilla, and salt until uniform and pale yellow.
- The Silky Secret (Preventing Curdling): Slowly pour the warm cream mixture into the egg mixture while continuously whisking. This is called tempering and ensures the eggs do not scramble. Once combined, pour the entire custard mixture through a fine-mesh sieve into a clean bowl. Straining is absolutely essential to remove any bits of chalaza or egg that might have cooked, guaranteeing a bubble-free, silky texture.
- Bake with the Water Bath: Place the blind-baked tart shell inside a larger baking pan or roasting dish. Carefully pour the strained custard filling into the tart shell. Place the larger pan into the oven, then pour hot water into the larger pan until the water level reaches about halfway up the sides of the tart pan. This water bath (or bain-marie) provides gentle, consistent heat, preventing the edges from setting too fast and becoming spongy while the center cooks.
- Bake the Tart: Bake for 40 to 50 minutes at 325 degrees F, or until the custard is mostly set but still has a slight wobble in the center (about 2 inches wide).
- Cool and Chill: Carefully remove the tart from the water bath and allow it to cool completely on a wire rack before transferring it to the refrigerator. Chill for at least 4 hours, or preferably overnight, until the custard is fully firm.
- Finish the Top: Once fully chilled, sprinkle the surface of the custard evenly with the 2 tablespoons of sugar. Use a kitchen torch to melt and caramelize the sugar quickly until a hard, amber crust forms. If you do not have a torch, place the tart briefly under a preheated broiler (watch constantly, 30 to 60 seconds maximum) until the sugar melts and bubbles. Serve immediately after caramelizing the top for the best crust.
Notes
- Straining the custard and using a water bath (bain-marie) are essential for a silky texture.