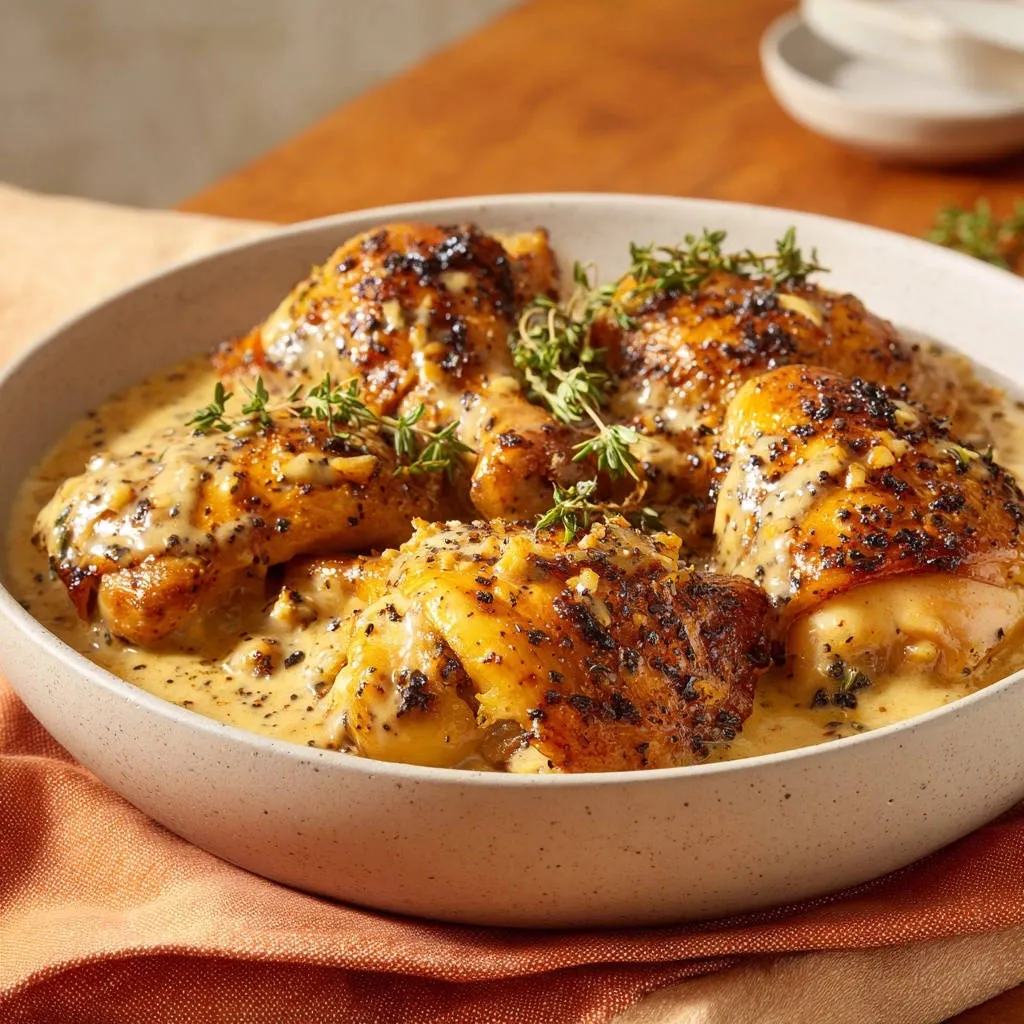
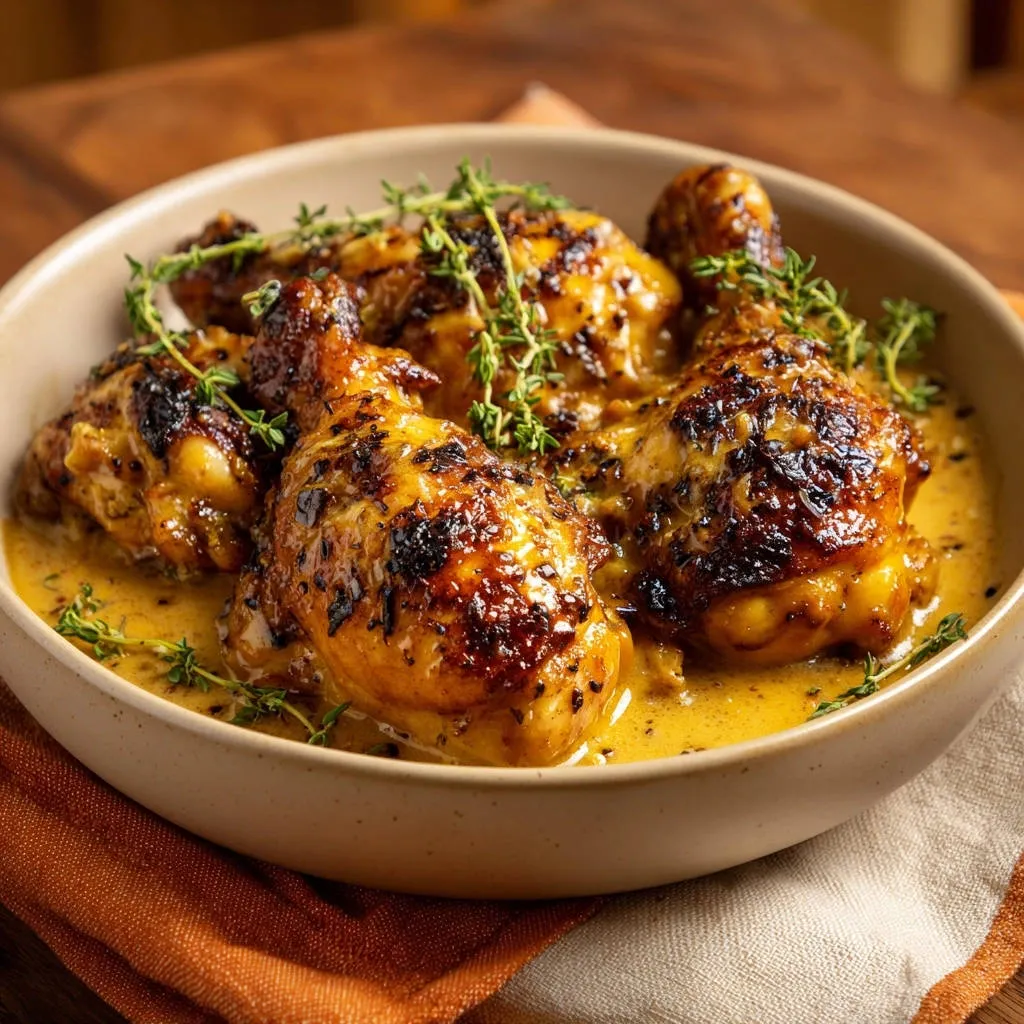
For years, I struggled with the culinary paradox of crispy chicken skin: the moment it touched a luscious sauce, that hard-earned crunch turned into a disheartening, rubbery mess. This recipe for Creamy Black Pepper Chicken Thighs is the definitive solution, guaranteeing skin that stays shatteringly crisp while smothered in a rich, savory sauce.
This method employs a specific high-heat searing technique that renders the fat and creates a durable, enduring crust, making soggy skin a problem of the past. Trust the process; this dish is the ultimate comfort food triumph that proves you truly can have it all.
Stop the Soggy Skin Cycle: Why This Recipe Is Different
This isn’t just another skillet chicken recipe. We use precise temperature control and timing to fundamentally change the structure of the chicken skin before the sauce is even introduced, delivering perfect results every time.
The Crispy Skin Guarantee: Searing Science Explained
Moisture is the single greatest enemy of a crispy sear. By thoroughly patting the chicken dry and utilizing an extended, uninterrupted sear time (7 to 8 minutes), we force the fat beneath the skin to render completely.
This process transforms the skin into a dehydrated, almost leathery crust. This hard structure is highly resistant to moisture, allowing it to withstand the creamy sauce without immediately becoming soft.
Rich Flavor in a Flash: Speed and Simplicity
Once the durable crust is established, the chicken thighs are quickly finished in the oven. This ensures the meat cooks evenly to a safe temperature (165°F) without burning the exterior.
The sauce is built directly in the same pan, using the rendered chicken fat and browned bits (fond) for immediate, complex flavor development, minimizing active cooking time.
Unlocking Deep, Complex Pepper Notes
We use a dual-stage approach to seasoning that elevates the black pepper from a simple spice to a core flavor profile. Coarse pepper is pressed into the skin before searing, creating an aromatic, pungent crust.
A second, generous dose of coarse black pepper is toasted with the garlic and butter during the sauce-building phase. This unlocks its volatile oils, integrating a deep, aromatic, and warm pepper flavor throughout the creamy base.
The Flavor Foundation: Essential Ingredients and Strategic Substitutions
The quality and preparation of just a few simple ingredients are crucial for maximizing the E-E-A-T value of this creamy black pepper chicken recipe.
The Ideal Cut: Bone-In, Skin-On Chicken Thighs
Bone-in, skin-on thighs are preferred due to their high fat content, which renders beautifully and keeps the meat incredibly tender and moist.
The bone adds depth of flavor to the pan drippings, contributing significantly to the final taste of the sauce.
Coarse Salt and Black Pepper: Quality Matters
Always opt for coarse kosher salt for searing, not fine table salt. The larger granules pull moisture out effectively and create a textural crust.
Similarly, fresh, coarse-ground black pepper is essential. Fine powder burns easily during the sear and lacks the necessary pungent aroma that defines this dish.
The Creamy Base: Heavy Cream vs. Alternative Dairy
Heavy cream (with 36% or more milk fat) is ideal because its high fat content stabilizes the sauce, making it resistant to breaking or curdling when simmered.
For substitutions, half-and-half can be used, but the resulting sauce will be thinner and may require a light cornstarch slurry for thickening.
If you need a dairy-free option, full-fat coconut cream provides similar richness, though it will impart a subtle tropical note to the sauce.
The Aromatic Duo: Garlic and Thyme
Garlic must be minced and sautéed briefly-only about 30 seconds-until fragrant. If the garlic browns, it becomes acrid and bitter, ruining the delicate flavor of the sauce.
Fresh thyme is non-negotiable for garnish and flavor infusion; its slight earthiness beautifully cuts through the richness of the heavy cream and pepper.
Essential Tools for Your Crispy Chicken Thighs Adventure
The Non-Negotiable Skillet: Cast Iron or Stainless Steel
A heavy-bottomed pan, such as cast iron or quality stainless steel, is mandatory for this technique. Thin pans struggle to maintain the high, consistent heat required for the long sear.
These materials distribute heat evenly, ensuring the entire surface of the chicken skin receives the necessary thermal energy to render the fat fully.
Oven Safety Check: Why Your Pan Needs to Be Oven-Proof
Since the chicken finishes cooking in the oven, your chosen skillet must be oven-safe up to at least 375°F.
Ensure that any handles are metal or specifically rated for high oven temperatures to prevent melting or damage.
Mastering the Sear: A Step-by-Step Guide to Creamy Black Pepper Chicken Thighs
- Preparation: The Moisture Elimination Protocol
Thoroughly pat the chicken thighs dry on all sides using paper towels; any residual moisture prevents the fat from rendering quickly and achieving a durable crust.
Season the skin side generously with coarse salt and pepper, gently pressing the spices into the skin to ensure maximum adherence and flavor delivery.
- The Extended Uninterrupted Sear
Heat your skillet over medium-high heat with olive oil and 1 tablespoon of butter. Once the butter melts and the foaming subsides, place the chicken skin-side down.
Do not move the chicken for the critical 7 to 8 minutes. This extended, untouched sear is what renders the fat fully, developing a deeply golden-brown color and forming the crust that resists the sauce later.
Monitor the heat carefully; if the pepper coating darkens too quickly, slightly reduce the heat to maintain a strong sear without burning the spices.
- Oven Finish and Internal Temperature Checks
Flip the chicken and add another tablespoon of butter, briefly basting the exposed surface to introduce richness before transferring the pan to a preheated 375°F oven.
Bake for 10 to 15 minutes, or until the thickest part of the thigh registers 165°F internally. Immediately remove the chicken and let it rest on a separate plate for 5-10 minutes to retain juiciness.
- Building the Robust, Flavorful Sauce
Return the skillet to medium heat and add the remaining butter and minced garlic. Sauté for just 30 seconds until the garlic is fragrant, ensuring it does not begin to brown.
Immediately add the remaining salt and a generous 2 teaspoons of coarse pepper. Briefly toast the pepper in the butter mixture to bloom the spice and release its essential oils.
- Simmering and Achieving Perfect Thickness
Pour in the chicken stock and immediately scrape up all the flavorful browned bits (fond) stuck to the bottom of the pan-this is the base of the sauce’s richness.
Allow the stock to rapidly reduce by approximately half, which takes about 2 minutes, concentrating the savory flavors.
Reduce the heat to low, stir in the heavy cream, and simmer gently for 2 to 3 minutes until the sauce has thickened slightly to coat the back of a spoon. Avoid boiling the cream, which can cause it to break.
- The Perfect Plate: Serving Strategy
Plate the crispy-skinned Creamy Black Pepper Chicken Thighs immediately after resting.
Spoon the sauce generously over the meat but strategically around the perimeter of the skin. This allows the creamy richness to coat the chicken while preserving the prized crispy texture of the skin.
Chef’s Secrets and Troubleshooting Your Creamy Chicken Thighs
These expert tips ensure you achieve a professional result, addressing common pitfalls in skillet cooking.
To ensure your sauce stays thick, try this skillet chicken and mushrooms recipe.
Maximizing the Fond: Why Scrape Matters
Fond refers to the caramelized sugars and proteins left on the bottom of the pan after searing. It is an intense source of umami and depth that must be captured.
Effective deglazing involves pouring the liquid (stock) into the hot pan and immediately scrubbing the bottom aggressively with a wooden spoon or spatula, dissolving every piece into the sauce.
Adjusting for Heat: Dealing with Spatter and Smoke
Maintaining medium-high heat is crucial, but if the butter starts smoking excessively or the pepper flakes show signs of charring after a few minutes, back off the heat slightly.
A successful sear involves continuous, high heat, but not so high that it burns the surface before the fat has time to render completely.
Handling Texture: Preventing a Grainy or Broken Sauce
Always add the heavy cream only after the chicken stock has reduced and the pan has been brought to low heat. Rapid boiling or excessive heat after adding cream can cause the sauce to separate or become grainy.
If your sauce looks too thin, resist the urge to boil it vigorously; instead, allow it to simmer gently for a longer period to evaporate excess moisture slowly.
Resting Period Precision
The 5 to 10 minute resting period allows the muscle fibers in the chicken to relax and redistribute their internal juices.
Skipping this step causes the flavorful juices to immediately run out when the chicken is cut, leading to dry meat, regardless of the temperature it was cooked to.
For similar creamy chicken preparations, check out these creamy sun-dried tomato chicken thighs.
What to Serve with Creamy Black Pepper Chicken Thighs: Ultimate Pairings
Classic Starch Pairings to Soak Up the Sauce
The velvety sauce is the star, and you need a high-quality starch to capture every drop. Creamy mashed potatoes are an excellent choice, offering a comforting contrast to the crispy chicken.
More Delicious Ideas
To go with your creamy black pepper chicken, consider these complementary dishes.
- For a rich mushroom addition, try these creamy morel mushrooms, which offer a velvety texture that pairs well with saucy chicken.
- Make your meal lighter and brighter with cilantro lime cauliflower rice, ensuring a fluffy base that complements the chicken’s flavors.
Fluffy jasmine or basmati rice is a fantastic neutral base that provides structure for the sauce.
Alternatively, serve with a thick, crusty sourdough bread to use for aggressive sauce dipping (mopping).
Green Vegetable Compliments for Balance
Choose sides that offer brightness and cut through the richness of the heavy cream and butter.
Blanched green beans tossed with a hint of toasted sesame oil, or roasted asparagus finished with a squeeze of fresh lemon juice, work perfectly.
A simple arugula salad dressed with a light vinaigrette provides a slightly bitter contrast that refreshes the palate between bites of the decadent chicken.
Storage, Reheating, and Quick FAQs
How long can I store leftover Creamy Black Pepper Chicken Thighs?
Leftovers should be stored in an airtight container in the refrigerator and consumed within 3 to 4 days.
Note that the crispy skin will inevitably soften upon refrigeration and reheating, but the flavor remains excellent.
Can I use boneless chicken breasts instead?
You can substitute boneless, skinless chicken breasts, but you must significantly adjust the cooking time. Sear for only 3-4 minutes per side, then bake for only 5-8 minutes, checking the internal temperature often.
Chicken breasts lack the protective fat layer of thighs and will dry out if overcooked, so monitor them closely.
Is this recipe naturally gluten-free or dairy-free?
Yes, this recipe is naturally gluten-free, relying on the reduction of the heavy cream and stock for thickness rather than flour or starches.
While the recipe contains dairy (heavy cream and butter), you can achieve a dairy-free version by substituting unsalted plant-based butter and full-fat coconut cream (not coconut milk) for the heavy cream.
Ready to Impress? Share Your Creamy Black Pepper Chicken Thighs Masterpiece!
If you’ve struggled with soggy skin in the past, trust this rigorous searing method. The combination of the deep, earthy black pepper, the rich cream, and the satisfying crunch of the skin is truly unbeatable.
Take the time to execute the steps precisely, especially the uninterrupted sear. The reward is a five-star meal achieved in a single pan.
Now that you have the knowledge and the technique, go master the perfect Creamy Black Pepper Chicken Thighs and see for yourself how simple perfection can be.

Creamy Black Pepper Chicken Thighs
Course: Main CourseCuisine: InternationalDifficulty: easy4
servings10
minutes35
minutes650
kcal45
minutesNever suffer through soggy chicken skin again! This recipe uses a high-heat, uninterrupted searing technique to lock in an ultra-crispy crust that holds up beautifully against the luxurious, rich black pepper cream sauce.
Ingredients
4 bone-in, skin-on chicken thighs
1 tablespoon coarse kosher salt, divided
1 tablespoon coarse black pepper, divided
2 tablespoons olive oil
3 tablespoons butter, divided
4 cloves garlic, minced
1/2 cup chicken stock
3/4 cup heavy cream
2 sprigs fresh thyme for garnish
Directions
- Prepare the Chicken for Searing: This is the most critical step for crispy skin. Thoroughly pat the chicken thighs dry on all sides using paper towels. Moisture is the enemy of crispiness. Sprinkle the skin side evenly with 1 teaspoon of kosher salt and 1 teaspoon of coarse black pepper. Gently press the seasoning into the skin.
- The Crispy Skin Technique (Pain Point Solution Highlight): Heat a large, oven-safe skillet (cast iron or stainless steel works best) over medium-high heat. Add the olive oil and 1 tablespoon of butter. Once the butter foams and subsides, place the chicken thighs skin-side down in the hot pan. Do not move the chicken for at least 7 to 8 minutes. This extended, uninterrupted sear renders the fat and creates a hard, durable crust that resists the sauce. Maintain medium-high heat, adjusting slightly if the seasoning begins to burn, but avoid moving it until the skin is deeply golden brown and releases easily from the pan.
- Finish the Chicken: Flip the chicken thighs and add 1 tablespoon of butter to the skillet. Baste the chicken briefly with the melted butter. Transfer the skillet to an oven preheated to 375 degrees F. Bake for 10 to 15 minutes, or until the internal temperature of the chicken reaches 165 degrees F. Remove the chicken from the pan and set it aside on a plate to rest.
- Build the Sauce: Return the skillet to the stovetop over medium heat. Add the remaining 1 tablespoon of butter and the minced garlic. Saute for 30 seconds until fragrant (do not let the garlic brown). Add the remaining salt and pepper (about 2 teaspoons of pepper for extra flavor).
- Simmer and Thicken: Pour in the chicken stock and scrape up any flavorful browned bits (fond) from the bottom of the pan. Let the stock reduce by half, about 2 minutes. Reduce the heat to low and stir in the heavy cream. Let the sauce simmer gently for 2 to 3 minutes until it slightly thickens. Taste and adjust seasoning as needed.
- Serve Immediately: Plate the crispy-skinned chicken thighs and immediately spoon the sauce over and around the chicken, ensuring you get that luxurious coating without completely drowning the skin. Garnish with fresh thyme sprigs and serve while hot.
Notes
- The success of this dish relies on completely patting the chicken skin dry before seasoning.