There’s nothing more disappointing than digging into a beautiful pot pie only to find the filling has turned thin and runny. I used to struggle with that exact problem, but after perfecting a few simple steps, my Creamy Chicken and Mushroom Pot Pie filling is now guaranteed thick, rich, and creamy every single time, making those cozy evenings even better.
This isn’t just another pot pie recipe; it’s a reliable method for achieving that coveted, perfectly set, savory interior. Get ready to impress yourself and your loved ones with a hearty meal that truly delivers on its promise of ultimate comfort.
Why This Creamy Chicken and Mushroom Pot Pie Will Be Your New Favorite
This Creamy Chicken and Mushroom Pot Pie recipe stands out because it systematically eliminates the common pitfall of a watery filling. Through precise techniques for building the roux and extended simmering, we ensure a luxuriantly thick and stable sauce.
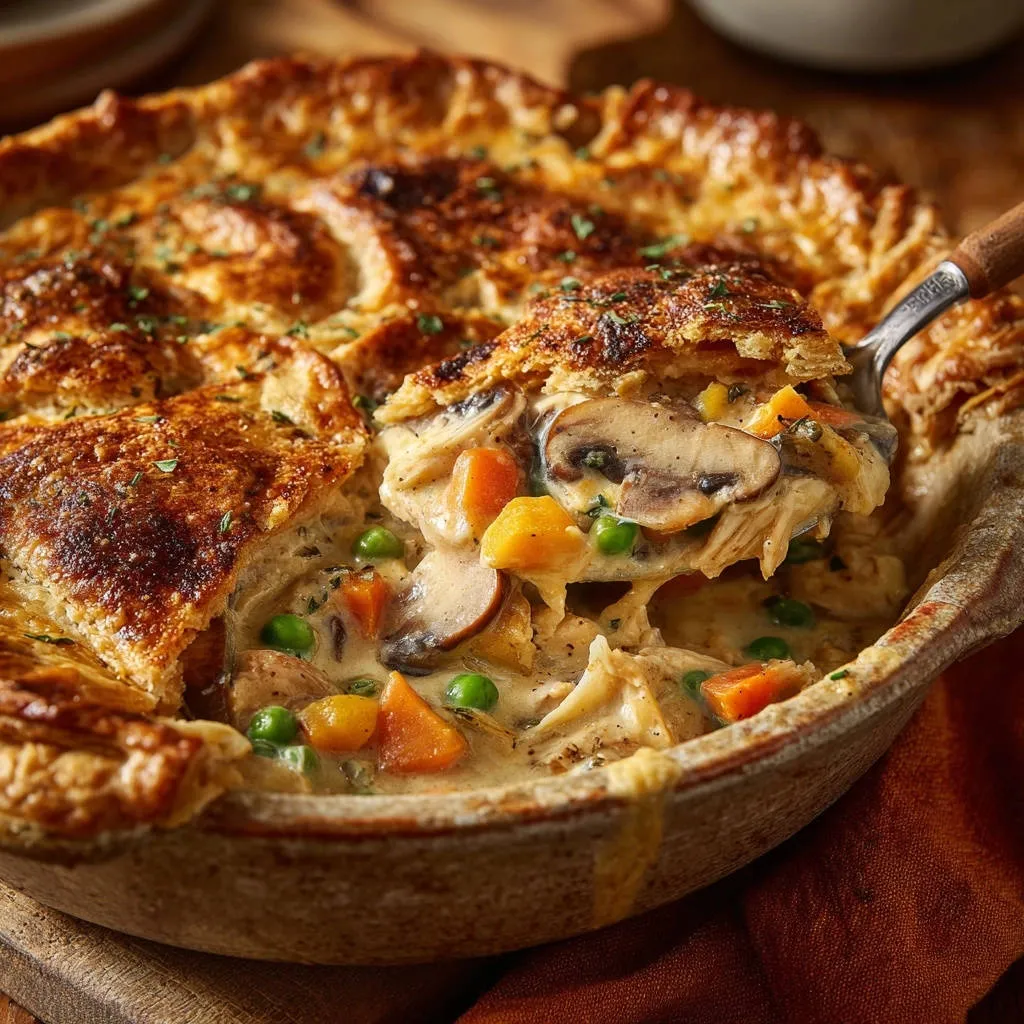
Beyond its perfect texture, this dish offers a harmonious blend of tender shredded chicken, earthy mushrooms, and sweet carrots, all enveloped in a deeply flavored, savory sauce. It’s the ultimate comfort food, providing warmth and satisfaction with every bite.
You’ll enjoy the convenience of prepared pie crusts paired with a homemade filling that tastes like it took hours. This makes it an ideal choice for both weeknight dinners and special occasions.
The Heart of the Meal: Gathering Your Pot Pie Provisions
For the Irresistible Filling
Cooked Chicken Breast (shredded): Two cups of tender, pre-cooked chicken breast form the protein heart of your pot pie. Using cooked chicken saves time and ensures a moist texture.
Button or Cremini Mushrooms (sliced): Eight ounces of earthy mushrooms add a wonderful depth of flavor and texture, complementing the chicken beautifully.
Carrots (diced): One cup of vibrant carrots adds sweetness and essential nutrients to the savory filling.
Frozen Green Peas: One cup of quick-cooking peas provides a pop of color and freshness, stirred in at the end to retain their texture.
Unsalted Butter: A quarter cup of butter is the base for sautéing vegetables and creating the essential roux for thickening.
All-Purpose Flour: A quarter cup of flour is critical for forming the roux, which guarantees a thick, stable, and creamy sauce.
Chicken Broth: Two cups of rich chicken broth provides the savory liquid base for your sauce, building a deep flavor profile.
Milk or Half-and-Half: Half a cup adds an extra layer of creaminess and richness to the filling, ensuring a luxurious mouthfeel.
Salt & Black Pepper: One teaspoon of salt and half a teaspoon of black pepper are essential for seasoning, bringing out all the flavors.
Dried Thyme: Half a teaspoon of dried thyme infuses the filling with a classic, aromatic herb flavor that perfectly suits a pot pie.
For the Golden Crust
Prepared Pie Crusts (9-inch size): Two ready-made pie crusts offer convenience without compromising on that essential flaky topping and bottom.
Large Egg (for egg wash, optional): Whisked egg creates a beautiful, golden-brown, and slightly crisp finish on your top crust.
Optional Finishes
Fresh Parsley or Thyme: A sprinkle of fresh herbs adds a vibrant burst of color and a final touch of aroma upon serving.
Your Culinary Arsenal: Must-Have Tools for Pot Pie Perfection
Large Pot or Dutch Oven: Ideal for sautéing vegetables, building the roux, and simmering the rich, creamy filling.
9-inch Pie Dish: The perfect vessel to beautifully assemble and bake your Creamy Chicken and Mushroom Pot Pie.
Whisk: Essential for incorporating the flour into the butter to form a smooth roux, and for whisking in liquids to prevent lumps in your sauce.
Measuring Cups and Spoons: For precise ingredient measurements, ensuring consistent results every time.
Pastry Brush (Optional): For applying an even egg wash, guaranteeing a beautiful golden-brown crust.
Sharp Knife and Cutting Board: For efficient and safe preparation of vegetables and chicken.
The “Never Runny” Secret: Mastering Your Creamy Chicken and Mushroom Pot Pie Filling
Building the Roux Foundation
The journey to a thick pot pie filling begins with a properly cooked roux. This mixture of melted butter and flour, cooked for 1-2 minutes, forms the essential thickening agent. Cooking it ensures that any raw flour taste is eliminated and its full thickening power is activated, laying a stable base for your sauce.
The Power of Gradual Whisking
When adding the chicken broth and milk, incorporate them gradually while whisking constantly. This technique is paramount for preventing lumps and ensuring a smooth, velvety sauce. A lump-free sauce means a consistently creamy filling throughout your pot pie.
Extended Simmer for Optimal Thickness
The most critical step for a never-runny pot pie is allowing the sauce to gently simmer for 5 to 7 minutes after adding all liquids. This extended simmering time gives the flour ample opportunity to fully thicken the sauce to a visibly rich and creamy consistency. Rushing this step is often the cause of watery pot pies.
Your Path to Pot Pie Perfection: A Step-by-Step Guide
Preheat Your Oven: Start by preheating your oven to 400°F (200°C) to ensure it’s at the ideal temperature for baking your pot pie.
Sauté the Vegetables: In a large pot or Dutch oven, melt the butter over medium heat. Add the diced carrots and sliced mushrooms. Cook for 5 to 7 minutes, stirring occasionally, until the vegetables begin to soften.
This step builds the foundational flavors and begins to soften the vegetables, contributing to a tender filling.
Create the Roux: Stir in the all-purpose flour. Cook for 1 to 2 minutes, stirring constantly, to create a smooth, golden roux.
This crucial step activates the flour’s thickening properties and eliminates any raw flour taste, guaranteeing a stable and thick sauce.
Build the Creamy Sauce: Gradually whisk in the chicken broth until the mixture is smooth and lump-free. Then, whisk in the milk or half-and-half. Bring the mixture to a gentle simmer over medium heat, stirring frequently.
Whisking slowly and continuously prevents lumps from forming, ensuring a silky-smooth base for your filling.
Thicken the Filling: Continue to simmer the sauce for 5 to 7 minutes, or until it has visibly thickened to a rich, creamy consistency.
This extended simmering is absolutely key to ensuring your pot pie filling will not be watery after baking.
Combine with Chicken & Seasonings: Remove the pot from the heat and stir in the shredded cooked chicken, frozen green peas, salt, black pepper, and dried thyme.
Adding the pre-cooked chicken and frozen peas at this stage prevents them from becoming overcooked or mushy.
Assemble the Pot Pie: Line a 9-inch pie dish with one of the prepared pie crusts. Pour the chicken and vegetable filling evenly into the crust.
Distribute the filling uniformly to ensure even cooking and a balanced bite in every slice.
Top & Seal: Place the second pie crust over the filling. Crimp the edges of both crusts together to seal them securely. Cut several small slits in the top crust to allow steam to escape during baking. For a beautiful golden crust, whisk the egg lightly and brush it over the top of the pie.
The slits are vital for releasing steam, preventing a soggy crust and allowing the filling to bubble enticingly.
Bake to Golden Perfection: Bake for 35 to 40 minutes, or until the top crust is golden brown and the filling is bubbling.
Keep an eye on the edges; if they start to brown too quickly, you can loosely cover them with aluminum foil to prevent burning.
For an equally satisfying experience with a flaky crust, check out skillet chicken pot pie.
Rest Before Serving: Let the pot pie rest for 10 to 15 minutes before slicing and serving. Garnish with fresh chopped parsley or thyme if desired.
Resting allows the filling to set properly, resulting in cleaner slices and preventing a runny consistency when served.
For an even crisper crust, explore this guide to flaky chicken pot pie secrets.
Chef’s Secrets: Elevating Your Creamy Chicken and Mushroom Pot Pie
Pre-Cooked Chicken Efficiency: Maximize convenience by using leftover rotisserie chicken or cooking chicken breasts ahead of time. Shred or dice it evenly for optimal texture throughout the filling.
Mushroom Variety for Depth: While button or cremini mushrooms are excellent, consider experimenting with wild mushrooms like shiitake, oyster, or porcini for an even deeper, more complex umami flavor profile.
Herbal Enhancements: Beyond the classic thyme, a pinch of dried sage or rosemary can add an earthy, aromatic twist. A tiny dash of freshly grated nutmeg also beautifully complements the creamy sauce.
Combatting a Soggy Bottom: To prevent a common pot pie woe, brush the bottom crust with a thin layer of egg white or sprinkle with breadcrumbs before adding the filling. Alternatively, partially blind bake the bottom crust for 5-10 minutes prior to filling.
Perfect Golden Crust Technique: Don’t skip the egg wash! It’s not just for shine; it’s key to achieving that irresistible golden-brown color and crisp texture. A sprinkle of flaky sea salt on the top crust before baking adds a gourmet touch.
Customizing Vegetables: This recipe is incredibly flexible. Feel free to incorporate other quick-cooking vegetables like corn, green beans, or diced celery based on your preference or what you have on hand.
Solving Your Pot Pie Puzzles: Common Issues & Quick Fixes
My Filling is Too Thin/Runny After Baking!
This is usually due to insufficient cooking of the roux or not simmering the sauce long enough. Ensure you cook the flour for the full 1-2 minutes to eliminate raw taste and activate its thickening properties, and always simmer the sauce for the specified 5-7 minutes until it’s visibly thick before adding chicken and peas.
For a quick fix in the future, if you suspect it’s still too thin before baking, whisk in a cornstarch slurry (1 tablespoon cornstarch mixed with 1 tablespoon cold water) to the simmering sauce until desired thickness is reached.
The Crust is Burning Before the Filling is Cooked!
Oven temperatures can vary, causing crust edges to brown too quickly. Loosely cover the edges of the pie crust with aluminum foil if they start browning prematurely. You can also form an aluminum foil ring to place over the edges from the start of baking.
My Pot Pie Bottom Crust is Soggy!
A soggy bottom can result from a watery filling or underbaking. Always ensure your filling is properly thickened as per the recipe. You can also try blind baking the bottom crust for 5-10 minutes before adding the filling, or sprinkle a thin layer of breadcrumbs or grated Parmesan cheese on the bottom crust as a moisture barrier.
The Filling is Too Salty or Bland!
Seasoning is key! Always taste and adjust salt and pepper levels before incorporating the chicken and peas. If it turns out too salty, a pinch of sugar or a splash of cream can help balance the flavors. If bland, consider adding a little garlic powder or onion powder to boost savory notes.
From Oven to Table: Serving, Storing, and Enjoying Your Pot Pie
Perfect Pairings & Serving Suggestions
A hearty Creamy Chicken and Mushroom Pot Pie is a meal in itself, but it pairs wonderfully with simple accompaniments. A light green salad with a vinaigrette dressing provides a refreshing contrast to the richness. Steamed green beans or roasted asparagus also make excellent, easy side dishes.
Complementary Recipes
To round out your meal, consider these options that share similar ingredients or offer a fresh counterpoint.
- For a light yet satisfying addition, try the grilled chicken kale and cabbage power salad, featuring chicken that complements the pot pie.
- If you enjoy creamy textures, the creamy herb and pea potato salad offers a familiar richness with its potatoes and fresh herbs.
Storing Leftovers for Future Enjoyment
Allow any leftover pot pie to cool completely, then cover it tightly with plastic wrap or transfer slices to an airtight container. It will keep well in the refrigerator for up to 3-4 days. Reheat individual portions in the microwave, or for a crispier crust, warm it in the oven at 300°F (150°C) until heated through.
Can You Make This Pot Pie Ahead? (Yes!)
This pot pie is an excellent make-ahead meal! You can prepare the entire pot pie up to the point of baking (step 8), then wrap it tightly in plastic wrap and aluminum foil. Refrigerate for up to 24 hours, or freeze for up to 2-3 months. If baking from frozen, allow extra baking time (around 60-75 minutes) at a slightly lower temperature (375°F/190°C), covering edges with foil if needed.
Your Pot Pie Questions, Answered: FAQs
Can I use different vegetables in this Creamy Chicken and Mushroom Pot Pie?
Absolutely! This recipe is incredibly versatile. Feel free to substitute or add other quick-cooking vegetables like corn, green beans, diced celery, or even small broccoli florets. If using heartier vegetables like potatoes, ensure they are diced small and cooked until tender before adding to the filling.
Can I use raw chicken instead of cooked?
Yes, you can! Dice raw chicken breast into small, bite-sized pieces and cook it in the pot with the butter (before adding the carrots and mushrooms) until it’s no longer pink. Then, proceed with the recipe as directed. This will add approximately 5-7 minutes to your initial cooking time.
What if I don’t have prepared pie crusts?
No problem! You can easily use puff pastry for a deliciously flaky topping; simply cut it to fit your pie dish and crimp the edges. Alternatively, prepare your favorite homemade pie crust recipe – just ensure you have enough for a top and bottom crust for a 9-inch pie.
Is this recipe freezer-friendly?
Yes, it is! You can freeze the unbaked pot pie (without the egg wash) by wrapping it tightly in plastic wrap and then foil. Bake from frozen at 375°F (190°C) for 60-75 minutes, or until golden and bubbling, covering edges with foil if they brown too quickly. Leftover slices can also be frozen and reheated in the oven.
Can I make a gluten-free version?
Certainly! To make this Creamy Chicken and Mushroom Pot Pie gluten-free, simply substitute the all-purpose flour with a high-quality gluten-free all-purpose flour blend (one that contains xanthan gum works best) for the roux. You’ll also need to use gluten-free prepared pie crusts.
Ready to Impress? Share Your Creamy Chicken and Mushroom Pot Pie Masterpiece!
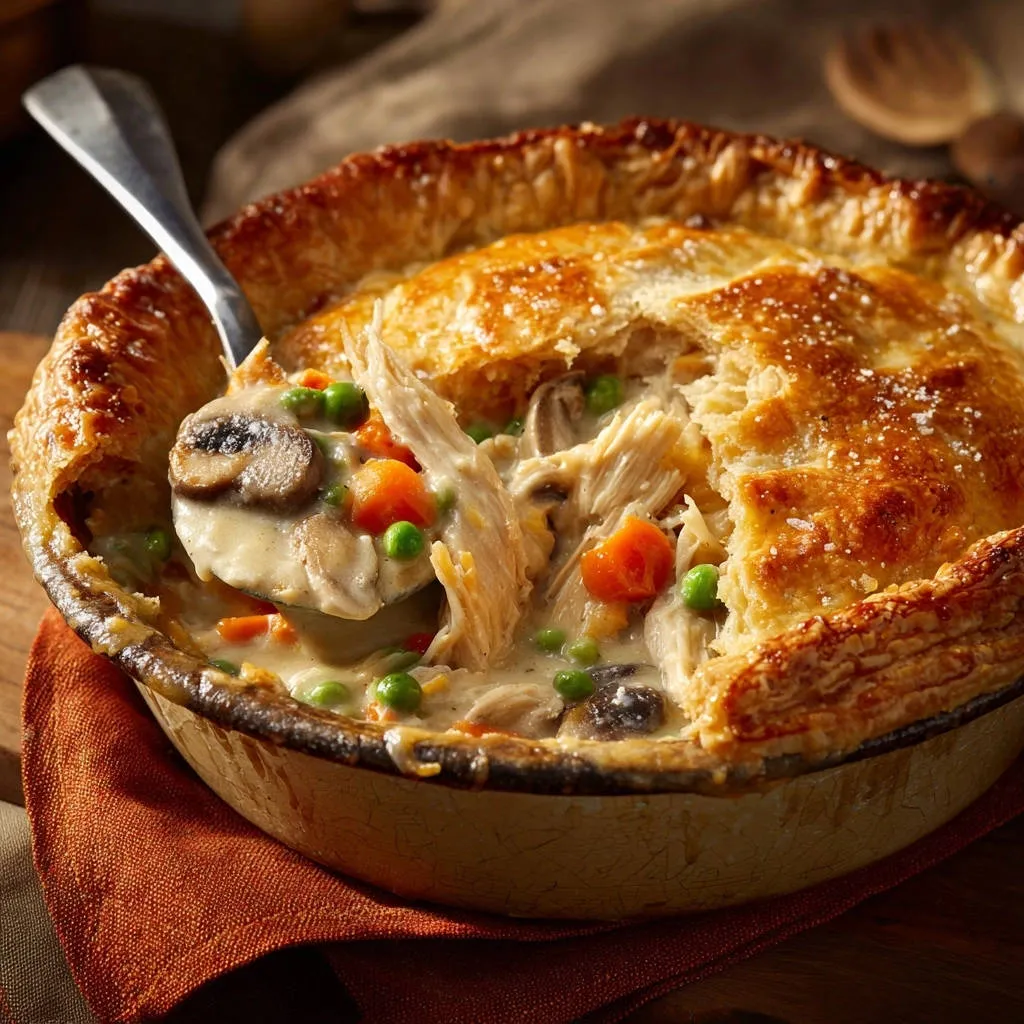
There’s a unique satisfaction in pulling a golden, bubbling pot pie from the oven, especially one you know will be perfectly creamy every time. This Creamy Chicken and Mushroom Pot Pie recipe is designed to bring that joy and comfort to your kitchen with confidence. Whether you’re cooking for a weeknight dinner or a special gathering, its rich flavors and guaranteed thick filling are sure to earn rave reviews.
So, gather your ingredients, follow these steps, and get ready to savor the ultimate comfort food. We’d love to see your creations! Share your beautiful pot pies and tell us about your experience in the comments below.
Chicken Mushroom Pot Pie
Course: Main CourseCuisine: AmericanDifficulty: medium6
servings30
minutes35
minutes550
kcal60
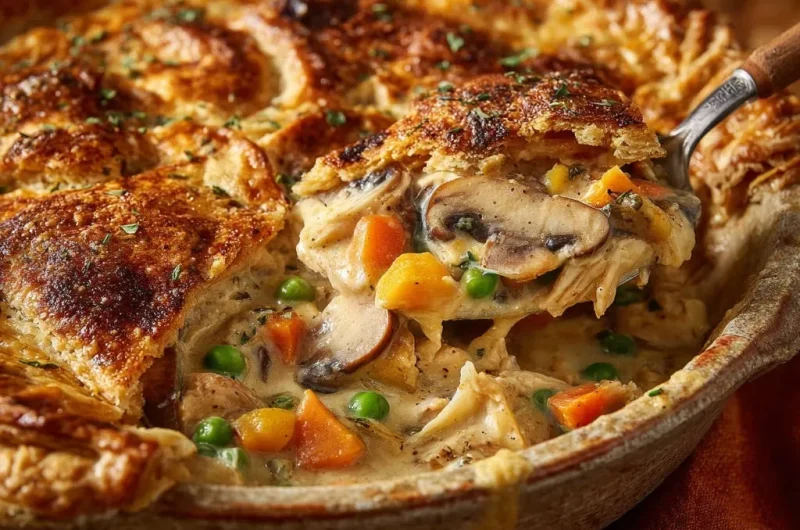
minutesSay goodbye to watery fillings! This recipe guarantees a thick, rich, and creamy chicken and mushroom pot pie every single time. Perfect for a cozy and satisfying meal that will become a family favorite.
Ingredients
2 cups cooked chicken breast, shredded
8 ounces button or cremini mushrooms, sliced
1 cup carrots, diced
1 cup frozen green peas
1/4 cup unsalted butter
1/4 cup all-purpose flour
2 cups chicken broth
1/2 cup milk or half-and-half
1 teaspoon salt
1/2 teaspoon black pepper
1/2 teaspoon dried thyme
2 prepared pie crusts (9-inch size)
1 large egg (for egg wash, optional)
Fresh parsley or thyme for garnish (optional)
Directions
- Preheat your oven to 400°F (200°C).
- In a large pot or Dutch oven, melt the butter over medium heat. Add the diced carrots and sliced mushrooms. Cook for 5 to 7 minutes, stirring occasionally, until the vegetables begin to soften.
- Stir in the all-purpose flour. Cook for 1 to 2 minutes, stirring constantly, to create a smooth roux. This step is crucial for building a stable and thick sauce.
- Gradually whisk in the chicken broth until the mixture is smooth and lump-free. Then, whisk in the milk or half-and-half. Bring the mixture to a gentle simmer over medium heat, stirring frequently.
- Continue to simmer the sauce for 5 to 7 minutes, or until it has visibly thickened to a rich, creamy consistency. This extended simmering time is key to ensuring your filling will not be watery after baking.
- Remove the pot from the heat and stir in the shredded chicken, frozen green peas, salt, black pepper, and dried thyme.
- Line a 9-inch pie dish with one of the prepared pie crusts. Pour the chicken and vegetable filling evenly into the crust.
- Place the second pie crust over the filling. Crimp the edges of both crusts together to seal them. Cut several small slits in the top crust to allow steam to escape during baking. For a beautiful golden crust, whisk the egg lightly and brush it over the top of the pie.
- Bake for 35 to 40 minutes, or until the top crust is golden brown and the filling is bubbling. If the crust edges start to brown too quickly, you can loosely cover them with aluminum foil.
- Let the pot pie rest for 10 to 15 minutes before slicing and serving. Garnish with fresh chopped parsley or thyme if desired.
Notes
- Extended sauce simmering is key to a thick, non-watery filling.