There’s nothing more frustrating than a beautifully seared chicken breast that turns out disappointingly dry. After years of experimenting, I’ve perfected a technique for this Creamy Peppercorn Pan Chicken that guarantees incredibly juicy results every single time.
This recipe isn’t just about avoiding dryness; it’s about building layers of rich flavor, culminating in a luscious peppercorn sauce that transforms a simple chicken dinner into an unforgettable meal.
Why You’ll Love This Creamy Peppercorn Pan Chicken Recipe
This isn’t just another chicken recipe. It’s a masterclass in achieving perfectly tender chicken with a deeply flavorful sauce, all while being surprisingly straightforward.
The Secret to Never-Dry Chicken
We combine a high-heat sear with a quick oven finish, then crucially, a dedicated rest. This method locks in the natural juices, ensuring every bite of your chicken is moist and tender.
A Rich Pan Sauce, Every Time
The flavorful “fond” left in the skillet after searing the chicken becomes the foundation of an exquisite creamy peppercorn sauce. You’ll deglaze with chicken stock, creating an unparalleled depth of flavor.
Quick Weeknight Elegance
Despite its gourmet taste, this Creamy Peppercorn Pan Chicken comes together quickly enough for a weeknight. It delivers an impressive, restaurant-quality meal without the fuss.
Essential Ingredients for Flavorful Creamy Peppercorn Pan Chicken
Using quality ingredients and understanding their role is key to this dish’s success. Each component contributes to the harmonious blend of flavors and textures.
The Star: Boneless, Skinless Chicken Breasts
Choose large, good-quality boneless, skinless chicken breasts for this recipe. Aim for pieces of similar thickness to ensure even cooking, or gently pound thicker parts to unify them.
The Creamy Peppercorn Sauce Essentials
Heavy Cream: This provides the luxurious richness and silky texture of the sauce. Opt for full-fat heavy cream for the best body and flavor.
Coarse Ground Black Pepper: Freshly ground coarse black pepper is non-negotiable here. It offers a pungent, aromatic heat and delightful texture that pre-ground pepper simply can’t match.
Chicken Stock: Low-sodium chicken stock allows you to control the seasoning. It’s vital for deglazing and building the savory base of your pan sauce.
Flour: A small amount of all-purpose flour creates a simple roux with the pan drippings, thickening the sauce to a perfect consistency.
Fresh Parsley: Minced fresh parsley adds a vibrant pop of color and a fresh, herbaceous counterpoint to the rich sauce. Stir it in at the very end for maximum impact.
Fresh Sides: Potatoes & Spinach
Small Yellow Potatoes: These roast beautifully, becoming golden and tender. Their mild flavor complements the rich chicken and sauce.
Fresh Spinach: Quickly wilted spinach adds a tender, earthy green element to the plate. It’s a healthy and visually appealing accompaniment that cooks in minutes.
Pantry Staples: Oils, Seasonings & Thickeners
Olive Oil & Unsalted Butter: The combination of these two fats is ideal for searing. Olive oil handles higher heat, while butter adds a nutty richness and helps with browning.
Kosher Salt: Essential for seasoning the chicken and adjusting the final sauce. Kosher salt’s larger crystals allow for better control and adherence to the meat.
Tools for Your Creamy Peppercorn Pan Chicken Success
Oven-Safe Skillet: Essential for searing and oven-finishing, like a good cast iron or stainless steel pan. This allows for seamless transfer from stovetop to oven.
Meat Thermometer: Your best friend for perfectly cooked, juicy chicken, ensuring you hit that crucial temperature without overcooking. An instant-read thermometer is highly recommended.
Whisk: For a lump-free, silky pan sauce that coats the back of a spoon beautifully. A good whisk ensures your roux is smooth and your sauce is emulsified.
Cutting Board & Knife: For efficient prep and elegantly slicing your rested chicken. A sharp knife makes all the difference for clean cuts.
Foil: Crucial for tenting the chicken during its non-negotiable resting period, locking in moisture. This simple step is vital for juiciness.
Step-by-Step: Crafting Your Creamy Peppercorn Pan Chicken Perfection
Follow these steps closely to achieve that perfectly juicy chicken and luscious sauce.
Prep Ahead: Roasted Potatoes & Wilted Spinach
Roast the Potatoes: Preheat your oven to 400°F (200°C). Toss 1 cup of roughly chopped small yellow potatoes with 1 tablespoon of olive oil, ½ teaspoon of kosher salt, and ½ teaspoon of coarse ground black pepper. Spread them on a baking sheet and roast for 25-30 minutes, or until they are beautifully golden brown and tender. Set these aside while you prepare the chicken, keeping them warm if possible.
Wilt the Spinach: In a separate pan, quickly sauté 4 cups of fresh spinach with a small pat of butter or a drizzle of oil over medium heat. Cook just until the spinach is tender and vibrant green, typically about 2 minutes. Season lightly with a pinch of salt and set aside.
Mastering the Chicken’s Unbeatable Juiciness
Pat Dry & Season Generously: This is a critical first step for achieving that coveted golden-brown crust. Pat your 2 large boneless, skinless chicken breasts extremely dry with paper towels, removing all surface moisture. Season generously on both sides with ½ teaspoon of salt and ½ teaspoon of coarse ground black pepper.
Achieve the Perfect Sear: Heat a large oven-safe skillet (cast iron works wonderfully) over medium-high heat. Add 1 tablespoon of olive oil and 1 tablespoon of unsalted butter. Once the butter foams and subsides, indicating it’s hot enough, carefully place the seasoned chicken breasts in the hot skillet. Sear for 4 minutes without moving them until a beautiful, deep golden-brown crust forms on the bottom.
The “Temperature Lock-In” Oven Finish: Flip the chicken breasts to the other side. Immediately transfer the skillet to your preheated 400°F (200°C) oven. Bake for just 6 to 8 minutes, or until the internal temperature reaches 162°F (72°C) in the thickest part of the breast. This brief oven time gently finishes cooking without drying the chicken out, as it will continue cooking while resting.
The Non-Negotiable Rest: Remove the skillet from the oven and immediately transfer the chicken to a clean cutting board. TENT IT LOOSELY WITH FOIL AND LET IT REST FOR A FULL 10 MINUTES. Do not skip this step! This crucial resting period allows the muscle fibers to relax, redistributing the juices throughout the meat and allowing the internal temperature to coast up to a safe 165°F (74°C), guaranteeing a truly tender, juicy result.
Building the Rich Creamy Peppercorn Sauce
Create a Quick Roux: While the chicken rests, return the skillet (with all its flavorful drippings) to the stovetop over medium heat. Add 1 tablespoon of flour to the pan drippings and whisk quickly and continuously for 30 seconds. This creates a light roux, which will serve as the thickening agent for your luscious sauce.
Deglaze with Stock: Pour in ½ cup of low-sodium chicken stock and vigorously scrape up all the flavorful browned bits (the “fond”) from the bottom of the pan with a wooden spoon or whisk. These bits are pure flavor! Let the stock bubble and thicken slightly, about 2 minutes, as it incorporates all that savory goodness.
Finish with Cream & Seasoning: Reduce the heat to low. Stir in ¼ cup of heavy cream, a generous pinch of fresh coarse black pepper, and 1 teaspoon of minced fresh parsley. Simmer gently for just 1 minute until the sauce thickens and coats the back of a spoon beautifully. Taste the sauce and adjust salt if needed, remembering that your chicken is already seasoned.
Bringing It All Together for Serving
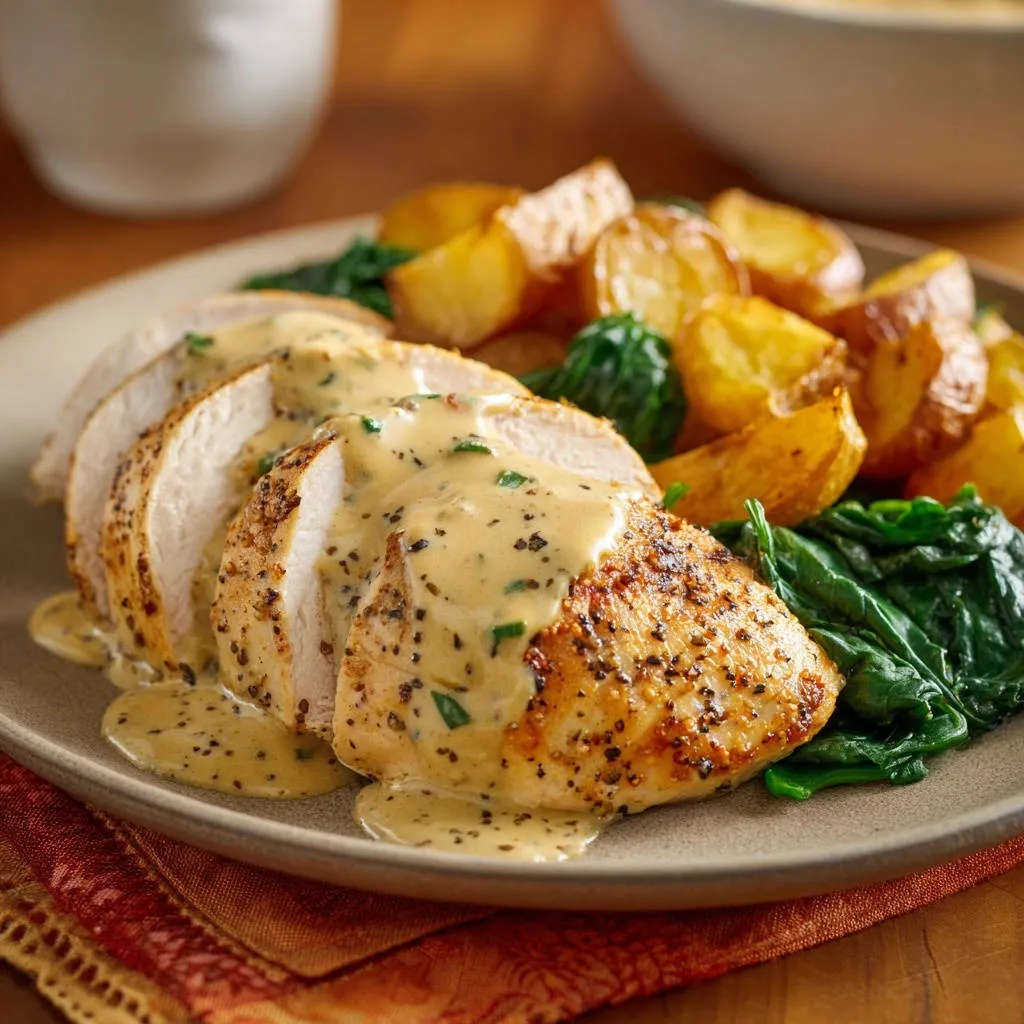
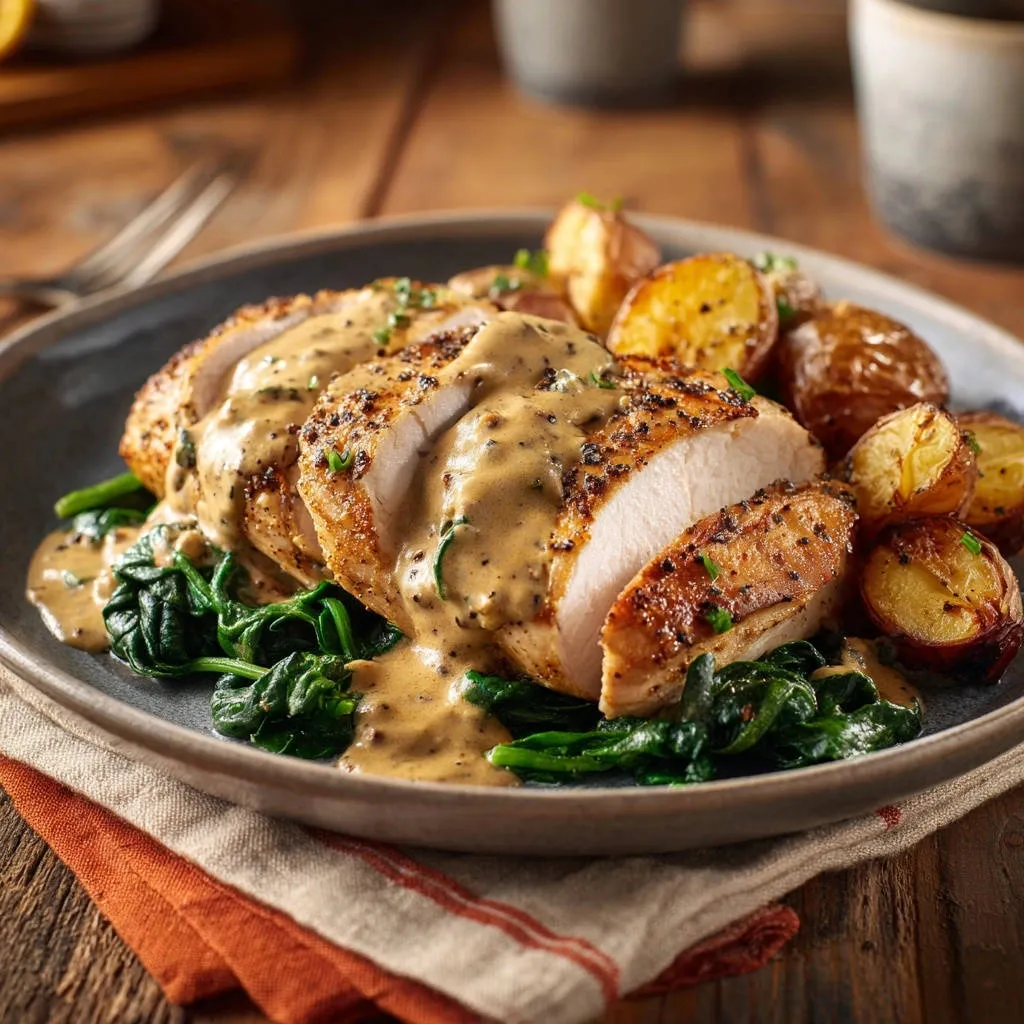
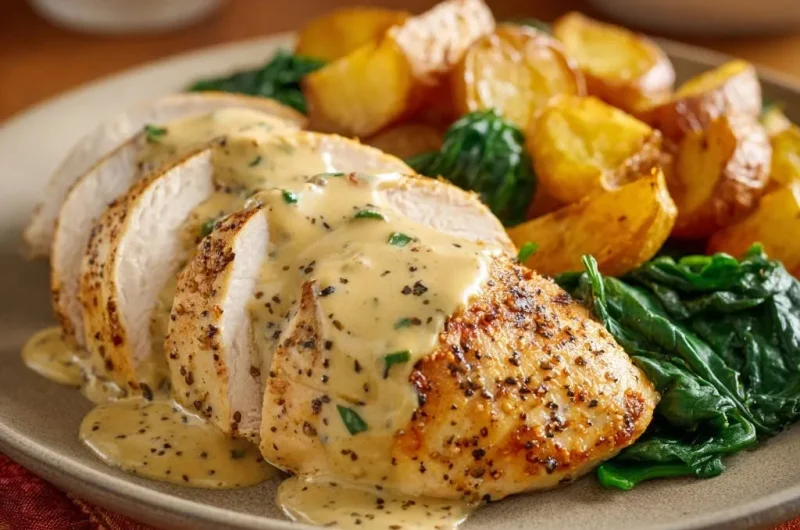
Slice and Plate: Slice the rested chicken breast diagonally into even, tender pieces. Arrange the succulent chicken slices alongside the warm roasted potatoes and vibrant wilted spinach on individual plates.
Generously Sauce: Spoon the warm, creamy peppercorn sauce generously over the chicken slices, ensuring every piece is coated in its rich, flavorful embrace. Serve immediately and enjoy your perfectly prepared Creamy Peppercorn Pan Chicken.
Expert Tips & Tricks for the Best Creamy Peppercorn Pan Chicken
Elevate your cooking with these insightful tips that make all the difference.
Don’t Fear the Fond: Those browned bits stuck to the bottom of your pan after searing the chicken are pure flavor! Make sure to scrape them up diligently when deglazing with chicken stock – they’re essential for a rich, deep sauce and the essence of pan chicken.
Season Generously: Chicken needs ample seasoning to truly shine. Don’t be shy with salt and pepper at the outset; this builds layers of flavor from the first bite and helps create that beautiful crust.
Freshly Ground Pepper is Key: While pre-ground works in a pinch, freshly coarse-ground black pepper delivers a much more vibrant, aromatic kick and delightful texture to your creamy sauce. It truly makes a noticeable difference in this Creamy Peppercorn Pan Chicken.
Vary Your Sides: While roasted potatoes and spinach are excellent companions, consider serving your Creamy Peppercorn Pan Chicken with other favorites. Creamy mashed potatoes, fluffy rice, or even a side of perfectly crispy skillet potatoes and onions would be delicious for variety.
Adjust Sauce Thickness: If your sauce appears too thin after simmering, let it gently bubble a little longer to reduce and thicken naturally. If it becomes too thick, simply add a splash more chicken stock or heavy cream to achieve your desired consistency.
Use a Good Skillet: A heavy-bottomed, oven-safe skillet (like cast iron or a quality stainless steel pan) is crucial for an even sear and successful transfer to the oven. Thin pans won’t hold heat as well or provide the necessary even cooking.
Common Questions About Creamy Peppercorn Pan Chicken
Can I use different cuts of chicken?
Yes, you can adapt this technique for boneless, skinless chicken thighs, though cooking times will vary slightly. Thighs are more forgiving and remain juicy even if slightly overcooked. For another take on succulent chicken, try this juicy pan-seared chicken breast recipe.
How can I make this Creamy Peppercorn Pan Chicken gluten-free?
To make the sauce gluten-free, simply substitute the all-purpose flour with 1 tablespoon of cornstarch mixed with 2 tablespoons of cold chicken stock to create a slurry. Whisk this slurry into the hot pan drippings and stock mixture, stirring until thickened, then proceed with adding the cream.
What if I don’t have an oven-safe skillet?
If you don’t have an oven-safe skillet, sear the chicken on the stovetop as directed. Then, transfer the seared chicken breasts to an oven-safe baking sheet to finish cooking in the oven. For the sauce, transfer the pan drippings to a separate saucepan and proceed with the sauce steps there.
Can I prepare parts of this dish ahead of time?
You can chop and season the potatoes ahead of time and store them in the refrigerator. The spinach can be washed and dried. However, the chicken searing, oven finishing, and sauce preparation are best done fresh for optimal flavor and texture. For another delicious make-ahead meal, consider a creamy chicken broccoli bake.
How long does leftover Creamy Peppercorn Pan Chicken last?
Leftover Creamy Peppercorn Pan Chicken, when stored properly, will last for 3-4 days in an airtight container in the refrigerator. The sauce might thicken slightly upon cooling, but it reheats beautifully.
Storage, Reheating & Make-Ahead Advice
Proper handling ensures you can enjoy this delicious dish for days to come.
Storing Leftovers
Allow any leftover Creamy Peppercorn Pan Chicken to cool completely before transferring it to an airtight container. Store the chicken, sauce, potatoes, and spinach together or separately in the refrigerator for up to 3-4 days.
Best Way to Reheat
For best results, gently reheat leftovers in a skillet over medium-low heat. Add a splash of chicken stock or cream to the sauce if it has thickened too much. Alternatively, you can reheat in the microwave, but ensure you do so in short bursts to prevent the chicken from drying out.
Making it Ahead: Components
While the chicken and sauce are best prepared fresh, you can save time by prepping your vegetables. Wash and chop the potatoes and spinach in advance. You can also measure out your sauce ingredients like flour, stock, and cream, having them ready to go.
Ready to Impress? Share Your Creamy Peppercorn Pan Chicken Masterpiece!
Now that you’re equipped with the secrets to perfectly juicy chicken and a rich, creamy sauce, it’s time to create your own Creamy Peppercorn Pan Chicken. This recipe is a testament to how simple techniques can yield extraordinary results.
Don’t be surprised when this becomes a regular in your dinner rotation! We’d love to hear about your experience in the comments below, or share your culinary creations with us.
Creamy Peppercorn Chicken
Course: Main CourseCuisine: AmericanDifficulty: easy2
servings20
minutes30
minutes550
kcal60
minutesNever suffer from dry chicken again! This technique guarantees tender, juicy boneless chicken breasts, finished with a rich creamy peppercorn pan sauce. Paired with roasted potatoes and fresh spinach, this complete meal is perfect for a satisfying dinner.
Ingredients
2 large boneless skinless chicken breasts
1 tablespoon olive oil
1 tablespoon unsalted butter
1/2 teaspoon kosher salt
1/2 teaspoon coarse ground black pepper (or more, to taste)
1 cup small yellow potatoes, roughly chopped
4 cups fresh spinach
1/2 cup chicken stock (low sodium)
1/4 cup heavy cream
1 teaspoon fresh parsley, minced
1 tablespoon flour (for thickening)
Directions
- Prepare the Potatoes and Greens: Preheat the oven to 400 degrees F. Toss the chopped potatoes with 1 tablespoon of oil, salt, and pepper. Roast for 25-30 minutes, or until golden brown and tender. Set aside.
- Prepare the Chicken (The Juiciness Key): Pat the chicken breasts extremely dry with paper towels. Season generously on both sides with salt and pepper.
- Sear the Chicken: Heat a large oven-safe skillet (cast iron works great) over medium-high heat. Add the olive oil and butter. Once the butter foams and subsides, carefully place the chicken breasts in the hot skillet. Sear for 4 minutes without moving them, until a beautiful golden crust forms. Flip the chicken.
- The Temperature Lock-In Method (Solving Dryness): Immediately transfer the skillet to the preheated 400 degree F oven. Bake for just 6 to 8 minutes, or until the internal temperature reaches 162 degrees F in the thickest part of the breast. (The visual goal is to pull it slightly before the fully safe temperature of 165F, as it will continue cooking while resting.)
- The Non-Negotiable Rest: Remove the skillet from the oven. Transfer the chicken immediately to a cutting board. TENT IT LOOSELY WITH FOIL AND LET IT REST FOR A FULL 10 MINUTES. Do not skip this step! This crucial resting period locks in the moisture and allows the internal temperature to coast up to 165F, guaranteeing a juicy result.
- Build the Cream Sauce: While the chicken rests, return the skillet to the stovetop over medium heat. Add the flour to the pan drippings and whisk quickly for 30 seconds to create a roux. Deglaze the pan by pouring in the chicken stock and scraping up all the browned bits (the fond) from the bottom of the pan. Let the stock bubble and thicken slightly, about 2 minutes.
- Finish the Sauce: Reduce the heat to low. Stir in the heavy cream and a heavy pinch of fresh pepper and the minced parsley. Simmer gently for 1 minute until the sauce coats the back of a spoon. Taste and adjust salt if needed.
- Sauté the Spinach: In a separate pan, quickly wilt the fresh spinach with a small pat of butter or oil, just until tender (about 2 minutes). Season with a pinch of salt.
- Serve: Slice the rested chicken breast diagonally. Plate the chicken alongside the roasted potatoes and spinach. Spoon the creamy peppercorn sauce generously over the chicken slices and serve immediately.
Notes
- Do not skip the chicken resting period; it’s crucial for juiciness.