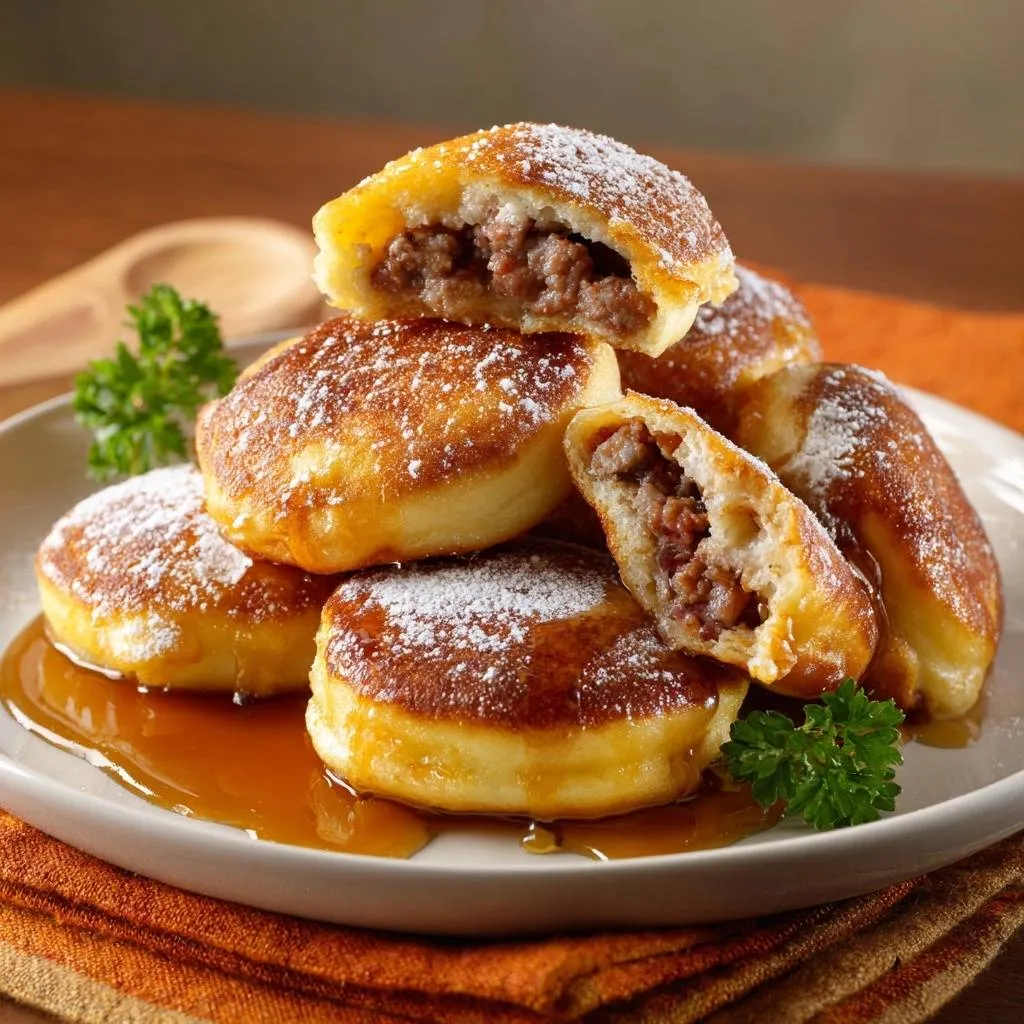
Imagine biting into pierogi that stick to the pan, tear open, and end up soggy no matter what you do. You’ve been there, right? This crispy beef pierogi recipe fixes that frustration with a dead-simple pat-dry technique and a hot oil sear. You’ll get ultra-crispy golden bottoms every time, plus juicy beef filling that stays locked in.
Why does this method work so well? Boiling alone leaves them waterlogged, but the quick dry-off followed by frying creates that perfect crunch. In addition, the sweet maple drizzle adds an unexpected twist to this Eastern European classic, balancing the savory beef perfectly.
Here’s the expertise booster: pat the boiled pierogi very dry on both sides with paper towels. That removes surface moisture completely, preventing steam that causes sticking. About 30 pierogi, 1 hour active time, 1.5 hours total, serves 4-6. You’re in for a treat.
Essential Components for Crispy Beef Pierogi
Dough Ingredients and Their Roles
All-purpose flour forms the base, 2 1/2 cups total, giving you tender wrappers that hold up to frying. The large egg adds elasticity, so the dough stretches without tearing. In addition, lukewarm water (3/4 cup) hydrates gently, preventing tough gluten development.
Salt (1/2 teaspoon) seasons the dough itself. However, don’t swap bread flour here; it makes chewier results. Resting the dough 30 minutes relaxes gluten, so it rolls out smooth. You’ll get about 30 pierogi from this batch.
Beef Filling Breakdown
One pound ground beef, ideally 80/20 for flavor without greasiness, browns up perfectly. Vegetable oil (1 tablespoon) starts the sear, while salt (1 teaspoon) and black pepper (1/2 teaspoon) bring balanced savoriness. Drain excess fat after cooking to keep filling from making dough soggy.
Cooling it completely is key; warm filling melts the dough during assembly. Therefore, pop it in the fridge if needed. This simple mix packs juicy punch in every crispy beef pierogi bite.
Serving Finishers: Sugar, Syrup, Parsley
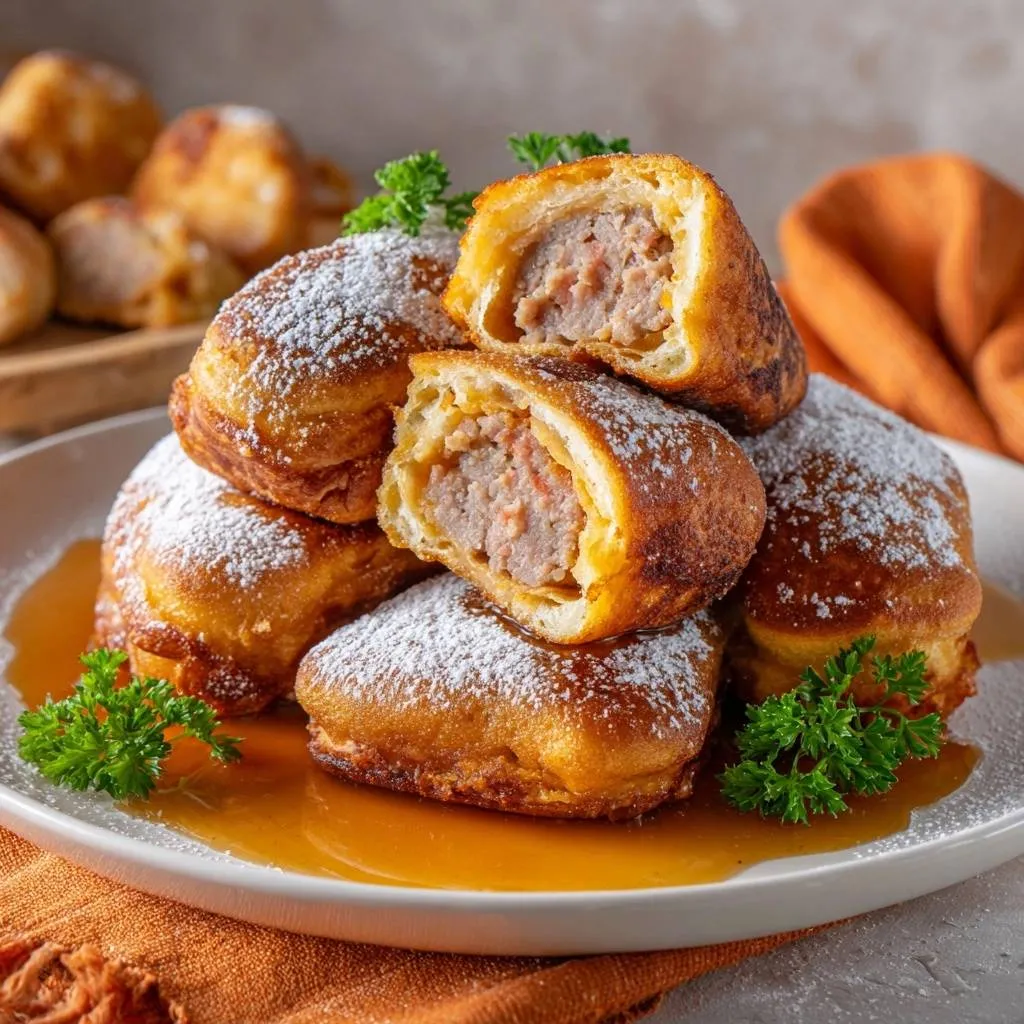
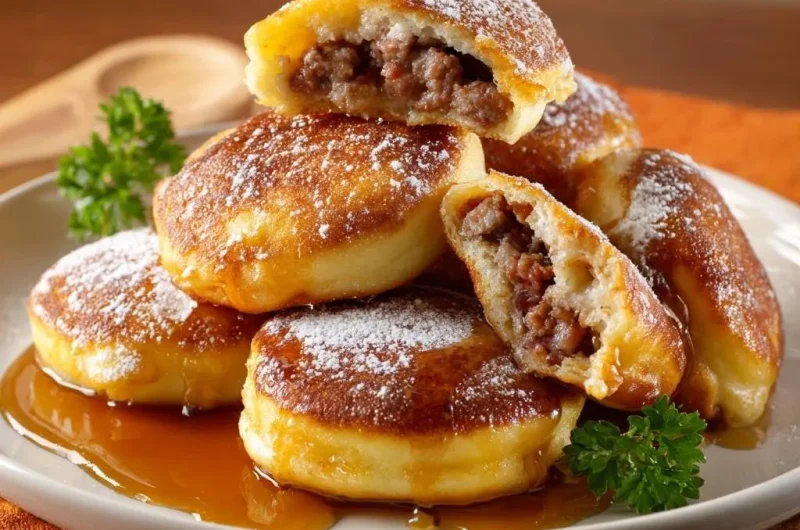
Powdered sugar dusts on hot for a subtle crunch contrast against the crispy bottoms. Maple syrup drizzle brings caramel sweetness that elevates the beef’s richness. Chopped fresh parsley adds a burst of green freshness.
Serve immediately, since heat maximizes that sweet-savory synergy. It’s what turns good pierogi into unforgettable crispy beef pierogi. You won’t stop at one.
Science of Crispy Pan-Seared Pierogi
Pat-Dry Technique Prevents Sticking
Boiled pierogi carry surface water that turns to steam in the pan, creating tension that glues them down. Pat-dry absorbs that moisture fully, so oil hits hot dough directly. This sparks the Maillard reaction for deep golden crispness.
Damp ones stick and tear; dry ones release like magic. Therefore, use plenty of paper towels and press firmly on both sides. It’s the foolproof secret to perfect crispy beef pierogi.
Hot Oil Searing Locks in Crisp
Heat oil to shimmering (around 350-375°F) for instant dehydration and browning. Fry undisturbed first, building a fond that crisps the bottom. Nonstick skillets excel here for even heat and easy flips.
Cast iron works too, but watch for sticking without enough oil. Flip after 3-4 minutes when edges lift easily. That second side takes just 2-3 minutes more.
Boil-to-Fry Transition Explained
Parboiling gelatinizes starch in the dough, setting the structure around the filling. They float after 3-4 minutes, signaling doneness inside. However, excess water on the surface leads straight to sogginess if skipped.
Frying then crisps the exterior perfectly. Therefore, this hybrid method delivers juicy centers with shatteringly crisp outsides in your crispy beef pierogi.
Equipment Choices for Perfect Crispy Beef Pierogi
Nonstick Skillet Advantages
A large 12-inch nonstick skillet heats evenly and releases pierogi effortlessly. It holds a single layer without crowding, which drops temps and steams them. Use 2 tablespoons oil per batch.
Carbon steel is a solid alternative for that fond buildup. In addition, always preheat fully. This setup guarantees crispy success.
Dough Tools: Cutter and Rolling Pin
A 3-inch glass or round cutter ensures uniform circles for tight seals. Roll dough to exactly 1/8-inch thick; thinner tears, thicker stays chewy. Dust with flour to prevent sticking.
A wooden rolling pin gives you control over even pressure. Therefore, these basics make assembly a breeze for 30 pierogi.
Step-by-Step: Mastering Crispy Beef Pierogi Dough
Mixing and Kneading Process
Mix 2 1/2 cups flour and 1/2 teaspoon salt in a bowl. Beat 1 egg with 3/4 cup lukewarm water, then stir into flour until shaggy. Knead on a floured surface for 5 minutes until smooth and elastic, passing the windowpane test.
Over-kneading toughens it, so stop when springy. Wrap and rest 30 minutes; this relaxes gluten for tender dough. You’ll smell that fresh flour aroma building.
Rolling, Cutting, Filling
Roll rested dough to 1/8-inch on floured surface. Cut 3-inch rounds; re-roll scraps once. Add just 1 teaspoon cooled filling per center to avoid bursts.
Fold and pinch edges tightly, then crimp with fingers or fork. Therefore, seals hold through boiling and frying for about 30 intact crispy beef pierogi.
For more ways to keep layers firm, check out this loaded taco pie.
Step-by-Step: Beef Filling and Boiling
Browning Ground Beef Perfectly
Heat 1 tablespoon vegetable oil over medium. Add 1 pound ground beef, breaking it up constantly. Cook 8 minutes until browned and no pink remains; season with 1 teaspoon salt and 1/2 teaspoon pepper.
Drain fat well, then cool fully. For extra flavor, stir in minced onion or garlic if you like. Cool filling handles easily without softening dough.
Boiling Batches Without Crowding
Bring a large pot of salted water to a rolling boil. Add 10-12 pierogi at a time; they sink then float after 3-4 minutes. Use a slotted spoon to lift them out gently.
Crowding clouds the water with starch and drops temp. Therefore, work in batches for even cooking.
Step-by-Step: Achieving Ultra-Crispy Sear
Drying and Oil Heating
Pat boiled pierogi very dry on both sides with paper towels; press firmly. This step is non-negotiable for no-stick magic. Heat 2 tablespoons vegetable oil in nonstick skillet over medium-high until shimmering, not smoking.
Test with a drop of water; it should sizzle instantly. Add pierogi in a single layer. Pro tip: double-dry if humid for extra crisp.
Frying, Flipping, Batch Management
Fry undisturbed 3-4 minutes until deep golden; edges lift easily. Gently flip with a thin spatula, fry 2-3 minutes more. Refresh oil between batches if it looks dry.
Drain on a wire rack briefly. You’ll hear that satisfying sizzle and see crispy perfection emerge.
History and Evolution of Beef Pierogi
Eastern European Roots
Pierogi trace back to Poland and Ukraine, where they’re a staple like varenyky across the region. Traditionally stuffed with potato, cheese, or sauerkraut, then boiled or steamed. Beef fillings emerged as hearty adaptations for colder climates.
Immigrants brought them to America in the 19th century, evolving at church suppers and family tables. Therefore, they became comfort food icons with regional twists.
Modern Crispy Twists
Pan-frying took off for that craveable crunch, moving beyond soft boiled versions. The maple drizzle fuses sweet American notes with savory beef, perfect for crispy beef pierogi. Beef shines here because it stays juicy under the sear.
These innovations keep the tradition alive while adding excitement. You’ll love how it updates the classic.
For another comforting meal featuring similar ingredients, try this cheesy beef and potato pie.
Avoiding Pitfalls in Crispy Beef Pierogi
Sticky Pan and Tear Fixes
Skipping the pat-dry traps steam, causing sticks and tears. Overcrowding drops pan temp, leading to sogginess. Always dry thoroughly and use single layers.
Solution: blot twice if needed. Therefore, your bottoms stay golden and intact.
Dough and Filling Errors
No rest makes tough dough; poor crimps cause leaks. Under-seasoned beef tastes bland, and warm filling softens wrappers. Rest dough, seal tight, season generously, and chill filling.
Cold hands help pinch cleanly. These fixes ensure success.
Flavor Variations for Crispy Beef Pierogi
Spice and Herb Swaps
Mix smoked paprika or garlic powder into beef for smoky depth. Add finely chopped onions during browning, or mushrooms for earthiness. A bit of cheese melts in nicely too.
Keep fillings concise to maintain crisp focus. Experiment, but taste before filling.
Sweet Drizzle Alternatives
Honey offers floral sweetness over maple. Balsamic reduction adds tangy zip. For savory, try a yogurt-dill dip on the side.
Regional twists like fruit compote work too. Light drizzles keep textures crisp.
Make-Ahead and Storage Guide
Freezing Uncooked Pierogi
Arrange uncooked pierogi on a parchment-lined tray, freeze solid 1-2 hours, then bag airtight for up to 3 months. Boil from frozen, adding 1-2 extra minutes until floating.
Don’t thaw first; it risks sogginess. Great for quick weeknight crispy beef pierogi.
Reheating for Crisp Revival
Store cooked leftovers in fridge up to 2 days airtight. Reheat in a hot oiled skillet 2-3 minutes per side, not microwave. Oven at 400°F crisps trays nicely too.
Skip syrup until reheated. Crisp returns easily.
Pairing Sides with Crispy Beef Pierogi
Salad and Slaw Complements
Tangy cabbage slaw cuts through beef richness with vinegar snap. Cucumber salad brings cool crunch and refreshment. Acids balance the maple perfectly.
Keep portions light to let pierogi shine. Simple and satisfying.
Complementary Dishes to Try
Round out your meal with these delicious recipes that go well with hearty pierogi.
- For a fun finger food option, consider making these Pancake Sausage Rolls, offering a similar comforting feel.
- If you enjoy creamy textures, you might like this Creamy Green Bean and Egg Salad, which provides a refreshing contrast.
Vegetable and Soup Matches
Roasted beets echo earthy sweetness. A light borscht nods to roots without overwhelming. Sautéed greens add bitterness contrast.
Pair for balanced meals. You’ll crave the combo.
Troubleshooting Crispy Beef Pierogi Issues
Soggy Bottoms and Leaks
Soggy bottoms mean skipped drying; steam ruins crisp. Leaks come from overfilling or weak seals. Pat dry always, use 1 teaspoon filling max, crimp firmly.
Visual check: no gaps before boiling. Fixed every time.
Dough Too Sticky or Tough
Sticky dough needs more flour during knead, 1 tablespoon at a time. Tough results from no rest or overworking. Adjust water if too dry initially.
Dense filling? Drain fat fully. Tweaks keep it tender.
Finishing and Texture Woes
Syrup overwhelms if heavy; drizzle lightly post-fry. Not crispy enough signals low oil temp. Heat to shimmer, fry undisturbed.
Golden lift test confirms doneness. Perfection follows.
FAQ
How do I store leftover crispy beef pierogi and can they freeze?
Store cooked pierogi in an airtight container in the fridge for up to 2 days. For freezing, flash-freeze uncooked ones on a tray first, then transfer to freezer bags for 3 months. Reheat cooked from fridge in a hot skillet with oil for crisp revival; boil frozen uncooked adding 1-2 minutes extra until they float. Avoid freezing cooked ones as texture suffers.
Why are my pierogi sticking to the pan or staying soggy?
Sticking happens from residual moisture after boiling; pat very dry on both sides with paper towels, pressing firmly. Sogginess comes from overcrowding or low oil heat, which steams instead of sears. Dry thoroughly, use medium-high shimmer (not smoke), and single layer only. This duo guarantees release and gold bottoms every batch.
Can I substitute ingredients in the dough or filling for crispy beef pierogi?
Swap all-purpose flour for gluten-free 1:1 blend, but add 1 teaspoon xanthan gum for elasticity. No egg? Use 3 tablespoons aquafaba or extra water. For beef, ground turkey works but brown longer for flavor; drain fat same way. Keep ratios tight to maintain tenderness and seal. Lukewarm water stays key for soft dough.
Why is my dough tough and how do I fix it?
Tough dough means over-kneading or skipping the 30-minute rest, which overdevelops gluten. Knead just to elastic (5 minutes max, windowpane test), then rest wrapped at room temp. If still tough, next time use slightly less flour or more water incrementally. Resting relaxes it for rollable tenderness perfect for frying.
How much filling per pierogi and why does it matter?
Use exactly 1 teaspoon per 3-inch round; more causes bursts during boiling or frying from pressure. It ensures tight seals that hold juicy beef inside without leaks. Overfilling weakens crimps, leading to lost filling and soggy results. Spoon precisely for 30 plump, intact crispy beef pierogi.
What’s the best oil temperature for the crispy sear?
Heat 2 tablespoons vegetable oil to shimmering over medium-high, about 350-375°F; a water drop should dance instantly, not smoke. Too low steams soggily; too hot burns. Undisturbed 3-4 minutes builds crust, flip when edges lift golden. Refresh oil per batch for consistent ultra-crisp bottoms.
Crispy Beef Pierogi
Course: Main CourseCuisine: Polish-AmericanDifficulty: medium4
30 pierogi45
minutes30
minutes240
kcal60
MinutesTired of boiled pierogi sticking to the pan, tearing, and staying soggy? This dead-simple pat-dry technique plus hot oil sear guarantees they release perfectly for ultra-crispy golden bottoms every single time, locking in juicy beef filling. Sweet maple drizzle takes them over the top.
Ingredients
Dough:
2 1/2 cups all-purpose flour, plus extra for dusting
1 large egg
3/4 cup lukewarm water
1/2 teaspoon salt
Filling:
1 pound ground beef
1 teaspoon salt
1/2 teaspoon black pepper
1 tablespoon vegetable oil (for browning filling)
To serve:
Powdered sugar
Maple syrup
Fresh parsley leaves, chopped
Directions
- Make the dough: In a bowl, mix flour and salt. Beat egg with lukewarm water, then stir into flour. Knead on a floured surface for 5 minutes until smooth and elastic. Wrap in plastic and rest at room temperature for 30 minutes. This keeps dough tender.
- Prepare filling: Heat 1 tablespoon vegetable oil in a skillet over medium heat. Add ground beef, breaking it up. Cook until browned and cooked through, about 8 minutes. Season with salt and pepper. Drain excess fat, cool completely.
- Roll dough to 1/8-inch thick on floured surface. Cut into 3-inch rounds using a glass or cutter. Place 1 teaspoon filling in center of each. Fold and pinch edges tightly to seal, crimping for extra security.
- Bring a large pot of salted water to a boil. Add pierogi in batches (do not crowd). Boil 3 to 4 minutes until they float. Remove with slotted spoon.
- Pat pierogi VERY DRY with paper towels on both sides. This removes all surface moisture, the secret to foolproof pan release, no sticking or sogginess.
- Heat 2 tablespoons vegetable oil in a large nonstick skillet over medium-high until shimmering hot (not smoking). Add pierogi in a single layer, without crowding. Fry undisturbed 3 to 4 minutes until deep golden and crispy. Gently flip with spatula, fry other side 2 to 3 minutes more. Add oil if needed between batches.
- Dust hot pierogi generously with powdered sugar. Drizzle with maple syrup. Garnish with chopped parsley. Serve immediately for peak crisp.
Notes
- Pat pierogi VERY DRY with paper towels after boiling—this removes all surface moisture, the secret to foolproof pan release, no sticking or sogginess. Use hot shimmering oil (not smoking) for the crispiest results.