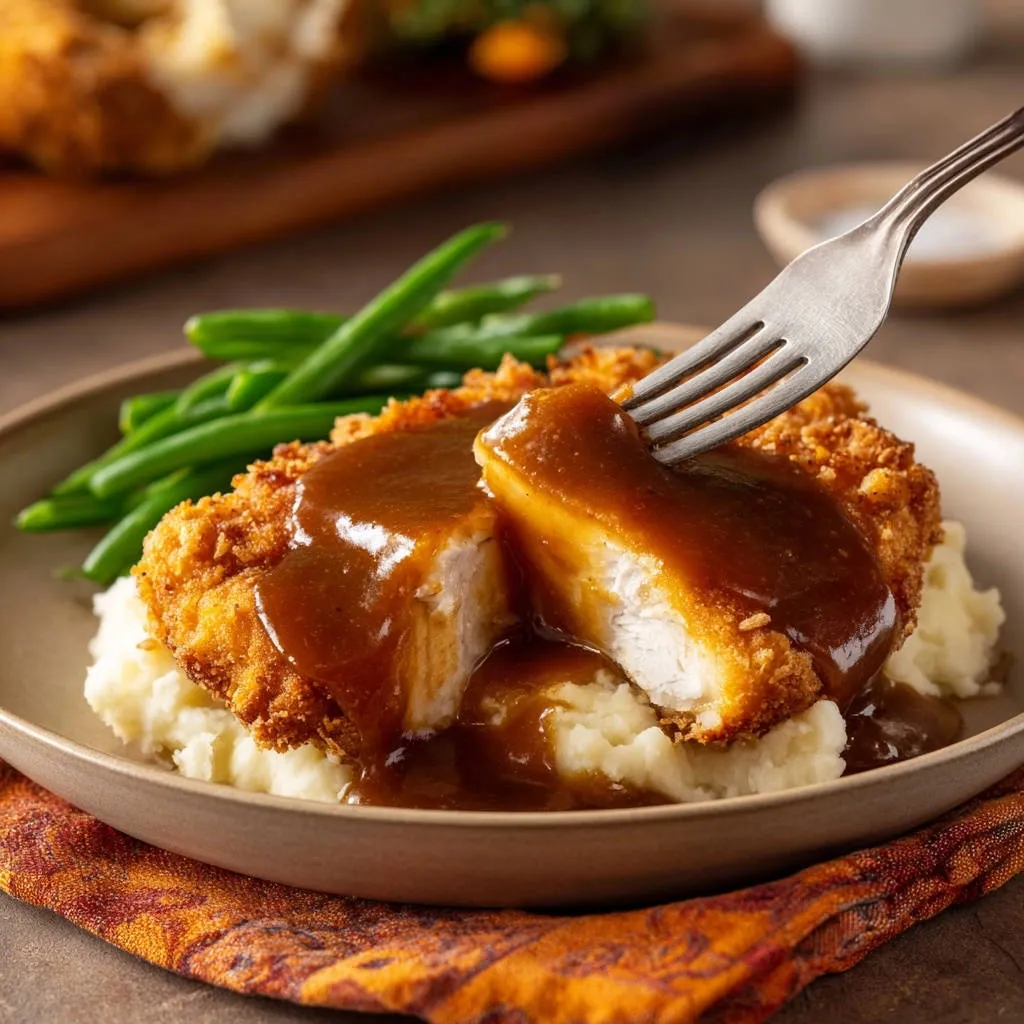
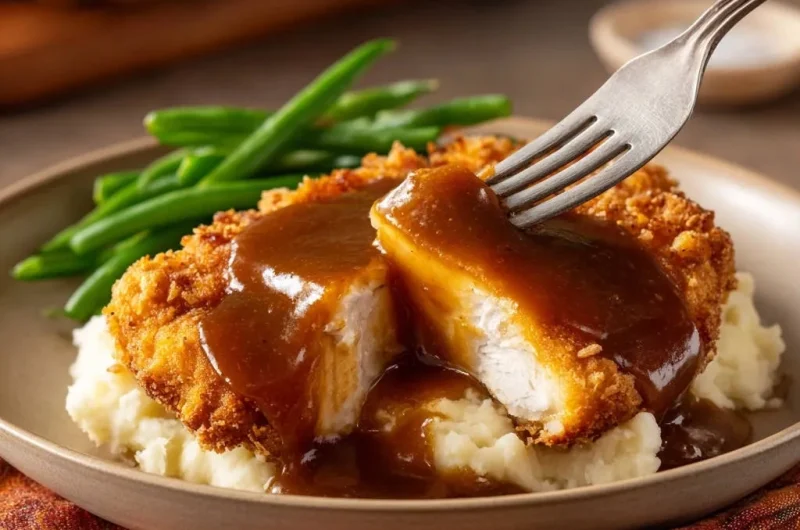
There’s nothing more frustrating than expecting a golden, juicy bite of Crispy Chicken Cutlets with Savory Gravy, only to encounter a dry, tough texture instead. I’ve personally perfected a simple trick that ensures your chicken stays incredibly moist every time, nestled beneath that irresistible, crackling crust. This recipe isn’t just a meal; it’s a promise: say goodbye to dry chicken forever and hello to your new favorite comfort food classic.
Why This Crispy Chicken Cutlets with Savory Gravy Recipe is a Game-Changer
Say Goodbye to Dry Chicken Forever: Our Secret Unveiled
The core of this recipe’s success lies in a simple yet profound technique: carefully pounding the chicken. This crucial step not only tenderizes the meat but also ensures it cooks rapidly and evenly, preventing moisture loss.
You’ll achieve chicken that remains succulent and flavorful, encased in a delightfully crunchy breading, making every bite a truly satisfying experience.
The Magic of Perfectly Pounded Chicken for Even Cooking
Pounding the chicken to a consistent 1/2-inch thickness is vital. This uniformity allows the cutlets to cook quickly and simultaneously across the pan, eliminating dry spots while maximizing tenderness.
It’s the secret to achieving that coveted “never dry” result, ensuring your Crispy Chicken Cutlets with Savory Gravy are a triumph every time.
A Complete, Comforting Meal on One Plate (Mashed & Greens Included!)
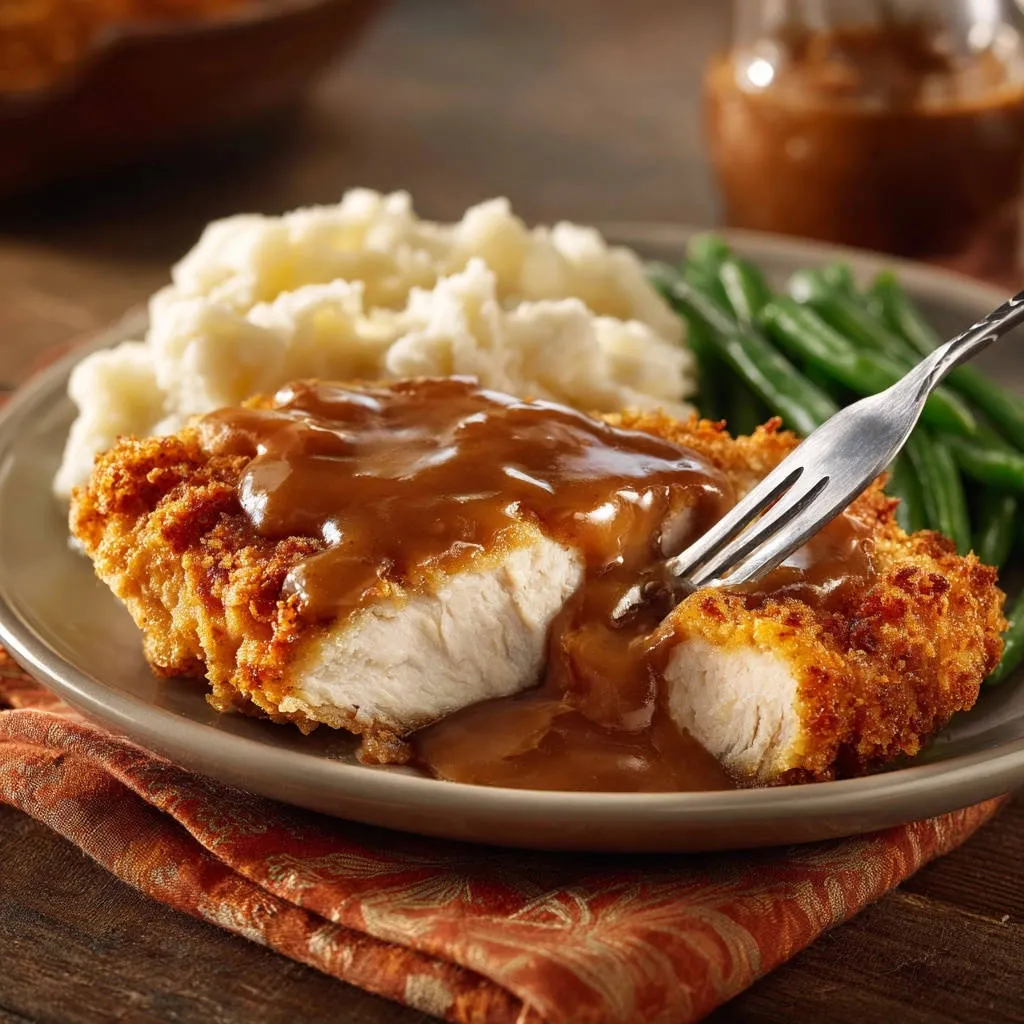
This isn’t just a recipe for amazing chicken; it’s a complete, wholesome dinner solution. We’ve thoughtfully paired the golden cutlets with velvety mashed potatoes and vibrant green beans, all tied together with a rich, homemade savory gravy.
It’s a truly satisfying meal that brings classic comfort to your table without extra effort.
Essential Gear for Your Culinary Adventure
Meat Mallet or Heavy Pan: Crucial for evenly pounding the chicken, ensuring consistent cooking and tenderness. If you don’t have a mallet, a heavy-bottomed pan works perfectly.
Large Skillet: Ideal for pan-frying the cutlets and subsequently preparing the savory gravy, concentrating flavors in one pan.
Shallow Plates/Bowls: Essential for setting up an efficient breading station, making the dredging process smooth and mess-free.
Whisk: Your best friend for creating a lump-free roux and a perfectly smooth, rich gravy.
Potato Masher: For achieving wonderfully creamy and smooth mashed potatoes, the ultimate comforting side.
Gather Your Ingredients: Building the Best Crispy Chicken Cutlets with Savory Gravy
The Star: Boneless, Skinless Chicken Breasts
Boneless, skinless chicken breasts are chosen for their lean profile and quick cooking time once pounded. Aim for good quality, fresh chicken for the best flavor and texture.
Their neutral taste makes them an excellent canvas for the crispy breading and rich gravy.
Achieving the Ultimate Golden Crunch: Panko Power
Panko breadcrumbs are non-negotiable for that superior, airy crispness. Unlike regular breadcrumbs, panko absorbs less oil and creates a much lighter, crunchier coating.
This ensures your Crispy Chicken Cutlets boast an incredible texture that truly stands out.
Creating the Silky, Savory Gravy Base
The gravy is built on a classic roux of butter and all-purpose flour, creating a thick and flavorful foundation. Chicken broth is then gradually whisked in, transforming it into a silky, savory sauce.
This simple combination yields a rich gravy that beautifully complements the chicken and mashed potatoes.
The Perfect Companions: Creamy Potatoes & Fresh Green Beans
Russet potatoes are ideal for mashing, offering a fluffy and creamy texture that readily absorbs butter and milk. Their starch content ensures a smooth, lump-free consistency.
Fresh green beans provide a vibrant, tender-crisp contrast, adding essential freshness and color to your plate.
Pantry Staples: Essential Seasonings & Oils
Salt and pepper are fundamental, enhancing every layer of flavor from the chicken to the gravy and potatoes. Don’t underestimate their power in bringing the dish to life.
Vegetable oil is crucial for pan-frying, providing the consistent heat needed for that irresistible golden-brown crust on your Crispy Chicken Cutlets.
Your Path to Crispy Chicken Cutlets Perfection: A Detailed Guide
-
Pounding for Tenderness: The First Crucial Step
Place each chicken breast between two sheets of plastic wrap. Using a meat mallet or a heavy pan, pound the chicken until it’s about 1/2 inch thick and an even thickness throughout. This prevents dryness and ensures quick, consistent cooking.
Season both sides of the pounded chicken with 1/2 teaspoon salt and 1/4 teaspoon pepper, preparing it for its flavorful coating.
-
The Foolproof Breading Station: Layer by Layer
Set up three shallow plates or bowls for your breading station. On the first, place 1/2 cup of all-purpose flour. In the second, beat two large eggs. On the third, spread out the panko breadcrumbs, mixing in the remaining 1/2 teaspoon salt and 1/4 teaspoon pepper for seasoned crunch.
-
Achieving Golden Crispiness: Dredging and Frying the Cutlets
Dip each pounded chicken breast first into the flour, tapping off any excess. Then, coat it completely in the beaten egg. Finally, press it firmly into the seasoned panko breadcrumbs, ensuring the entire surface is covered for maximum crispness.
Heat 1/2 cup vegetable oil in a large skillet over medium-high heat until a dropped breadcrumb sizzles immediately. Carefully place 1 or 2 breaded cutlets in the hot oil, avoiding overcrowding the pan to maintain oil temperature.
Cook for 3 to 4 minutes per side, or until the breading is a beautiful golden brown and crispy, and the chicken is cooked through. Its thinness means it cooks quickly, locking in those precious juices. Remove cooked cutlets to a plate lined with paper towels to drain excess oil, and repeat with any remaining chicken. For more ideas on achieving perfect crispiness, explore our tips for crispy chicken bites.
-
From Skillet to Smooth: Crafting the Rich, Savory Gravy
In the same skillet used for the chicken (after carefully draining any remaining oil), melt 2 tablespoons of butter over medium heat. Add the remaining 1/2 cup all-purpose flour and whisk constantly for 1 minute to create a golden roux, which is the flavorful base for your gravy.
Gradually whisk in 2 cups of chicken broth, a little at a time, ensuring the gravy remains smooth and lump-free. Bring it to a gentle simmer and cook for 2 to 3 minutes, stirring occasionally, until it thickens to your desired consistency. Season with salt and pepper to taste. You can find more ideas for creating a rich, creamy country gravy to elevate any meal.
-
Whipping Up Velvety Mashed Potatoes
While the chicken fries, boil the peeled and quartered russet potatoes in salted water until they are very tender, typically 15 to 20 minutes. Drain them thoroughly and return them to the pot.
Add 1/4 cup butter and 1/4 cup milk or cream to the hot potatoes. Mash until they are smooth and wonderfully creamy. Season with salt and pepper to taste, adjusting to your preference. If you enjoy creative potato dishes, our perfect potato gratin is another fantastic side option.
-
Sautéing Vibrant Green Beans
Steam or blanch the fresh green beans until they are tender-crisp, usually about 5 to 7 minutes. They should retain a slight bite and their vibrant green color.
-
Plating Your Comfort Food Masterpiece
Arrange a generous spoonful of fluffy mashed potatoes on each plate. Top them with a golden, crispy chicken cutlet, and generously spoon the warm, savory gravy over both the chicken and potatoes. Serve immediately with the perfectly cooked green beans on the side, creating a truly satisfying meal.
Chef’s Secrets: Elevate Your Chicken Cutlet Game
Don’t Skip the Pound: The Key to Even Cooking
Pounding the chicken isn’t just about making it thinner; it’s about creating a uniform thickness. This ensures every part of the cutlet cooks at the same rate, preventing one end from drying out while the other finishes cooking.
It guarantees tenderness and juicy results by allowing for a quick, consistent cook time.
Breading Adhesion: Tips for a Perfect Coat That Stays Put
For breading that truly sticks, ensure you press the chicken firmly into the panko breadcrumbs. Don’t be shy; a good firm press creates excellent contact, reducing the chance of breading falling off during frying.
Additionally, shake off excess flour after the first dip to prevent gumminess and promote better adhesion of the egg and panko layers.
Frying Temperature: The Goldilocks Zone for Crispy, Not Burnt
Maintaining a consistent medium-high heat is essential for a golden, crispy crust without burning. If the oil isn’t hot enough, the breading will become soggy and greasy; too hot, and it will burn before the chicken cooks through.
Avoid overcrowding the pan, as this lowers the oil temperature dramatically, leading to less crispy results. Fry in batches if necessary.
Gravy Wisdom: Achieving Silky Smoothness Every Time
The secret to lump-free gravy lies in creating a smooth roux first and then gradually whisking in the broth. Add broth slowly, a little at a time, continuously whisking to incorporate it fully before adding more.
This technique emulsifies the liquid into the flour-butter mixture, ensuring a velvety smooth finish for your savory gravy.
The Resting Rule: Why It Matters for Juiciness
Once fried, allow your chicken cutlets to rest for 1-2 minutes on a paper towel-lined plate. This crucial step allows the juices within the meat to redistribute throughout the cutlet.
The result is a more tender and juicy piece of chicken, maximizing its flavor and texture.
Troubleshooting Your Crispy Chicken & Gravy
Why is my chicken tough or dry?
Chicken often becomes tough or dry from overcooking. Because these cutlets are pounded thin, they cook very quickly, so precise timing is important.
Ensure your oil is at medium-high heat and cook just until the breading is golden and the chicken reaches an internal temperature of 165°F (74°C).
My breading isn’t crispy or falls off.
Lack of crispiness usually comes from oil that isn’t hot enough or an overcrowded pan, which drops the oil temperature. Make sure the oil sizzles immediately when a breadcrumb is dropped in.
Breading falls off if the chicken isn’t patted dry before dredging, or if you don’t press the panko firmly enough. Also, ensure you shake off excess flour after the first dip.
How to fix lumpy or too-thin gravy.
For lumpy gravy, vigorously whisk over low heat to break up lumps, or strain it through a fine-mesh sieve for ultimate smoothness. If your gravy is too thin, create a quick slurry with 1 teaspoon of cornstarch mixed with 1 tablespoon of cold water.
Whisk this into the simmering gravy and cook for another minute or two until thickened to your desired consistency.
Serving Suggestions & Complementary Sides
Beyond the Plate: Creative Ways to Enjoy Your Cutlets
While delicious with mashed potatoes and green beans, these Crispy Chicken Cutlets are incredibly versatile. Serve them alongside a fresh garden salad for a lighter meal, or thinly slice them for a hearty sandwich filling.
They also pair wonderfully with roasted asparagus or a creamy risotto for an elevated dining experience.
Beverage Pairings for a Complete Meal
For a perfect pairing, consider a crisp white wine like a Sauvignon Blanc or a light-bodied Pinot Noir if you prefer red. Non-alcoholic options include sparkling cider or a refreshing iced tea with lemon.
These choices complement the rich flavors of the chicken and gravy without overpowering them.
Make-Ahead & Storage Solutions
Best Practices for Reheating to Maximize Crispness
To restore the crispiness of your Crispy Chicken Cutlets, reheat them in a preheated oven at 375°F (190°C) for 10-15 minutes, or in an air fryer at 350°F (175°C) for 5-8 minutes.
Avoid the microwave, as it will make the breading soggy. Reheat gravy gently on the stovetop, whisking occasionally, adding a splash of broth if it’s too thick.
Preparing Components in Advance: Your Weeknight Time-Saver
You can pound and bread the chicken cutlets up to a day in advance, storing them on a parchment-lined tray in the refrigerator. Prepare the gravy base (roux) ahead of time and store it in the fridge, adding broth when ready to serve.
Potatoes can be peeled and stored in cold water, and green beans trimmed, making meal prep significantly faster on busy weeknights.
Proper Storage for Leftovers
Store leftover cooked chicken cutlets and gravy separately in airtight containers in the refrigerator for up to 3-4 days. Mashed potatoes also keep well in an airtight container for the same duration.
This ensures everything stays fresh and delicious for future meals.
Frequently Asked Questions
Can I substitute panko breadcrumbs for regular breadcrumbs?
You can substitute regular breadcrumbs, but be aware it will affect the texture. Regular breadcrumbs tend to absorb more oil and produce a denser, less airy crust.
For the signature light and super golden brown chicken crispiness, panko is truly the best choice.
What’s the best way to thin chicken breasts without a mallet?
If you don’t own a meat mallet, a heavy rolling pin or the flat bottom of a sturdy skillet works perfectly. Simply cover the chicken with plastic wrap and pound gently but firmly until the desired thickness is achieved.
Ensure you hit evenly across the surface to prevent tearing the meat.
Is it possible to bake or air fry these cutlets instead of pan-frying?
Yes, you can absolutely bake or air fry for a slightly healthier alternative, though the pan-fried crispiness is unique. For baking, spray the breaded cutlets with cooking spray and bake at 400°F (200°C) for 15-20 minutes, flipping halfway, until golden and cooked through.
In an air fryer, cook at 375°F (190°C) for 10-12 minutes, flipping halfway, until perfectly crispy.
How can I make this recipe gluten-free or dairy-free?
To make it gluten-free, substitute the all-purpose flour for a cup-for-cup gluten-free flour blend and use gluten-free panko breadcrumbs. For a dairy-free version, swap the butter for a plant-based butter alternative and use unsweetened plant-based milk or cream for the mashed potatoes and gravy.
These simple substitutions ensure everyone can enjoy this delicious comfort food meal.
Ready to Impress? Share Your Crispy Chicken Cutlets with Savory Gravy Creation!
You’re now equipped with all the knowledge and techniques to create truly exceptional Crispy Chicken Cutlets with Savory Gravy that are guaranteed never dry. This dish is more than just a meal; it’s a testament to simple culinary magic that delivers maximum flavor and comfort.
Don’t be shy-give this recipe a try and transform your dinner routine. We’d love to see your creations and hear your experiences, so be sure to share your photos and thoughts in the comments below!
Crispy Chicken Cutlets
Course: Main CourseCuisine: AmericanDifficulty: medium4
servings35
minutes30
minutes1100
kcal60
minutesSay goodbye to dry chicken forever with this game-changing recipe for super moist, crispy chicken cutlets. Paired with a rich, savory gravy, creamy mashed potatoes, and fresh green beans, it’s a truly satisfying meal.
Ingredients
4 boneless, skinless chicken breasts
1 cup all-purpose flour, divided
2 large eggs, beaten
1 1/2 cups panko breadcrumbs
1 teaspoon salt, divided
1/2 teaspoon black pepper, divided
1/2 cup vegetable oil, plus 2 tablespoons
2 tablespoons butter
2 cups chicken broth
2 pounds russet potatoes, peeled and quartered
1/4 cup milk or cream
1/4 cup butter, for mashed potatoes
1 pound fresh green beans
Directions
- Prepare the chicken: Place each chicken breast between two sheets of plastic wrap. Using a meat mallet or a heavy pan, pound the chicken until it is about 1/2 inch thick and an even thickness all around. This is a crucial step for even cooking and preventing dryness. Season both sides of the pounded chicken with 1/2 teaspoon salt and 1/4 teaspoon pepper.
- Set up the breading station: Place 1/2 cup of flour on a shallow plate. In another shallow bowl, beat the eggs. On a third shallow plate, spread out the panko breadcrumbs, mixing in the remaining 1/2 teaspoon salt and 1/4 teaspoon pepper.
- Dredge the chicken: Dip each pounded chicken breast first into the flour, shaking off any excess. Then, dip it into the beaten egg, ensuring it is fully coated. Finally, press the chicken into the panko breadcrumbs, making sure the entire surface is completely covered. Press firmly to help the breading adhere.
- Fry the chicken: Heat 1/2 cup vegetable oil in a large skillet over medium-high heat. The oil should be hot enough that a breadcrumb dropped in sizzles immediately. Carefully place 1 or 2 breaded chicken cutlets in the hot oil, ensuring you do not overcrowd the pan. Cook for 3 to 4 minutes per side, or until the breading is golden brown and crispy, and the chicken is cooked through. The key here is to maintain consistent heat and avoid overcooking. Because the chicken is pounded thin, it cooks quickly, locking in juices. Remove cooked cutlets to a plate lined with paper towels to drain excess oil. Repeat with any remaining chicken.
- Make the gravy: In the same skillet (after carefully draining any remaining oil), melt 2 tablespoons butter over medium heat. Add the remaining 1/2 cup all-purpose flour and whisk constantly for 1 minute to create a roux. Gradually whisk in the chicken broth, a little at a time, until the gravy is smooth and thick. Bring to a simmer and cook for 2 to 3 minutes, stirring occasionally, until it reaches your desired consistency. Season with salt and pepper to taste.
- Prepare the mashed potatoes: While the chicken is frying, boil the quartered potatoes in salted water until very tender, about 15 to 20 minutes. Drain well. Return the potatoes to the pot. Add 1/4 cup butter and 1/4 cup milk or cream. Mash until smooth and creamy. Season with salt and pepper to taste.
- Cook the green beans: Steam or blanch the green beans until tender-crisp, about 5 to 7 minutes.
- Serve: Place a generous spoonful of mashed potatoes on each plate. Top with a crispy chicken cutlet, and generously spoon the savory gravy over the chicken and potatoes. Serve immediately with the green beans on the side.
Notes
- Pounding chicken thin is crucial for even cooking and moisture. Avoid overcrowding the pan when frying for best results.