Most home cooks avoid making breaded fish because they’re tired of the “soggy bottom” syndrome. You know the one where the top looks golden, but the underside is a damp, mushy mess that slides right off the fillet. This recipe changes that by focusing on a shatteringly crisp exterior that rivals any deep-fried pub classic.
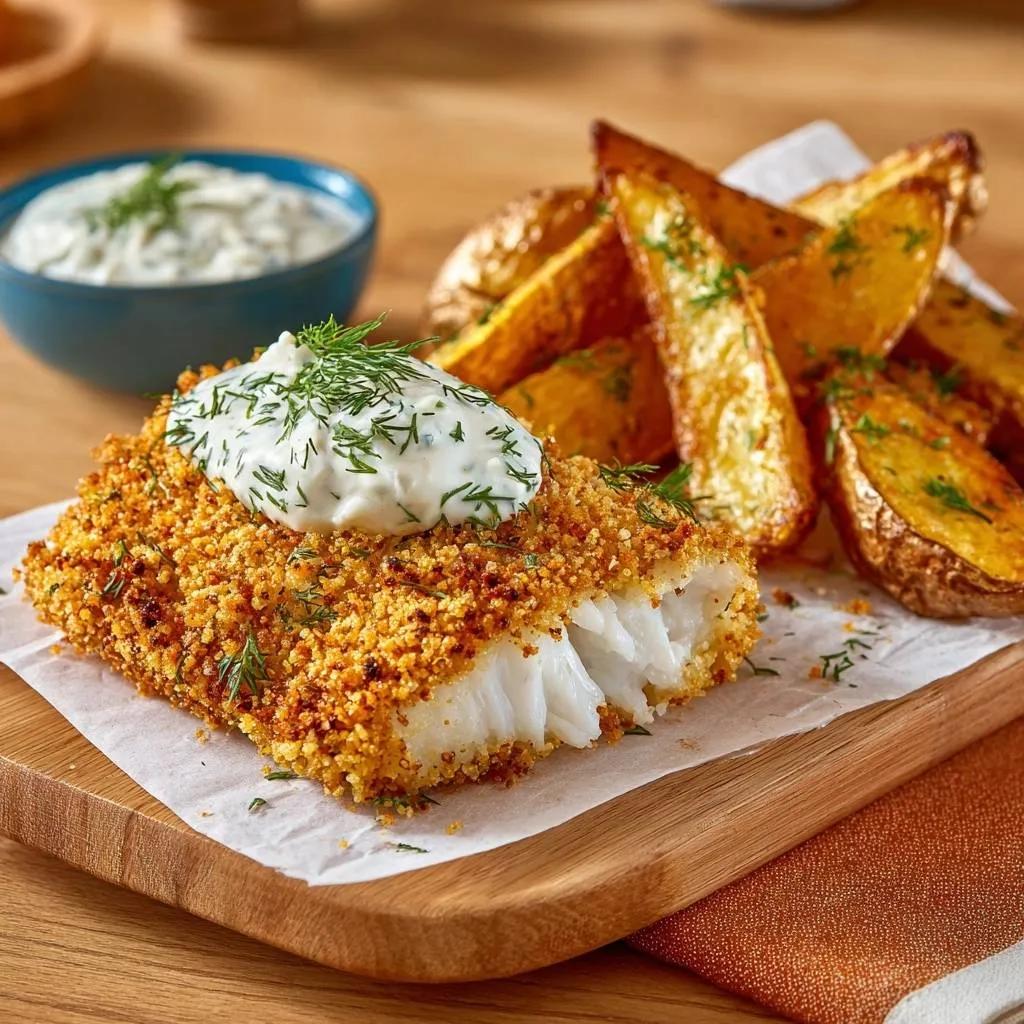
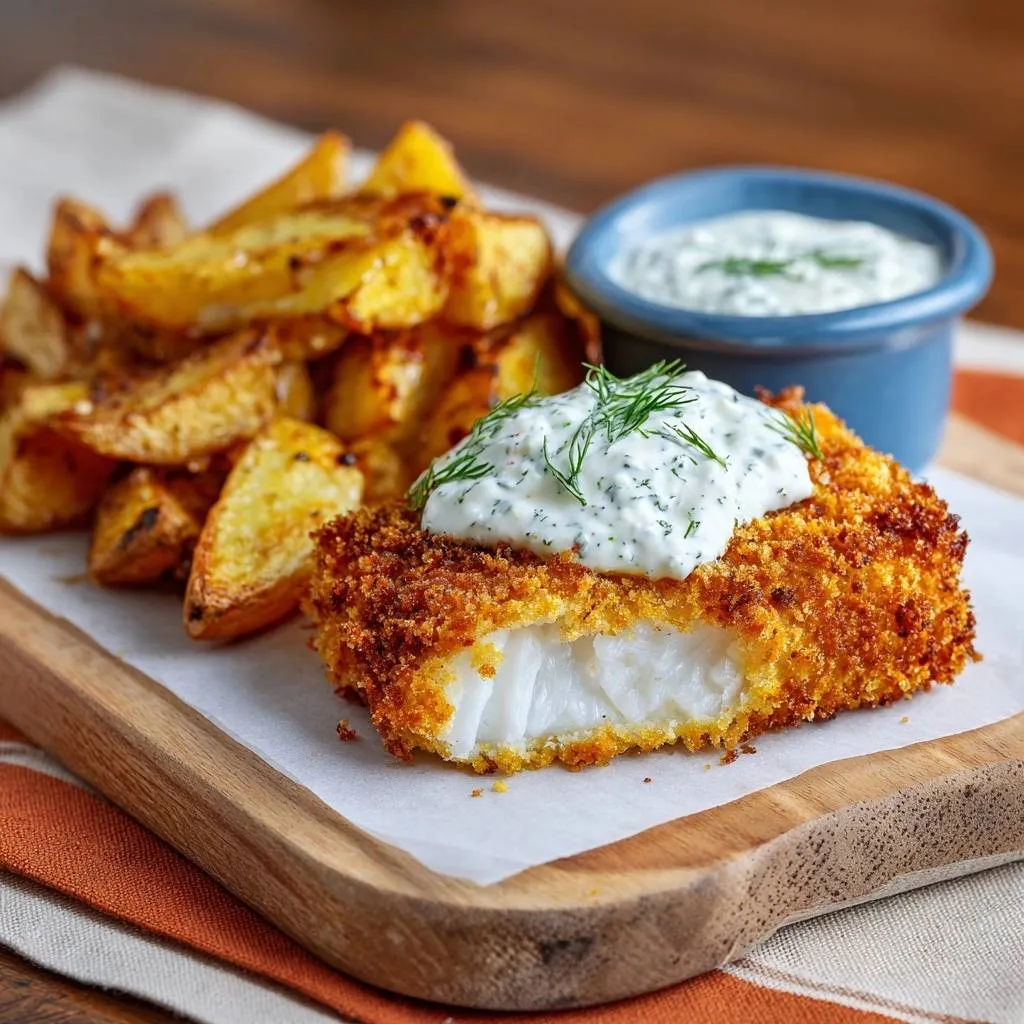
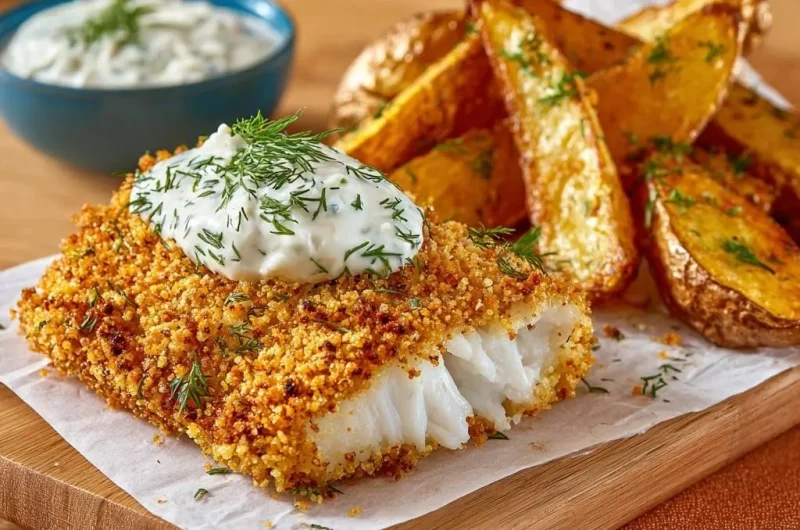
The contrast here is what makes the dish a total winner. You get a loud, satisfying crunch from the toasted Panko that gives way to buttery, flaky white fish that’s perfectly steamed inside its crust. Paired with thick, salty potato wedges, it’s the ultimate comfort meal that doesn’t leave you feeling weighed down by heavy frying oils.
For an equally satisfying crunch on your fish, explore herb crusted baked cod.
The secret to this professional-grade texture is moisture management. By pre-toasting your breadcrumbs in a dry skillet, you ensure they stay crispy even as the fish releases its natural juices during the bake. It’s a simple five-minute step that makes the difference between a mediocre dinner and a restaurant-quality feast.
The Science of Moisture Management in Breading
When you bake fish, it naturally releases steam as the proteins tighten and cook. In a standard breading setup, that steam gets trapped between the flesh and the crust, turning your beautiful breadcrumbs into a wet paste. To prevent this, you have to treat the fish like a construction project where the first layer is the most important.
Patting the cod bone-dry with paper towels is a non-negotiable requirement. If there’s surface moisture, the flour won’t stick; if the flour doesn’t stick, the egg slides off, and the Panko has nothing to hold onto. You want the flour to bond with the fish’s natural albumin, creating a dry “primer” layer that seals the juices inside the fillet while providing a tacky surface for the egg wash.
Furthermore, overcrowding the pan is the enemy of a good crunch. If the fillets and wedges are too close together, they create a humid microclimate on the baking sheet. Give everything plenty of breathing room so the hot oven air can circulate freely, evaporating moisture instantly and hardening the crust into a golden shell.
Why Pre-Toasting Panko is Mandatory
Panko breadcrumbs are unique because they are already “cooked” via electric current, which gives them their jagged, airy shape. However, straight out of the box, they are pale and prone to absorbing liquid. Because cod cooks so quickly, the fish is often done before the breadcrumbs have a chance to brown properly in the oven.
By tossing them in a skillet first, you trigger the Maillard reaction manually. This develops a deep, nutty flavor and a toasted structure that resists moisture. Once those crumbs are golden and crisp before they even touch the fish, they act as a protective barrier that stays crunchy regardless of the steam coming from the cod.
Essential Components for Panko Crusted Cod
For the best results, you need thick-cut cod fillets, ideally at least an inch thick. Cod is prized for its large, clean flakes and mild flavor, but you can easily swap it for Haddock or Pollock if you’re looking for sustainable alternatives. Thicker cuts are better because they allow the crust to brown without the fish overcooking and becoming rubbery.
When it comes to the wedges, Russet potatoes are the undisputed kings. Their high starch content and low moisture levels mean the interiors turn fluffy and mashed-potato-like, while the exteriors develop a thick, rugged crust. Yukon Golds are delicious but tend to stay waxy, which doesn’t provide that classic “steak fry” texture we’re hunting for here.
Don’t overlook the quality of your olive oil. Since we aren’t deep frying, the oil you drizzle over the top provides the necessary fat to carry flavor and conduct heat. A good extra virgin olive oil adds a fruity pepperiness that complements the delicate white fish and the earthy potatoes perfectly.
The Spice Profile: Beyond Salt and Pepper
We use a blend of dried dill, onion powder, and paprika to give the breading a sophisticated edge. Dried dill is actually superior to fresh inside the breading because it doesn’t add extra moisture and its flavor intensifies under high heat. It provides that classic “seafood” aroma that pairs so well with white fish.
Paprika isn’t just there for a hint of sweetness; it helps the Panko achieve a vibrant, orange-gold hue that looks incredible on the plate. Onion and garlic powders provide a savory backbone that ensures the breading tastes seasoned all the way through, rather than just being a bland coating.
Preparing the Perfect Potato Wedge Base
Consistency is the key to great wedges. When you slice your Russets, aim for uniform thickness so they all finish at the same time. If you have some tiny slivers and some giant chunks, the small ones will burn before the large ones are tender. Aim for about 8 to 10 wedges per potato depending on the size.
The “par-roasting” phase is the most critical part of the timing. Potatoes take significantly longer to cook than fish. By giving them a 20-minute head start at 425°F, you allow the starch to begin gelatinizing and the edges to start crisping. By the time you add the fish to the tray, the potatoes are halfway to perfection.
Make sure you toss the wedges thoroughly in the oil and spices. You want every nook and cranny coated. This oil acts as a heat conductor, essentially “frying” the surface of the potato against the hot baking sheet. Flip them once before adding the fish to ensure even browning on both sides.
Step-by-Step: Achieving the Ultimate Crunch
Success in the kitchen often comes down to organization. Before you even touch the fish, have your dredging station ready. Use wide, shallow bowls that allow you to lay the entire fillet flat. This prevents you from having to “scrunch” the fish, which can break the delicate flesh.
Phase 1: The Dredging Station Workflow
To keep your kitchen clean, use the “Dry Hand/Wet Hand” method. Use your left hand for the dry flour and Panko, and your right hand for the egg wash. This prevents your fingers from becoming breaded “club hands.” It keeps the process efficient and ensures the coating stays on the fish, not on you.
Start with a light dusting of flour and shake off every bit of excess. You only want a microscopic layer to act as a primer. Dip into the egg, let the extra drip off, and then press the fish firmly into the toasted Panko. Pressing down helps the crumbs adhere so they don’t fall off when you move the fish to the pan.
Phase 2: The Oil Drizzle Technique
Once the fish is on the baking sheet, don’t just put it in the oven. Take your remaining olive oil and drizzle it directly over the Panko. This is the “secret” that mimics the deep-fryer. The oil soaks into the toasted crumbs and sizzles in the high heat of the oven, creating a golden, crispy texture that air alone cannot achieve.
This drizzle also helps the spices bloom. The heat of the oil extracts the flavor from the paprika and dill, distributing it evenly across the surface of the fish. It results in a beautiful, glistening finish that looks like it came straight out of a professional kitchen’s frying station.
Troubleshooting Common Coating Failures
If your breading is falling off, you likely used too much flour or didn’t pat the fish dry enough. The flour should be a whisper, not a blanket. If the layer is too thick, it creates a barrier that prevents the egg from actually grabbing onto the fish, causing the whole crust to slide off in one piece.
A soggy bottom usually happens because of steam. If you didn’t use parchment paper, the fish might stick and tear. If you crowded the pan, the moisture had nowhere to go. Always ensure there is at least an inch of space between each item on your baking sheet to allow for maximum airflow and evaporation.
Overcooking is the final hurdle. Cod is done when it reaches an internal temperature of 145°F or when it flakes easily with a fork. If the fish feels firm and bouncy, it’s likely overdone. It should feel tender and separate into large, moist flakes with very little pressure.
Flavor Variations and Regional Swaps
You can easily take this recipe in different directions. For a “Spicy Cajun” version, swap the dill for a heavy dose of cayenne pepper and blackening seasoning, and add a teaspoon of Dijon mustard to your egg wash. This gives the fish a bold, zesty kick that pairs beautifully with the crunchy Panko.
For another take on this fish, check out herb-crusted cod with its Mediterranean flavors.
If you want a Mediterranean vibe, use lemon zest and dried oregano in the breading. You can even toss the finished potato wedges in a little bit of truffle oil and parsley for “Truffle Fries” that feel extra fancy. The base technique remains the same; only the aromatics change.
Optimal Pairings for Cod and Wedges
Since this dish is rich and crunchy, you need something acidic to balance the palate. A bright, vinegar-based coleslaw is the perfect companion. The crunch of the cabbage and the tang of the vinegar cut right through the olive oil and the starch of the potatoes, making every bite feel fresh.
More to Try
Round out your meal with these complementary dishes.
- To complement your crispy cod and potatoes, consider this creamy herb and pea potato salad for a satisfying potato pairing.
- For a fresh contrast to your fish, try this crispy chicken kale cabbage salad for a vibrant mix of textures and flavors.
A high-quality tartar sauce is also essential. Look for one with plenty of capers and lemon juice. If you want to get fancy, a bright green pea purée with a hint of mint provides a beautiful color contrast and a sweet, earthy flavor that is a traditional staple in British fish and chip shops.
Storage and Reheating for Maximum Texture
Whatever you do, stay away from the microwave! Microwaves work by heating water molecules, which will turn your crispy Panko into a soggy, rubbery mess in seconds. If you have leftovers, store them in an airtight container in the fridge for up to two days.
To reheat, use your oven or an air fryer. Place the fish and wedges on a wire rack over a baking sheet at 400°F for about 5 to 8 minutes. The wire rack allows hot air to circulate under the food, re-crisping the bottom while the oven heat brings the center back to temperature without drying it out.
Expert Tips for Professional Presentation
For a true gastropub look, serve the fish and wedges directly on a fresh piece of parchment paper or in a small wooden basket. The rustic look of the paper complements the golden tones of the food. Garnish heavily with fresh dill sprigs and a few lemon wedges on the side for a pop of color.
The final touch is a pinch of flaky sea salt. As soon as the tray comes out of the oven, sprinkle a little extra salt over the fish and potatoes. The heat helps the salt stick, and those large crystals provide a final burst of flavor and texture that makes the whole dish sing.
Frequently Asked Questions
How do I store leftovers and can I freeze this?
Store any leftovers in an airtight container in the refrigerator for up to 2 days. I do not recommend freezing the cooked dish, as the potatoes will become grainy and the fish will lose its delicate texture upon thawing. For the best experience, eat this fresh or reheat it in the oven to maintain the crunch.
Why did my breading fall off the fish?
This usually happens for two reasons: the fish wasn’t dry enough or you used too much flour. If the fish is damp, the flour turns into a slick paste that won’t bond. Similarly, if the flour layer is too thick, it creates a “dusty” barrier that prevents the egg from sticking. Always pat the fish bone-dry and shake off all excess flour until only a translucent coating remains.
Can I use a different type of fish?
Absolutely. While cod is the standard for its thick flakes, you can use haddock, pollock, or even halibut. If you use a thinner fillet like tilapia or flounder, reduce the baking time by 3 to 5 minutes to ensure the fish doesn’t dry out before the breading is finished.
Can I make this gluten-free?
Yes, you can substitute the all-purpose flour with a 1-to-1 gluten-free flour blend and use gluten-free Panko-style breadcrumbs. The technique remains exactly the same, including the pre-toasting step, which is even more important for gluten-free crumbs to help them develop a sturdy texture.
What if I don’t have Panko breadcrumbs?
Regular breadcrumbs will work, but you won’t get the same “shatteringly crisp” texture. Panko has a larger, airier surface area that creates more crunch. If you must use regular crumbs, skip the pre-toasting step as they are much finer and will burn very quickly in a skillet.
Why are my potatoes still hard?
Potatoes need a head start because they are much denser than fish. If they are still hard, they likely weren’t cut into uniform wedges or the oven temperature was too low. Ensure your oven is fully preheated to 425°F and give them the full 20 minutes of roasting time before you add the fish to the tray.
Crispy Panko Crusted Cod and Potato Wedges
Course: Main CourseCuisine: AmericanDifficulty: easy2
servings15
minutes35
minutes520
kcal50
MinutesA healthy alternative to deep-fried fish and chips, this recipe uses pre-toasted Panko breadcrumbs and high-heat roasting to achieve a shatteringly crisp exterior on flaky white cod and golden potato wedges.
Ingredients
2 thick cod fillets (6 ounces each)
2 large russet potatoes, cut into thick wedges
1 1/2 cups Panko breadcrumbs
1/4 cup all-purpose flour
1 large egg, beaten with 1 teaspoon water
4 tablespoons olive oil, divided
1 teaspoon garlic powder
1 teaspoon onion powder
1/2 teaspoon paprika
1 teaspoon dried dill
Salt and black pepper to taste
Fresh dill and tartar sauce for serving
Directions
- Preheat your oven to 425°F (220°C). Line a large baking sheet with parchment paper. Toss the potato wedges with 2 tablespoons of olive oil, salt, pepper, onion powder, and half the garlic powder. Spread them in a single layer and roast for 20 minutes.
- While potatoes roast, address the soggy coating problem. Place Panko breadcrumbs in a dry skillet over medium heat. Stir constantly for 3 to 5 minutes until they are a deep golden brown. This removes residual moisture so they stay crunchy in the oven. Transfer to a shallow bowl and mix with dried dill, paprika, and the remaining garlic powder.
- Use paper towels to pat the cod fillets completely dry on all sides. This is the most important step to prevent the breading from sliding off or getting steamed from the inside out. Season the naked fish lightly with salt and pepper.
- Set up a dredging station: one plate with flour, one shallow bowl with the beaten egg wash, and one bowl with the toasted Panko.
- Dredge each fillet in flour, shaking off all excess. Dip into the egg wash, then press firmly into the toasted Panko crumbs. Ensure the coating is thick and even on all sides.
- Move the potatoes to one side of the baking sheet. Place the fish on the other side. Drizzle the remaining 2 tablespoons of olive oil directly over the Panko coating on the fish to ensure a fried-like texture in the oven.
- Bake for another 12 to 15 minutes (depending on thickness) until the fish is opaque and flakes easily with a fork, and the potatoes are deeply golden and crisp.
- Serve immediately on parchment paper. Top the fish with a generous dollop of tartar sauce and a heavy garnish of fresh dill to match the visual presentation.
Notes
- The most important step is patting the fish bone-dry with paper towels to prevent the breading from sliding off or steaming during the baking process.