There is nothing more frustrating than spending hours baking only to pull out a dense, dry cake, a common pitfall for home bakers attempting a classic chocolate layer cake.
I struggled with that exact disappointment until I perfected this unique method that guarantees a perfectly tender, dark, and impossibly moist crumb every time.
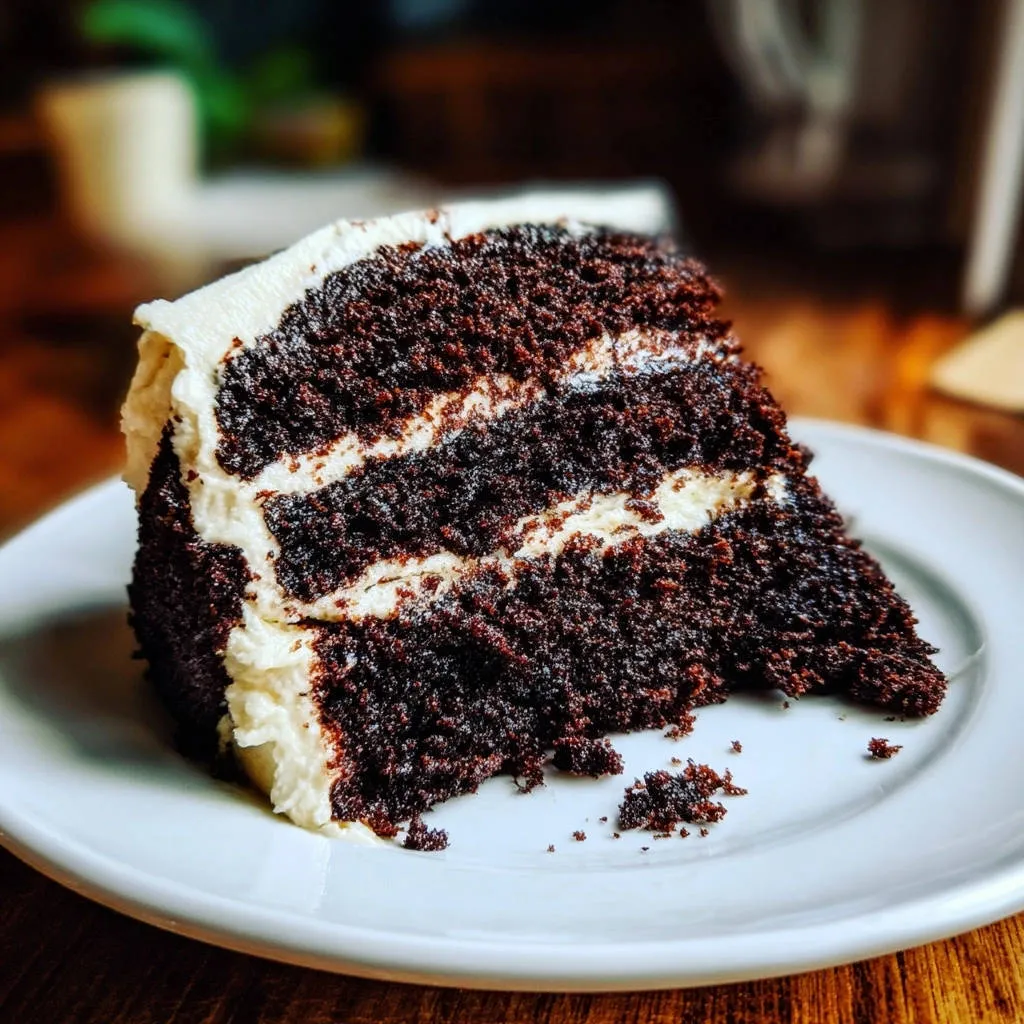
This recipe for Decadent Triple-Layer Chocolate Cake uses a secret boiling liquid technique that blooms the cocoa, ensuring depth of flavor and texture that is truly unmatched.
The End of Dry Cake: Why This Decadent Triple-Layer Chocolate Cake Recipe Works
This recipe successfully overcomes density by focusing on hydration and controlled aeration, ensuring the final cake is fluffy yet substantial.
We use a combination of oil for long-lasting moisture and buttermilk, which tenderizes the cake structure and keeps the layers from drying out.
The precise measurement of leavening agents-both baking soda and baking powder-creates a strong, even rise without the metallic aftertaste that often accompanies too much soda.
This balanced approach ensures a high-rising cake that maintains a fine, velvety crumb structure even after cooling.
The Chemistry of an Impossibly Tender Crumb
Buttermilk, a key ingredient, is highly acidic, and its acidity is specifically engineered to react aggressively with the baking soda in the recipe.
This acid-base reaction produces a burst of carbon dioxide gas, providing the primary initial lift that gives the cake its signature light texture.
Using buttermilk at room temperature is essential as warmth increases the efficacy of this chemical reaction, resulting in superior volume and a finer crumb structure.
Perfecting the Texture: Why the Hot Liquid is a Game Changer
The addition of the hot (boiling) liquid at the very end is the crucial innovation that sets this Decadent Triple-Layer Chocolate Cake apart.
When boiling water or coffee hits the cocoa powder, it instantly “blooms” the powder, releasing volatile flavor compounds and intensifying the chocolate notes dramatically.
Simultaneously, the heat temporarily gelatinizes some of the starch in the flour, preventing excessive gluten development which would otherwise lead to a tough, dry cake.
Mastering the Ingredients: Achieving Deep Chocolate Flavor and Light Texture
Choosing High-Quality Cocoa Powder for Richness
The quality of your cocoa powder directly correlates to the intensity of the chocolate flavor in the final cake.
For this recipe, unsweetened natural cocoa powder, with its high acidity, works best in conjunction with the buttermilk and baking soda for optimal lift and depth.
The Buttermilk Factor: Why Room Temperature is Essential
Cold dairy ingredients can cause the batter to seize up, negatively affecting the smooth emulsification of the fats and eggs.
Bringing buttermilk and eggs to room temperature ensures they mix uniformly, creating a cohesive, stable batter ready to accept the hot liquid.
Coffee vs. Water: Selecting Your Hot Liquid Base
Using freshly brewed hot coffee significantly deepens the flavor profile of the chocolate, enhancing bitterness and complexity without tasting overtly like coffee.
If you prefer a pure chocolate flavor without any trace of coffee notes, boiling water is an effective neutral alternative, providing necessary moisture and structure modification.
For similar stuffed delights, discover the Red Velvet Cheesecake Stuffed Cookies.
Always ensure the liquid is actively boiling when you add it, as the temperature is crucial for the blooming and gluten-inhibition process.
Prep and Gear Check: Setting Up for Cake Success
Essential Tools for Triple-Layer Baking
Three 8-inch round cake pans are non-negotiable for achieving the classic height and perfect layer ratio intended for this masterpiece.
A stand mixer or powerful hand mixer is necessary for beating the wet ingredients and especially for whipping the buttercream to the ideal light and fluffy consistency.
A large wire cooling rack ensures that air circulates entirely around the cake layers once they are removed from the pan, preventing steam buildup that can lead to soggy bottoms.
A Note on Preparation: Greasing and Flour Dusting
Start by liberally greasing the pans with shortening or nonstick spray, ensuring coverage on the sides and bottom.
For guaranteed non-stick release, cut parchment paper circles to fit the base of each pan before lightly dusting the entire interior surface with flour.
From Batter to Bake: A Detailed Guide to Flawless Cake Layers
Layer 1: Mixing Dry Ingredients and Sifting Strategy
In your largest mixing bowl, whisk together the flour, sugars, cocoa, salt, baking soda, and baking powder until they are completely uniform.
Thorough whisking is crucial here; it acts as a sifting mechanism, distributing the leavening agents evenly so the cake rises consistently without tunnels or dense spots.
Layer 2: Combining Wet and Dry Mixtures
Pour the whisked buttermilk, oil, eggs, and vanilla mixture into the dry ingredients and beat on medium speed for about two minutes.
Pause often to scrape down the sides of the bowl completely; this ensures that all dry pockets are fully incorporated, preventing streaks of unmixed flour that can create tough spots in the layers.
The Game Changer: Incorporating the Boiling Liquid
While the mixer is running on low speed, slowly and carefully pour the entire cup of boiling water or hot coffee into the batter.
The batter will immediately thin out considerably, becoming almost watery, which is the exact, correct consistency needed for superior moisture and texture.
Once the liquid is just combined and no dry streaks remain, immediately stop mixing; overmixing at this stage will activate too much gluten and ruin the delicate structure achieved by the hot liquid.
Ensuring Perfect Layers: Baking and Cooling Protocol
Divide the thin batter as evenly as possible among the three prepared 8-inch cake pans, ideally using a kitchen scale for perfect layer symmetry.
Bake the layers for 28 to 33 minutes at 350 degrees F, testing for doneness by inserting a wooden toothpick into the center.
The perfect result is achieved when the toothpick emerges with just a few moist crumbs clinging to it, indicating the cake is done but not dry.
Allow the cakes to cool in their pans for exactly 10 minutes before turning them out onto a wire rack; this prevents layers from tearing or sticking to the pan edges.
Whipped Perfection: Crafting the Silky Vanilla Buttercream
This vanilla buttercream provides the perfect creamy, sweet counterbalance to the deep, dark chocolate layers.
If you enjoy this moistening method, you’ll find it just as effective in our old-fashioned gingerbread cake.
The key to a light frosting is patient whipping and careful addition of ingredients, ensuring everything remains fully emulsified.
The texture of the frosting should be spreadable but firm enough to hold the weight of the three chocolate layers without squeezing out the sides.
Achieving Fluffy Butter: Temperature Matters
Your unsalted butter must be softened to a cool room temperature, where it yields easily to gentle pressure but is not oily or shiny.
Beat the softened butter vigorously using a stand mixer until it is noticeably lighter in color and fluffy-a process known as creaming-which incorporates essential air for texture.
When to Add Liquid: Adjusting for the Perfect Spreadable Consistency
Gradually introduce the powdered sugar into the whipped butter, alternating the sugar additions with small splashes of milk or heavy cream.
This alternating method prevents the frosting from becoming heavy and ensures the sugar dissolves fully, reducing grittiness.
Add only enough liquid until the frosting reaches a smooth, spreadable consistency that can hold a peak; stop adding liquid immediately if it starts looking too glossy or thin.
The Grand Finale: Expert Tips for Assembling and Frosting the Triple Layers
Leveling the Layers for Stability
Once the layers are completely cooled, use a long serrated knife or a specialized cake leveler to carefully slice off any domed tops.
Starting with level layers is crucial for structural integrity, preventing the entire Decadent Triple-Layer Chocolate Cake from leaning or sliding during frosting.
Applying the Crumb Coat
Spread a very thin, translucent layer of buttercream over the entire cake, top and sides, trapping any loose crumbs.
Chill the cake for 15 minutes to set this crumb coat; this foundational layer ensures the final decorative coat is perfectly smooth and crumb-free.
The Final Chill: Setting the Frosting
After applying the final, thicker coat of frosting, return the assembled cake to the refrigerator for at least 30 minutes before serving.
Chilling firms the buttercream, which allows for much cleaner slices and makes the cake easier to handle and present beautifully.
Troubleshooting Your Bake: Solving Common Triple-Layer Cake Issues
“My Cake Layers Rose Unevenly or Sank”
Uneven rising is often caused by an inaccurately calibrated oven or placing pans too close together, blocking heat circulation.
If the layers sink in the middle, it typically indicates they were either removed from the oven too early or that the batter was overmixed, causing too much air to be knocked out just before baking.
“Why Does My Batter Look Watery and Thin?”
You may be alarmed by the liquid consistency, but this is entirely correct for this Decadent Triple-Layer Chocolate Cake recipe due to the inclusion of the boiling liquid.
This thin consistency is intentional, facilitating the unique textural properties of the cake, resulting in the desired moistness.
However, if the batter is thin and contains obvious lumps or streaks of flour, it needs a few more very quick, gentle pulses of the mixer to fully incorporate the dry ingredients.
What Else to Try
Enjoying this rich chocolate cake? Consider these other sweet creations for your next bake.
- For a delightful morning treat, explore these fluffy diner-style pancakes, known for their airy texture.
- If you’re after more tender baked goods, check out the fluffy golden pancakes for another satisfying option.
“My Frosting is Gritty or Too Runny”
Gritty frosting is usually the result of undissolved powdered sugar; always sift your powdered sugar before use, or beat the frosting for several extra minutes to help the sugar dissolve into the fat.
If the frosting is too runny, add powdered sugar one tablespoon at a time until the desired firmness is achieved, or chill the bowl for 15 minutes before whipping again.
Make-Ahead, Storage, and Serving Suggestions
Storing Unfrosted Layers and Freezing for Later
Once the cake layers are completely cool, wrap each tightly in plastic wrap, then wrap again in aluminum foil to prevent moisture loss.
Unfrosted layers can be stored at room temperature for up to two days, or frozen for up to two months; thaw them fully, still wrapped, before assembling.
How Long Does the Frosted Decadent Triple-Layer Chocolate Cake Last?
The assembled, frosted cake should be stored covered in the refrigerator to maintain freshness, lasting well for 3 to 4 days.
For the best eating experience, allow the chilled cake to sit at room temperature for 30 to 45 minutes before serving so the layers and frosting soften slightly.
Elegant Presentation and Topping Ideas
Enhance the presentation by dusting the top of the cake lightly with high-quality cocoa powder or finely grated bittersweet chocolate shavings.
Fresh red berries, such as raspberries or strawberries, provide a beautiful visual contrast and a tart counterpoint to the rich chocolate.
Frequently Asked Questions About This Chocolate Masterpiece
Can I make this recipe in 9-inch pans instead of 8-inch?
You can substitute three 9-inch pans, but be aware that the layers will be slightly thinner, which reduces the overall height of the finished cake.
If using 9-inch pans, reduce the baking time by about 5 to 8 minutes, checking for doneness closer to the 25-minute mark.
Is there a substitute for buttermilk?
Yes, if buttermilk is unavailable, you can substitute by making your own soured milk.
Measure 1 tablespoon of white vinegar or lemon juice into a measuring cup, then fill the remainder with whole milk until you reach 1 cup total, stirring and letting it sit for five minutes before use.
Why use oil instead of butter in the cake batter?
Oil remains liquid at room temperature, while butter is solid; this characteristic means oil keeps the cake significantly moister and more tender for a longer duration.
This oil-based recipe results in a superior, tender crumb that avoids the dense texture sometimes associated with butter-only cake recipes.
Ready to Impress? Share Your Decadent Triple-Layer Chocolate Cake Success!
Mastering this simple technique of incorporating the hot liquid will fundamentally change how you approach baking chocolate cakes forever.
This ultra-moist method ensures your next gathering is complete with a stunning, perfectly structured, and flavorful Decadent Triple-Layer Chocolate Cake that will elicit gasps of delight.
We encourage you to try this ultimate chocolate recipe and leave a review or share your photos to inspire fellow bakers in their quest for cake perfection!
Triple-Layer Chocolate Cake
Course: DessertCuisine: AmericanDifficulty: medium1
triple-layer cake30
minutes30
minutes750
kcal120
minutesThis recipe guarantees the moistest, darkest chocolate crumb you’ve ever achieved, using the simple secret of adding boiling liquid directly to the batter. Layered high with rich vanilla frosting, this impressive cake is guaranteed to be a centerpiece for any celebration.
Ingredients
For the Cake:
2 cups all-purpose flour
2 cups granulated sugar
3/4 cup unsweetened cocoa powder (high quality)
2 teaspoons baking soda
1 teaspoon baking powder
1 teaspoon salt
1 cup buttermilk (room temperature)
1/2 cup vegetable oil
2 large eggs (room temperature)
1 teaspoon vanilla extract
1 cup hot water or freshly brewed hot coffee (boiling)
For the Vanilla Frosting:
1 cup unsalted butter (softened)
4 cups powdered sugar
1 teaspoon vanilla extract
3 to 5 tablespoons milk or heavy cream
Directions
- Prepare the Pans and Dry Ingredients
- Preheat the oven to 350 degrees F. Grease and flour three 8-inch round cake pans. In a very large bowl, whisk together the flour, sugar, cocoa powder, baking soda, baking powder, and salt.
- Combine Wet Ingredients
- In a separate medium bowl, whisk together the buttermilk, oil, eggs, and vanilla extract until well combined. Pour the wet mixture into the dry ingredients and beat with a stand or hand mixer on medium speed for about 2 minutes, ensuring there are no lumps remaining. Scrape down the sides of the bowl.
- The Ultra-Moisture Secret: Adding the Boiling Liquid
- The key to achieving this specific level of deep chocolate flavor and superior moisture is introducing the hot liquid. Carefully and slowly, pour the 1 cup of boiling water or hot coffee into the batter while mixing on low speed until just combined. The batter will be very thin; this is correct. Do not overmix after adding the hot liquid.
- Bake the Layers
- Divide the thin batter evenly among the three prepared cake pans. Bake for 28 to 33 minutes, or until a wooden toothpick inserted into the center of a cake comes out with just a few moist crumbs attached.
- Cool and Frost
- Allow the cakes to cool in the pans for 10 minutes before inverting them onto a wire rack to cool completely. While the cakes cool, prepare the frosting.
- Prepare the Vanilla Frosting
- In a large bowl, beat the softened butter until light and fluffy. Gradually add the powdered sugar, alternating with the milk or cream, until the frosting is smooth and spreadable. Add the vanilla extract and beat for one minute more.
- Assemble the Cake
- Once the cake layers are fully cooled, place one layer on your serving plate. Spread a generous layer of frosting, then repeat with the remaining two layers. Frost the top and sides, then chill the cake briefly to set the frosting before serving.
Notes
- The use of boiling water or coffee is key to dissolving the cocoa and activating the leavening agents, resulting in superior flavor and moisture.