Achieving the perfect crispy treat shouldn’t result in a dense, jaw-breaking brick. I spent years perfecting the technique to ensure my Double Chocolate Crispy Squares stay wonderfully soft, gooey, and deeply chewy every time.
The secret lies entirely in strict heat control when melting the marshmallow binder, guaranteeing unmatched textural perfection and deep chocolate flavor.
Why This Double Chocolate Crispy Squares Recipe is Guaranteed Soft and Gooey
The “80% Melt” Rule: Controlling the Heat for Optimal Texture
Overheating marshmallows is the primary cause of tough, brittle crispy squares because the sugar crystallizes when exposed to high, prolonged heat.
By removing the saucepan when the binder is only about 80% melted, we use the residual heat to achieve smoothness without compromising the sugar structure, locking in that signature chew.
Deep Chocolate Flavor Without the Dryness
Traditional recipes often incorporate cocoa directly into the dry ingredients, which can unnecessarily dry out the final mix and create a dusty texture.
Here, the cocoa powder is swiftly incorporated directly into the warm, melted binder, ensuring deep, rich chocolate flavor without any textural sacrifice.
Fast Cleanup and Zero Baking Time
As a no-bake dessert, these treats require no oven time and set up quickly at room temperature or with a short chill time.
Using a parchment paper sling is essential; it allows you to lift the entire slab out of the pan, making clean, professional cuts effortless and minimizing dish washing.
Essential Building Blocks: Selecting Your Ingredients for Success
The Marshmallow Quality: Size and Freshness Matter
Mini marshmallows are strongly preferred because their smaller mass melts faster and more evenly than large ones, reducing the chance of scorching.
Always use a fresh bag; older marshmallows tend to dry out and do not yield the same soft, stretchy binder quality.
Cocoa Powder Selection: Dutch Process vs. Natural
While either natural or Dutch process cocoa works, a high-quality natural cocoa powder provides a more robust, slightly acidic flavor that balances the sweetness.
Dutch process cocoa delivers a darker color and smoother taste, which is excellent for an intensified visual impact on these chewy treats.
Choosing the Right Cereal Base
Using chocolate crisp rice cereal enhances the double chocolate aspect of these squares significantly.
If using standard original cereal, ensure it is fresh and crisp; stale cereal will quickly absorb moisture and become soggy when mixed with the binder.
The Topping Trio: Chocolate, Oil, and Gloss
The combination of semi-sweet chocolate chips and neutral oil is vital for the perfect glossy topping.
The tablespoon of neutral oil (like refined coconut or vegetable) lowers the viscosity, creating a topping that spreads easily and prevents the chocolate from becoming brittle or cracking when sliced.
Tools of the Trade: Preparing Your Kitchen for the Task
The Right Pan Size (9×13 Importance)
Using a 9×13 inch pan is crucial for achieving the proper bar thickness, maintaining a perfect cereal-to-binder ratio.
A smaller pan will result in overly tall, thick bars, while a larger pan creates thin, flimsy squares.
Spatulas and Their Purpose
A sturdy, heat-safe rubber spatula is mandatory for folding the cereal; it minimizes crushing the delicate rice puffs.
Avoid using rigid tools, which tend to smash the cereal against the sides of the bowl, leading to a denser final texture.
Prep Work: The Parchment Paper Trick
Always line the pan with parchment paper, leaving a generous overhang on the long sides to create two handles.
This simple trick allows you to lift the entire solidified slab out for clean removal and precise cutting.
Mastering the Method: Step-by-Step Double Chocolate Crispy Squares Guide
Setting the Stage: Pan Preparation
Ensure the pan is lightly greased before lining it with parchment paper to prevent the mixture from shifting.
This ensures the cereal base stays anchored while pressing and guarantees a clean lift later.
The Chewy Binding Agent: Low and Slow Melting
Melt the butter completely in a large saucepan over low heat before adding the marshmallows. The low heat is non-negotiable here to avoid scorching and crystalization, which leads to a hard square.
Finishing the Binder Off-Heat (The Chewy Secret)
Remove the saucepan immediately when approximately 80% of the marshmallows are melted, using the pan’s residual heat to finish the smoothing process.
This specific technique ensures the sugar molecules remain soft and pliable.
Rapidly mix in the cocoa and vanilla immediately after removing from the heat until the binder is uniform brown and perfectly glossy.
Folding for Fluffiness: Incorporating the Cereal
Pour the crisp rice cereal into the marshmallow mixture and fold quickly and gently using a rubber spatula.
Focus on lifting the binder up and over the cereal, minimizing the time spent stirring; crucially, do not overmix, which crushes the cereal pieces and creates a dense texture.
Gentle Pressing and Cooling
Transfer the mixture to the prepared pan immediately. Use slightly damp hands or buttered hands to press the mixture lightly into the pan-only enough to level the surface.
For a similar easy method, check out these foolproof pan release chocolate bars.
Avoid compacting the mixture; density is the enemy of a soft, chewy square. Let the mixture cool at room temperature.
Creating the Perfect Chocolate Topping
Combine the chocolate chips and oil in a microwave-safe bowl. Microwave in short, 30-second intervals, stirring thoroughly between each burst until the mixture is smooth.
The oil ensures the chocolate sets with a pleasant, glossy sheen and prevents it from becoming brittle or cracking when cut.
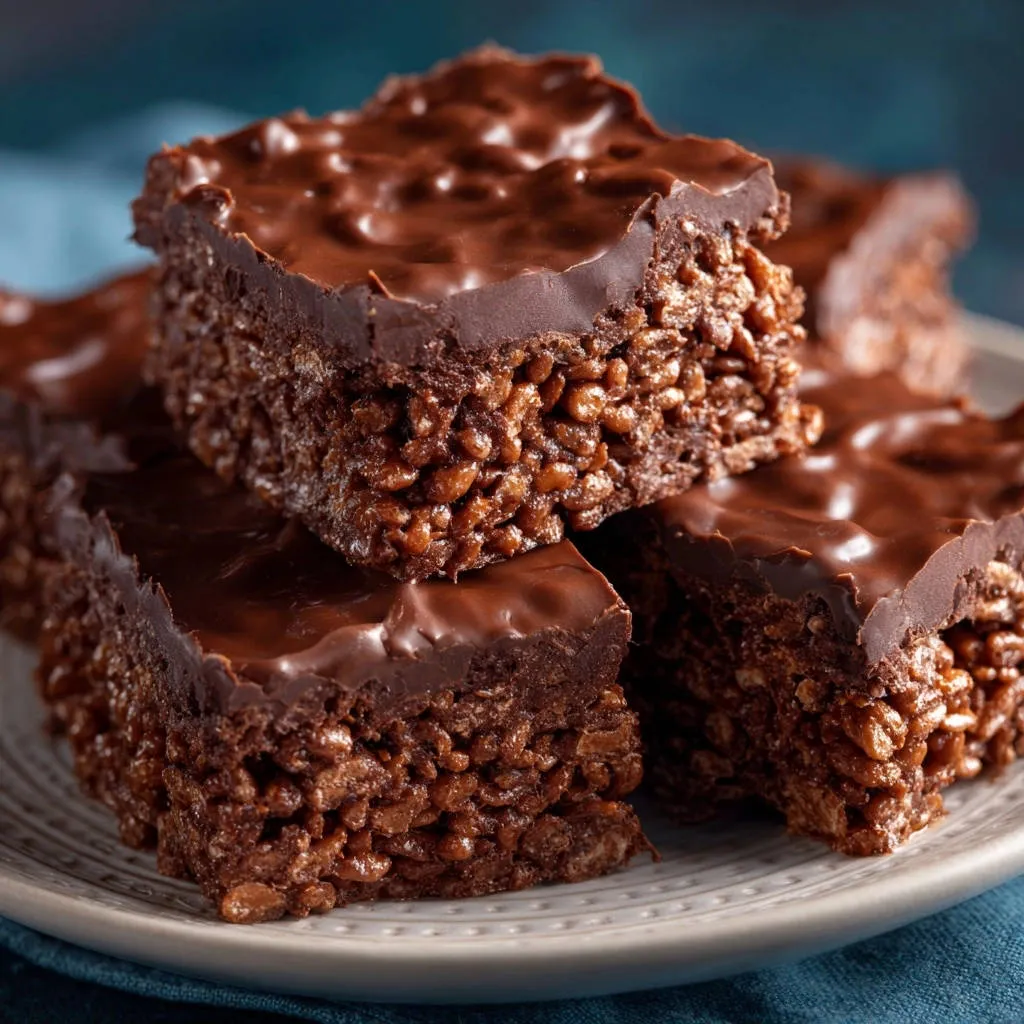
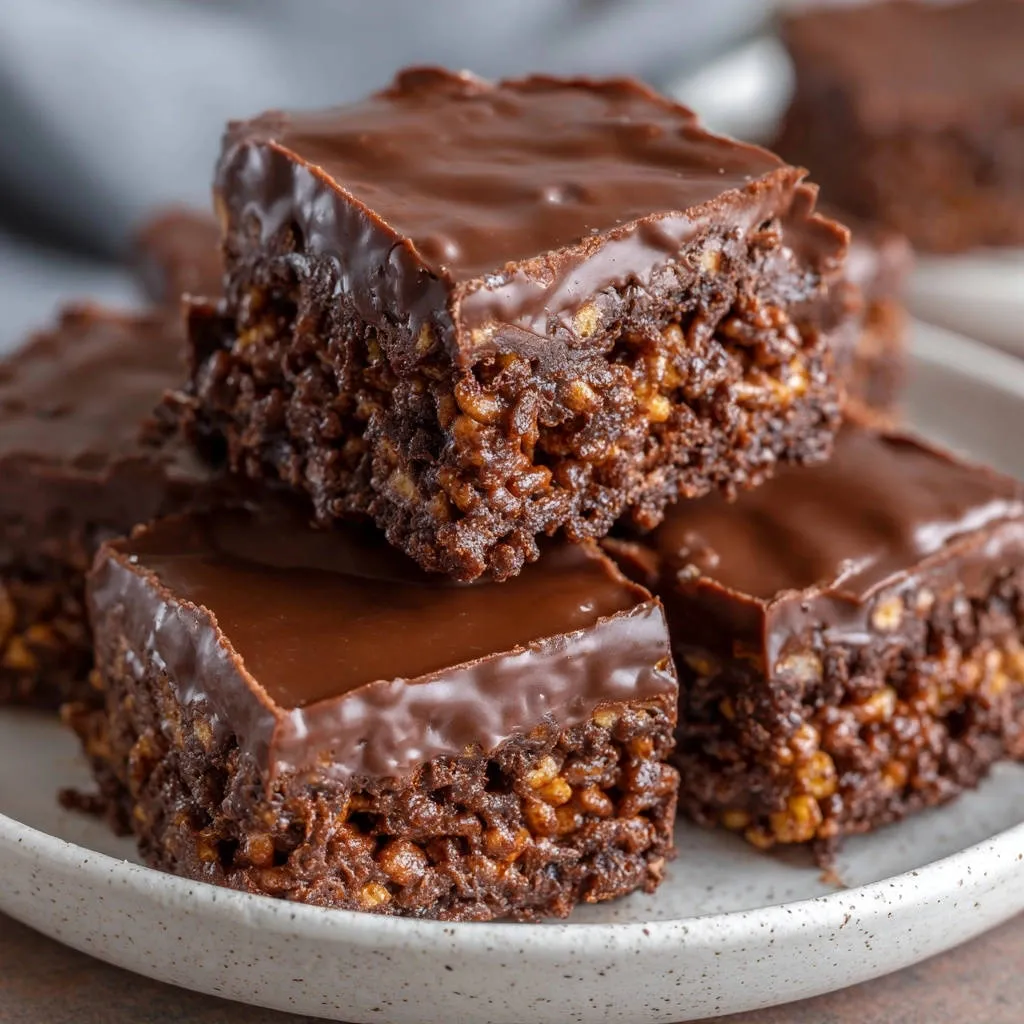
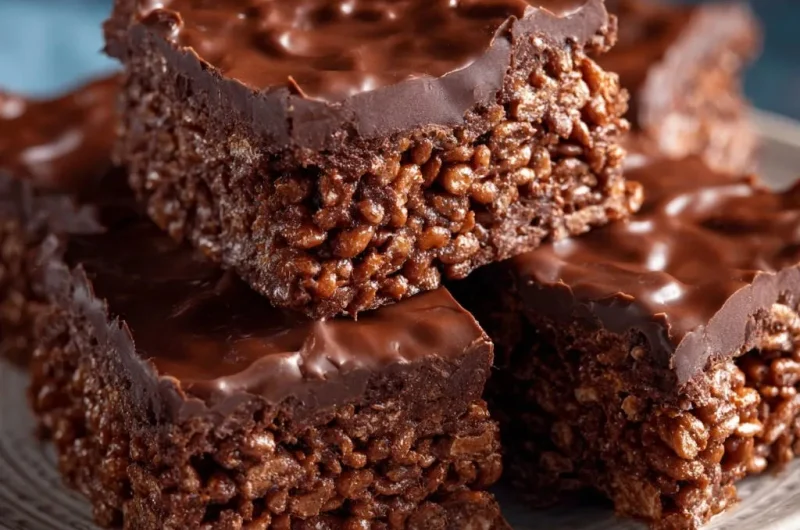
Finish, Set, and Cut
Spread the topping evenly over the cereal base. Allow the bars to set completely at room temperature (1-2 hours is ideal) before cutting, as this maximizes the chewiness.
Once set, use the parchment paper handles to lift the slab, then use a sharp, lightly oiled knife to cut the clean, crisp squares.
Chef’s Toolkit: Troubleshooting and Advanced Crispy Square Tips
Why Are My Squares Hard or Brittle? (The Temperature Error)
This is nearly always caused by overheating the marshmallows. If you see browning or smell burnt sugar, the binder is compromised and will not set soft.
It is far safer to remove the pan promptly from the heat before fully melted and rely on residual heat than to risk scorching the sugar.
Maximizing the Vanilla and Cocoa Punch
Ensure the cocoa powder is sifted before adding it to the melted binder, which prevents frustrating clumps and maximizes flavor dispersion.
Adding the vanilla extract right at the end helps preserve its delicate aromatics, preventing them from evaporating in the heat.
Achieving a Smooth, Crack-Free Chocolate Topping
Never skip the oil when melting chocolate for a topping; it’s the key to maintaining elasticity and a beautiful gloss.
If your chocolate seized, it means water (even steam) entered the mixture. You must start over for a smooth finish.
Handling the Sticky Situation: Quick, Clean Pressing
If you don’t want to butter your hands, running cold water over them and shaking off the excess (so they are damp, not dripping) works just as well to prevent sticking when pressing the mixture.
Customizing Your Squares: Variations and Dietary Swaps
Gluten-Free and Vegan Adaptations
Ensure certified gluten-free crisp rice cereals are used, as some common brands contain malt flavoring derived from barley.
For a vegan swap, utilize specific brands of plant-based marshmallows and high-quality vegan butter substitutes, noting that vegan binders may set up slightly faster.
Flavor Boosters: Mix-Ins and Extracts
A sprinkle of flaky sea salt over the finished melted chocolate topping heightens the richness and complexity of the dark cocoa.
Alternatively, replace the vanilla with a touch of espresso powder or fold in mini chocolate chips alongside the cereal for added intensity.
White Chocolate vs. Dark Chocolate Toppings
White chocolate contains higher sugar and milk solids, making it far more susceptible to scorching than semi-sweet or dark chocolate.
Melt white chocolate using a double boiler or use very short, 15-second microwave bursts, and consider adding a pinch more oil to ensure a fluid topping consistency.
Perfect Planning: Storage and Prep Strategies
How to Store Double Chocolate Crispy Squares for Maximum Freshness
Store these treats in an airtight container at room temperature, away from direct sunlight.
Refrigeration is generally not recommended unless you are in a very warm climate, as the cold can quickly stiffen the marshmallow binder and reduce the desirable chewy texture.
Can I Make These Ahead of Time?
These squares are excellent for making 1-2 days in advance, as the texture holds up beautifully at room temperature.
If storing for longer than 3 days, layer them between sheets of parchment paper to prevent the cut edges from sticking together.
Quick Answers to Common Crispy Square Questions
Do I have to use mini marshmallows?
While large marshmallows can be used, they take longer to melt, significantly increasing the risk of overheating the binder and creating a hard square.
If using large marshmallows, cut them into quarters first for efficiency and to ensure they melt quickly and evenly.
What is the role of the oil in the chocolate topping?
The neutral oil acts as an emulsifier and helps lower the viscosity of the melted chocolate, making it easier to spread thinly and evenly.
Crucially, it prevents the topping from becoming brittle and cracking into shards when the Double Chocolate Crispy Squares are cut.
Can I use a different size pan if I don’t have a 9×13?
Yes, but you will need to accept a change in the finished bar thickness. If using a standard 8×8 pan, the recipe will yield very thick squares, which requires careful, minimal pressing to avoid density.
Ready to Create Your New Favorite No-Bake Treat?
The secret to truly irresistible results, whether you are preparing snacks for lunchboxes or platters for a party, rests entirely in mastering the low heat technique during the binding stage.
Follow these expert tips for ingredient selection and preparation, and you are guaranteed to create the ultimate batch of soft, chewy, reliable Double Chocolate Crispy Squares.
Try this method today and discover the true meaning of chewy perfection!
Crispy Squares
Course: DessertCuisine: AmericanDifficulty: easy4
18-24 squares (9×13 pan)15
minutes5
minutes350
kcal20
minutesMaster the perfect chewy texture every time with this enhanced recipe for crispy treats. Controlling the marshmallow heat prevents a hard, brittle texture, ensuring these double chocolate squares remain gooey and deeply satisfying.
Ingredients
1/4 cup unsalted butter
10 ounces mini marshmallows (about 6 cups)
2 tablespoons unsweetened cocoa powder
1/2 teaspoon vanilla extract
6 cups crisp rice cereal (chocolate or original)
10 ounces semi-sweet or dark chocolate chips (for topping)
1 tablespoon neutral oil (like vegetable or coconut)
Directions
- Prepare the Pan. Grease a 9×13 inch baking pan lightly and line it with parchment paper, leaving an overhang on the long sides for easy lifting. Set aside.
- The Chewy Secret: Melt the butter in a large saucepan over low heat. Once the butter is fully melted, add the marshmallows and reduce the heat to the lowest setting possible. Stir constantly until the marshmallows are about 80% melted.
- Finish the Binder. Remove the saucepan immediately from the heat. The residual heat will finish melting the last few lumps. This is the crucial step to prevent a hard, brittle final product. Stir until perfectly smooth. Add the vanilla extract and the cocoa powder, mixing rapidly until the binder is uniform and chocolate brown.
- Fold in the Cereal. Pour the crisp rice cereal into the marshmallow mixture. Using a rubber spatula, fold the ingredients together gently but quickly until the cereal is evenly coated. Do not overmix or press down firmly in the pot, as this can crush the cereal and compromise the texture.
- Pressing and Cooling. Transfer the mixture to the prepared pan. Lightly dampen your hands or coat them with a thin layer of butter, then gently press the mixture evenly into the pan. Only press until the surface is level; avoid compacting it too densely, which can also lead to a tough final texture. Let it cool at room temperature while preparing the topping.
- Prepare the Topping. Combine the chocolate chips and the oil in a microwave safe bowl. Microwave in 30 second intervals, stirring well between each interval, until the chocolate is smooth and glossy. The oil helps the chocolate spread easily and keeps it from becoming brittle when it sets.
- Finish and Chill. Pour the melted chocolate topping over the cereal base and spread it evenly with an offset spatula. Allow the bars to set completely at room temperature for about 1 to 2 hours, or chill in the refrigerator for 30 minutes for a faster set.
- Cut. Once the chocolate topping is firm, use the parchment paper handles to lift the entire slab out of the pan. Place on a cutting board and use a sharp knife coated lightly with cooking spray or butter to cut into squares.
Notes
- Requires 30 minutes to 2 hours setting time (at room temperature or chilled) before cutting.