There’s nothing more disheartening than meticulously crafting beautiful Fall Fest Cake Pops, only for them to wobble or even fall right off the stick. I’ve been there, but through a few simple, strategic tweaks, I’ve perfected a method that guarantees secure, wobble-free cake pops every single time. This reliable technique transforms a common baking frustration into pure seasonal delight.
Beyond Wobbles: Why These Fall Fest Cake Pops Are Your New Go-To
This recipe isn’t just about making delightful treats; it’s about making them with confidence and ease. The unique approach ensures your cake pops are not only beautiful but also incredibly stable, making them a joy to create and share.
For more delightful swirls, check out these peppermint cheesecake swirl brownies.
The Game-Changing “Secure Stick” Method Explained
The common frustration of wobbly cake pops is completely eliminated with our innovative technique. By dipping the lollipop sticks into melted candy coating before inserting them, we create a strong, edible adhesive bond. This crucial step ensures each cake pop stays firmly attached, giving you peace of mind.
No more worrying about your festive treats losing their heads before they reach the party! This method guarantees stability, allowing you to focus on creative decorating and presentation.
Effortless Elegance: Simple Steps, Stunning Results
Despite their professional appearance, these Fall Fest Cake Pops are surprisingly straightforward to make. The recipe breaks down each step into manageable, clear instructions, ensuring success even for novice bakers.
The combination of simple ingredients and a clever technique delivers stunning results that will impress everyone.
Versatile Flavors for Any Fall Celebration
The beauty of starting with a yellow or vanilla cake base is its incredible versatility. This allows you to easily adapt the flavor profile to suit any autumnal occasion.
While we lean into classic fall colors, you can customize the cake flavor, frosting, and even the candy coating. Consider adding a hint of cinnamon or pumpkin spice to the cake base, or explore other delightful fall dessert options like amazing chewy spiced molasses cookies.
Gather Your Harvest: Essential Ingredients for Delicious Cake Pops
Every exceptional recipe starts with quality ingredients. Here’s what you’ll need to create these irresistible Fall Fest Cake Pops, along with a brief explanation of why each component is key.
The Cake Base: Your Flavor Canvas
You’ll need one baked 9×13 inch yellow or vanilla cake. Whether from a convenient box mix or a cherished homemade recipe, ensure it is completely cooled before crumbling. A fully cooled cake crumbles perfectly and blends smoothly, preventing a greasy texture.
The Binding Agent: Cream Cheese Frosting
One cup of cream cheese frosting is essential for binding the cake crumbs. This specific frosting provides the ideal moisture and richness, creating a pliable mixture that rolls easily without being too sticky or dry. Store-bought or homemade, its quality directly impacts the final cake ball texture.
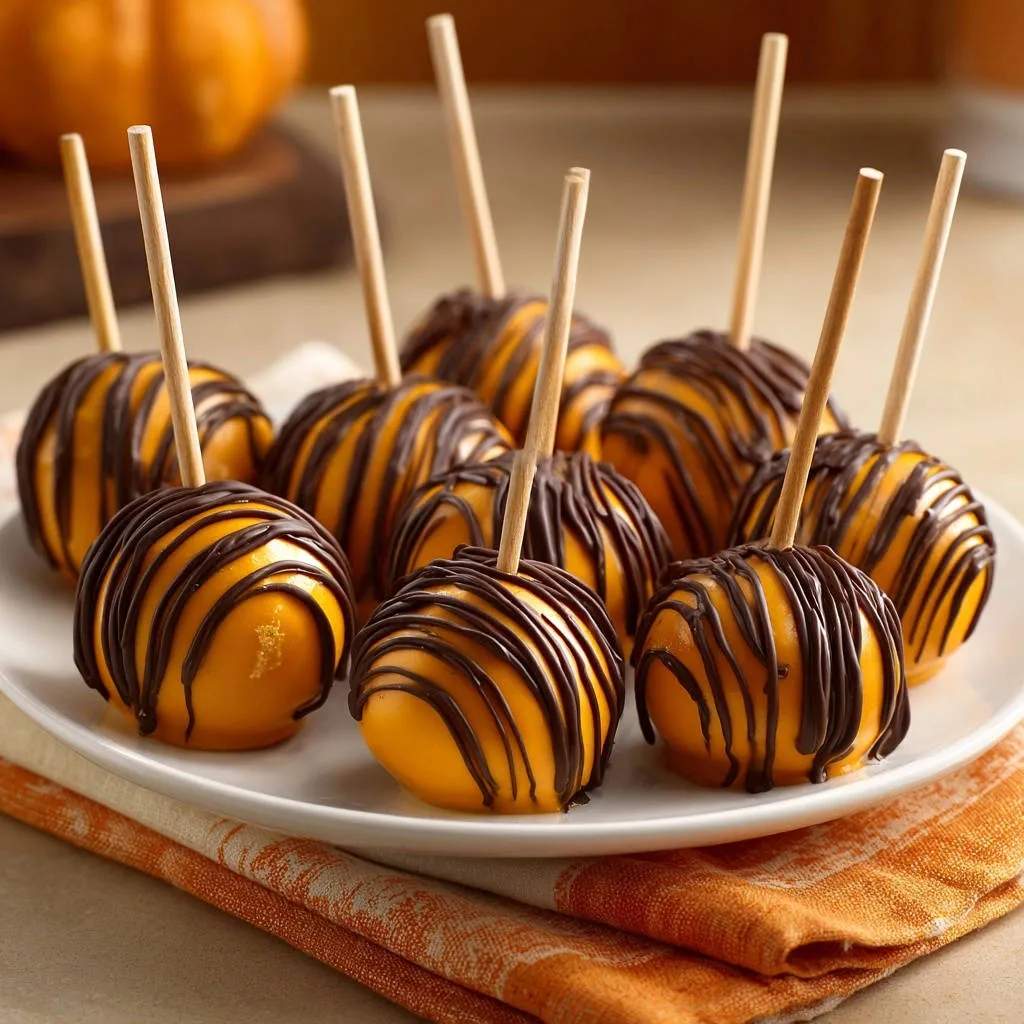
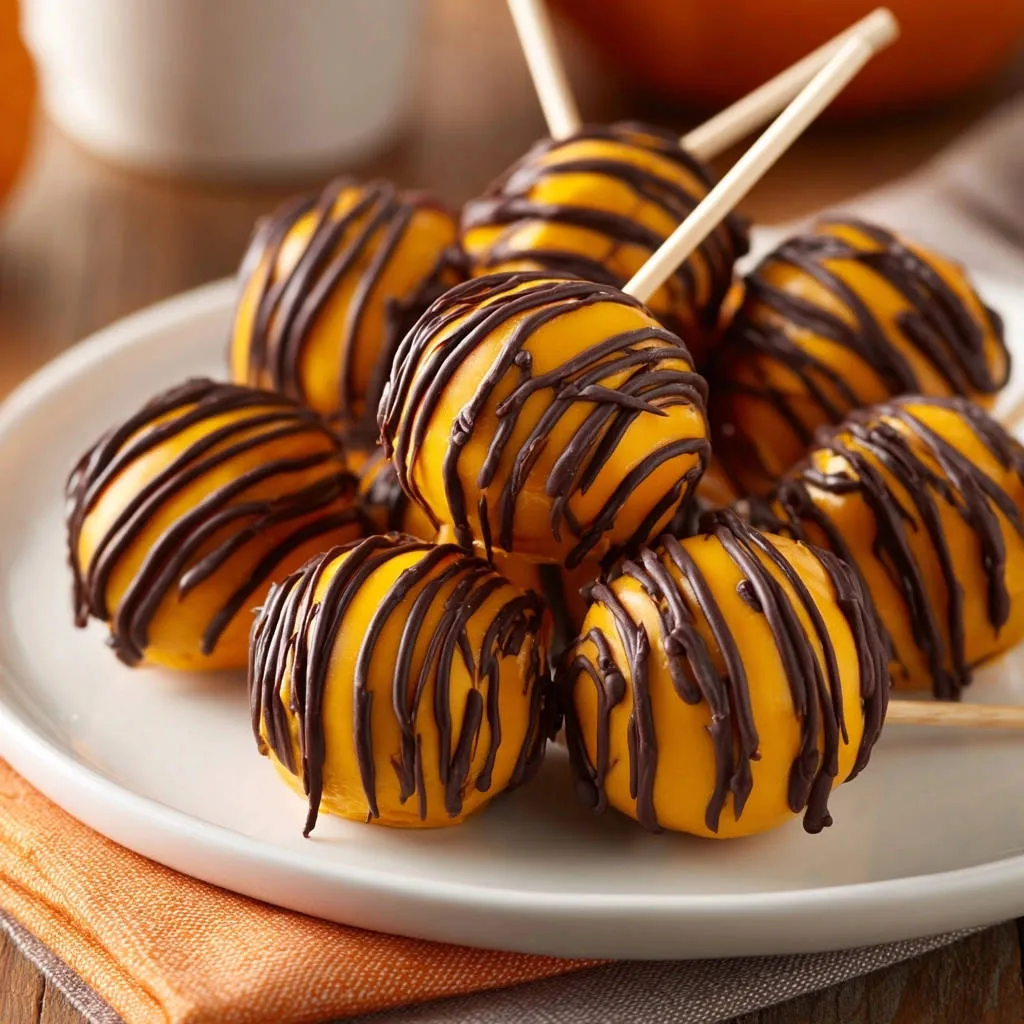
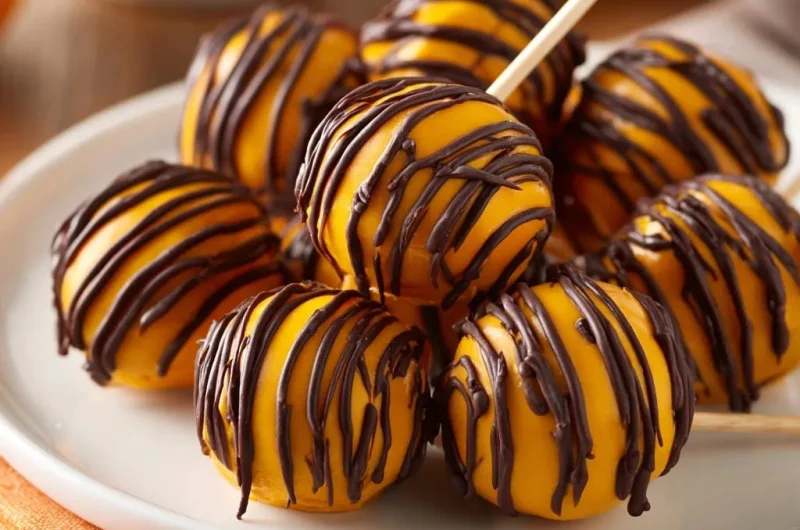
Candy Coatings: Vibrant Orange and Rich Chocolate
For the primary coating, 12 ounces of bright orange candy melts capture the essence of fall. For decorative drizzles, 4 ounces of semi-sweet chocolate chips add a delicious contrast and visual appeal. An optional 1 tablespoon of coconut oil helps thin the candy melts to a perfectly dippable consistency, ensuring a smooth finish.
Don’t Forget the Lollipop Sticks!
You’ll need 18-24 lollipop sticks. These are fundamental for turning your cake balls into classic cake pops, making them easy to handle, serve, and display.
Tools of the Trade: Equipping Your Cake Pop Kitchen
Having the right tools makes the cake pop creation process much smoother and more enjoyable. Gather these essentials before you begin.
Must-Have Equipment for Cake Pop Success
Large Mixing Bowl: Essential for crumbling cake and mixing with frosting, providing ample space for thorough combination.
Baking Sheet & Parchment Paper: Crucial for chilling cake balls, preventing sticking, and allowing dipped pops to set without adhering to the surface.
Microwave-Safe Bowls or Double Boiler: For melting candy melts and chocolate smoothly and controllably, avoiding scorching.
Foam Block or Tall Glass: For holding cake pops upright while the candy coating and chocolate drizzles dry and set, preventing flat spots.
Piping Bag or Ziploc Bag: For neatly drizzling melted chocolate for decoration, offering precision and control.
Crafting Your Fall Fest Cake Pops: A Step-by-Step Guide
Follow these detailed instructions carefully to ensure beautifully secure and delicious Fall Fest Cake Pops.
- Prepare the Cake Crumbs:
In a large bowl, crumble the cooled 9×13 inch cake into very fine, even crumbs. It’s important to ensure there are no large lumps remaining, as this will result in a smooth, uniform cake ball texture.
- Bind the Cake Mixture:
Add the 1 cup of cream cheese frosting to the cake crumbs. Use your hands or a sturdy spoon to mix thoroughly until the mixture is evenly moist and comes together easily. The ideal consistency is firm enough to roll without crumbling, but crucially, not sticky or greasy.
- Form Uniform Cake Balls:
Roll the cake mixture into smooth, uniform balls, approximately 1.5 inches in diameter. Consistency in size ensures even chilling and dipping, leading to a professional finish. Place these perfectly formed balls onto a baking sheet lined with parchment paper.
- Chill for Firmness:
Place the baking sheet with the cake balls into the refrigerator for at least 30 minutes, or the freezer for 15 minutes. This crucial chilling step firms the cake balls, which is essential to prevent them from being too soft and falling apart during the stick insertion and dipping processes.
- Prep the Sticks (The Secret Weapon!):
Melt about half (6 ounces) of the orange candy melts according to package directions, using either a microwave or a double boiler. Dip the tip of each lollipop stick about half an inch into the melted candy coating; this thin layer of candy will act as a strong, edible adhesive.
- Secure the Sticks:
Immediately insert the candy-dipped end of a stick into the center of a chilled cake ball, pushing it about halfway through. The melted candy quickly cools and sets upon contact with the cold cake ball, creating a strong, secure bond between the stick and the cake ball.
- Set the “Glue” Firmly:
Return the assembled cake pops to the refrigerator for another 15-20 minutes. This critical chilling period allows the candy coating on the sticks to fully set and firmly anchor the cake balls, guaranteeing your pops won’t slip or fall off during the final dipping stage.
- Dip in Orange Coating:
While the pops are chilling, melt the remaining orange candy melts. If the coating seems too thick, add a tiny bit of coconut oil (1/4 teaspoon at a time) to thin it to a smooth, dippable consistency; this ensures an even, flawless finish. Dip each chilled cake pop into the melted orange coating, rotating gently to get an even, smooth layer, then gently tap off any excess coating by lightly tapping the stick against the side of the bowl.
- Drizzle with Chocolate:
Place the dipped Fall Fest Cake Pops upright in a block of foam or a tall glass and let them set slightly. Meanwhile, melt the semi-sweet chocolate chips (with a tiny bit of coconut oil if needed) until smooth. Transfer the melted chocolate to a piping bag with a tiny snip at the end or a Ziploc bag with a corner snipped, then drizzle decorative lines over the orange coating for a festive look.
- Final Set & Store:
Allow the chocolate drizzle to set completely at room temperature or in the refrigerator for a few minutes. Once fully set, store your finished Fall Fest Cake Pops in an airtight container to maintain their freshness and flavor.
Pro Tips for Flawless Fall Fest Cake Pops Every Time
Achieving perfection with cake pops is all about a few key details. These tips will elevate your baking and ensure stunning results.
Achieving the Perfect Cake Ball Consistency
Ensure your cake mixture is pliable; it should be neither too dry, which causes cracking, nor too moist or greasy, which leads to stickiness and crumbling. If the mixture is too dry, incorporate a tiny bit more frosting; if too moist, a small amount of powdered sugar can sometimes help, but be cautious not to overdo it.
The Art of Dipping: Smooth & Even Coating
Melt your candy melts slowly and gently, preferably in short bursts in the microwave or over a double boiler, to prevent them from burning or seizing. The ideal temperature and consistency allow for a smooth, thin coat on your cake pops. Tap off excess coating by gently tapping the stick against the side of the bowl, letting gravity create a beautiful, even finish.
Creative Decorating Ideas for Your Fall Fest Cake Pops
Beyond chocolate drizzles, unleash your creativity! Consider using fall-themed sprinkles, edible glitter, or even other colors of candy melts like brown, white, or deep red for additional festive designs. Edible markers can also add intricate fine details like leaves or pumpkin faces to truly capture the autumn spirit.
Troubleshooting Common Cake Pop Challenges
Even seasoned bakers encounter hurdles. Here are solutions to common cake pop issues.
Why Are My Cake Balls Cracking After Dipping?
Cracking often occurs if the cake balls are too cold, or if the candy coating is either too hot or too thick. To prevent this, ensure your cake balls are firm but not frozen solid, and your coating is at the right, slightly warm temperature and thin consistency (use coconut oil if needed).
My Fall Fest Cake Pops Keep Falling Off the Stick!
This is precisely what our “secret weapon” method is designed to prevent! If this still happens, it’s usually because the candy-dipped stick wasn’t allowed to set properly in the cake ball, or the cake ball itself wasn’t adequately chilled before the stick was inserted. Revisit steps 5-7 to ensure a secure bond, perhaps even adding a tiny bit more melted coating around the base of the stick before the final chill, similar to how one might ensure foolproof honeycomb bites never stick to their pan.
The Coating is Too Thick or Won’t Melt Smoothly
Overheating candy melts can cause them to seize, becoming clumpy and difficult to work with. Always melt gently, in short bursts if using a microwave, and stir frequently to distribute heat evenly. If the coating is too thick, gradually add tiny amounts of coconut oil or paramount crystals to thin it to the desired, smooth consistency.
Serving, Storing, and Making Ahead Fall Fest Cake Pops
Plan your fall festivities with ease, knowing how to best handle your delightful cake pop creations.
Best Ways to Serve Your Fall Fest Cake Pops
To truly showcase your Fall Fest Cake Pops, display them upright in a festive block of floral foam, arranged beautifully in a tall vase filled with candy corn or sprinkles, or artfully fanned out on a decorative platter. Their vibrant colors and charming presentation make them an ideal centerpiece for any fall gathering or dessert table.
How to Store Your Cake Pop Creations
Store finished Fall Fest Cake Pops in an airtight container at room temperature for up to 2-3 days, or in the refrigerator for up to a week. If storing them in the refrigerator, it’s best to allow them to come to room temperature for about 15-20 minutes before serving. This ensures the cake inside is perfectly moist and tender.
Can You Make Fall Fest Cake Pops Ahead of Time?
Absolutely! You can prepare the cake crumbs and mix them with frosting up to two days in advance, storing the mixture tightly covered in an airtight container in the refrigerator. Formed cake balls can also be chilled in the refrigerator for up to 24 hours before dipping. For the freshest taste and appearance, fully assembled and decorated pops are best made no more than 2-3 days prior to when you plan to serve them.
Your Fall Fest Cake Pop Questions Answered
Here are answers to some common questions that arise when making these festive treats.
Can I use a different type of cake for these Fall Fest Cake Pops?
Absolutely! While yellow or vanilla cake provides a versatile base, you can certainly experiment with other flavors like chocolate, pumpkin spice, or even a rich red velvet cake mix to create different flavor profiles for your Fall Fest Cake Pops. Just ensure the cake is fully cooled before crumbling for optimal texture.
What if I don’t have lollipop sticks?
If lollipop sticks aren’t available, you can still enjoy these treats as delicious cake truffles. Simply form the balls, chill them, and then dip them completely in your chosen coating, placing them directly on parchment paper to set. If you’re looking for other no-stick alternatives, consider making delicious raspberry chocolate coconut truffles.
How long do Fall Fest Cake Pops last?
When stored properly in an airtight container, your Fall Fest Cake Pops will remain fresh for up to 2-3 days at room temperature. If you need them to last longer, they can be kept in the refrigerator for up to a week. For optimal taste and texture, it’s always best to enjoy them within these recommended periods.
Can I make these gluten-free or dairy-free?
Yes, with appropriate substitutions, these Fall Fest Cake Pops can be adapted! Use a certified gluten-free cake mix and ensure your frosting is also gluten-free. For a dairy-free version, choose a dairy-free cake mix and a plant-based cream cheese frosting. Be aware that the texture might vary slightly with these substitutions, but the core method of binding and dipping remains effective.
Ready to Impress? Share Your Fall Fest Cake Pops Masterpiece!
Now that you’re armed with the ultimate guide to creating perfectly secure and utterly delicious Fall Fest Cake Pops, it’s time to unleash your inner pastry artist! This recipe promises not only incredible flavor but also the satisfaction of creating treats that stay put, making them a joy to make and an even bigger joy to share.
We’d love to see your festive creations! Don’t hesitate to tag us on social media or share your experiences in the comments below. Happy baking, and enjoy the delightful flavors of the season with these irresistible Fall Fest Cake Pops!
Cake Pops
Course: DessertCuisine: AmericanDifficulty: medium4
18-24 cake pops45
minutes15
minutes350
kcal120
minutesTired of wobbly cake pops? This recipe offers simple tweaks to ensure your Fall Fest Cake Pops are perfectly secure on their sticks. Enjoy beautifully stable and fun-to-eat cake pops with ease, making them easier and more enjoyable for any fall celebration.
Ingredients
1 baked 9×13 inch yellow or vanilla cake (from a box mix or homemade, cooled)
1 cup cream cheese frosting (store-bought or homemade)
12 ounces orange candy melts
4 ounces semi-sweet chocolate chips
1 tablespoon coconut oil (optional, for thinning chocolate)
18-24 lollipop sticks
Directions
- Prepare the Cake Crumbs: In a large bowl, crumble the cooled cake into fine crumbs. Ensure there are no large lumps.
- Bind the Cake: Add the cream cheese frosting to the cake crumbs. Using your hands or a sturdy spoon, mix thoroughly until the mixture is evenly moist and comes together easily. The mixture should be firm enough to roll without crumbling, but not sticky or greasy. This is key for a stable cake ball.
- Form Cake Balls: Roll the cake mixture into smooth, uniform balls, about 1.5 inches in diameter. Place them on a baking sheet lined with parchment paper.
- Chill for Firmness: Place the baking sheet with the cake balls into the refrigerator for at least 30 minutes, or the freezer for 15 minutes, until they are firm to the the touch. This crucial step prevents the balls from being too soft and falling apart later.
- Prep the Sticks (The Secret Weapon!): Melt about half of the orange candy melts according to package directions (microwave or double boiler). Dip the tip of each lollipop stick about half an inch into the melted candy coating.
- Secure the Sticks: Immediately insert the candy-dipped end of a stick into the center of a chilled cake ball, pushing about halfway through. The melted candy acts like glue, creating a strong bond. Repeat for all cake balls.
- Set the “Glue”: Return the cake pops to the refrigerator for another 15-20 minutes to allow the candy coating on the sticks to fully set and firmly anchor the cake balls. This ensures your pops won’t slip or fall off.
- Dip in Orange Coating: While the pops are chilling, melt the remaining orange candy melts. If the coating is too thick, add a tiny bit of coconut oil (1/4 teaspoon at a time) to thin it to a dippable consistency. Dip each chilled cake pop into the melted orange coating, rotating gently to get an even, smooth layer. Tap off excess coating by gently tapping the stick against the side of the bowl.
- Drizzle with Chocolate: Place the dipped cake pops upright in a block of foam or a tall glass. Let them set slightly. Meanwhile, melt the chocolate chips with a tiny bit of coconut oil if needed, until smooth. Transfer the melted chocolate to a piping bag with a tiny snip at the end or a Ziploc bag with a corner snipped. Drizzle decorative lines over the orange coating.
- Final Set: Allow the chocolate drizzle to set completely at room temperature or in the refrigerator for a few minutes. Store finished cake pops in an airtight container.
Notes
- Follow chilling and stick-dipping steps carefully for secure cake pops.