If you have always struggled to serve side greens that weren’t tough, dry, or tasted faintly metallic, you know how disappointing a healthy side dish can be.
This recipe for Garlicky Sautéed Leafy Greens solves that common problem using a unique two-part technique-mechanical tenderizing combined with a brief steam fix-to guarantee an irresistibly tender, melt-in-your-mouth texture every single time.
This method transforms basic greens into a deeply flavorful, essential side dish that establishes your expertise in the kitchen.
Beyond Basic: Why This Garlicky Sautéed Leafy Greens Recipe Delivers Perfect Texture
Achieving restaurant-quality texture requires more than just quickly tossing greens into a hot pan.
This approach relies on specific preparation techniques that break down tough vegetable fibers and neutralize bitterness, ensuring a tender finish.
The Power of Mechanical Tenderizing: Why We Massage the Greens
Leafy greens like kale and collards are protected by tough cellulose fibers, which prevent them from softening during quick cooking.
The simple act of massaging the chopped leaves with a pinch of salt mechanically breaks down these rigid cell walls before the cooking process even begins.
This critical pre-treatment initiates tenderizing and simultaneously starts drawing out the compounds responsible for the inherent bitterness, leading to a much smoother, richer flavor profile.
The Crucial “Steam Fix”: Finishing for Maximum Tenderness
While the initial sautéing achieves beautiful color and blooms the garlic, it often leaves the greens slightly resistant and chewy.
We introduce a small amount of liquid and immediately cover the skillet to create a controlled, brief braise.
This hot steam finish ensures the greens are cooked through and meltingly tender, preventing them from becoming dry or aggressively browned, without ever turning them into a mushy, boiled mess.
Simple Ingredients, Monumental Flavor: The Magic of Acid and Aromatics
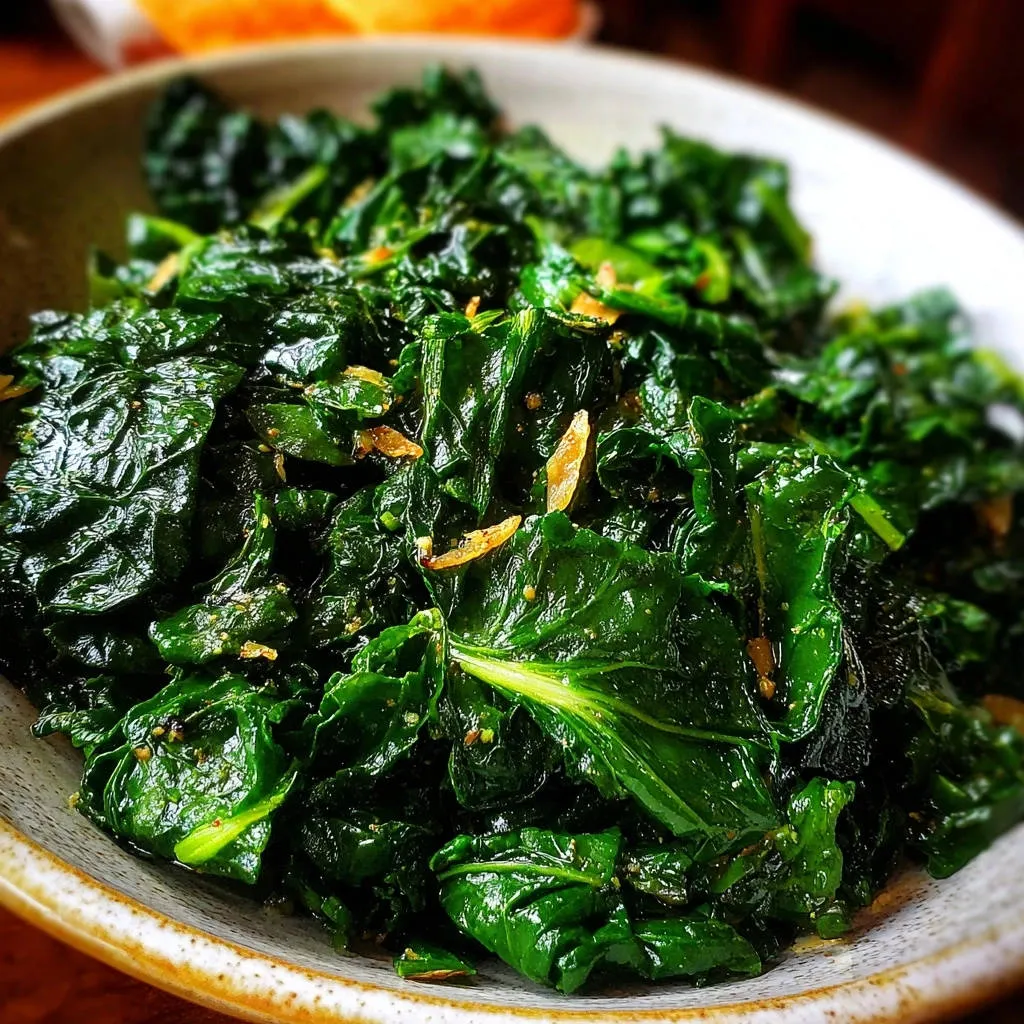
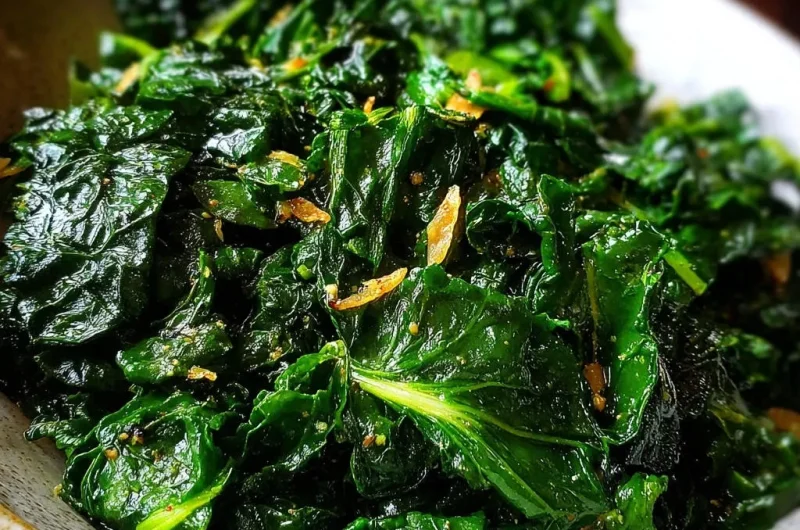
The vibrant base flavor relies on thinly sliced fresh garlic gently bloomed in quality olive oil, building a warm and savory foundation.
The quick addition of acid-either vinegar or lemon juice-is crucial at the very end.
This final flavor note cuts through any lingering metallic or bitter compounds, elevating the entire dish and locking in that bright, satisfying taste.
For another way to build deep flavor in vegetarian dishes, check out this hearty veggie & quinoa soup.
Gathering Your Building Blocks: Essential Ingredients List
Quality ingredients are essential for truly exceptional Garlicky Sautéed Leafy Greens. Here is what you need:
- 1 pound kale or collard greens, washed and de-stemmed
- 3 tablespoons olive oil
- 4 cloves garlic, thinly sliced
- 1/4 cup vegetable broth or water
- 1 teaspoon apple cider vinegar or lemon juice
- 1/2 teaspoon kosher salt (divided for two steps)
- 1/4 teaspoon black pepper
- Pinch of crushed red pepper flakes (optional)
Choosing Your Base: Selecting the Best Leafy Greens (Kale vs. Collards)
This preparation technique is highly effective for robust greens like curly kale, Lacinato kale, or traditional collard greens.
Collard greens are thicker and generally require the full 5-minute steam duration, capitalizing on the massaging step due to their resilience.
Lacinato kale, being slightly more delicate, may require a minute less of steaming, but the preparation method remains the same for either choice.
The Garlic Factor: Preparation and Quality
For the best flavor release without scorching, always choose to thinly slice your garlic rather than mincing it.
Slicing provides larger surface area pieces that caramelize slowly and release their subtle aroma steadily into the oil.
Mincing greatly increases the risk of burning, resulting in a bitter, acrid flavor that can ruin the entire side dish.
Which Acid is Best? Vinegar vs. Lemon Juice
The choice of finishing acid dictates the final flavor profile of the Garlicky Sautéed Leafy Greens.
Apple Cider Vinegar provides a deeper, slightly fruity tang that complements earthy greens like collards beautifully.
Fresh lemon juice offers a cleaner, brighter, and incredibly refreshing lift, which is often preferred when using kale.
The Essential Prep: Mastering the Green Massage Technique
The single most important step for achieving tender greens happens before the pan ever touches the heat.
Proper preparation ensures that the greens accept the heat quickly and soften uniformly.
Step 1: Washing, De-stemming, and Rough Chopping
Thoroughly wash your chosen greens to remove any trace of grit, then ensure they are mostly dry by spinning or patting them off.
It is crucial to completely remove the tough, central ribs or stems from collards or kale, as these will remain inedibly chewy even after extensive cooking.
Chop the remaining leaves into rough 1-inch pieces, ensuring consistent size for uniform cooking later.
Step 2: Activating Tenderness with Salt and Hands
Place the chopped leaves into a large bowl and sprinkle them with a small, precise pinch of salt (about 1/8 teaspoon).
Use firm, consistent pressure to massage and squeeze the leaves vigorously with your hands for two to three full minutes.
You know you are done when the greens visibly darken in color and have reduced their volume by roughly 25%-this visual cue confirms the fibers have broken down.
Your Path to Garlicky Sautéed Leafy Greens Perfection: A Detailed Method
Follow these steps closely to ensure both the tenderness and the vibrant, robust flavor profile are achieved.
- Sauté the Aromatics and Oil:
Heat a large, heavy skillet or Dutch oven over medium heat. Add the olive oil and the thinly sliced garlic.
Sauté for approximately 60 to 90 seconds until the garlic is intensely fragrant and just starting to develop a light golden color on the edges.
Crucial Tip: Do not walk away during this phase. Burnt garlic is irreparable; if the browning accelerates, immediately pull the pan off the heat to cool it slightly.
- Introduce the Massaged Greens:
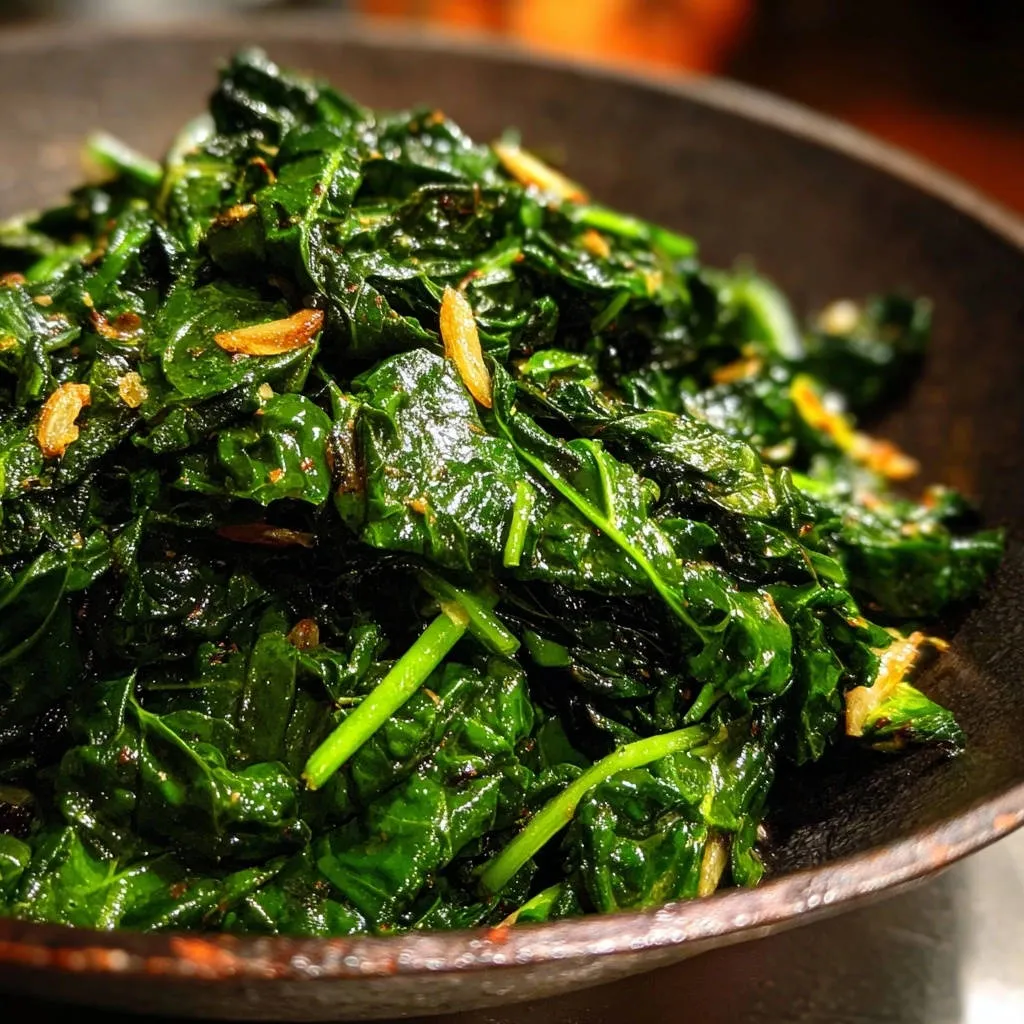
Add the prepared, massaged greens directly to the skillet. Increase the heat to medium high.
Cook, stirring constantly, for 3 to 4 minutes.
The immediate goal is to significantly reduce the greens’ volume while achieving a vibrant, shiny green color, indicating the initial softening and searing are complete.
- Implement the Tenderizing Steam Fix:
Pour the 1/4 cup of vegetable broth or water over the greens, ensuring the liquid hits the hot surface.
Immediately cover the skillet tightly with a lid and reduce the heat to low.
Allow the greens to steam and braise gently for exactly 5 minutes (adjust slightly less for delicate kale). This low-and-slow steam finish ensures the greens are perfectly tender without leaching out their flavor or developing a soggy texture.
- Reduce and Finish the Dish:
Remove the lid. If a substantial amount of liquid remains, raise the heat back up to medium-high and cook uncovered for 1 minute until the liquid evaporates.
Remove the skillet entirely from the heat. Stir in the remaining salt, pepper, and the crucial finishing acid-the apple cider vinegar or lemon juice.
Taste immediately and adjust seasoning, adding a touch more salt or pepper as needed for perfect balance.
Chef’s Secrets and Troubleshooting: Achieving Irresistible Flavor
Even expert cooks encounter small challenges; knowing how to navigate them is key to truly exceptional food.
Troubleshooting Scorching: How to Save Your Garlic
If you notice the garlic slices turning dark brown too quickly, you need to cool the pan instantly to stop the cooking process.
Immediately remove the skillet from the heat source and add a splash of cold oil or a teaspoon of water, stirring quickly.
This rapidly drops the temperature, preventing the bitter flavor of scorched garlic from permeating the cooking oil.
Maximizing the Brightness: Why Acid Must Be Added Last
If acid is introduced too early, it chemically reacts with the plant fibers, causing them to stiffen and toughen, undermining the massage and steam steps.
Adding the vinegar or lemon juice off-heat ensures the final flavor is beautifully bright and tangy without compromising the desirable tender texture.
Salt Strategy: Why Salting is Done in Two Stages
The initial small pinch of salt used during the massage step is purely functional; it aids the mechanical breakdown of fibers and helps draw out bitter water compounds.
The final salt addition, stirred in at the end, is for true seasoning and balancing the overall flavor profile.
This two-stage strategy ensures the greens are properly conditioned for texture and perfectly seasoned for taste.
Perfect Pairings: Serving Suggestions for Garlicky Sautéed Leafy Greens
These flavorful, slightly acidic Garlicky Sautéed Leafy Greens serve as more than just a side-they are a balancing element for countless main courses.
Classic Main Dish Pairings
The garlicky, acidic profile of these greens is specifically designed to cut through richness, creating a harmonious meal.
They pair beautifully with rich, flaky seared salmon, where the acid balances the fish oil, or alongside expertly seasoned, crispy-skinned roasted chicken.
The tanginess of the greens also provides an excellent counterpoint to the savory depth of pan-seared pork chops or robust steaks.
For wonderfully fluffy grains, check out this cilantro lime cauliflower rice too.
Beyond the Side Dish: Creative Serving Ideas
These greens are versatile and can be incorporated into many dishes beyond the typical plate accompaniment.
Complementary Dishes
To round out your meal, consider these dishes that build on the theme of satisfying greens and savory elements.
- For a substantial main course that features greens alongside tender shredded meat, explore the Hearty Braised Greens with Shredded Meat.
- If you prefer a nourishing bowl, the Hearty Quinoa and White Bean Soup offers a filling and flavorful option that pairs well.
- Use the cooked greens as a flavorful, textural base layer for savory breakfast omelets or simple egg scrambles.
- Stir the mixture into simple, oil-based pasta preparations, like spaghetti aglio e olio, to add nutrients and robust flavor.
- Serve a generous portion of the garlicky mixture piled high onto creamy, hot polenta, grits, or risotto for a rustic, satisfying main course.
Planning Ahead: Storage and Reheating FAQs
Proper planning ensures that you can always serve these delicious sautéed greens with minimal fuss.
Can I Prep the Greens Ahead of Time?
Yes, the labor-intensive washing, chopping, and the all-important massaging steps can be completed well in advance of cooking.
Store the massaged, seasoned greens tightly covered in the refrigerator for up to four hours.
However, the actual cooking (sautéing and steaming) must be done just before serving to achieve the optimal, fresh texture.
What is the Best Way to Store Leftovers?
Any cooled leftovers should be stored in an airtight container in the refrigerator.
These sautéed greens will maintain excellent flavor and texture for three to four days after cooking.
How Should I Reheat Garlicky Greens Without Making Them Soggy?
Avoid using the microwave, as its steaming action often dulls the flavor and makes the greens overly watery.
The best method is to briefly reheat the greens in a dry, hot skillet or Dutch oven over medium-high heat.
Toss quickly for 60 to 90 seconds to refresh the texture and evaporate any minimal moisture that accumulated during storage.
Ready to Impress? Share Your Tender Leafy Greens Masterpiece!
Say goodbye to tough, flavorless vegetable side dishes forever by applying these simple yet powerful techniques.
By incorporating the unique steps of mechanical massaging and the precise “steam fix,” you are now guaranteed to serve truly exceptional Garlicky Sautéed Leafy Greens.
Master this melt-in-your-mouth method tonight, and enjoy the confidence that comes with serving perfectly cooked vegetables every single time.
I encourage you to try this technique and share your results-your new favorite side dish awaits!
Sautéed Leafy Greens
Course: Side DishCuisine: InternationalDifficulty: easy4
servings10
minutes12
minutes240
kcal22
minutesNever eat chewy, tough greens again! This recipe utilizes a simple hand-massage technique followed by a quick steam fix to guarantee melt-in-your-mouth tenderness for kale or collard greens. Finishing with a touch of acid locks in vibrant flavor.
Ingredients
1 pound kale or collard greens, washed and de-stemmed
3 tablespoons olive oil
4 cloves garlic, thinly sliced
1/4 cup vegetable broth or water
1 teaspoon apple cider vinegar or lemon juice
1/2 teaspoon kosher salt
1/4 teaspoon black pepper
Pinch of crushed red pepper flakes (optional)
Directions
- Prepare the Greens for Tenderness: After washing the greens, roughly chop the leaves into 1-inch pieces. Place them into a large bowl. Sprinkle just a small pinch of salt over the leaves (about 1/8 teaspoon). Now, use your hands to firmly massage the greens for 2 to 3 minutes, squeezing and working them until the leaves become slightly darker green and visibly wilted. This step mechanically breaks down the tough fibers and begins to neutralize bitterness.
- Sauté the Aromatics: Heat a large skillet or Dutch oven over medium heat. Add the olive oil and sliced garlic. Sauté for about 60 to 90 seconds until the garlic is fragrant and just beginning to turn golden brown. Do not let the garlic scorch.
- Introduce the Greens: Add the massaged greens to the skillet. Increase the heat to medium high. Cook, stirring constantly for 3 to 4 minutes until the leaves have fully reduced in volume and are shiny and bright green.
- The Tenderizing Steam Fix: Pour the 1/4 cup of vegetable broth or water over the greens. Immediately cover the skillet tightly with a lid and reduce the heat to low. Allow the greens to steam and braise gently for 5 minutes. This creates a hot, steamy environment that finishes tenderizing the greens without making them mushy.
- Finish and Season: Remove the lid. If there is any remaining liquid, raise the heat and cook for 1 minute until it evaporates. Remove the skillet from the heat. Stir in the remaining salt, pepper, and the apple cider vinegar (or lemon juice). The quick addition of the acid helps to cut through any remaining residual bitterness, locking in that vibrant flavor. Serve immediately.
Notes
- The hand-massaging step (Step 1) is crucial for tenderizing the greens and removing bitterness.