Picture this: you’re prepping for a holiday feast, and those tiny pearl onions have you fumbling with a paring knife for what feels like hours. Skins stick like glue, and half the onions end up mangled. But here’s the game-changer for glossy honey-glazed pearl onions: a simple 4-minute blanch-and-ice trick that makes skins slip off in seconds.
Therefore, you get perfect, intact little spheres ready for that stunning glaze. No more peeling nightmares. These honey-glazed petite onions transform into tender-crisp gems with a shine that steals the show on any plate.
The secret lies in that exact 2-minute boil followed by an ice bath shock. It loosens the pectin just enough without cooking the onion. That’s why this glossy honey-glazed pearl onions recipe delivers pro results every time.
If you enjoyed the tang from the vinegar, you’ll also appreciate the depth offered in balsamic glazed pearl onions.
Why Glossy Honey-Glazed Pearl Onions Elevate Any Plate
Glazed pearl onions bring versatility to your table. They shine as a side for roasts, perk up salads, or add pop to charcuterie boards. Forget boring boiled onions; these caramelized beauties amplify natural sweetness with a honey glaze.
In addition, the balsamic reduction creates visual appeal that turns heads. Honey-glazed pearl onions offer that sweet-tangy punch missing from plain veggies. You’ll crave their glossy shine at every meal.
However, it’s the contrast that hooks you. Tender insides meet a crisp bite, all wrapped in clingy glaze. These make any dish feel festive.
Texture Contrast: Tender Inside, Crisp Outside
Blanching shocks the skins loose while keeping the snap. You preserve that al dente core, unlike overcooked mush from boiling too long. Therefore, glossy honey-glazed pearl onions stay firm yet yielding.
Gently squeeze, and skins pop right off. Pat dry, and you’re set for searing. This step ensures the perfect tender-crisp balance every time.
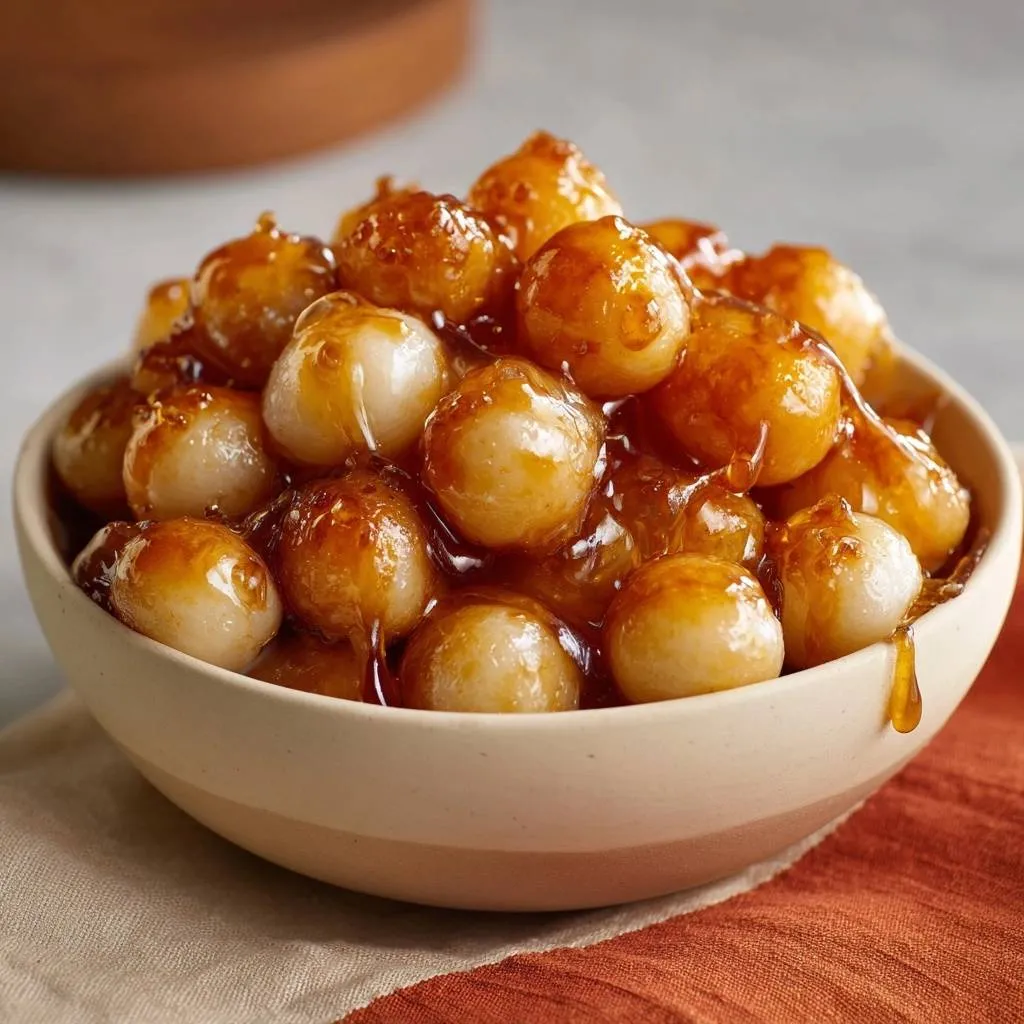
Visual Appeal of That Irresistible Sheen
The glaze’s light refraction creates a jewel-like glow on glossy honey-glazed pearl onions. It catches every light, making them table stars. For home cooks, snap photos right after glazing while warm.
Therefore, that sheen holds better on small pearls than big onions. Tilt your plate for the best shot. It’s pure eye candy.
Pearl Onions Showdown: Fresh vs Frozen vs Jarred
Fresh pearl onions win for flavor in glossy honey-glazed pearl onions. They pack the sweetest punch, especially from farmers markets in fall. One pound yields four servings, but the peeling trick makes it effortless.
Frozen ones work in a pinch; they’re convenient but release more water, diluting glaze. Jarred? Too soft and vinegary already. Stick to fresh for that pop.
Unsalted butter keeps things controlled; no bitterness sneaks in. Therefore, source small, firm pearls without sprouts. You’ll taste the difference.
Honey and Balsamic: Sweet-Tangy Balance Essentials
Raw honey avoids crystallization for a smooth, clingy glaze on honey-glazed pearl onions. Balsamic’s acidity cuts the richness perfectly. Use exactly 1/4 cup honey; less won’t coat well.
For a similar earthy sweetness, explore balsamic roasted beets and carrots.
Salt and pepper go in last to build flavor layers. This balance makes every bite irresistible.
Butter’s Role in Golden Searing Base
Melt cold unsalted butter over medium; it foams to signal readiness. Two tablespoons give golden sear without grease. Therefore, it builds the base for glossy shine.
Blanching Breakthrough: Skins Slip Off in Seconds
Start with boiling water for glossy pearl onions prep. Drop in pearl onions for exactly two minutes; this loosens pectin without softening the flesh. Immediately plunge into ice water for two more minutes.
The shock halts enzymes, keeping onions crisp. Squeeze gently at the root end, and skins slide off like magic. No knife needed, and onions stay whole.
Pat dry thoroughly; excess water steams them later. Therefore, this blanching breakthrough saves time and frustration. Pro tip: test one onion first to nail timing.
Timing Precision for Perfect Peel
Two minutes boil plus two in ice equals effortless peels. Over-blanch, and you get mush; under-do it, skins stick. Therefore, use a timer religiously.
If skins resist, give another quick ice dip. Perfect every time.
Skillet Searing for Honey-Glazed Pearl Onions Foundation
Melt butter in a skillet over medium heat until it foams. Add peeled onions and stir occasionally for five minutes. They turn lightly golden, releasing a sweet aroma via Maillard reaction.
Gentle tosses prevent burning and even out color. This builds nutty depth for honey-glazed pearl onions. Don’t rush; patience pays off.
However, watch the heat. Too high chars edges bitter. Medium keeps it golden.
Nonstick vs Stainless: Skillet Choice Impact
Nonstick shines for glaze stage; no sticking issues. Stainless builds tasty fond if you deglaze later. A 10-inch pan fits one pound perfectly.
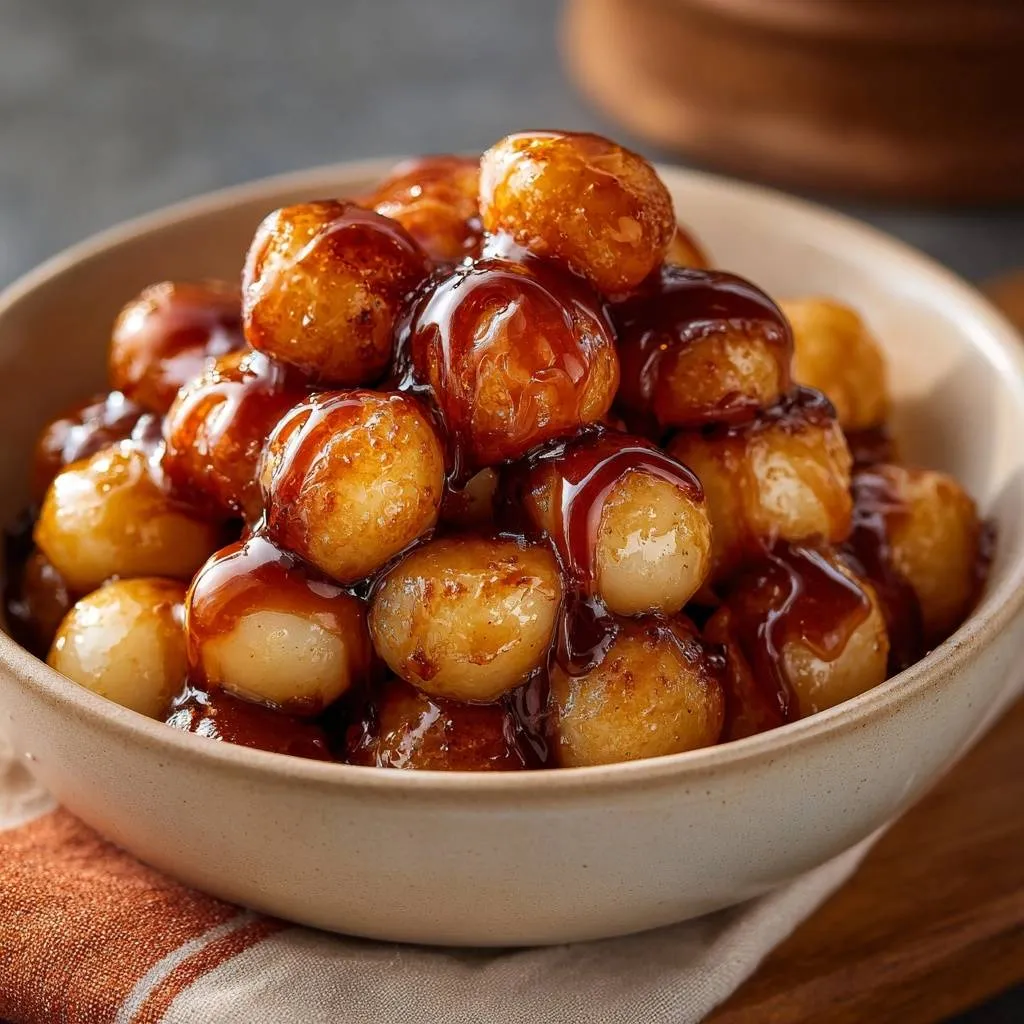
Simmering the Glossy Honey Glaze to Perfection
Stir in honey, balsamic vinegar, salt, and pepper. Drop to low heat and simmer 10-12 minutes, tossing gently. The glaze thickens to syrupy cling as water evaporates, hitting about 225°F.
Sugar inversion creates that glossy honey-glazed pearl onions shine. Bubbles slow, and onions yield to a fork when done. Avoid breakup with light stirring.
Therefore, taste midway; adjust pepper for kick. This stage transforms them into sticky jewels.
Glaze Separation Fixes During Simmer
Watery glaze? Crank heat briefly to reduce. If it splits, whisk in a cold butter pat. Smooths right out.
Science of Clinging Glossy Honey Glaze on Pearl Onions
Butter fats emulsify honey sugars and vinegar acids for perfect cling. Blanching strips the waxy layer, boosting absorption. Caramelization at 320°F seals the glossy shine.
Pearl onions’ high sugar content makes them ideal over cipollini. Therefore, the glaze coats evenly without pooling. It’s chemistry you can taste.
In addition, low simmer concentrates flavors. No separation means pro-level results.
Reducing Without Burning the Glaze
Low heat evaporates water slowly. Small bubbles mean syrup stage; big ones risk candy hardness. Stir often to prevent hot spots.
Avoiding Pitfalls in Honey-Glazed Pearl Onions
Skip the ice bath, and skins stick forever. High heat bitters the char; rushed simmer leaves runny glaze. Over-peeling tears onions, ruining shape.
Store in an airtight container in the fridge up to five days. Reheat gently on stovetop with a splash of water. Therefore, they stay glossy.
Pro tip: don’t crowd the pan, or steaming replaces searing.
Rescuing Overcooked or Sticky Batches
Soggy onions? Dry-sauté two extra minutes. Dull glaze? Splash balsamic to revive shine. Turns mistakes around fast.
Flavor Twists on Glossy Honey-Glazed Pearl Onions
Add thyme sprigs during simmer for earthy lift. Swap balsamic for red wine vinegar if tangy. Maple sub for honey brings woodsy notes.
Vegan? Use olive oil instead of butter. Red pepper flakes add heat. These keep honey-glazed petite onions exciting.
However, scale herbs lightly; they infuse fast.
Herb and Spice Swaps for Variety
Rosemary complements balsamic’s depth; use one teaspoon chopped. Cumin seeds give Moroccan flair, toasted first. Start small to match sweetness.
Pairing Glossy Honey-Glazed Pearl Onions with Mains
They pair beautifully with roast chicken, soaking up juices. Try alongside vegetarian lentil loaf or on cheese boards. Chardonnay’s acidity cuts the glaze perfectly.
Round Out Your Meal
To complement your glossy pearl onions, consider these dishes that share similar comforting flavors or hearty ingredients.
- For a rich, layered casserole experience that highlights French onion flavors, try the creamy French onion chicken casserole.
- If you’re in the mood for a warming bowl, the hearty white bean and ham soup offers similar savory notes and satisfying textures.
Holiday tables love them as stars. Therefore, their shine elevates simple mains to special.
In addition, scatter over grains for easy weeknights.
Sheet Pan Roasts with These Onions
Add glossy honey-glazed pearl onions to carrots and potatoes the last 15 minutes at 400°F. They caramelize together beautifully. Sync timing for even doneness.
Scaling and Storing Honey-Glazed Pearl Onions
Double the recipe? Keep ratios, use a wider skillet. Make ahead: blanch and peel day prior, glaze fresh. Freezes well up to three months; thaw overnight in fridge.
Reheat low on stovetop, stirring gently. Therefore, flavor holds strong.
Troubleshooting Glossy Honey-Glazed Pearl Onions
Can I Skip the Blanching Step?
No way; it’s the key to glossy pearl onions prep. Without it, skins cling stubbornly, and you’ll spend ages peeling with a knife. The 2-minute boil plus ice bath shocks pectin loose for seconds-long slips, keeping onions intact and crisp. Trust the process for perfect results.
Do Frozen Onions Work for This Recipe?
Yes, but thaw and pat them bone-dry first. Frozen pearl onions release extra water, which can make your honey glaze watery. Dry sauté them an extra minute before adding glaze to mimic fresh texture in glossy honey-glazed pearl onions. Fresh still edges out for sweetness.
What If My Glaze Gets Too Thick?
Stir in a teaspoon of water or balsamic at a time over low heat. This thins it back to clingy syrup without diluting flavor. For honey-glazed pearl onions, aim for slow-dripping consistency off a spoon. If over-reduced, a quick vinegar splash revives shine too.
How Do I Make a Vegan Version?
Swap butter for olive oil or coconut oil; two tablespoons does it. The oil emulsifies the glaze just as well, keeping that glossy honey-glazed pearl onions sheen. Everything else stays the same for full sweet-tangy joy.
What’s the Best Serving Temperature?
Warm, not piping hot. Let them sit five minutes off heat; the glaze sets glossy and clings best. Room temp works for apps, but warm maximizes tender-crisp bite in glossy honey-glazed pearl onions. Reheat gently if needed.
How Long Do Leftovers Last, and Can I Freeze Them?
Store in an airtight container in the fridge up to five days; the glaze holds without separating. Freezes excellently for three months; portion into bags flat for quick thaw. Reheat low on stovetop with a stir to restore shine, avoiding microwave mush. Perfect for batch prepping honey-glazed pearl onions.
Honey Glazed Pearl Onions
Course: Side DishCuisine: AmericanDifficulty: easy4
servings10
minutes20
minutes150
kcal30
MinutesBlanch pearl onions to easily remove skins, then glaze them in a honey-balsamic sauce for tender, shiny results.
Ingredients
1 pound fresh pearl onions
1/4 cup honey
2 tablespoons unsalted butter
1 tablespoon balsamic vinegar
1/4 teaspoon salt
1/2 teaspoon black pepper
Directions
- Bring a pot of water to a rolling boil. Add pearl onions and blanch for exactly 2 minutes. Immediately transfer to an ice water bath for 2 minutes. This blanch-to-peel secret shocks the skins loose, so they slip off effortlessly with a gentle squeeze, no knife needed, solving the top peeling nightmare in seconds. Pat dry.
- In a skillet over medium heat, melt butter. Add peeled onions and cook, stirring occasionally, for 5 minutes until lightly golden.
- Stir in honey, balsamic vinegar, salt, and pepper. Simmer on low for 10-12 minutes, gently tossing until onions are tender and coated in a thick, glossy glaze that clings perfectly without separating.
- Remove from heat and serve warm. The blanching ensures intact onions with ideal tender-crisp texture under that irresistible shine.
Notes
- Blanching for exactly 2 minutes shocks the skins loose for effortless peeling—no knife required. Simmer gently to achieve a thick, clinging glaze.