
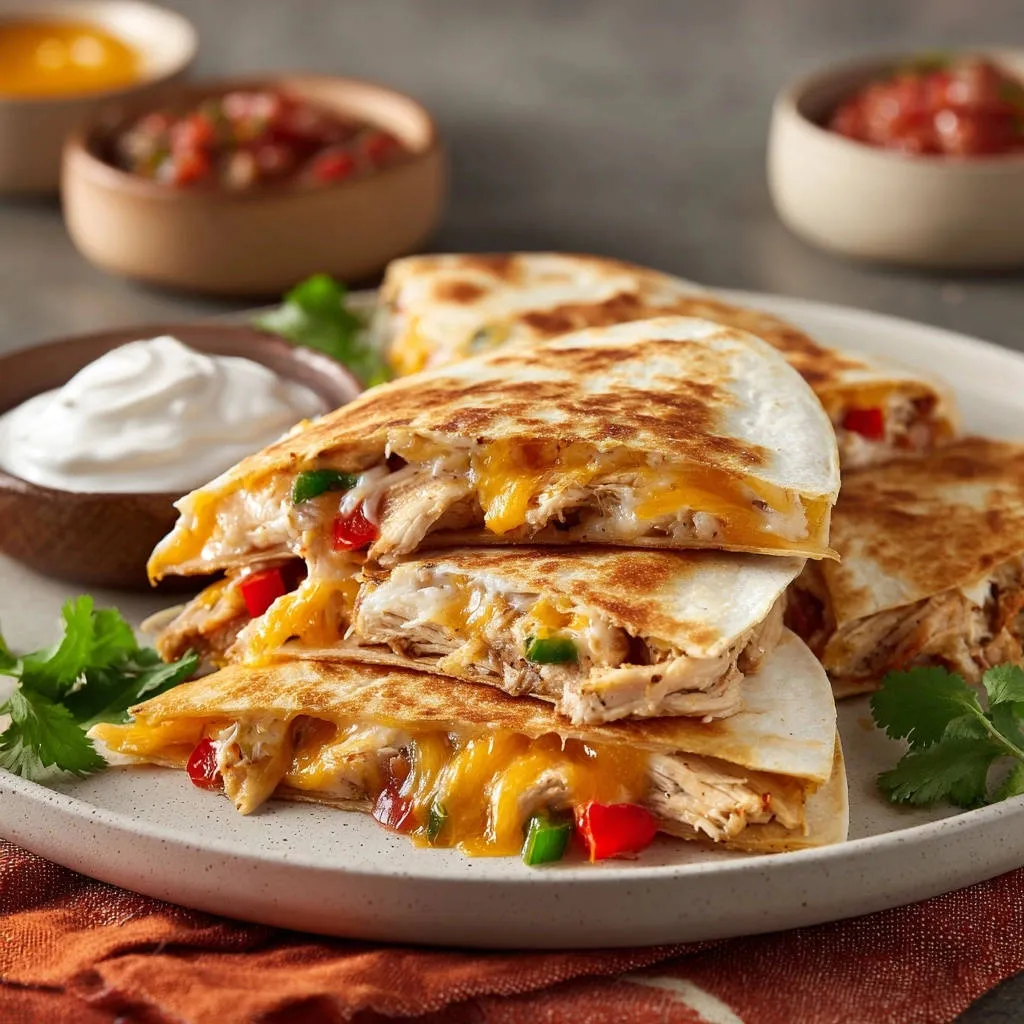
I remember a time when my quesadillas would emerge from the pan soft and uninspired, a far cry from the crisp, golden perfection I envisioned. It was a quest for that ultimate crunch that led me to perfect these Golden Chicken & Cheese Quesadillas, transforming a simple meal into a truly satisfying experience.
This recipe is special because it guarantees a perfectly crisp exterior every single time, without sogginess, thanks to a few expert techniques. Get ready to discover a go-to meal that’s bursting with flavor and delivers that satisfying crunch you’ve been dreaming of.
For another taste of chicken and cheese, explore this cheesy chicken enchilada skillet.
Why This Golden Chicken & Cheese Quesadilla Recipe Wins Every Time
No More Soggy Tortillas: The Golden Crisp Secret Revealed
This recipe focuses on precise pan heat and the optimal amount of oil, turning your tortillas into beautifully golden, crisp shells. Say goodbye to soft, flimsy quesadillas and hello to a gratifying crunch with every bite.
For more tender chicken strips, check out these cheesy chicken fajita tacos.
Flavor-Packed Filling, Perfectly Balanced
The thoughtful combination of tender shredded chicken, sweet bell peppers, and balanced seasoning creates a filling that is both robust and harmonious. Each ingredient plays its part in delivering a vibrant, delicious taste profile.
Quick Weeknight Meal & Crowd-Pleaser
These Golden Chicken & Cheese Quesadillas are incredibly easy and fast to prepare, making them an ideal solution for busy weeknights. They’re also universally loved, ensuring a happy crowd at any mealtime.
The Building Blocks of Flavor: Inside Your Golden Chicken & Cheese Quesadillas
For the Irresistible Filling
Cooked Shredded Chicken Breast: Opt for pre-cooked chicken breast, either leftover from a roast or a store-bought rotisserie chicken for ultimate convenience. Ensure it’s finely shredded for even distribution and texture.
Diced Bell Peppers (Red & Green): Fresh, vibrant bell peppers add a sweet undertone and a pop of color to the filling. Critically, dice them very finely to ensure they soften quickly and, most importantly, prevent excess moisture from steaming your tortilla, which is key for crispness.
Salt & Black Pepper: These essential seasonings elevate the natural flavors of the chicken and peppers. A balanced amount ensures the filling is well-seasoned, but not overpowering.
The Crisping Canvas: Flour Tortillas
Medium flour tortillas are your best friend here, offering a generous surface area for filling while being manageable to crisp and fold. Their pliability makes them perfect for achieving that desirable golden-brown, crispy exterior.
The Melty Heart: Choosing Your Cheese
Shredded cheddar cheese or a Mexican blend provides the ultimate melt factor and classic quesadilla flavor. For the best melt and texture, I always recommend shredding your own cheese from a block; it melts smoother than pre-shredded varieties which often contain anti-caking agents.
The Golden Touch: Vegetable Oil
Vegetable oil is crucial for achieving that signature golden, crisp crust on your tortillas. Its neutral flavor ensures the delicious filling shines through, while a light coating prevents greasiness.
Essential Gear for Golden Chicken & Cheese Quesadilla Perfection
The Right Pan Makes All the Difference
A large non-stick skillet or a cast-iron pan is essential for even heat distribution and achieving a beautifully golden crust. Both options excel at maintaining consistent heat, which is vital for preventing soggy spots and ensuring uniform browning.
Spatula Savvy & Cutting Board Basics
A sturdy, thin-edged spatula is your best tool for carefully folding and flipping the quesadillas without tearing them. A clean cutting board provides a stable surface for resting your finished quesadillas, allowing the cheese to set before slicing into neat wedges.
Crafting Your Golden Chicken & Cheese Quesadillas: A Step-by-Step Guide
-
Prepare the Flavorful Filling:
In a small bowl, combine the shredded chicken, finely diced red bell pepper, finely diced green bell pepper, salt, and black pepper. Stir well to ensure the ingredients are evenly mixed and seasoned.
This initial prep is crucial for flavor distribution and helps prevent excess moisture from the raw vegetables steaming the tortilla later, ensuring ultimate crispness.
-
Preheat Your Pan to Perfection:
Heat a large non-stick skillet or cast-iron pan over medium heat. This step is crucial; a properly heated pan is key to preventing sogginess and achieving even browning.
Add just a very light coating of oil to the pan, about 1/2 teaspoon per quesadilla. You want enough to crisp, not enough to fry, so the tortilla gets golden without becoming greasy.
-
Lay the Tortilla & Start the First Cheese Layer:
Place one tortilla into the hot skillet. Immediately sprinkle about 1/4 cup of your chosen cheese over one half of the tortilla.
This initial layer of cheese acts as a barrier and helps the filling adhere later, preventing it from migrating.
-
Spread the Chicken and Pepper Mixture:
Evenly spread about 1/4 cup of the prepared chicken and pepper mixture over the cheese on one half of the tortilla.
Ensure an even layer to promote consistent cooking and melting, which is key for a uniform bite.
-
Add the Final Cheese Layer:
Top the chicken mixture with another 1/4 cup of cheese.
This creates a gooey “glue” that holds everything together once melted, sealing in all the delicious flavors.
-
Crisp the First Side:
Allow the tortilla to cook undisturbed for 2 to 3 minutes, or until the bottom is golden brown and the cheese is just beginning to melt.
This initial cooking phase helps to crisp the tortilla bottom before you fold it, creating a protective barrier against moisture from the filling and setting up that satisfying crunch.
-
The Fold:
Using a spatula, carefully fold the empty half of the tortilla over the filled half. Press down gently with the spatula to ensure good contact with the pan.
This seals the quesadilla and starts cooking the top half, getting it ready for the final crisping.
-
Cook to Golden Perfection:
Continue cooking for another 2 to 3 minutes, gently pressing occasionally, until the second side is golden brown and the cheese is fully melted and gooey.
If the pan gets too hot, reduce the heat slightly to avoid burning while ensuring the cheese melts thoroughly inside. Adjust as needed for even browning and a beautiful finish.
-
Rest and Slice:
Remove the quesadilla from the pan and place it on a cutting board. Let it rest for a minute or two before slicing into wedges.
Resting allows the cheese to set slightly, preventing the filling from oozing out and making for cleaner slices. Garnish with fresh cilantro if desired for a burst of freshness.
-
Repeat & Serve:
Repeat with the remaining tortillas and filling, ensuring you re-oil the pan very lightly between each quesadilla if needed.
Serve immediately with your favorite sides like salsa or sour cream to enjoy while warm and crispy.
Mastering the Golden Quesadilla: Expert Tips & Troubleshooting
Chef’s Secrets for Extra Crispy Results
Don’t Overcrowd the Pan: Cook one quesadilla at a time to maintain consistent pan temperature and ensure even browning. Overcrowding drops the temperature and can lead to steaming, which is the enemy of crispness.
Light Oil, Big Impact: Use just enough oil to lightly coat the pan. Too much oil will deep-fry the tortilla, making it greasy instead of perfectly crisp. A spritz of cooking spray or a dab with a paper towel works wonders.
The Power of Gentle Pressure: Lightly pressing the quesadilla with your spatula helps maximize contact with the hot pan, promoting even browning and melting. This ensures every part of the tortilla gets that golden treatment.
Moisture Management for Ultimate Crispness: Remember the finely diced peppers? This is key. Avoid watery fillings or adding too much moisture that could steam the tortilla from the inside. Cooked chicken is also better than raw to avoid releasing liquid during cooking.
Preventing Common Quesadilla Pitfalls
Problem: Soggy Tortilla
Ensure your pan is properly preheated to medium heat before adding the tortilla, and use only a very light coating of oil. Excess moisture from the filling can also contribute, so finely dice your vegetables and use cooked protein.
Problem: Filling Falling Out
Avoid overfilling the tortilla; a modest amount ensures the cheese can properly bind everything together. Carefully fold and gently press the quesadilla with your spatula to secure the filling as it cooks.
Problem: Cheese Not Fully Melted
Confirm your pan temperature isn’t too low, and allow adequate cooking time for the cheese to melt fully. Using freshly shredded cheese, rather than pre-shredded, often results in a better, more consistent melt.
Problem: Tortilla Burns Before Cheese Melts
The heat is likely too high. Cook on a consistent medium heat, adjusting slightly downwards if you notice rapid browning. This allows enough time for the cheese to melt without scorching the tortilla.
Beyond the Plate: Serving Suggestions & Creative Variations
Perfect Pairings: What to Serve With Your Quesadillas
These Golden Chicken & Cheese Quesadillas shine when served with classic condiments. Offer bowls of fresh salsa, cool sour cream, creamy guacamole, or even a vibrant pico de gallo. For a more complete meal, pair them with a simple green salad, seasoned rice, or hearty black beans.
Round Out Your Meal
To complement your Golden Chicken & Cheese Quesadillas, consider these dishes that bring similar textures and tastes.
- For a fresh, crunchy addition, try the Crunchy Taco Slaw Salad, which offers crisp Mexican layers that go well with the cheesy quesadillas.
- If you’re in the mood for something warm and cheesy, the Jalapeno Cheddar Cornbread provides a perfectly moist and cheesy contrast.
Exciting Filling Adaptations & Swaps
Protein Swaps: Instead of chicken, try ground beef seasoned with taco spices, flaky fish, or even plant-based options like seasoned black beans or refried beans for a vegetarian twist.
Vibrant Veggies: Elevate your quesadillas with additions like sautéed onions, sweet corn, baby spinach, or sliced mushrooms. Ensure any added vegetables are cooked down to release excess moisture.
Spice It Up: Introduce a pinch of cayenne pepper or a dash of your favorite hot sauce into the filling for a spicy kick. Cumin, chili powder, or smoked paprika can also add depth and warmth.
Dietary Considerations: Making it Your Own
For those avoiding gluten, corn tortillas or gluten-free flour tortillas work wonderfully, though the cooking time may vary slightly for optimal crispness. Dairy-free cheese alternatives can be used for a dairy-free version, and a hearty black bean and corn mix makes an excellent vegetarian quesadilla.
Prep Smart: Make-Ahead & Storage Tips for Quesadilla Lovers
Can You Prepare Golden Quesadillas Ahead of Time?
Absolutely! The chicken and bell pepper filling can be prepared up to 2 days in advance and stored in an airtight container in the refrigerator. This significantly cuts down on prep time when you’re ready to cook, making weeknight meals a breeze.
Storing Leftover Quesadillas Safely
If you have any delicious leftovers, allow them to cool completely before storing. Place them in an airtight container or wrap them tightly in foil and refrigerate for up to 2-3 days.
Reheating for Optimal Crispness
To revive that irresistible crunch, avoid the microwave! Reheat leftover quesadillas in a dry skillet over medium heat until warmed through and crispy again, about 2-3 minutes per side. Alternatively, a toaster oven or air fryer works exceptionally well for achieving a perfectly golden texture.
Your Golden Chicken & Cheese Quesadillas Questions Answered
What kind of chicken is best for quesadillas?
Cooked shredded chicken breast is ideal, providing a lean protein that blends seamlessly with the other ingredients. A store-bought rotisserie chicken is an excellent shortcut for quick meal prep.
Can I use different cheeses for my Golden Chicken & Cheese Quesadillas?
Yes, absolutely! While cheddar and Mexican blend are excellent, Monterey Jack, Colby, or a combination of these will also provide fantastic melt and flavor. Aim for good melting cheeses.
How do I prevent the tortilla from burning while the cheese melts?
The key is maintaining a consistent medium heat. If your tortilla is browning too quickly, slightly reduce the heat. You can also lightly cover the pan for a minute or two to help the cheese melt from residual steam, then remove to finish crisping.
Is there a gluten-free tortilla option for this recipe?
Yes, corn tortillas are naturally gluten-free and can create a delicious, crisp quesadilla. Gluten-free flour tortillas are also widely available and work just as well.
What’s the best way to get a perfectly even golden crust?
Use consistent medium heat, apply a very light coating of oil, and avoid overcrowding the pan. Gently pressing the quesadilla with your spatula ensures maximum contact with the hot surface, leading to uniform golden crispness.
Ready to Savor the Crunch? Your Golden Quesadilla Adventure Awaits!
You now hold the secrets to crafting the ultimate Golden Chicken & Cheese Quesadillas – a dish that delivers on flavor, texture, and pure comfort. With perfectly seasoned chicken, gooey melted cheese, and that coveted golden, crispy tortilla, this recipe is guaranteed to become a family favorite.
Don’t just dream of that satisfying crunch; make it a reality tonight! Whip up a batch, serve with your favorite sides, and savor every irresistible bite. Share your golden creations with us; we can’t wait to see them!
Chicken Cheese Quesadillas
Course: Main CourseCuisine: MexicanDifficulty: easy4
servings15
minutes20
minutes450
kcal35
minutesAchieve perfectly golden, crispy quesadillas every time with this foolproof recipe. Packed with savory shredded chicken, colorful bell peppers, and gooey melted cheese, these quesadillas deliver satisfying crunch in every bite. Follow our simple steps to avoid soggy tortillas and elevate your weeknight meal.
Ingredients
1 tablespoon vegetable oil, plus more for cooking
1 cup cooked shredded chicken breast
1/2 small red bell pepper, finely diced
1/2 small green bell pepper, finely diced
1/4 teaspoon salt
1/4 teaspoon black pepper
4 medium flour tortillas
2 cups shredded cheddar cheese or Mexican blend
Fresh cilantro for garnish (optional)
Directions
- In a small bowl, combine the shredded chicken, diced red bell pepper, diced green bell pepper, salt, and black pepper. Stir well to ensure the ingredients are evenly mixed and seasoned. This prep helps prevent excess moisture from the raw vegetables steaming the tortilla later.
- Heat a large non-stick skillet or cast-iron pan over medium heat. This step is crucial; a properly heated pan is key to preventing sogginess and achieving even browning. Add just a very light coating of oil to the pan, about 1/2 teaspoon per quesadilla. You want enough to crisp, not enough to fry.
- Place one tortilla into the hot skillet. Immediately sprinkle about 1/4 cup of cheese over one half of the tortilla.
- Evenly spread about 1/4 cup of the chicken and pepper mixture over the cheese.
- Top the chicken mixture with another 1/4 cup of cheese.
- Allow the tortilla to cook undisturbed for 2 to 3 minutes, or until the bottom is golden brown and the cheese is beginning to melt. This initial cooking phase helps to crisp the tortilla bottom before you fold it, creating a protective barrier against moisture from the filling.
- Using a spatula, carefully fold the empty half of the tortilla over the filled half. Press down gently with the spatula to ensure good contact with the pan.
- Continue cooking for another 2 to 3 minutes, gently pressing occasionally, until the second side is golden brown and the cheese is fully melted and gooey. If the pan gets too hot, reduce the heat slightly to avoid burning while ensuring the cheese melts.
- Remove the quesadilla from the pan and place it on a cutting board. Let it rest for a minute or two before slicing into wedges. Garnish with fresh cilantro if desired.
- Repeat with the remaining tortillas and filling, ensuring you re-oil the pan very lightly between each quesadilla if needed. Serve immediately with your favorite sides like salsa or sour cream.
Notes
- Serve immediately with salsa or sour cream.