There’s a special kind of disappointment that comes with cutting into a homemade apple pie, only to find a watery, unset filling. I’ve been there, but after years of perfecting, I’ve finally cracked the code to making the ultimate Grandma’s Apple Crumble Pie, guaranteed to have a perfectly thick, spoonable filling every single time.
This recipe doesn’t just promise deliciousness; it delivers a foolproof method for the comforting classic you’ve always dreamed of, ensuring tender spiced apples and a golden, crisp topping.
Why This Grandma’s Apple Crumble Pie Will Become Your New Favorite
The “Watery Filling Fix” Explained: Your Secret to Perfection
The core innovation of this Grandma’s Apple Crumble Pie recipe lies in its unique apple preparation. We actively draw out and drain excess liquid from the apples before baking.
This simple yet crucial step prevents the filling from becoming diluted and watery during the baking process, ensuring your cornstarch can work its magic for a consistently thick, spoonable result.
Effortless Elegance: Simple Steps, Stunning Results
Despite its gourmet taste and flawless filling, this apple crumble pie is surprisingly easy to make. Utilizing a store-bought crust streamlines the process significantly.
You’ll achieve a bakery-quality dessert with minimal fuss, perfect for both novice and experienced bakers alike.
A Slice of Pure Comfort: Bringing Joy to Every Table
There’s something uniquely heartwarming about a slice of homemade apple pie. This Grandma’s Apple Crumble Pie evokes nostalgia and comfort.
It’s the perfect dessert for family gatherings, holiday tables, or simply to enjoy on a cozy evening, bringing smiles and satisfaction with every bite.
Your Baking Arsenal: Essential Tools & Ingredients for a Stellar Crumble
Gathering Your Gear: Essential Kitchen Tools
To embark on your baking journey, you’ll need a few standard kitchen tools. A 9-inch pie plate is fundamental for shaping your pie.
Large and medium mixing bowls are essential for preparing the filling and crumble separately. Measuring cups and spoons ensure accuracy, while a pastry blender or your fingertips are key for the crumble.
A wire rack for cooling and a baking sheet to catch any drips complete your essential arsenal for this perfect apple crumble pie.
The Foundation: Choosing Your Pie Crust
For convenience and consistent results, this recipe calls for one store-bought 9-inch pie crust. This eliminates the need for making dough from scratch, saving you time and effort.
You can gently flute the edges for a traditional, elegant presentation, or simply press them down for a rustic appeal.
The Heart of the Pie: Selecting and Prepping Apples
The choice of apples is critical for a great apple crumble pie. Opt for firm baking apples such as Honeycrisp or Granny Smith.
These varieties hold their shape well during baking and offer a delightful balance of sweetness and tartness. Ensure they are peeled, cored, and sliced consistently about 1/4 inch thick for even cooking.
For a similar sweet experience, try these cozy baked apples next.
Crafting the Sweet & Spiced Apple Filling
The filling is a symphony of flavors and textures. Granulated sugar provides a classic sweetness, while light brown sugar adds a deep, molasses-rich note.
Ground cinnamon and nutmeg infuse the apples with a warm, comforting spice blend. A touch of salt enhances all these flavors.
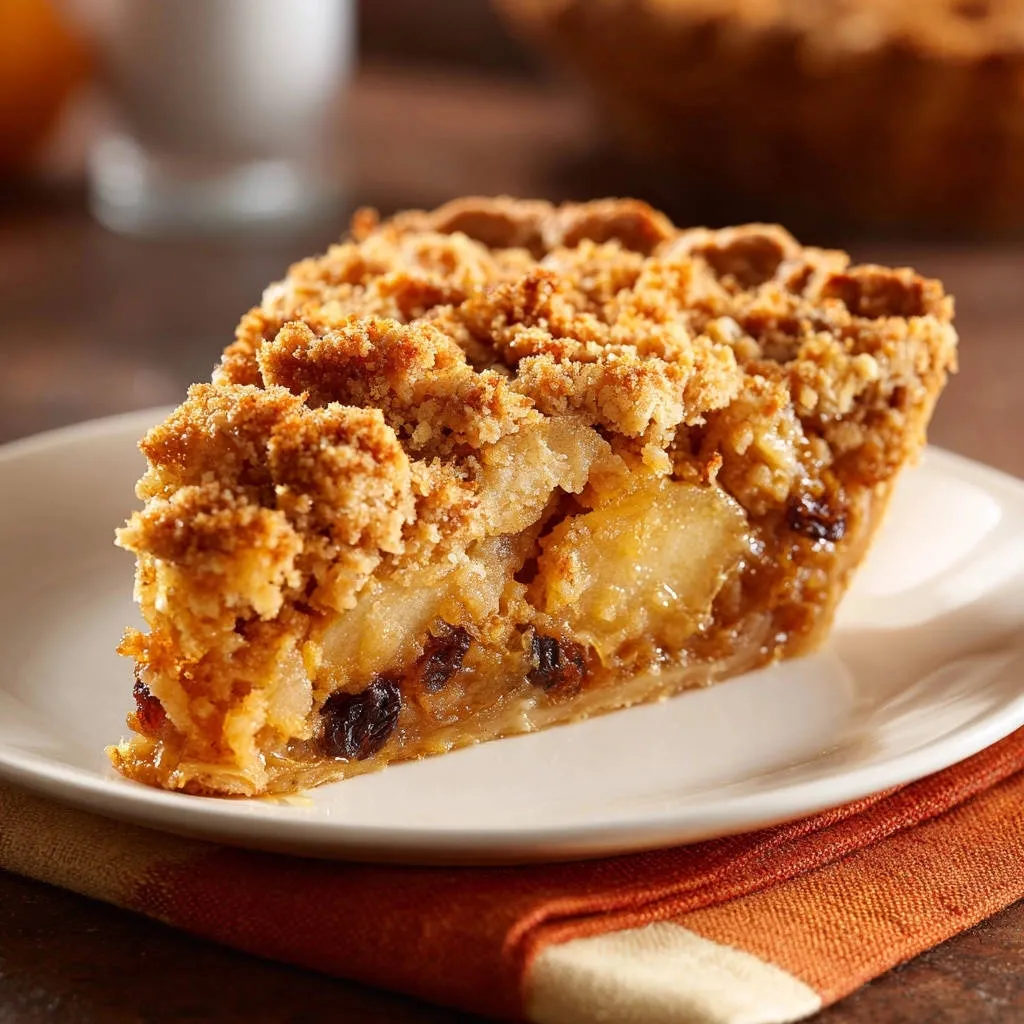
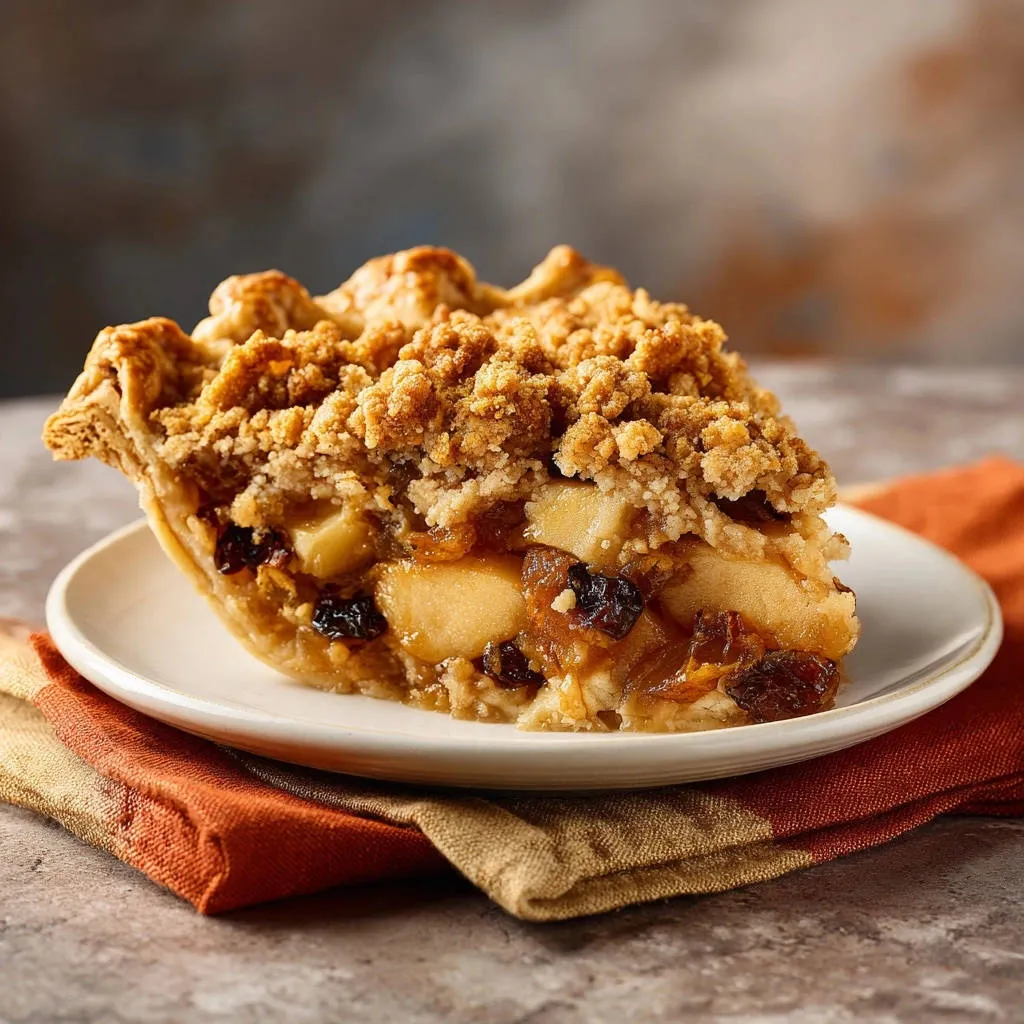
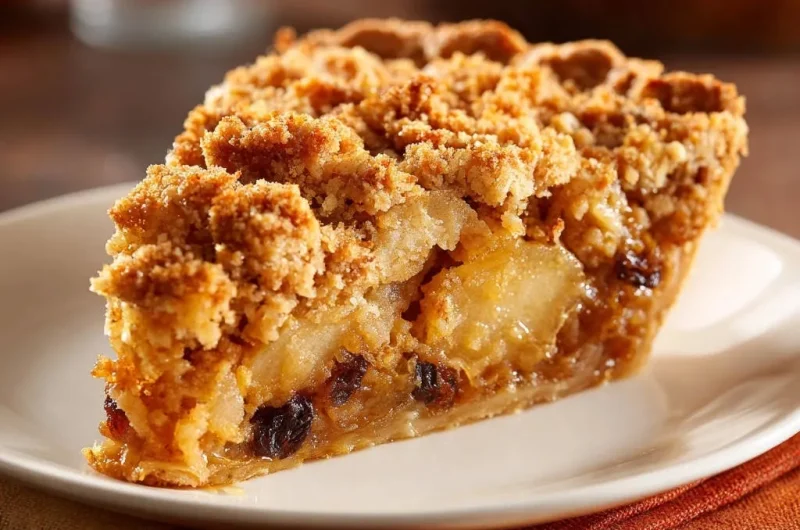
Cornstarch is your secret weapon for a thick, luscious filling, ensuring it sets beautifully. Raisins are an optional but delightful addition, providing pockets of chewy sweetness.
The Irresistible Golden Crumble Topping
The crumble topping brings a wonderful textural contrast. All-purpose flour forms the base, while rolled oats add a delightful chewiness and rustic appeal.
Packed light brown sugar contributes to the rich, caramel-like flavor and golden color. Ground cinnamon and a pinch of salt balance the sweetness and deepen the taste.
Crucially, cold unsalted butter, cut into small cubes, is worked into the dry ingredients. This creates pockets of butter that melt during baking, resulting in a perfectly crisp, golden-brown crumble.
Baking Bliss: Step-by-Step to Your Grandma’s Apple Crumble Pie Perfection
Prepping Your Pie Base and Oven
Preheat your oven to 400 degrees Fahrenheit (200 degrees Celsius). This ensures the oven is at the optimal temperature for the initial bake.
Carefully place your store-bought 9-inch pie crust into a pie plate. Gently flute the edges as desired to create an attractive border for your Grandma’s Apple Crumble Pie.
Unlocking the Secret: The “Watery Filling Fix” Apple Prep
In a large bowl, combine your peeled, cored, and 1/4 inch thick sliced apples with granulated sugar, 1/4 cup brown sugar, 1 teaspoon cinnamon, nutmeg, and 1/4 teaspoon salt. Toss everything thoroughly until the apples are evenly coated with the sugar and spice mixture.
Allow this apple mixture to sit undisturbed for 20-30 minutes. This crucial resting period draws out excess natural liquid from the apples, which is the key to preventing a runny pie filling later.
After resting, you will notice liquid at the bottom of the bowl. Carefully and thoroughly drain off all this excess liquid. Do not skip this step; it is your primary defense against a watery apple pie filling.
Once drained, add the 2 tablespoons of cornstarch and 1/2 cup of raisins (if using) to the apple mixture. Toss thoroughly until the apples are evenly coated with the cornstarch. The cornstarch will now act as your reliable thickener, ensuring a perfectly set filling during baking.
Crafting the Golden, Crumbly Topping
In a separate medium bowl, combine 1 cup all-purpose flour, 1/2 cup rolled oats, 1/2 cup brown sugar, 1/2 teaspoon cinnamon, and 1/4 teaspoon salt. Whisk these dry ingredients together to ensure they are well mixed and evenly distributed.
Add the 1/2 cup (1 stick) of cold unsalted butter, cut into small cubes, to the dry ingredients. Using your fingertips or a pastry blender, quickly work the butter into the mixture until it resembles coarse crumbs with some pea-sized pieces remaining. This texture is ideal for a wonderfully crisp and distinct crumbly topping.
Assembling and Initial Bake
Pour the prepared, drained, and cornstarch-coated apple filling evenly into the pie crust, spreading it out to fill the base.
Generously sprinkle the crumble topping over the apple filling, ensuring it covers the surface uniformly to create that irresistible golden crust.
Place the assembled pie onto a baking sheet to catch any potential drips or bubbling over. Bake for 20 minutes at the initial temperature of 400 degrees Fahrenheit (200 degrees Celsius).
The Long, Slow Bake for Perfection
After the initial 20 minutes, reduce the oven temperature to 375 degrees Fahrenheit (190 degrees Celsius). Continue to bake the pie for another 40-50 minutes, or until the crumble topping is beautifully golden brown, the apple filling is visibly bubbling around the edges, and a knife inserted into an apple slice feels tender.
This two-stage baking process ensures the apples cook through thoroughly and the cornstarch has ample time to properly set the filling, preventing any runniness.
The Patience of Cooling: The Final Crucial Step
Once baked, carefully transfer the pie to a wire rack. Let it cool completely for at least 3-4 hours before slicing and serving.
This extended cooling period is absolutely critical for the filling to fully set up and firm, guaranteeing a perfectly spoonable slice and preventing any disappointing runniness in your Grandma’s Apple Crumble Pie.
Mastering Your Pie: Expert Tips for a Flawless Grandma’s Apple Crumble Pie
Don’t Skimp on Draining the Apples
This is arguably the most important tip for a perfect Grandma’s Apple Crumble Pie! The 20-30 minute rest and subsequent draining of the apple liquid are non-negotiable for a thick, non-watery filling. Patience here pays off immensely with a beautifully set pie.
The Art of Cold Butter for the Crumble
Always ensure your butter for the crumble topping is very cold and cut into small cubes. This helps create pockets of steam during baking, which leads to a wonderfully crisp and distinct crumbly texture that truly elevates the pie.
Embrace the Two-Stage Bake
Starting your apple crumble pie at a higher temperature then reducing it ensures a quick initial set for the crust and a golden crumble. The subsequent lower temperature allows the apples to cook through gently without burning the top. Trust this process for optimal results.
The Unsung Hero: The Cooling Process
It’s incredibly tempting to cut into a warm, aromatic pie, but waiting the full 3-4 hours (or even longer) for cooling is absolutely essential. This allows the cornstarch to fully set the filling, giving you that perfect, neat sliceable consistency every time.
Cover if Browning Too Fast
During the longer baking time, if you notice your crumble topping is browning more quickly than desired, simply tent the pie lightly with aluminum foil. This will protect the top while the apples continue to cook and tenderize below.
Solving Common Pie Predicaments: Troubleshooting Your Crumble Pie
My Apple Pie Filling is Still Runny!
A runny filling typically indicates either insufficient draining of the apples during the initial prep or not enough cooling time after baking. Next time, ensure you drain thoroughly after the 20-30 minute rest and extend the cooling period significantly to allow the cornstarch to fully set.
Another factor could be that your cornstarch didn’t fully activate. Make sure the pie is visibly bubbling vigorously around the edges during the later stages of baking, which indicates the filling is cooking properly and thickening.
The Crumble Topping Isn’t Crispy Enough (or it’s Burnt!)
For a consistently crispier topping, ensure your butter is very cold when you’re mixing the crumble. Avoid overworking the mixture, which can melt the butter prematurely. If the topping is burning, lightly tent the pie with aluminum foil during the last 20-30 minutes of baking.
My Apples Are Still Hard After Baking
Hard apples in your pie can be due to two main reasons: your apple slices were too thick, or the pie didn’t bake long enough at the lower temperature. Ensure your apple slices are no thicker than 1/4 inch for even cooking, and always bake until a knife inserted into an apple slice feels tender, even if it requires a bit more time in the oven.
Enjoying Your Masterpiece: Serving, Storing & Making Ahead
Delicious Serving Suggestions for Your Crumble Pie
This Grandma’s Apple Crumble Pie is absolutely divine served warm or at room temperature. It’s fantastic on its own, but truly shines with a generous scoop of high-quality vanilla bean ice cream.
A dollop of freshly whipped cream or a decadent drizzle of homemade caramel sauce also makes for an unforgettable dessert experience.
Storing Leftovers to Keep it Fresh
Once your apple crumble pie has completely cooled, cover it loosely with plastic wrap or aluminum foil. It can be stored at room temperature for up to 2 days, maintaining its freshness and flavor.
For longer storage, refrigerate the pie for up to 4-5 days. Always ensure it’s fully cooled before covering to prevent condensation.
Make-Ahead & Freezing Options
To prepare ahead, you can make the apple filling (without the cornstarch) and the crumble topping separately up to a day in advance. Store both components in the refrigerator, adding the cornstarch to the apples just before assembling the pie.
For freezing, bake the pie completely and allow it to cool thoroughly. Then, wrap it tightly in several layers of plastic wrap and aluminum foil. It can be frozen for up to 3 months. Thaw overnight in the refrigerator and gently reheat in a low oven (300°F/150°C) until warmed through.
Your Grandma’s Apple Crumble Pie Questions Answered (FAQs)
What are the best apples for apple crumble pie?
For the best texture and flavor balance in your apple crumble pie, a mix of tart and sweet apples works wonderfully. Excellent choices include Honeycrisp, Granny Smith, Braeburn, Fuji, or Golden Delicious. Avoid using very soft or mealy apple varieties, as they can turn to mush during baking.
Can I make this pie without a store-bought crust?
Absolutely! If you have a beloved homemade pie crust recipe, feel free to use it as the base for this apple crumble pie. For this specific recipe, an unbaked crust works perfectly fine; you typically won’t need to blind-bake it.
Can I substitute the cornstarch for another thickener?
Yes, you can substitute cornstarch with other thickeners. If using all-purpose flour, you’ll need about 4 tablespoons for every 2 tablespoons of cornstarch, as flour has less thickening power. Tapioca starch is another excellent alternative and can often be used in similar quantities to cornstarch for a clear, glossy filling.
How do I know when my apple crumble pie is perfectly baked?
You’ll know your apple crumble pie is perfectly baked when the crumble topping is a beautiful golden-brown, and you see clear juices visibly bubbling around the edges of the pie. A knife inserted into an apple slice (gently lift a bit of crumble if needed) should meet little resistance, indicating the apples are tender. The internal temperature of the filling should be around 200-205°F (93-96°C).
What if I don’t like raisins?
No problem at all! The raisins in this Grandma’s Apple Crumble Pie are entirely optional and can be omitted without affecting the outcome. If you’d like a different fruity element, you could substitute them with dried cranberries or chopped dried apricots for a unique twist.
Bake, Share, and Savor: Your New Go-To Apple Crumble Pie Recipe
With the simple yet incredibly effective “watery filling fix” method, you now possess the secret to baking a Grandma’s Apple Crumble Pie that’s consistently perfect – no more soggy bottoms or runny slices! This recipe promises a heartwarming aroma, tender spiced apples, and a crisp, buttery crumble that will undoubtedly earn you rave reviews from everyone who tries it.
We encourage you to try this foolproof recipe, share it with loved ones, and savor every spoonful of this comforting classic. Don’t forget to share your baking triumphs with us; we love to see your delicious creations!
Apple Crumble Pie
Course: DessertCuisine: AmericanDifficulty: medium8
servings45
minutes1
hour450
kcal300
minutesTired of watery apple pies? This recipe guarantees a perfectly thick, spoonable apple filling every time. Featuring a buttery oat crumble topping, it’s a comforting classic that will impress.
Ingredients
For the Pie Crust:
1 store-bought pie crust (9-inch)
For the Apple Filling:
6 medium baking apples (like Honeycrisp or Granny Smith), peeled, cored, and sliced 1/4 inch thick
1/2 cup granulated sugar
1/4 cup packed light brown sugar
1 teaspoon ground cinnamon
1/4 teaspoon ground nutmeg
1/4 teaspoon salt
2 tablespoons cornstarch
1/2 cup raisins
For the Crumble Topping:
1 cup all-purpose flour
1/2 cup rolled oats
1/2 cup packed light brown sugar
1/2 teaspoon ground cinnamon
1/4 teaspoon salt
1/2 cup (1 stick) cold unsalted butter, cut into small cubes
Directions
- Preheat your oven to 400 degrees Fahrenheit (200 degrees Celsius). Place your pie crust into a 9-inch pie plate. Flute the edges as desired.
- For the Filling (The Watery Filling Fix!): In a large bowl, combine the sliced apples, granulated sugar, 1/4 cup brown sugar, 1 teaspoon cinnamon, nutmeg, and 1/4 teaspoon salt. Toss well to coat. Let the mixture sit for 20-30 minutes. This crucial step draws out excess liquid from the apples.
- After 20-30 minutes, you’ll notice liquid at the bottom of the bowl. Carefully drain off this excess liquid. This is key to preventing a runny pie.
- Once drained, add the cornstarch and raisins to the apple mixture. Toss thoroughly until the apples are evenly coated. The cornstarch will act as your thickener, ensuring a perfectly set filling.
- For the Crumble Topping: In a separate medium bowl, combine the flour, oats, 1/2 cup brown sugar, 1/2 teaspoon cinnamon, and 1/4 teaspoon salt. Whisk to combine. Add the cold butter cubes. Using your fingertips or a pastry blender, work the butter into the dry ingredients until the mixture resembles coarse crumbs with some pea-sized pieces remaining.
- Pour the prepared apple filling into the pie crust, spreading it evenly.
- Evenly sprinkle the crumble topping over the apple filling.
- Place the pie on a baking sheet to catch any potential drips. Bake for 20 minutes at 400 degrees Fahrenheit (200 degrees Celsius).
- Reduce the oven temperature to 375 degrees Fahrenheit (190 degrees Celsius) and continue to bake for another 40-50 minutes, or until the topping is golden brown, the filling is visibly bubbly, and a knife inserted into an apple slice feels tender. The longer baking time at a slightly lower temperature ensures the apples fully cook and the thickener properly sets the filling.
- Let the pie cool completely on a wire rack for at least 3-4 hours before slicing and serving. This allows the filling to fully set up and prevents it from being runny.
Notes
- Crucial to let apples sit and drain excess liquid, and cool completely for a perfectly set filling.