The quest for the perfect Grandma’s Apple Crumble Pie often hits a snag: that disheartening soggy bottom crust. I’ve been there, endlessly tweaking, until I discovered a simple, ingenious trick that changed everything.
This recipe isn’t just about delicious apples and a golden crumble; it’s about consistently achieving a beautifully crisp base, transforming your baking from good to absolutely legendary.
The Secret to a Perfect Apple Crumble Pie: A Crisp Bottom Every Time
There’s nothing quite like the warmth and aroma of a freshly baked apple pie. However, the joy can quickly turn to disappointment when slicing into a beautiful pie, only to find the bottom crust has succumbed to a sad, damp sogginess.
For a similar crisp base that avoids sogginess, check out glazed orange creamsicle cookies.
This common pie predicament arises from the moisture released by the apple filling during baking. Traditionally, it steams the bottom crust, preventing it from ever crisping up.
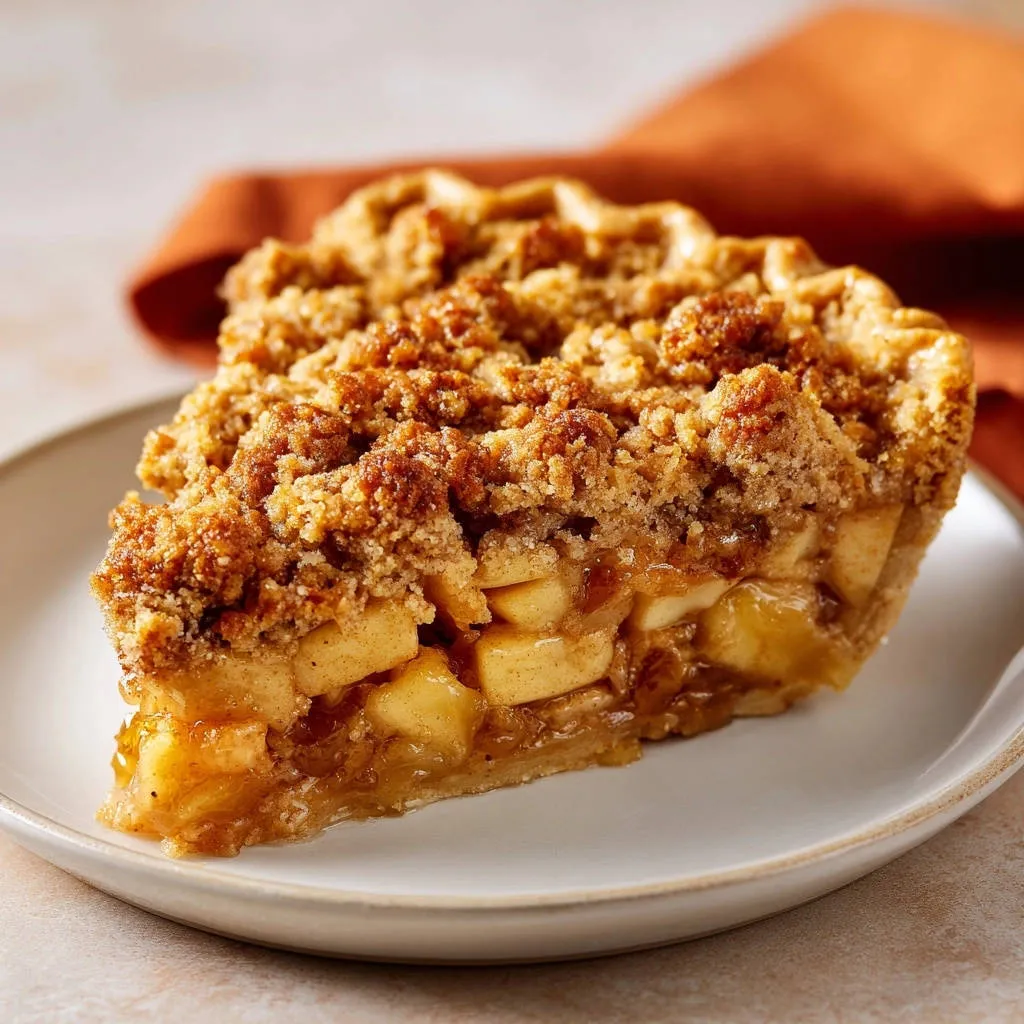
Our Grandma’s Apple Crumble Pie recipe solves this age-old problem with an unexpectedly brilliant secret: a protective layer of finely crushed vanilla wafer or graham cracker crumbs.
This simple addition acts as a moisture barrier, eagerly absorbing any juices from the apples before they can reach the crust. The result? A perfectly crisp, flavorful bottom crust every single time, elevating this classic dessert to new heights of deliciousness.

Gather Your Sweet Essentials: Key Ingredients for This Delightful Pie
The Heart of the Filling: Choosing Your Apples
For the quintessential apple pie experience, selecting the right apples is paramount. A blend of varieties offers a more complex and engaging flavor profile.
Sweet & Tart Balance: Combine a firm, tart apple like Granny Smith with a sweeter, crisp variety such as Honeycrisp, Fuji, or Braeburn.
Preparation: Always peel, core, and dice your apples to a uniform size (about 1/2-inch pieces). This ensures even cooking and a consistent texture throughout the pie.
Sweet & Spicy Harmony: Filling Enhancers
These ingredients work in concert to create a rich, perfectly spiced apple filling.
Granulated & Brown Sugar: Granulated sugar provides foundational sweetness, while packed light brown sugar adds a deep, molasses-like warmth and moisture.
All-Purpose Flour: This acts as a crucial thickening agent, preventing a watery filling and ensuring a satisfying, cohesive texture.
Ground Cinnamon & Nutmeg: These classic spices are non-negotiable, infusing the apples with aromatic warmth that defines an apple crumble pie.
Lemon Juice: A splash of lemon juice brightens the apple flavor, prevents browning, and balances the sweetness, adding a subtle tart lift.
The Golden Topping: Crumble Ingredients
A truly exceptional crumble topping is all about texture and rich flavor.
All-Purpose Flour: Forms the structural base of your crumble, providing its bulk and tenderness.
Packed Light Brown Sugar: Contributes a moist, caramel-like sweetness and helps achieve that desirable golden-brown color.
Ground Cinnamon & Salt: Cinnamon enhances the overall warmth, while a pinch of salt balances the sweetness and brings out the flavors.
Cold Unsalted Butter: This is the secret to a perfectly crumbly, not dense, topping. Cut into small cubes, it creates steam pockets during baking for a tender, crisp result.
Our Crisp Bottom Hero: Vanilla Wafers or Graham Crackers
This is the star ingredient that sets our Grandma’s Apple Crumble Pie apart from the rest.
Finely crushed vanilla wafer or graham cracker crumbs form an indispensable layer. They absorb excess moisture from the apple filling, directly preventing the bottom crust from becoming soggy.
Beyond moisture absorption, these crumbs add a subtle, sweet, and comforting flavor note, enhancing the overall deliciousness without overpowering the apples.
Pantry Staples: Crust & Butter
Every great pie starts with a solid foundation and rich flavor.
Pie Crust: A good quality store-bought refrigerated pie crust is perfectly acceptable for convenience, or you can use your favorite homemade recipe for an extra touch.
Unsalted Butter: We specify unsalted butter for the crumble. This allows you to control the exact amount of salt in the recipe, ensuring perfect flavor balance.
Essential Kitchen Gear for Your Grandma’s Apple Crumble Pie Journey
9-inch Pie Dish: The standard size for this recipe, ensuring even baking.
Large Mixing Bowls (at least two): For preparing the apple filling and the crumble topping separately.
Pastry Blender or Your Fingertips: Essential for cutting cold butter into the crumble mixture effectively.
Peeler, Corer, and Sharp Knife: For efficient apple preparation.
Wire Rack: Crucial for cooling the pie completely and preventing condensation.
Baking Sheet: To catch any potential drips during baking, keeping your oven clean.
Measuring Cups and Spoons: For accurate ingredient proportions.
Fork: For pricking the pie crust, a key step for the crisp bottom.
Bake with Confidence: Step-by-Step Guide to Grandma’s Apple Crumble Pie
Preparation Steps
- Preheat & Prep:
Set your oven to 400°F (200°C) and prepare your 9-inch pie dish.
Gather all your ingredients and tools beforehand for a smooth baking process, often called “mise en place,” making your cooking efficient.
- Craft the Apple Filling:
In a large bowl, gently toss the diced apples with granulated sugar, 1/4 cup brown sugar, 1/4 cup flour, 1 teaspoon cinnamon, nutmeg, and lemon juice.
Ensure the apples are evenly coated; this mixture will become the luscious, spiced heart of your Grandma’s Apple Crumble Pie.
- Assemble the Crumble Topping:
In a separate medium bowl, combine 1 cup flour, 1/2 cup brown sugar, 1/2 teaspoon cinnamon, and salt. Add the cold butter cubes.
Using your fingertips or a pastry blender, cut the butter into the dry ingredients until the mixture resembles coarse crumbs with some pea-sized pieces of butter remaining. This specific texture is key for a tender, perfectly crisp crumble topping.
The Crisp Bottom Innovation
- The Game-Changing Crumb Layer:
Lightly prick the bottom of your pie crust all over with a fork. This helps release steam and prevents air pockets.
Then, sprinkle the 1/2 cup of crushed vanilla wafer or graham cracker crumbs evenly over the bottom of the pie crust.
This crucial protective layer acts as a powerful moisture barrier, absorbing juices from the apples during baking and guaranteeing a gloriously crisp bottom crust, preventing dreaded sogginess.
Filling & Baking
- Layer the Filling:
Carefully pour the prepared apple mixture evenly over the cracker crumbs in the prepared pie crust.
Distribute it well to ensure an even bake and consistent apple-to-crumble ratio.
- Add the Crumble:
Evenly scatter the crumble topping over the apples, ensuring good coverage across the entire surface for that signature golden, textured crust.
- Initial Bake:
Place the pie on a baking sheet to catch any potential drips and bake for 20 minutes at 400°F (200°C).
This initial high heat helps set the crust, begins to tenderize the apples, and activates the flavors, initiating a beautiful caramelization.
- Complete Baking:
Reduce the oven temperature to 375°F (190°C) and continue baking for an additional 40 to 50 minutes.
The pie is ready when the crumble topping is a rich golden brown, the apple filling is visibly bubbly around the edges, and the apples are tender when pierced with a thin knife.
If the crust edges start to brown too quickly before the filling is fully cooked, loosely cover them with aluminum foil to protect them.
The Essential Cooling Phase
- Cool to Perfection:
This step is absolutely critical and non-negotiable for a perfect Grandma’s Apple Crumble Pie! Allow the pie to cool completely on a wire rack for at least 2 to 3 hours before slicing and serving.
Proper cooling allows the hot apple filling to properly set, firming up and preventing it from being runny. It also ensures clean, beautiful slices and crucially prevents the bottom crust from re-absorbing any remaining moisture and becoming soggy later.
Chef’s Secrets: Elevating Your Grandma’s Apple Crumble Pie Experience
For the Perfect Filling
Apple Varieties Matter: Use a mix of sweet and tart apples (e.g., Honeycrisp, Granny Smith, Fuji) for a balanced flavor profile and varied texture in your filling. This adds complexity and depth to every bite.
Don’t Skip the Lemon Juice: It’s not just for flavor; lemon juice brightens the apple taste and helps prevent the apples from browning excessively while prepping, maintaining a vibrant look.
Gentle Handling: When tossing the apples with the other filling ingredients, be gentle to avoid bruising them. Bruised apples can release excessive moisture during baking, impacting pie consistency.
Achieving the Best Crumble
Keep Butter Cold: Ensure your butter for the crumble topping is very cold and cut into small cubes. This technique creates pockets of steam during baking, leading to a perfectly crisp and tender topping with delightful texture.
Texture is Key: Aim for a crumble mixture that resembles coarse crumbs with some pea-sized pieces of butter still visible. Avoid overworking it into a paste, which would result in a dense, less appealing topping.
Mastering the Bake
Trust the Cooling Time: The 2-3 hour cooling period is non-negotiable for a set filling and a truly crisp bottom crust. Patience is key for perfection, allowing flavors to meld and structure to firm.
Watch for Doneness Cues: Beyond the timer, look for visual signs: a rich golden-brown crumble, a visibly bubbly filling (especially around the edges), and apples that yield easily when pierced with a thin skewer. These are the true indicators of readiness.
Troubleshooting Common Pie Challenges: Solutions for Your Crumble Pie
Soggy Bottom Crust
This Grandma’s Apple Crumble Pie recipe directly addresses soggy bottoms with the ingenious cracker crumb layer! Ensure you don’t skip this critical step and that your pie cools completely on a wire rack for at least 2-3 hours to prevent re-absorption of moisture.
Runny Filling
A runny filling can often be attributed to improper cooling, or using very high-moisture apples without enough thickener. Ensure adequate cooling time, and consider adding a touch more flour (an extra tablespoon) to your apple mixture if your apples are particularly juicy.
Burnt Crumble or Crust Edges
If you notice the crumble or crust edges browning too quickly during baking, loosely tent the pie with aluminum foil. This clever trick protects the sensitive crust while allowing the rest of the pie to cook through evenly.
Hard Apples After Baking
Hard apples usually mean they haven’t cooked long enough. Ensure your apples are diced to an even size for consistent cooking and that you’re baking until they are truly tender when pierced with a knife. You may simply need a few extra minutes in the oven.
Enjoying Your Masterpiece: Serving, Storage, and Prep Tips
Perfect Pairings: How to Serve Grandma’s Apple Crumble Pie
Serve your Grandma’s Apple Crumble Pie warm or at room temperature for the best experience. The flavors and textures truly shine when not too cold.
Complementary Sweet Treats
After enjoying that apple crumble pie, you might be in the mood for more comforting baked goods.
- For a breakfast or brunch option that also features warm spices, consider making a batch of fluffy pumpkin spice pancakes.
- If you’re looking for another classic, sweet baked item to enjoy, try your hand at making homemade cinnamon rolls with their soft, spiced centers.
A generous scoop of premium vanilla bean ice cream is a classic complement, melting delicately into the warm, spiced apple filling, creating a luxurious contrast.
Other delightful additions include a dollop of freshly whipped cream, a luscious drizzle of homemade caramel sauce, or a sprinkle of toasted pecans for an extra layer of crunch and nutty flavor.
Keeping it Fresh: Storage Instructions
Store any leftover pie loosely covered at room temperature for up to 2 days, especially if you plan to consume it quickly. This maintains the crumble’s texture best.
For longer storage, or in warmer climates, refrigerate the pie, well-covered, for up to 4-5 days. Ensure it’s fully cooled before chilling to prevent condensation.
Reheating individual slices gently in the oven (around 300°F/150°C for 10-15 minutes) can help crisp up the crumble again, reviving its fresh-baked appeal.
Plan Ahead: Make-Ahead Tips
You can efficiently prepare the apple filling mixture and the crumble topping a day in advance to save time on baking day.
Store the apple mixture, covered, in the refrigerator, and the crumble in an airtight container in the fridge. This keeps everything fresh and ready.
Assemble and bake the pie fresh for the best results, as this ensures the crispiest crust. If starting with chilled components, simply add a few extra minutes to the bake time.
Your Grandma’s Apple Crumble Pie Questions Answered
Can I use gluten-free flour for the crumble?
Yes, you can absolutely substitute a 1:1 gluten-free all-purpose flour blend for the regular flour in the crumble topping. For the best texture, ensure your chosen blend contains xanthan gum, or add 1/4 teaspoon per cup of flour.
What kind of pie crust is best for this recipe?
A good quality store-bought refrigerated pie crust works perfectly for convenience and reliability. If you desire an extra layer of deliciousness and have the time, a homemade all-butter pie crust will elevate your Grandma’s Apple Crumble Pie even further.
Can I freeze Grandma’s Apple Crumble Pie?
Yes, you can successfully freeze a baked pie. Once completely cooled, wrap it tightly first in plastic wrap, then in a layer of aluminum foil to prevent freezer burn. It can be frozen for up to 2-3 months.
To serve, thaw the pie overnight in the refrigerator. For best results, reheat gently in a 350°F (175°C) oven until warmed through and the crumble is crisp again.
How do I know when the apples are perfectly tender?
To accurately check for tenderness, insert a thin knife or skewer into the center of the pie through a gap in the crumble. If it slides through the apples with little to no resistance, they are perfectly cooked and tender.
Is there a substitute for vanilla wafers/graham crackers?
While vanilla wafers or graham crackers are ideal for their specific absorbency and complementary flavor, you could experiment with other finely crushed dry cookies (like shortbread) or even a very thin layer of toasted panko breadcrumbs. Be aware that substituting may alter the final flavor and moisture absorption, so results may vary.
Bake, Share, and Savor: Your Perfect Grandma’s Apple Crumble Pie Awaits!
You now possess the secret to a Grandma’s Apple Crumble Pie that promises not just incredible flavor, but also that coveted crisp bottom crust every single time. This recipe is more than just a dessert; it’s a labor of love, a centerpiece for gatherings, and a warm, comforting hug in every single bite.
For a similar sweet finish, try creamy lemon crumble bars next.
Don’t let the fear of a soggy crust deter you any longer. Embrace this simple yet revolutionary trick and watch as your apple crumble pie earns rave reviews from everyone lucky enough to try a slice.
Go forth, bake with confidence, and create wonderful memories around a slice of pure, unadulterated bliss. We’d absolutely love to hear about your baking success! Share your ‘Grandma’s Apple Crumble Pie’ triumphs in the comments below.
Apple Crumble Pie
Course: DessertCuisine: AmericanDifficulty: medium4
9-inch pie25
minutes1
hour5
minutes550
kcal240
minutesTired of soggy pie bottoms? This recipe for Grandma’s Apple Crumble Pie provides the ultimate solution: a special crumb layer for a perfectly crisp crust. Enjoy tender spiced apples beneath a golden, buttery crumble topping, ensuring a delightful dessert that’s never a disappointment.
Ingredients
1 store-bought or homemade pie crust, for a 9-inch pie
6 cups apples, peeled, cored, and diced (about 4-5 medium apples)
1/2 cup granulated sugar
1/4 cup packed light brown sugar
1/4 cup all-purpose flour
1 teaspoon ground cinnamon
1/4 teaspoon ground nutmeg
1 tablespoon lemon juice
1 cup all-purpose flour (for crumble)
1/2 cup packed light brown sugar (for crumble)
1/2 teaspoon ground cinnamon (for crumble)
1/4 teaspoon salt (for crumble)
1/2 cup cold unsalted butter, cut into small cubes (for crumble)
1/2 cup finely crushed vanilla wafer or graham cracker crumbs
Directions
- Preheat your oven to 400 degrees Fahrenheit.
- In a large bowl, gently toss the diced apples with granulated sugar, 1/4 cup brown sugar, 1/4 cup flour, 1 teaspoon cinnamon, nutmeg, and lemon juice until the apples are evenly coated. Set aside.
- Prepare the crumble topping: In a separate medium bowl, combine 1 cup flour, 1/2 cup brown sugar, 1/2 teaspoon cinnamon, and salt. Add the cold butter cubes. Use your fingertips or a pastry blender to cut the butter into the dry ingredients until the mixture resembles coarse crumbs with some pea-sized pieces of butter remaining.
- To ensure a perfectly crisp bottom crust, this is the key step: Lightly prick the bottom of your pie crust all over with a fork. Then, sprinkle the 1/2 cup of crushed vanilla wafer or graham cracker crumbs evenly over the bottom of the pie crust. This protective layer absorbs moisture from the apples during baking, preventing sogginess.
- Pour the apple mixture evenly over the cracker crumbs in the pie crust.
- Evenly scatter the crumble topping over the apples.
- Place the pie on a baking sheet to catch any drips and bake for 20 minutes at 400 degrees Fahrenheit.
- Reduce the oven temperature to 375 degrees Fahrenheit and continue to bake for an additional 40 to 50 minutes, or until the crumble topping is golden brown, the filling is bubbly, and the apples are tender when pierced with a knife. If the crust edges start to brown too quickly, you can cover them loosely with foil.
- Let the pie cool completely on a wire rack for at least 2 to 3 hours before slicing and serving. This allows the filling to set properly, ensuring clean slices and preventing any remaining moisture from softening the bottom crust.
Notes
- Cooling completely for 2-3 hours is crucial for the filling to set and the bottom crust to remain crisp.