I spent years battling tough stew meat, constantly disappointed when my classic dinners turned out dry or chewy. Mastering this specific technique for a Hearty Slow-Cooked Beef Stew guarantees that meltingly tender result every single time.
The secret lies in the focus on high-heat searing and a long, undisturbed braise, transforming humble beef chuck into incredibly rich, luxurious comfort food.
Stop Making Tough Stew: Why This Recipe Works Every Time
Achieving fall-apart meat in a stew is not magic; it’s science rooted in specific cooking techniques. This method ensures maximum flavor retention and complete breakdown of tough muscle fibers.
The Critical Pre-Step: Achieving Maximum Tenderness Through Searing
Proper preparation is the foundation of flavor and texture. Patting the beef completely dry prevents moisture from hitting the hot pan, which is crucial for achieving a deep, flavorful brown crust rather than steaming the meat.
You must also season the beef aggressively upfront with salt and pepper. Slow-cooked dishes absorb a lot of salt, so coating the cubes heavily ensures the flavor penetrates deep into the core of the meat during the long braise.
The Low-and-Slow Commitment: The Guaranteed Tenderizing Braise
The long, low-temperature braise is non-negotiable for tender stew meat. Beef chuck contains tough connective tissues called collagen, which only break down into soft gelatin below the boiling point (around 205°F).
Cooking for 2 hours and 30 minutes, covered and undisturbed, allows the collagen to fully dissolve. This extended time guarantees fork-tender, shreddable results that literally melt in your mouth.
Flavor Layering: Building Depth with Tomato Paste and Deglazing
Stirring tomato paste into the aromatics and cooking it for two minutes on the stovetop deepens its inherent sweetness and richness, a technique known as caramelizing the paste.
Deglazing-scraping up the ‘fond’ (browned bits) left by the searing beef-incorporates concentrated, caramelized meat flavor directly into the cooking liquid, building the ultimate savory depth for your stew.
The Essential Building Blocks of Your Deeply Flavored Stew
Every ingredient plays a crucial, supportive role in creating the layered flavor profile of this comfort classic. Quality and timing are key to success.
Choosing the Right Meat: Chuck vs. Round for Slow Cooking
Beef chuck or beef round are the best choices because they are naturally high in collagen and fat marbling, which benefit most from a long, moist cooking environment.
For even more tender results, check out this guide to slow-braised beef short ribs.
Cutting the meat into uniform 1-inch cubes ensures even searing and guarantees that all pieces finish cooking at the same time, preventing some pieces from becoming overcooked while others remain tough.
For similarly meltingly tender results, explore slow braised beef short ribs.
Aromatic Anchors: Onion, Garlic, and Deepening the Base
Diced onion and minced garlic provide the fundamental aromatic base for the entire dish. The onion must be cooked until translucent and softened before adding the garlic to prevent the garlic from burning and turning bitter.
Cooking down these anchors before adding liquid concentrates their sweetness and depth, which is then absorbed by the broth as the stew simmers.
The Liquid and Herb Profile: Boosting Depth with Worcestershire, Thyme, and Rosemary
High-quality beef broth is essential as it serves as the primary flavor vehicle for the stew. Ensure the liquid fully covers the meat, as this provides the necessary moisture for the long braise.
Worcestershire sauce adds fermented complexity and a slightly tangy punch, while dried thyme and rosemary infuse the classic, earthy notes expected in a rich, slow-cooked beef stew.
Vegetable Timing: Ensuring Carrots and Celery Are Not Mushy
Carrots and celery require longer cooking than frozen vegetables, which is why they are added when the meat is almost tender, during the last 30 minutes of cooking.
Quick-cooking, tender ingredients like corn and peas are highly sensitive to heat and should only be stirred in during the final five minutes to preserve their bright color and tender, sweet texture.
The Right Tools for Stew Perfection (The Dutch Oven Difference)
Using the correct equipment is essential for maintaining the precise low heat required to break down tough connective tissues.
Why a Heavy-Bottomed Dutch Oven is Non-Negotiable
A heavy-bottomed Dutch oven provides superior heat retention and distribution, which is necessary to maintain a consistent, low temperature during the 2.5-hour braise.
Its heavy, tight-fitting lid minimizes steam loss. This keeps the critical moisture inside the pot, ensuring the beef remains submerged and moist while the tough collagen breaks down.
Prep Essentials: Heavy Knives and Tongs
A sharp, heavy chef’s knife makes quick work of preparing large quantities of root vegetables and ensuring uniform cubes of beef, which aids in even cooking.
Long metal tongs are essential for safely handling and flipping the searing beef cubes in the hot oil. They prevent overcrowding and allow you to remove the meat without sacrificing the valuable fond.
Your Step-by-Step Guide to the Hearty Slow-Cooked Beef Stew Method
- Prepare the Beef for Maximum Tenderness
Pat the beef cubes completely dry using paper towels to ensure they will sear rather than steam. Season all sides of the beef aggressively with salt and freshly ground black pepper.
- Sear the Meat in Small Batches
Heat the vegetable oil in your large Dutch oven over high heat until shimmering. Sear the beef in small batches, ensuring you do not overcrowd the pot, which would lower the temperature.
Sear the meat on all sides until a deep brown crust forms, about two minutes per side. This crust is the essential flavor foundation; remove the seared beef and set it aside.
- Build the Base Aromatics and Tomato Paste
Reduce the heat to medium. Add the diced onion and cook until softened, about five minutes. Then, add the minced garlic and cook for one minute until it becomes highly fragrant.
Stir in the tomato paste and continue cooking for two minutes. This caramelization step removes any raw acidity and deepens the paste’s inherent sweetness.
- Deglaze the Pot and Combine Liquids
Pour in approximately 1/2 cup of the beef broth and scrape up any browned bits (fond) from the bottom of the pot using a wooden spoon. This transfers all that caramelized meat flavor into your sauce.
Return the seared beef to the pot. Add the remaining beef broth, Worcestershire sauce, dried thyme, and dried rosemary. The liquid must fully cover the meat.
- The Critical Tenderizing Braise (2.5 Hours)
Bring the mixture briefly to a simmer, then immediately reduce the heat to the absolute lowest setting. Cover the pot tightly with the lid.
Cook the stew for 2 hours and 30 minutes without lifting the lid. This commitment to low, slow heat allows the connective tissues in the beef to completely break down into gelatin.
Do not be tempted to check on the stew or stir it; keeping the heat consistent is the key to achieving guaranteed tender results.
- Add the Firmer Vegetables (Carrots and Celery)
After 2 hours and 30 minutes, the meat should be easily pierced with a fork. Add the pre-cut carrots and celery to the stew liquid.
Continue to cook, covered, for another 30 minutes until the carrots are tender but still retain a slight bite; they should not be mushy.
- Finish the Stew with Quick-Cooking Vegetables and Seasoning
Stir in the corn kernels and peas during the last five minutes of cooking. Their latent heat will warm them through perfectly without overcooking.
Taste the finished stew and adjust the seasoning with additional salt and pepper as needed. This final taste test is critical, as flavors often concentrate or dilute during the braise.
- Serve Immediately with Garnish
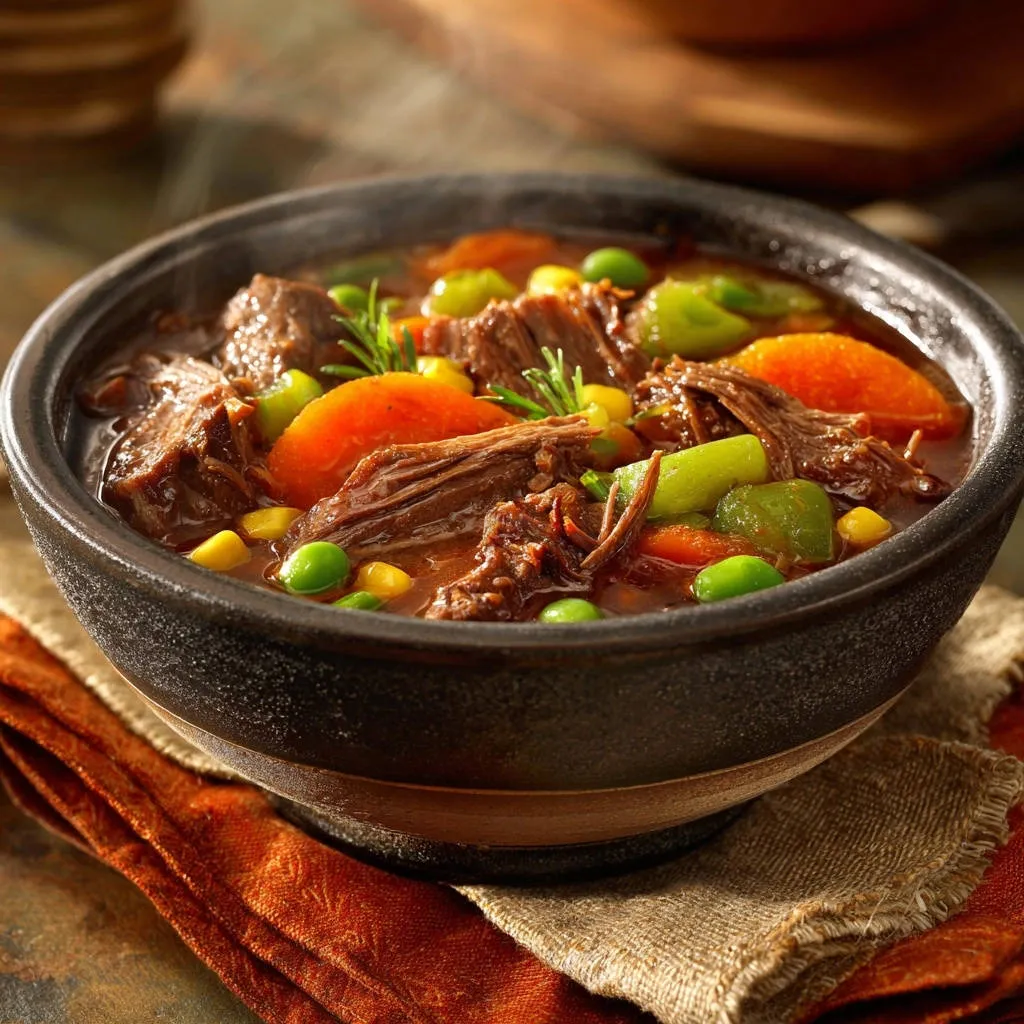
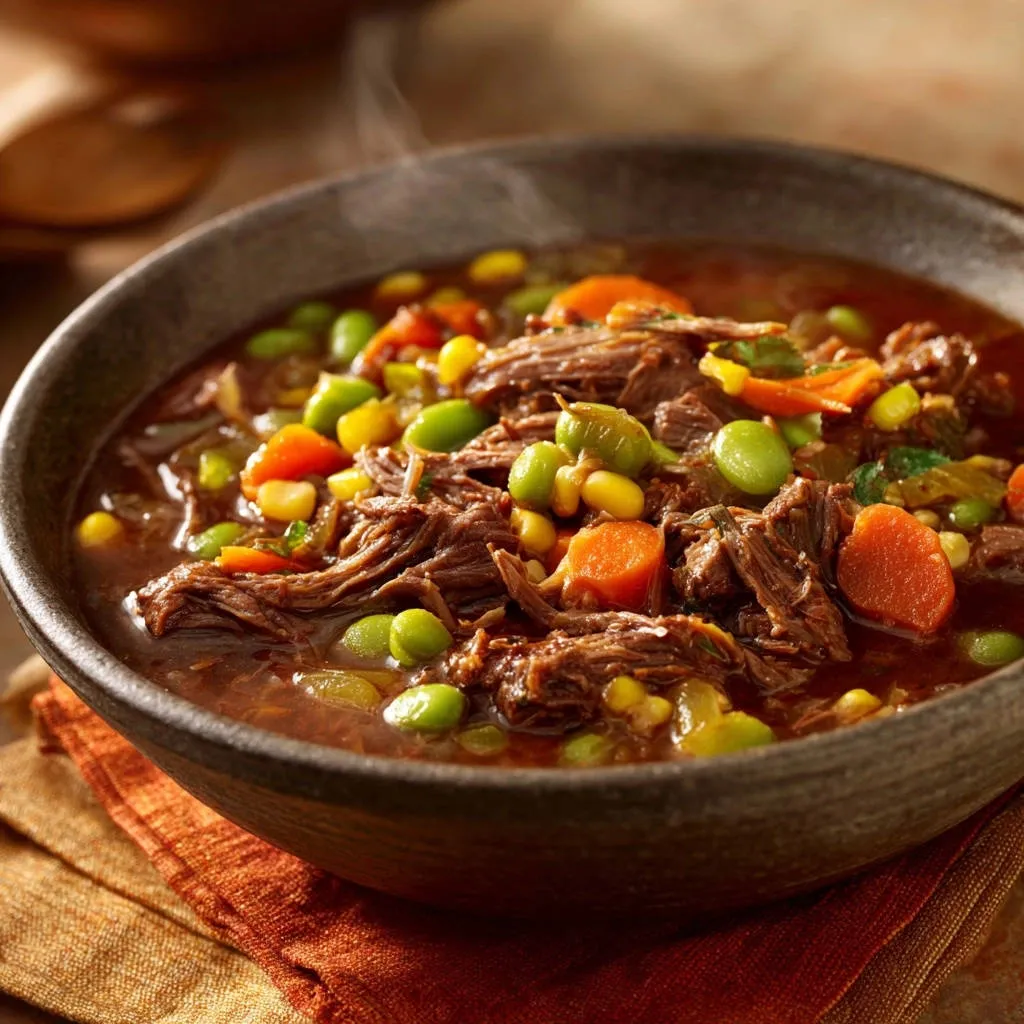
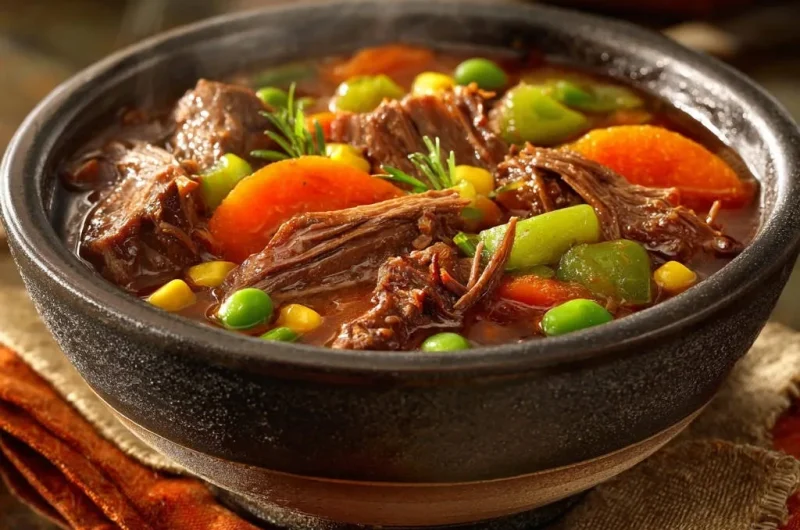
Ladle the hot stew into large bowls. The beef should easily shred with a fork, a sign of perfect tenderness.
Garnish each bowl with a fresh sprig of rosemary for an aromatic final touch and visual appeal.
Round Out Your Meal
To complement your hearty beef stew, consider these warm, comforting baked goods.
- For a classic, savory addition that pairs well with rich stews, try this golden cornbread and herb stuffing.
- If you prefer a touch of sweet heat with your stew, this hot honey jalapeño cornbread offers a delightful contrast.
Beyond the Recipe Card: Chef’s Tips and Troubleshooting
These expert adjustments ensure your slow-cooked beef stew reaches its absolute peak flavor potential.
Expert Tips for Flavor Elevation
Don’t Skimp on the Salt: Slow cooking dilutes flavor over time, so ensure you heavily salt the meat before searing. The final adjustment after the stew is done is crucial to ensure a balanced, deep flavor profile.
A Splash of Acidity: A small splash (1 teaspoon) of red wine vinegar or fresh lemon juice added at the very end dramatically brightens the stew. This tiny bit of acidity cuts through the richness and makes the deep, savory flavors pop.
Make it Thicker: If your stew is too thin, create a slurry by mixing 1 tablespoon of cornstarch with 2 tablespoons of cold water. Stir this into the simmering stew during the last 15 minutes of cooking until it reaches your desired thickness.
Troubleshooting Common Stew Problems
Problem: Why is My Beef Still Tough After the Required Cooking Time?
This common issue is almost always due to inadequate low heat, or lifting the lid too often during the critical braising time. The temperature must remain low and consistent.
If the meat is still tough, simply cover the pot again and continue cooking on the lowest possible heat for another 30 to 45 minutes, checking every 15 minutes until it is perfectly tender.
Problem: My Stew Tastes Flat or Undercooked
A flat taste means the foundation was not properly built. You likely needed more aggressive seasoning on the meat or didn’t fully sear it to build the rich fond at the beginning.
Solution: Stir in 1/2 teaspoon of salt and 1/4 teaspoon of black pepper, or add 1 teaspoon of low-sodium soy sauce or Marmite for an instant boost of savory umami.
Make-Ahead, Storage, and Perfect Pairings
This classic comfort dish is ideal for preparing ahead, as the flavors only deepen overnight.
How to Prepare Hearty Slow-Cooked Beef Stew in Advance
Stew tastes even better the next day! Making the entire Hearty Slow-Cooked Beef Stew a full day ahead allows all the complex herb and meat flavors to fully meld together overnight.
You can also prep by cutting all the vegetables and cubing the beef 24 hours in advance, storing them separately in airtight containers in the refrigerator until ready to cook.
Safe Storage and Reheating Instructions
Store leftover stew tightly covered in an airtight container in the refrigerator for up to 3 to 4 days. Do not leave the stew sitting out at room temperature for more than two hours.
For reheating, use the stovetop over low heat, stirring occasionally. This slow process prevents the vegetables from becoming mushy, unlike rapid microwave reheating.
Freezing Your Stew: Maximizing Convenience
Ensure the stew is completely cool before freezing. Portion it into freezer-safe containers, leaving about an inch of headspace to account for liquid expansion.
The stew freezes exceptionally well for up to three months. Thaw safely overnight in the refrigerator before reheating gently on the stove.
What to Serve Alongside This Robust Meal
This robust meal demands accompaniments that can soak up the rich, savory gravy created by the slow-braise process.
- Crusty Sourdough Bread or Baguette slices for dipping.
- Creamy Mashed Potatoes or Parsnip Puree.
- Wide egg noodles or polenta.
Frequently Asked Questions About Slow-Cooked Beef Stew
Can I use a slow cooker instead of a Dutch oven?
Yes, but you must still complete the crucial searing, deglazing, and aromatic-building steps on the stovetop first. Do not skip this initial caramelization, as it builds the foundational flavor.
Transfer the seared beef and liquid base to the slow cooker and cook on low for 6 to 8 hours, adding the firm vegetables only during the last 90 minutes of the cycle.
Does the type of broth truly matter for flavor?
Absolutely. Because the broth makes up the majority of the liquid, using a high-quality, low-sodium beef stock will result in a much deeper, cleaner final flavor profile.
Low-sodium is preferred because it gives you precise control over the final salt content, allowing you to season aggressively in the beginning without over-salting the dish.
What is the benefit of adding canned tomatoes? (A common variation)
Diced or crushed canned tomatoes add additional acidity, moisture, and sweetness, providing a brighter overall taste profile that balances the heaviness of the beef base.
If you choose to use them, add about 1 cup of canned diced tomatoes along with the beef broth and the other liquids in Step 4 before the long braise begins.
Taste the Difference: Your New Signature Beef Stew Recipe
This detailed method removes all the guesswork and disappointment from making classic comfort food. By adhering to the critical steps of searing, deglazing, and precise timing, you unlock beef stew perfection.
You now have the exact blueprint for a truly luxurious, deeply flavorful, and perfectly tender Hearty Slow-Cooked Beef Stew that will become a celebrated staple in your kitchen.
Gather your ingredients, start the sear, and get ready to enjoy the most tender stew you have ever made.
Beef Stew
Course: Soups-StewsCuisine: AmericanDifficulty: medium4
servings20
minutes3
hours450
kcal180
minutesThis method ensures fall-apart tender beef every time by prioritizing a deep, initial sear followed by a low-and-slow braise. Rich with beef broth, aromatic herbs, and hearty vegetables, this comforting stew is the perfect cold-weather meal.
Ingredients
2 pounds beef chuck or round, cut into 1-inch cubes
2 tablespoons vegetable oil
1 medium onion, diced
3 cloves garlic, minced
2 tablespoons tomato paste
4 cups beef broth
1 tablespoon Worcestershire sauce
1 teaspoon dried thyme
1 teaspoon dried rosemary
2 large carrots, cut into thick rounds
1 stalk celery, chopped
1/2 cup fresh or frozen corn kernels
1/2 cup fresh or frozen peas
Salt and freshly ground black pepper to taste
Fresh rosemary sprig for garnish
Directions
- Prepare the Beef for Maximum Tenderness The most crucial step for achieving fall-apart meat is proper searing. Pat the beef cubes completely dry using paper towels. Season them very aggressively on all sides with salt and pepper.
- Sear the Meat Heat the vegetable oil in a large Dutch oven over high heat until shimmering. Working in small batches so as not to overcrowd the pot, sear the beef on all sides until a deep brown crust forms, about 2 minutes per side. Remove the seared beef and set aside. Do not rush this step; the crust is where the flavor and tenderness foundation starts.
- Build the Base Reduce the heat to medium. Add the diced onion and cook until softened, about 5 minutes. Add the garlic and cook for 1 minute until fragrant. Stir in the tomato paste, cooking it for 2 minutes to deepen its flavor.
- Deglaze and Combine Pour in about 1/2 cup of the beef broth and scrape up any browned bits from the bottom of the pot. Return the seared beef to the pot. Add the remaining beef broth, Worcestershire sauce, dried thyme, and dried rosemary. The liquid should cover the meat fully.
- The Tenderizing Braise Bring the mixture to a simmer, then reduce the heat to low, cover the pot tightly, and cook for 2 hours and 30 minutes. This extended, low-and-slow braise breaks down all the tough connective tissue (collagen) in the beef, guaranteeing tender, shreddable results. Do not lift the lid during this time.
- Add Vegetables After 2 hours and 30 minutes, the meat should be fork-tender. Add the carrots and celery to the stew. Continue to cook, covered, for another 30 minutes until the carrots are tender but not mushy.
- Finish the Stew Stir in the corn kernels and peas during the last 5 minutes of cooking. Taste and adjust seasoning with additional salt and pepper as needed.
- Serve Immediately Ladle the hot stew into bowls. The beef should easily shred with a fork. Garnish with a fresh sprig of rosemary.
Notes
- For extra depth of flavor, consider adding a splash of red wine to deglaze the pot after searing the beef. Don’t overcrowd the pot when searing the beef; working in batches ensures a beautiful brown crust for maximum tenderness.