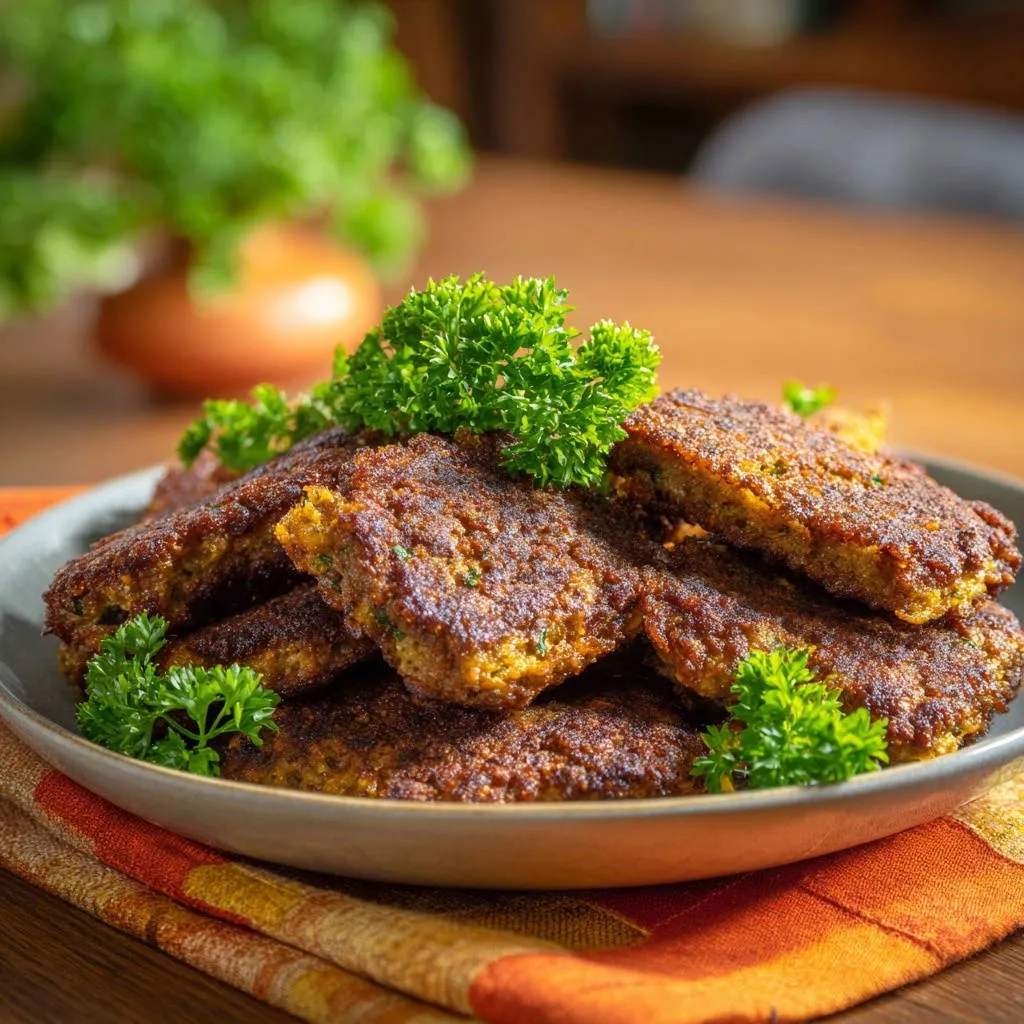
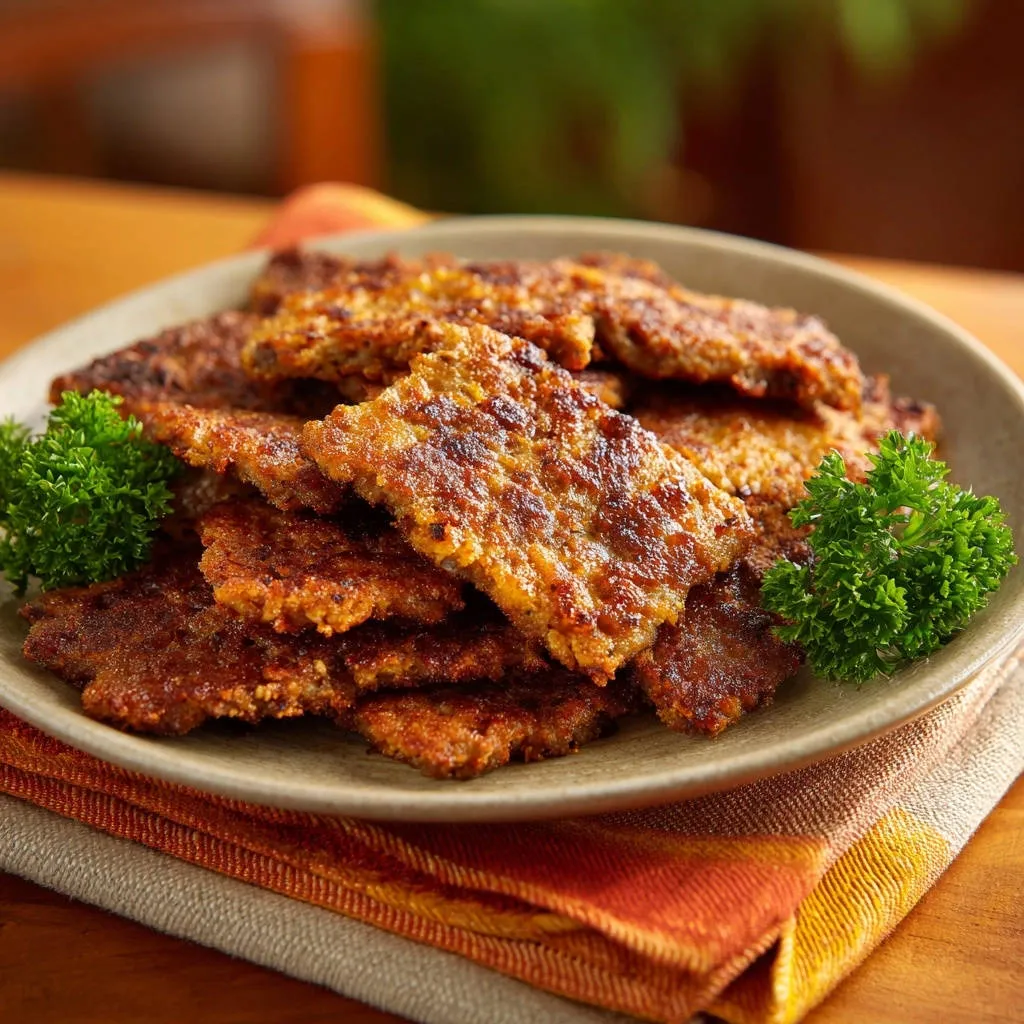
I spent years battling fritters that stubbornly crumbled the second they hit the hot oil-a frustrating mess that ruined countless batches. This recipe, built around a mandatory chilling step, is my definitive answer to that kitchen pain point, delivering perfectly structured, non-crumble Hearty Veggie & Chickpea Fritters every single time.
I promise this simple structural secret locks in the binders, ensuring a golden, crispy crust and a tender, flavor-packed interior that holds its shape under pressure.
The Fail-Safe Fritter Formula: Why This Recipe Is Different
Solving the Crumble Catastrophe: Our Binding Breakthrough
The universal frustration with homemade fritters is the structural failure-they break apart when flipping or fall apart in the oil. This occurs because the initial mix is too loose and the starches haven’t had time to activate.
Our method introduces a critical minimum 30-minute refrigeration period. This allows the flour and breadcrumbs to hydrate and swell, forming a resilient matrix around the chickpea pieces that withstands high heat without disintegrating.
Texture Control is Key: Why We Never Use a Food Processor
Many recipes rely on a food processor, which quickly turns the chickpeas into a sticky, homogeneous paste (almost like hummus). While it binds well, it results in an unpleasantly dense, gummy, and heavy fritter.
Coarse mashing with a fork or potato masher is essential. This technique breaks down most of the chickpeas while leaving enough larger pieces to provide a desirable chewy texture and lightness within the fritter structure.
Global Spice Blend: Enhancing Flavor with Cumin and Turmeric
These fritters go far beyond standard veggie patties thanks to a powerful, aromatic spice blend. Ground cumin and coriander provide a warm, earthy depth that is the hallmark of Mediterranean and Middle Eastern flavor profiles.
We add a touch of turmeric not just for its subtle warmth, but primarily for that rich, appealing golden color, signaling a deeply flavorful and well-seasoned dish before the first bite.
Building Blocks of Flavor: Essential Ingredients and Smart Substitutions
The Chickpea Foundation: Texture Versus Tinned
Canned chickpeas are perfect for convenience, but proper preparation is key. Always rinse them thoroughly to remove the starchy liquid (aquafaba) they are packed in, and ensure they are well drained before mashing.
For another way to let chickpeas shine without any sharp bite, consider this creamy classic chickpea salad.
Excess moisture is the enemy of a sturdy fritter. Even after draining, you may want to gently pat them dry before mashing, which helps manage the final consistency of the mix.
Binders and Structure: Flour, Breadcrumbs, and Egg
The large egg (or flax egg substitute for vegan preparation) acts as the primary molecular glue, holding the mix together before cooking. For those requiring a plant-based version, the flax egg works beautifully, provided the chilling step is followed.
All-purpose flour and the internal 1/2 cup of breadcrumbs provide the necessary starches that activate during the mandatory chilling rest, building the internal stability. The external breadcrumb coating adds a fantastic layer of crunch.
For more ideas on making dishes that stay crisp, check out this hearty roasted veggie & chickpea bowl.
The Aromatic Trio: Onion, Garlic, and Fresh Parsley
Finely chopped yellow onion and minced garlic are crucial for establishing a foundational savory base. They infuse the chickpea mixture with pungency and depth, preventing the final product from tasting bland.
Fresh parsley brightens the flavor profile considerably, offering a necessary herbaceous counterpoint to the warm spices. Ensure all aromatics are finely chopped so they blend smoothly into the mixture.
From Mash to Masterpiece: Step-by-Step Fritter Preparation
- The Coarse Mash Technique: Preparing the Chickpeas
Follow the instructions exactly: coarsely mash the chickpeas using a fork or masher. This leaves crucial texture. Avoid the food processor entirely to prevent the sticky, dense paste that causes heavy fritters.
- Flavor Infusion and Initial Binding
Incorporate all remaining interior ingredients (onion, spices, 1/2 cup breadcrumbs, flour, egg/substitute) into the mashed mixture.
Mix thoroughly, ensuring even distribution. The mixture should be firm enough to press into shape without crumbling immediately. Adjust with a teaspoon of flour if excessively wet.
- Forming Sturdy Patties and Initial Coating
Take about 1/4 cup of the mixture and press it firmly into a compact patty shape. Gentle handling is key, but firm pressure ensures internal cohesion.
Gently coat the formed Hearty Veggie & Chickpea Fritters on both sides with the reserved 1/4 cup of breadcrumbs. This external layer aids structure and crispness.
- The Mandatory Chilling Period (Do Not Skip This!)
Arrange all patties on a parchment-lined baking sheet and refrigerate for a minimum of 30 minutes. This is the single most critical step for success.
The rest allows the flour and breadcrumbs to fully hydrate, locking the structure in place and preventing disintegration in the hot oil.
- Frying to Golden Perfection: Mastering the Oil Temperature
Heat 1/2 inch of oil in a heavy skillet over medium heat until it reaches approximately 350°F. If you don’t have a thermometer, test with a small pinch of mixture-it should sizzle immediately.
Carefully place the chilled fritters in the oil, ensuring the pan is not overcrowded. Overcrowding drops the oil temperature, leading to soggy results.
- The Patient Flip: Cooking Without Moving
Fry for 3 to 4 minutes per side. Crucially, do not move or attempt to flip the fritters until the underside is deep golden brown and has formed a stable crust. Flipping prematurely is a common cause of failure.
- Drain and Serve
Transfer the finished fritters to a wire rack or paper towel-lined plate to drain excess oil. Serve immediately for optimal crispness.
The Critical Structural Step: Why Chilling is Mandatory for Perfect Fritters
The Science Behind the 30-Minute Rest
When the flour and breadcrumbs encounter the moisture from the chickpeas, onion, and egg, they begin to absorb it slowly. Refrigeration slows this absorption rate slightly, allowing the binding agents to fully hydrate without becoming mushy.
During this rest, the starches and proteins form microscopic molecular bonds. Once these bonds set (or “lock in”), the fritter is structurally sound enough to withstand the violent temperature change and movement of frying.
Maximizing Preparation Time: Why Longer Chilling Is Better
While 30 minutes is the minimum required to activate the binders, chilling for up to 2 hours provides an even better, sturdier result. The longer the chill, the less likely the fritters are to crumble.
This long rest also makes these fritters an excellent make-ahead component for entertaining. You can shape them in the morning and fry them quickly when guests arrive.
Troubleshooting Fritter Fails and Chef’s Tips for Optimal Crispy Texture
Common Problem 1: Why Are My Fritters Soggy?
Solution: Ensure your oil is consistently hot (350°F). If the oil temperature drops, the fritters absorb it rather than forming a crust. Fry in batches if necessary, and always drain on a wire rack, not just paper towels.
Common Problem 2: My Fritters Still Cracked When Flipped!
Solution: Only flip once you see a distinct, stable, golden-brown crust. If the fritters feel delicate after chilling, ensure you press them very firmly during the patty-forming stage to eliminate internal cracks.
Chef’s Tip: Achieving the Ideal Frying Oil Depth
While only 1/2 inch is used, ensure the oil completely coats the bottom of the pan and comes up halfway the side of the fritters. This promotes even cooking without submerging them.
Serving Suggestions and Make-Ahead Strategies for Busy Cooks
The Perfect Dipping Sauce Pairings
These Hearty Veggie & Chickpea Fritters pair exceptionally well with creamy, slightly tangy sauces, such as a simple lemon-tahini dressing or homemade garlic yogurt dip. For a bolder flavor, try a roasted red pepper pesto.
Round Out Your Meal
These fritters pair well with bright, fresh salads.
- For a flavorful experience with similar ingredients, explore the Moroccan Spiced Carrot and Chickpea Salad.
- If you enjoy vibrant flavors and chickpeas, try the Mediterranean Zesty Chickpea Salad.
Meal Prep and Make-Ahead Magic
You can prepare the fritter mixture up to 24 hours in advance; store it covered in the refrigerator. Even better, form the patties, chill them, and then flash-freeze them on the sheet before transferring them to a freezer bag. Cook straight from frozen, adding a couple of minutes to the frying time.
Beyond the Plate: Creative Ways to Use Fritters
These sturdy fritters are ideal as vegetarian burger patties, served in pita bread with fresh greens, or crumbled over a Mediterranean salad for a hearty protein boost.
Hearty Veggie & Chickpea Fritter FAQs: Your Culinary Questions Answered
Can I make these Hearty Veggie & Chickpea Fritters gluten-free?
Yes, absolutely. Simply substitute the all-purpose flour with a gluten-free blend that contains xanthan gum, and use gluten-free breadcrumbs. The binding structure should remain sound, provided you adhere to the chilling step.
Are these fritters freezer friendly after cooking?
Yes. Allow the cooked fritters to cool completely, then store them in an airtight container separated by parchment paper. Reheat them in a 350°F oven or air fryer until hot and crispy (about 8-10 minutes) for the best texture.
What oil is best for frying fritters?
Use any neutral oil with a high smoke point, such as canola, vegetable, or sunflower oil. Avoid olive oil, as its low smoke point can lead to a burnt taste before the fritters are fully cooked.
Ready to Impress? Share Your Hearty Veggie & Chickpea Fritters Masterpiece!
With the non-crumble secret firmly in your hands, you’re ready to create the crispiest, sturdiest, and most flavorful fritters yet. Ditch the fear of broken patties and embrace this guaranteed method!
We’d love to see how you served your batch! Tag us on social media and let us know your favorite dipping sauce pairing.

Chickpea Fritters
Course: Main CourseCuisine: InternationalDifficulty: easy8
Fritters15
minutes15
minutes240
kcal60
minutesSay goodbye to broken fritters and oily messes. This recipe uses a mandatory chilling step and specific binding techniques to ensure these veggie patties are sturdy, crisp, and golden on the outside while remaining tender inside. They are easy to prepare and guaranteed not to crumble during frying.
Ingredients
1 15-ounce can cooked chickpeas, rinsed and drained
1/2 cup finely chopped yellow onion
1/4 cup chopped fresh parsley
2 cloves garlic, minced
1 large egg, lightly beaten (or 1 flax egg substitute)
1/2 cup breadcrumbs, plus 1/4 cup extra for coating
2 tablespoons all-purpose flour
1 teaspoon ground cumin
1/2 teaspoon ground coriander
1/4 teaspoon turmeric (for color)
Salt and black pepper to taste
Vegetable oil, for frying
Directions
- Prepare the Chickpea Mixture: In a large bowl, coarsely mash the chickpeas using a fork or potato masher. You want them mostly broken down but still retaining some texture for chewiness. Do not use a food processor, as this creates a sticky paste which results in a denser fritter.
- Add Flavor and Bind: To the mashed chickpeas, add the onion, parsley, garlic, egg (or substitute), 1/2 cup breadcrumbs, flour, cumin, coriander, turmeric, salt, and pepper. Mix thoroughly until everything is evenly incorporated. The mixture should feel slightly tacky but hold together easily when pressed. If it feels too wet, add one more tablespoon of flour or breadcrumbs.
- Form the Patties and Lock in Structure: Place the remaining 1/4 cup breadcrumbs onto a shallow plate. Take about 1/4 cup of the chickpea mixture and form it into a sturdy, slightly rectangular patty, pressing firmly to ensure no cracks. Gently coat both sides of the patty with the extra breadcrumbs.
- The Fail-Safe Firmness Step (Solving the Pain Point): Arrange all the formed patties on a baking sheet lined with parchment paper. Crucially, cover the sheet and refrigerate the patties for a minimum of 30 minutes, or up to 2 hours. This resting period is mandatory; it allows the binders (flour/egg) to fully hydrate, locking the structure in place. This prevents the patties from breaking apart when they hit the hot oil.
- Fry to Golden Perfection: Heat 1/2 inch of vegetable oil in a large, heavy skillet over medium heat until shimmering (around 350 degrees F). Carefully place the chilled patties into the hot oil, ensuring not to overcrowd the pan.
- Cook without Moving: Fry the patties for 3 to 4 minutes per side. Do not attempt to move or flip them until they have achieved a deep golden brown crust on the bottom side. Flipping too early is another key reason for structural failure. Once flipped, cook for an additional 3 to 4 minutes until they are richly browned and heated through.
- Finish: Remove the fritters from the oil and place them on a rack or paper towel lined plate to drain excess oil. Serve immediately, garnished with fresh parsley.
Notes
- The minimum 30-minute refrigeration step is mandatory for structural integrity.