There is nothing worse than splurging on beautiful white fish only to have it come out of the oven dry, rubbery, or falling apart in sad little chunks.
For years I struggled to achieve that perfect, tender, flaky result in a baked fillet, but once I mastered the simple technique of sealing the top with a thick herb butter, guaranteed success followed every time.
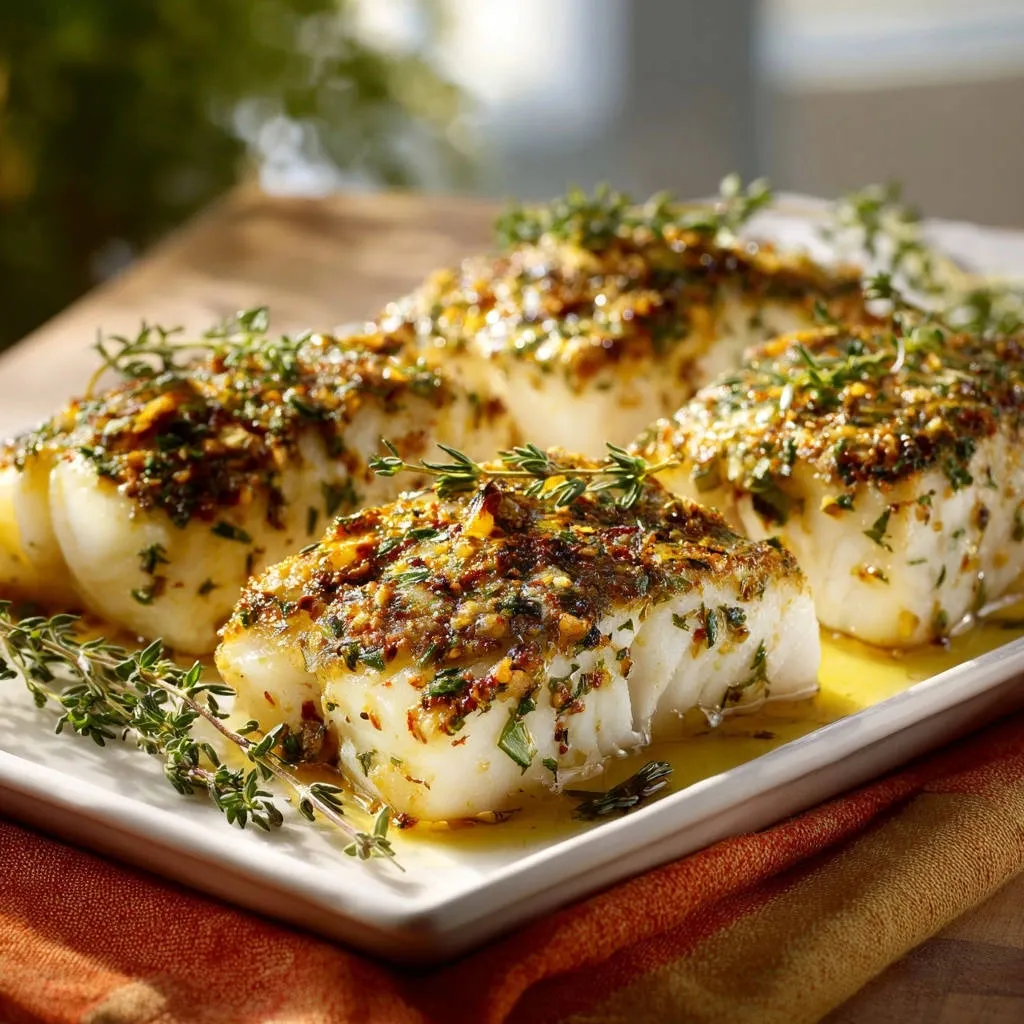
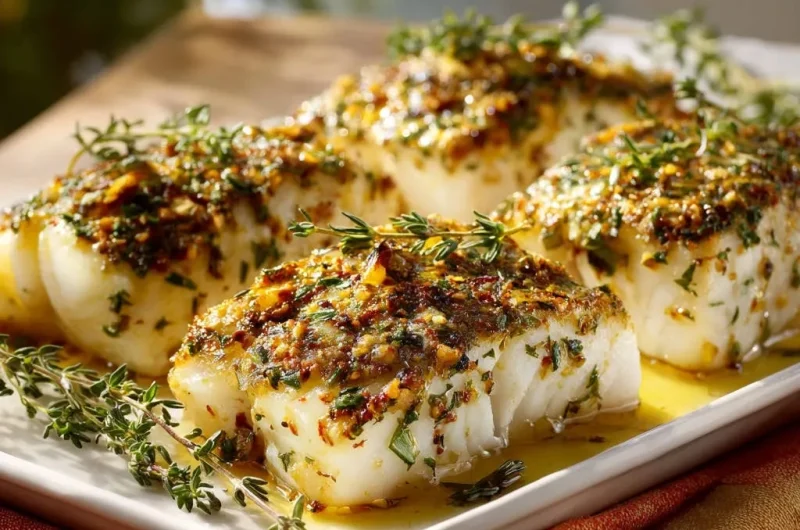
This method transforms ordinary baked fish into an exceptional, moist, and flavorful Herb-Crusted Baked Cod that locks in moisture under a crisp, punchy topping.
The Flakiness Failsafe: Why This Herb-Crusted Baked Cod Recipe Always Works
This method solves the #1 problem of baked fish: allowing the delicate proteins to become exposed to dry, high heat, which causes immediate moisture loss and a rubbery texture.
The role of the softened herb butter is dual: it provides intense flavor and acts as a thick, protective shield-a moisture lock-that melts slowly into the fish during the initial bake.
This protective layer insulates the cod, preventing the high heat from drawing out its internal moisture.

The final quick broil provides the necessary crunch and deep golden color to the crust without overcooking the perfectly protected fish inside.
Gathering the Essential Elements for Your Perfect Fish Dish
Selecting the Best Cod Fillets
Focus on thickness: why 1-inch thick fillets are ideal for this technique.
The thickness provides a buffer, allowing enough time for the butter shield to melt and the crust to brown without the fish drying out instantly.
Why patting the fish completely dry is non-negotiable for flavor application and achieving the best crust: any surface moisture will create steam and prevent the butter from adhering firmly.
Mastering the Punchy Herb Butter Blend
Discuss the power of fresh vs. dried herbs: fresh thyme and parsley are critical here because they retain their vibrant flavor and color under heat better than dried alternatives, contributing to both the taste and visual appeal of the crust.
The importance of softened, not melted, butter is paramount; it must be soft enough to mix easily but firm enough to create a very thick, insulating paste that holds its shape on the fillet.
Using red pepper flakes introduces a subtle warmth and complexity that cuts through the richness of the butter without making the dish spicy.
Essential Tools for Stress-Free Baked Fish Prep
Paper Towels: The most crucial (and often overlooked) tool for success. Used extensively to ensure the fish is completely dry before applying the coating.
Shallow Baking Dish: Why width over depth is important for even cooking and broiling. A shallow dish allows the tops of the fillets to be exposed directly to the radiant heat of the broiler without interference.
Instant-Read Thermometer: Absolutely mandatory for hitting the perfect internal temperature (140-145°F). This is your guarantee against overcooking.
Small Mixing Bowl: For combining the softened butter, minced garlic, and herbs efficiently into a uniform paste.
From Prep to Plate: A Step-by-Step Guide to Baking Perfection
Initial Setup and Oven Preparation (Step 1)
Preheat your oven to a consistent 400 degrees F and lightly coat the bottom of a shallow baking dish with olive oil to prevent sticking.
Before applying anything, take the necessary step of thoroughly drying the cod fillets using paper towels. This ensures maximum adhesion for the crust.
The Moisture Lock Technique: Sealing in the Juices (Step 2)
In a small bowl, combine the softened butter, minced garlic, minced thyme, parsley, salt, pepper, and red pepper flakes until a uniform, thick paste forms.
Apply a very generous, thick layer of this herb butter paste to the top and sides of each cod fillet.
This thick coating is the core of the recipe: it acts as insulation against the oven’s direct heat, guaranteeing moisture retention throughout the bake.
For an even better results, learn how to achieve an anti-soggy bottom when preparing your cod.
The Initial Gentle Bake (Step 3)
Place the heavily coated fillets in the prepared baking dish and bake for 12 to 14 minutes, depending on the exact thickness of your fish.
Crucial check: after this time, the fish should be opaque on the edges but still slightly translucent in the very center, registering about 135°F internally.
Achieving the Golden Crust (Step 4)
Change the oven setting to broil (high heat) and immediately move the baking dish to a rack about 6 to 8 inches from the heating element.
Broil for a very short 2 to 4 minutes MAX.
A strict warning: constant vigilance is required during this step, as the butter-rich crust can go from perfectly golden to burned in seconds.
Finishing, Resting, and Serving (Step 5)
The Herb-Crusted Baked Cod is finished when it easily flakes with a fork and reaches a final internal temperature of 140°F to 145°F.
Immediately remove the fish from the oven to halt cooking; residual heat will bring it up the final degree or two.
Suggestion to spoon the melted pan butter and oil mixture over the fish for final flavor and moisture before garnishing liberally with fresh thyme sprigs.
Chef’s Secrets: Expert Tips to Master Your Herb-Crusted Baked Cod Game
The Temperature Plateau: If your fish consistently finishes cooking too quickly before the crust has a chance to fully brown under the broiler, slightly lower your initial oven temperature to 375°F next time to extend the gentle baking window.
Herb Variations: Swap the base thyme and parsley for other robust, complementary fresh herbs like dill, chives, or tarragon to create an entirely new, bright flavor profile that pairs differently with various side dishes.
For a delightful variation, consider herb-crusted cod with roasted tomatoes for your next meal.
Add Panko for Crunch: For an ultra-crispy top crust, lightly sprinkle 2 tablespoons of Panko breadcrumbs directly over the thick butter layer just before you place the dish under the broiler.
Don’t Skimp on the Butter: The thickness of the butter layer is the secret weapon; it needs to be generous-about 1/4 inch thick-to provide proper insulation. A thin coat will melt too quickly and will not provide the same moisture lock.
Using Different Fish: This moisture-locking technique works exceptionally well on other thick, white fish like Halibut or Grouper, which also tend to dry out easily when baked, though cook times may need slight adjustment based on fillet density.
Troubleshooting Common Baking Issues: Help! Why Is My Fish Dry?
Problem 1: The Crust Burned Before the Fish Was Cooked
Solution: The fish was likely placed too close to the broiler element, causing the butter crust to scorch immediately.
Ensure the rack is exactly 6-8 inches away and, crucially, that the internal temperature reached at least 135°F during the initial bake before you switched to broiling.
Problem 2: The Fish Came Out Dry and Rubbery
Solution: You either skipped the ‘Moisture Lock Technique’ (thick butter coat) or, more likely, you overbaked it.
Use the instant-read thermometer religiously; cod is very lean and cooks quickly past 145°F, rapidly losing moisture and becoming dry.
Problem 3: The Herb Butter Slid Off During Baking
Solution: The fish likely wasn’t patted dry enough before application, leaving residual moisture that prevented adhesion, or the butter paste was too soft or thin.
Ensure the fillets are completely dry, and that the butter is softened but still holds a firm, pliable shape when combined with the herbs.
Perfect Pairings and Prep-Ahead Strategies
What to Serve with Herb-Crusted Baked Cod
For a light, bright meal, serve this flaky fish with sides like quick-roasted asparagus, sautéed snap peas, or a fresh green salad tossed in a sharp vinaigrette.
Complementary Dishes
To round out your seafood meal, consider these complementary dishes.
- For a starchy addition that shares herb flavors, try these garlic herb roasted potatoes.
- If you’re looking for a light grain to go with your cod, consider this zesty lemon herb rice.
For a more substantial pairing, choose simple starches such as creamy mashed potatoes, easy lemon risotto, or rustic roasted root vegetables that absorb the flavorful pan drippings.
Storage and Reheating
Properly store any leftovers in an airtight container in the refrigerator for two to three days.
The best method for reheating without drying out the fish is low and slow in a conventional oven or air fryer at 300°F; avoid the microwave entirely, as it turns the fish rubbery.
Can I Make the Herb Paste Ahead of Time?
Yes, the butter paste is an excellent component for advance preparation. It can be made up to a week ahead of time and stored tightly wrapped in the refrigerator.
Allow the paste to sit out for about 15-20 minutes to soften slightly before application for easier spreading.
Common Questions About Baking Cod and Handling Herbs (FAQ)
How do I know when the cod is perfectly done?
The best indicator is the internal temperature, which should register between 140°F and 145°F.
Visually, the flesh should look completely opaque and easily flake apart when gently tested with a fork.
Can I use dried herbs instead of fresh?
While fresh herbs are highly recommended for the best aroma and texture in the crust, if you must substitute, use only about one-third of the amount of dried herbs specified, as they are far more concentrated in flavor.
Is it safe to bake cod from frozen?
While technically possible, baking fish from a frozen state is not recommended for this specific Herb-Crusted Baked Cod recipe.
It prevents the necessary drying of the fish, ruins the adhesion of the herb crust, and extends the cook time, significantly increasing the risk of dryness.
Should I flip the fish while baking?
No, flipping is unnecessary and risks damaging the delicate herb crust and the protective butter layer.
This recipe relies entirely on the butter shield and the final, quick broil on the top side to cook the fish evenly and perfectly.
Ready to Impress? Share Your Tender Baked Cod Masterpiece!
You now have the exact professional technique required to guarantee tender, flaky, and moist results every time you prepare baked fish.
Embrace the moisture lock technique, and say goodbye to dry cod forever.
We encourage you to try this recipe for Herb-Crusted Baked Cod tonight, and share your successes (and any great pairing ideas!) in the comments below.
Herb-Crusted Baked Cod
Course: Main CourseCuisine: InternationalDifficulty: easy4
servings15
minutes20
minutes650
kcal35
minutesNever deal with dry white fish again! This recipe uses a thick layer of punchy herb butter to seal in moisture while baking, finishing under the broiler for a perfect golden crust. Get tender, flaky results every time.
Ingredients
4 thick 6 oz cod or halibut fillets
1/2 cup unsalted butter, softened
4 cloves garlic, minced
2 tablespoons fresh thyme leaves, minced, plus extra for garnish
1 tablespoon fresh parsley, minced
1/2 teaspoon kosher salt
1/4 teaspoon black pepper
1/4 teaspoon red pepper flakes (optional)
1 tablespoon olive oil
1 lemon, cut into wedges (optional, for serving)
Directions
- Prepare the Fish and Oven. Preheat your oven to 400 degrees F. Pat the fish fillets completely dry using paper towels. This is crucial for flavor application and preventing steaming. In a small bowl, combine the softened butter, minced garlic, minced thyme, parsley, salt, pepper, and red pepper flakes until a thick, uniform paste forms.
- The Moisture Lock Technique (Solving Dryness). Lightly coat the bottom of a shallow baking dish with the olive oil. Here is the secret to guaranteed moist fish: Apply a very generous, thick layer of the herb butter paste to the top and sides of each cod fillet, making sure the top surface is completely covered and sealed. This butter layer creates a protective, insulating shield that melts into the fish, preventing direct exposure to the heat and locking in moisture during the initial bake.
- Initial Bake. Place the coated fillets in the prepared baking dish. Bake for 12 to 14 minutes, depending on the thickness of your fillets, until the fish is mostly cooked through and registers about 135 degrees F internally. The fish should be opaque on the edges but still slightly translucent in the very center.
- Achieve the Crust. Change the oven setting to broil (high heat) and move the baking dish to a rack about 6 to 8 inches from the heating element. Broil for 2 to 4 minutes, watching constantly, until the herb crust is deeply golden brown and slightly bubbly. This final, quick broil provides the crust without overcooking the perfectly protected fish inside.
- Finish and Serve. The fish is done when it easily flakes with a fork and reaches an internal temperature of 140 to 145 degrees F. Immediately remove the fish from the oven. Garnish liberally with fresh thyme sprigs and serve immediately, spooning some of the melted pan butter/oil mixture over the top for extra flavor and moisture.
Notes
- The key technique is applying a generous layer of herb butter to the top and sides of the fillet to create an insulating seal, locking in moisture before and during the initial bake.