We’ve all been there: attempting to slice a beautiful, towering layered dessert only to have the delicate filling squish out the sides and ruin the presentation. I developed this definitive recipe for the Layered Chocolate Vanilla Cream Square specifically to eliminate that frustration entirely.
The secret lies in one simple, expert technique-pre-cutting the pastry-which guarantees those sharp, clean bakery slices every single time, turning an impossible task into an effortless reveal.
Layered Chocolate Vanilla Cream Square: Goodbye Mushy Desserts!
The Bakery Secret: Why We Pre-Cut the Pastry
When you attempt to cut through a tall, assembled dessert, the downward pressure inevitably compresses the soft cream filling and shatters the brittle puff pastry layers.
By pre-cutting the pastry into three perfect puff pastry squares before layering, you eliminate the need to apply significant force to the delicate internal structure.
For similar puff pastry success, check out these chocolate nut eclairs.
This crucial act ensures structural integrity, allowing the cream layers to set neatly within the defined boundaries of each square without distortion.
Achieving the Perfect Flat, Crisp Foundation
The “anti-squish foundation” relies entirely on controlling the volatile rise of commercial puff pastry during the bake.
Docking (pricking heavily with a fork) releases internal steam, while using a second baking sheet as a substantial weight prevents the layers from ballooning excessively into uneven mounds.
Beyond Vanilla: The Dual-Flavor Layering Advantage
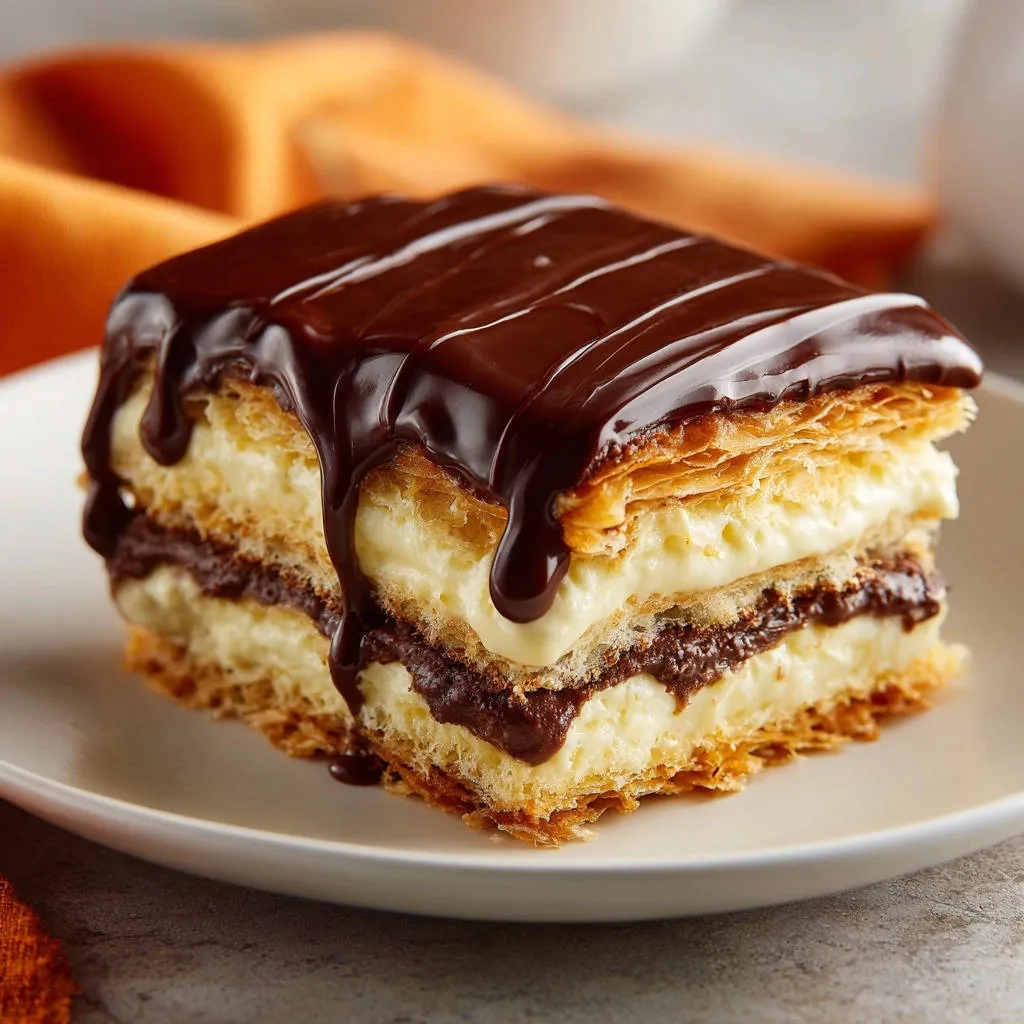
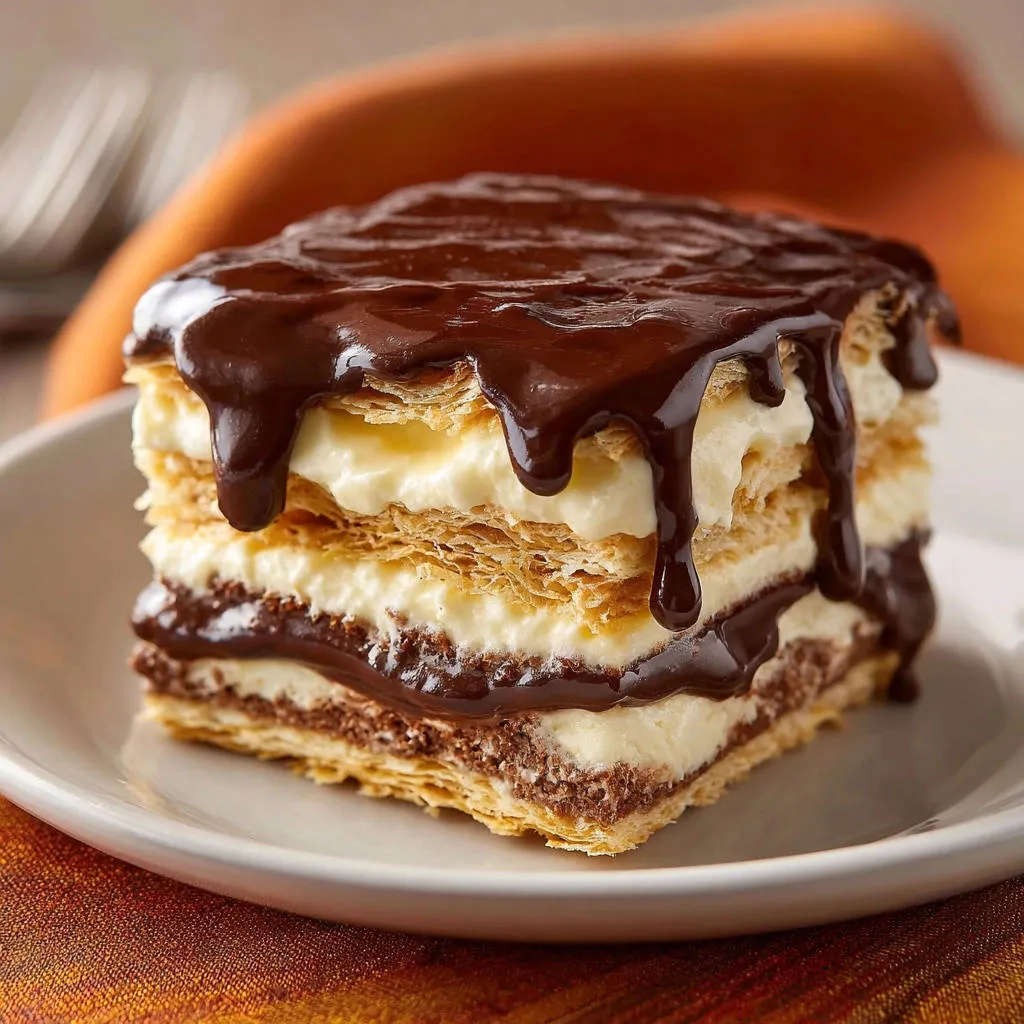
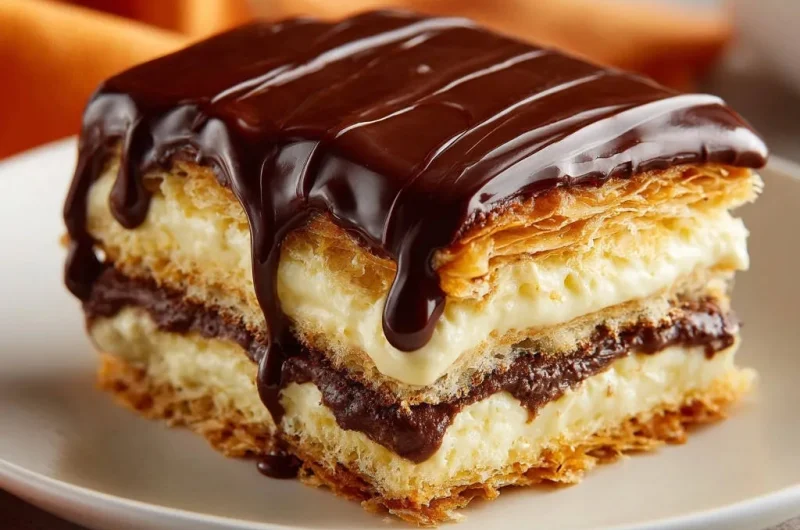
This specific Layered Chocolate Vanilla Cream Square utilizes a careful contrast of flavors to elevate the eating experience.
The rich, dark chocolate pastry cream is nestled between the lighter vanilla cream layers, providing a deep, satisfying foil to the bright flavor and the exceptional crispness of the pastry.
Mastering the Layers: Essential Ingredients and Substitutions
The Crisp Foundation: Store-Bought Puff Pastry
While you can make puff pastry from scratch, high-quality, all-butter frozen sheets provide excellent flavor and save considerable time.
Ensure the sheet is properly thawed but still very cold before unfolding and working with it, as warm dough compromises the defined layers of butter and flour.
Building the Silky Custard Base (Pastry Cream)
The high quantity of egg yolks contributes significant richness and acts as a natural emulsifier, creating the signature velvety texture of tempered custard.
Cornstarch is the required primary stabilizer, and it must reach a full, rolling boil to properly activate its thickening power and eliminate any starchy flavor.
For that perfect edge, explore techniques for classic vanilla custard slices.
Tempering ensures the eggs incorporate smoothly into the hot milk base without coagulating or turning into scrambled bits.
The Finishing Touch: Chocolate Glaze Perfection
Semi-sweet chocolate provides the ideal balance for the glaze, offering satisfying dark notes that cut through the richness of the creams.
Combining the melted chocolate with heavy cream creates a quick, simple ganache that sets into a smooth, glossy top layer.
Ingredients:
- 1 sheet store-bought puff pastry, thawed
- 1/4 cup granulated sugar (plus extra for sprinkling)
- 1 large egg
- 2 large egg yolks
- 3 tablespoons cornstarch
- 1 1/2 cups whole milk
- 1 teaspoon vanilla extract
- 4 ounces semi-sweet chocolate, melted and divided
- 1/2 cup heavy cream
Essential Tools for Bakery-Style Cream Squares
Two Large Baking Sheets: The second sheet is the non-negotiable weight required to press the puff pastry flat during the critical bake phase.
Sharp Serrated Knife: This is essential for cleanly cutting the brittle, baked pastry without crushing it or creating jagged edges during the pre-cut step.
Wire Whisk and Rubber Spatula: Use the whisk vigorously for tempering the custard, and the spatula for gently folding the whipped cream into the pastry cream to maintain airiness.
Parchment Paper: Crucial for preventing sticking and ensuring the weighted pan lifts cleanly from the delicate pastry surface.
The Layered Approach: How to Assemble Your Perfect Cream Square
- Scoring and Docking:
Score the thawed pastry into three equal rectangles; this is merely a guideline for the final cuts, so do not slice all the way through yet. Docking involves pricking the entire surface heavily with a fork, which prevents massive steam pockets and keeps the layer flat and stable.
- The Weighted Bake:
Cover the sprinkled pastry with a second layer of parchment, then immediately place a heavy, oven-safe baking sheet directly on top of the pastry. This weight ensures the puff pastry bakes into an exceptionally crisp and flat anti-squish foundation.
- Cooling and Final Cuts:
Once the pastry is completely cool and brittle, use a sharp serrated knife and a very light sawing motion to fully cut along the scored lines. This creates the three separate, distinct puff pastry squares ready for flawless assembly.
- Whisking the Base:
In a medium bowl, combine the remaining sugar, egg, yolks, and cornstarch, whisking until the mixture is completely smooth and uniform.
- Tempering Process:
Heat the whole milk until it is steaming hot but not boiling. Slowly drizzle in only about half a cup of the hot milk into the egg mixture while whisking constantly and rapidly.
- Thickening the Custard:
Return the tempered mixture to the saucepan with the remaining milk and cook over medium heat, whisking without pause. You must bring the mixture to a full, rolling boil and continue whisking vigorously for 30 seconds to fully activate the cornstarch thickener.
- Dividing and Flavoring:
Immediately remove from heat, stir in vanilla, and divide the pastry cream. Blend 1/2 cup of the cream with 1 ounce of the melted semi-sweet chocolate for the rich, dark middle layer.
- Chilling the Creams:
Press plastic wrap directly onto the surface of both the chocolate and vanilla pastry cream portions. Chilling for a minimum of 3 hours is crucial, as the cream must be firm and cold to hold its sharp structural shape during layering.
- Whipping and Folding the Cream:
Whip the 1/2 cup of heavy cream until soft, pillowy peaks form. Gently fold precisely half of the whipped cream into the chilled vanilla pastry cream until uniform in color and texture.
- Layering Order:
Place the first pastry square down and spread half of the vanilla cream mixture evenly over the top. Add the second square, top with the chocolate pastry cream, and finish with the third square.
- Crafting the Glossy Glaze:
Whisk the remaining 3 ounces of melted chocolate and the remaining heavy cream until the mixture is completely smooth and glossy. Spread or drizzle this simple ganache evenly across the top layer.
- Final Chill and Serving:
Refrigerate the assembled Layered Chocolate Vanilla Cream Square for at least one hour to allow the glaze to set firmly. Since the squares are already perfectly pre-cut, simply slice through the top glaze layer for effortless, clean presentation.
Phase 1: Preparing the Crisp Pastry Foundation (The Weight Trick)
Phase 2: Creating the Dual Pastry Cream (Tempering Eggs)
Phase 3: Final Assembly and Glazing
Troubleshooting and Chef’s Secrets for Flawless Layers
My Pastry Puffed Unevenly or Isn’t Crisp
Ensure you have heavily docked the entire surface of the pastry sheet, paying close attention to the edges; areas missed will puff and rise excessively.
The weighted bake must be substantial and consistent across the whole sheet, so use a heavy, flat baking pan that covers the pastry completely to guarantee even pressing.
The Pastry Cream Tastes Grainy or Curdled
Graininess usually means the eggs cooked too quickly during the tempering process; pour the hot milk in a slow, steady stream while maintaining constant, very fast whisking.
Once cooking on the stovetop, you must whisk vigorously and reach the full, rolling boil to activate the starch and achieve maximum thickening power.
How to Prevent a “Skin” from Forming on the Custard
The only way to prevent a rubbery, tough skin is to press plastic wrap directly onto the surface of the warm pastry cream immediately after flavoring it.
Tips for Keeping Edges Sharp During Assembly
Use a small, offset spatula, ensuring the cream is spread quickly and evenly to the edges without pushing the filling over the sides of the pastry.
Work with chilled components and clean the offset spatula between layering the vanilla and chocolate creams to maintain distinct, crisp color separation.
Storage, Make-Ahead, and Serving Suggestions
Can I Make This Layered Chocolate Vanilla Cream Square Ahead of Time?
Yes, the components-the baked pastry sheets and the chilled pastry cream-can be made and stored separately in airtight containers 1-2 days in advance.
For the optimal, crispiest texture, assemble the layered square no more than 12 hours before you plan to serve it, allowing just enough time for the glaze to set.
Best Practices for Storing Leftovers
Store any leftover puff pastry squares tightly covered in an airtight container in the refrigerator for up to 3 days.
Be aware that the crisp pastry will naturally soften slightly over time due to moisture released by the thick pastry cream fillings.
Elevating the Presentation: Serving Ideas
Before serving, dust the exposed chocolate glaze with a very light scattering of high-quality cocoa powder or fine chocolate shavings.
Serve each square alongside a small garnish of fresh raspberries or slightly sugared sliced strawberries to add crucial color and acidity.
More Sweet Treats to Try
Complement your chocolate vanilla creation with these other delightful baked goods.
- For a satisfying breakfast or snack, consider making Glazed Carrot Walnut Muffins that offer a similar comforting texture.
- If you’re in the mood for another rich chocolate dessert, the Moist Chocolate Bundt Cake provides a wonderful cocoa experience.
Frequently Asked Questions About This Layered Dessert
Can I use store-bought custard instead of making my own pastry cream?
You can substitute, but commercial custard is often too loose for stacking high layers and holding its shape under pressure.
If substituting, incorporate a small amount of gelatin or extra cornstarch and ensure the purchased cream is thoroughly chilled to guarantee it holds the weight of the puff pastry squares.
What is the difference between docking and scoring puff pastry?
Scoring uses a knife to lightly mark the pastry sheet, serving as the guideline for cutting the three final puff pastry squares.
Docking uses a fork to pierce hundreds of small holes across the surface, which is the technique that prevents excessive rising and keeps the layer flat for assembly.
Why is whole milk specified for the pastry cream?
Whole milk contains a higher fat percentage, which yields a much richer, smoother taste and contributes significantly to the final structure and stability of the finished pastry cream.
Is it necessary to chill the assembled square before serving?
Yes, the final brief chill is absolutely necessary. Chilling firms the cream layers and allows the chocolate glaze to set, making the clean slices guaranteed by the pre-cut method even sharper.
Ready to Impress? Share Your Layered Chocolate Vanilla Cream Square Masterpiece!
This Layered Chocolate Vanilla Cream Square proves that sophisticated, bakery-worthy results don’t require impossible techniques-they just need smart, structural preparation.
By implementing the expert weighted bake and the essential pre-cut methodology, you unlock guaranteed clean slices and exceptional flavor contrast with minimal fuss.
I hope you try this guaranteed crowd-pleaser soon; tag me when you share your stunning, perfectly sliced squares!
Chocolate Vanilla Cream Square
Course: PastryCuisine: FrenchDifficulty: medium4
(one large square)30
minutes25
minutes650
kcal300
minutesAchieve bakery-worthy presentation with this layered square dessert. Featuring crisp, flat puff pastry, creamy vanilla custard, and a rich chocolate filling, this recipe guarantees clean, sharp slices by utilizing a critical pre-cutting trick before assembly.
Ingredients
1 sheet store-bought puff pastry, thawed
1/4 cup granulated sugar (plus extra for sprinkling)
1 large egg
2 large egg yolks
3 tablespoons cornstarch
1 1/2 cups whole milk
1 teaspoon vanilla extract
4 ounces semi-sweet chocolate, melted and divided
1/2 cup heavy cream
Directions
- PREPARE THE PASTRY SHEETS (The Anti-Squish Foundation)
- Preheat the oven to 400 degrees F. Line a large baking sheet with parchment paper.
- Unfold the puff pastry sheet and lightly score it into three equal rectangles. Do not cut all the way through yet. Prick the entire surface heavily with a fork (docking) to prevent excessive puffing and keep the layers flat.
- Sprinkle the sheet evenly with 1 tablespoon of sugar. Place a second sheet of parchment paper and a second baking sheet (or a heavy oven-safe dish) directly on top of the pastry. This weight is essential for keeping the pastry even and crisp.
- Bake for 15 minutes. Remove the top baking sheet and parchment paper and continue baking for another 5 to 8 minutes, or until the pastry is deeply golden brown and very crisp.
- Remove from the oven and let cool completely on a wire rack.
- MAKE THE CUSTARD AND FILLINGS
- Whisk together the egg, yolks, cornstarch, and remaining sugar in a medium bowl until smooth.
- Heat the milk in a saucepan over medium heat until steaming but not boiling. Slowly drizzle about 1/2 cup of the hot milk into the egg mixture, whisking constantly to temper the eggs.
- Pour the tempered mixture back into the saucepan with the remaining milk. Cook over medium heat, whisking constantly and vigorously, until the mixture thickens significantly and boils for 30 seconds. Remove from heat and stir in the vanilla extract.
- Divide the pastry cream. Place 1/2 cup of the cream into a small bowl and stir in 1 ounce of the melted chocolate until fully incorporated for the dark middle layer.
- Cover both bowls (vanilla and chocolate) directly with plastic wrap to prevent a skin from forming. Chill completely in the refrigerator for at least 3 hours.
- ASSEMBLY (The Clean Slice Solution)
- CRITICAL STEP FOR CLEAN CUTS: Once the pastry is completely cool and crisp, use a sharp serrated knife and a very light sawing motion to completely cut along the pre-scored lines, creating three separate, perfect pastry rectangles. You will now be working with three distinct pastry pieces.
- Gently whip the heavy cream until soft peaks form. Fold half of the whipped cream into the chilled vanilla pastry cream until fully incorporated.
- Place the first pastry rectangle on a serving plate. Spread half of the vanilla cream mixture evenly over the top.
- Place the second pastry rectangle on top of the vanilla cream. Spread the chocolate pastry cream evenly over this layer.
- Place the third pastry rectangle on top.
- For the glaze, combine the remaining melted chocolate with the remaining half of the heavy cream until smooth and glossy. Drizzle or spread the glaze over the top layer of the pastry.
- Refrigerate the assembled pastry for at least 1 hour before serving. Because the pastry was pre-cut into perfect squares before assembly, your slices are already ready to go, and you avoid the squished-filling problem entirely. Simply slice the final layer of glaze to reveal your clean lines.
Notes
- For guaranteed clean slices, the puff pastry must be scored and baked under a weight, then cut into individual rectangles *before* the assembly process begins.