Chicken breasts come out dry way too often during busy weeknights. You know the drill: tough, flavorless results that make takeout tempting. But this Lemon Caper Chicken flips the script. You’ll have dinner on the table before delivery arrives, thanks to a simple pounding technique, hot sear, and gentle sauce finish.
Why does it work so well? Pounding creates even thickness for uniform cooking, so the crispy outside hits perfection without a dry inside. In addition, the bright lemon-caper sauce locks in juices while adding zing. Therefore, every bite bursts with flavor.
Here’s the pro tip that seals the deal: pat the chicken super dry after pounding. That moisture removal lets the flour dredge stick perfectly and triggers a killer Maillard reaction for golden crust. No more soggy disappointments in your Lemon Caper Chicken.
Why Pound Chicken for Lemon Caper Chicken Success
Even Cooking Through Uniform Thickness
Pound those boneless skinless chicken breasts to exactly 1/2-inch thickness. Use plastic wrap and a meat mallet for clean, even force. This uniform size means heat penetrates quickly and evenly.
Thick breasts cook unevenly: the outside overcooks while the center stays raw or dries out. However, thin ones crisp up fast without losing moisture. You’ll see the difference immediately, from puffy to flat and ready.
Pro tip: aim for 1/2-inch max, or the sear won’t crisp before the inside toughens. Therefore, your Lemon Caper Chicken stays juicy every time.
Pat Dry: The Secret to Crispy Crust
After pounding, pat the chicken thoroughly dry with paper towels. Surface moisture steams the meat instead of searing it. Dry surfaces promote the Maillard reaction, that beautiful browning for flavor and crunch.
Wet chicken leads to pale, rubbery results in Lemon Caper Chicken. In contrast, dry ones develop a golden crust in minutes. Shake off excess flour too, so it doesn’t gum up.
Quick check: the chicken should feel tacky, not slick. This step transforms your dish from meh to mouthwatering.
Key Ingredients for Bright Lemon Caper Chicken
Chicken Breasts: Boneless Skinless Basics
Grab 4 boneless skinless chicken breasts for 4 servings. Look for fresh, plump ones without tears. Thickness varies, so pounding evens them out perfectly for this recipe.
Quality matters: springy to the touch means better texture. Therefore, they hold up to searing and sauce simmering without falling apart. Fresh beats frozen for superior juiciness in Lemon Caper Chicken.
Flour Dredge: Salt Pepper Proportions
Mix 1/2 cup all-purpose flour with 1 teaspoon salt and 1/2 teaspoon black pepper. This seasoned dredge builds a flavorful crust that seasons the meat deeply. It crisps without sogginess.
No all-purpose? Use gluten-free 1:1 blend. However, skip heavy coatings, or the sauce won’t cling right. Shake off excess for lightness.
Why these ratios? Salt draws out moisture for better browning, while pepper adds subtle heat. Perfect balance for Lemon Caper Chicken.
Lemon Juice Capers Broth Trio
Squeeze 1/4 cup fresh lemon juice from about 2 lemons, add 1/4 cup drained capers, and 1 cup chicken broth. Fresh lemon cuts richness with bright acidity; bottled tastes flat and metallic.
Capers bring briny pop that balances the sauce. Broth deglazes for depth. Together, they create emulsion magic without overpowering.
Pro tip: taste the sauce before adding chicken. Adjust lemon if needed for that zesty Lemon Caper Chicken punch.
Butter Olive Oil Finishing Touches
Use 3 tablespoons butter divided, 2 tablespoons olive oil, 1/4 cup chopped fresh parsley, and lemon slices. Olive oil’s high smoke point handles the sear; butter adds luxe flavor later.
Divided butter layers richness: one tablespoon for initial sear, two for sauce. Parsley brightens at the end. Therefore, garnishes elevate the dish.
Fresh parsley wilts less than dried. Slice lemons thin for pretty, edible pops of citrus.
Complementary Flavors
To round out your chicken dinner, consider these dishes that bring bright or fresh notes.
- For a vibrant green addition, try this creamy kale Caesar salad, which shares a similar bright dressing profile.
- If you enjoy chicken with a zesty twist, this creamy zesty chicken and corn salad offers a different take on poultry with its bright corn and lime notes.
Science of Searing in Lemon Caper Chicken
High-Heat Shimmer for Golden Crust
Heat a large skillet with olive oil and 1 tablespoon butter over medium-high for 2 minutes until shimmering. This temp sparks the Maillard reaction: proteins and sugars brown for nutty flavor and crisp texture.
Cook chicken 3-4 minutes per side until deeply golden. Don’t flip too early, or you miss the crust. Internal temp stays low initially, preventing dryness.
Listen for sizzling; it means perfect heat. Therefore, your Lemon Caper Chicken gets restaurant-level sear at home.
Browned Bits: Flavor Foundation
Those stuck bits, called fond, form during searing from caramelized proteins. They pack umami punch. Scrape them into the sauce for intensified taste.
Without fond, sauce tastes flat. However, high heat creates it reliably. Chemistry turns drippings into gold for Lemon Caper Chicken.
Pro tip: use a wooden spoon to release bits easily. No scraping? Sauce lacks depth.
Mastering the Lemon Caper Sauce Build
Deglaze with Broth Lemon Capers
Drop heat to medium, melt 2 tablespoons butter in the skillet. Stir in broth, lemon juice, and capers; scrape fond vigorously. Simmer 2 minutes as it thickens slightly into emulsion.
Acid from lemon cuts butter’s fat, while capers add saltiness. Constant stirring prevents separation. You’ll smell the brightness building.
If it doesn’t emulsify, whisk faster. This step makes Lemon Caper Chicken sauce silky and addictive.
Gentle Simmer Finish for Juiciness
Return chicken to skillet, spoon sauce over. Simmer gently 2-3 minutes until 165F internal. Low heat steams softly, rehydrating without overcooking.
Oven finishes dry it out; pan keeps juices locked. Use an instant-read thermometer in the thickest part. Pull at 165F for tenderness.
Pro tip: spoon sauce every 30 seconds. Therefore, chicken absorbs flavors evenly.
Equipment Essentials for Lemon Caper Chicken
Skillet Size Heat Conductivity
Choose a 12-inch stainless steel or cast iron skillet. It holds heat evenly for searing and fits 4 breasts without crowding. Single-pan keeps flavors intact.
Nonstick fails here: no crust forms. Therefore, stainless wins for fond and browning in Lemon Caper Chicken.
Heavy bottom prevents hot spots. You’ll love the results.
Meat Mallet Thermometer Must-Haves
A meat mallet pounds evenly; wrap in plastic for no mess. Instant-read thermometer ensures 165F safety. Budget ones work fine under $20.
Pro mallets have flat and textured sides for versatility. Skip rolling pins; they uneven. These tools guarantee Lemon Caper Chicken success.
Avoiding Pitfalls in Lemon Caper Chicken
Overcrowding Skillet Fixes
Cook in batches if breasts overlap. Crowding traps steam, leading to boiled chicken instead of seared. Space lets heat circulate for crispiness.
Signs: weak sizzle, pale color. Adjust by halving batches. Therefore, perfect crust every time.
Sauce Separation Prevention
Stir constantly on low heat for emulsion. Add butter off heat if needed. Cold butter incorporates smoother.
Broken sauce? Whisk in a teaspoon cornstarch slurry. Fixes it fast for Lemon Caper Chicken.
Undercooked Dry Chicken Warnings
Pound thin and check temps religiously. Skipping pounding leads to dry centers. No resting needed; sauce keeps it moist.
Undercooked? Simmer longer gently. Prevention beats cure here.
Flavor Twists on Lemon Caper Chicken
Herb Swaps: Dill vs Parsley
Swap 1/4 cup parsley for dill for brighter, pickle-like vibe. Thyme adds earthiness. Dill shines with capers’ brine.
Use parsley for classic Italian feel. Experiment based on sides. Keeps Lemon Caper Chicken fresh.
Caper Substitutes Brine Adjustments
Green olives or pickles work; chop fine and reduce salt. Use low-sodium broth. Balances brininess perfectly.
Vegan? Veggie broth swaps seamlessly. Taste as you go.
Spice It Up Variations
Add 2 minced garlic cloves with sauce ingredients. Red pepper flakes (1/4 tsp) bring heat. Start mild for family.
Garlic deepens savoriness in Lemon Caper Chicken. Evolves it effortlessly.
For another great meal using similar flavors, check out skillet lemon caper chicken thighs.
Perfect Pairings for Lemon Caper Chicken
Crisp Veggie Sides
Sauté asparagus or green beans in olive oil, 5 minutes. Roasted broccoli chars nicely at 425F. Their snap cuts sauce richness.
Bright veggies match lemon acidity. Quick steam keeps color vibrant. Perfect contrast.
Starchy Bases Absorb Sauce
Mashed potatoes soak up every drop. Orzo or couscous cook fast and mingle flavors. Skip rice if you want more sauce contact.
Butter mashed for extra indulgence. Bases elevate Lemon Caper Chicken.
Simple Salads Balance
Toss arugula with lemon vinaigrette. Peppery greens refresh rich chicken. Drizzle sauce remnants for tie-in.
Quick and crisp. Balances the plate beautifully.
For more tender chicken, see this pan-seared herb chicken.
Lemon Caper Chicken Make-Ahead Guide
Prep Pounding Dredge Ahead
Pound and dredge chicken up to 24 hours ahead; store covered in fridge. Flash-freeze dredged pieces for 1 month. Thaw overnight.
Saves weeknight stress. Flavors meld slightly. Ready for quick cook.
Freezing Cooked Portions
Cool fully, portion chicken and sauce separately. Freeze up to 2 months in bags. Thaw fridge overnight, reheat skillet low with splash broth.
Avoids drying. Tastes nearly fresh. Handy for meal prep.
Troubleshooting Lemon Caper Chicken Issues
Soggy Crust Solutions
Low heat or wet chicken causes it. Pat drier next time, crank heat. Mid-cook, blot and sear extra minute.
Prevention is key. Crisps right up.
Lemon Too Tart Adjustments
Balance with 1 tsp honey or sugar. Use riper lemons. Taste sauce before chicken returns.
Sauce Too Thin Thickening
Simmer longer or whisk in 1 tsp cornstarch slurry. Reduces beautifully. Thickens without dulling brightness.
Chicken Still Dry Recovery
Slice thin against grain; sauce moistens. Next time, pound thinner. Serves juicy.
Lemon Caper Chicken FAQ
Can I use chicken thighs?
Yes, boneless thighs work great; they’re juicier naturally. Pound to 1/2-inch, cook 4-5 minutes per side. Bone-in needs 6-7 minutes, skin removed for sauce cling. Adjust for fat; blot excess. Delivers tender Lemon Caper Chicken.
Is fresh lemon essential?
Fresh beats bottled for vibrant flavor and aroma. Bottled works in pinch but lacks zest oils. Add 1 tsp lemon zest to bottled for boost. Fresh elevates the sauce noticeably.
How to store leftovers?
Store in airtight container fridge up to 3 days. Reheat gently in skillet with splash broth over low heat; microwave dries it. Doesn’t freeze well; sauce separates, chicken toughens on thaw.
Gluten-free Lemon Caper Chicken?
Swap all-purpose flour for rice flour or 1:1 gluten-free blend, same amount. Dredge same way for crisp crust. No other changes needed.
Double sauce recipe?
Double broth, lemon, capers, butter to 2 cups, 1/2 cup each, 4 tbsp. Simmer 3-4 minutes for thickening. Perfect for extra saucy Lemon Caper Chicken over pasta.
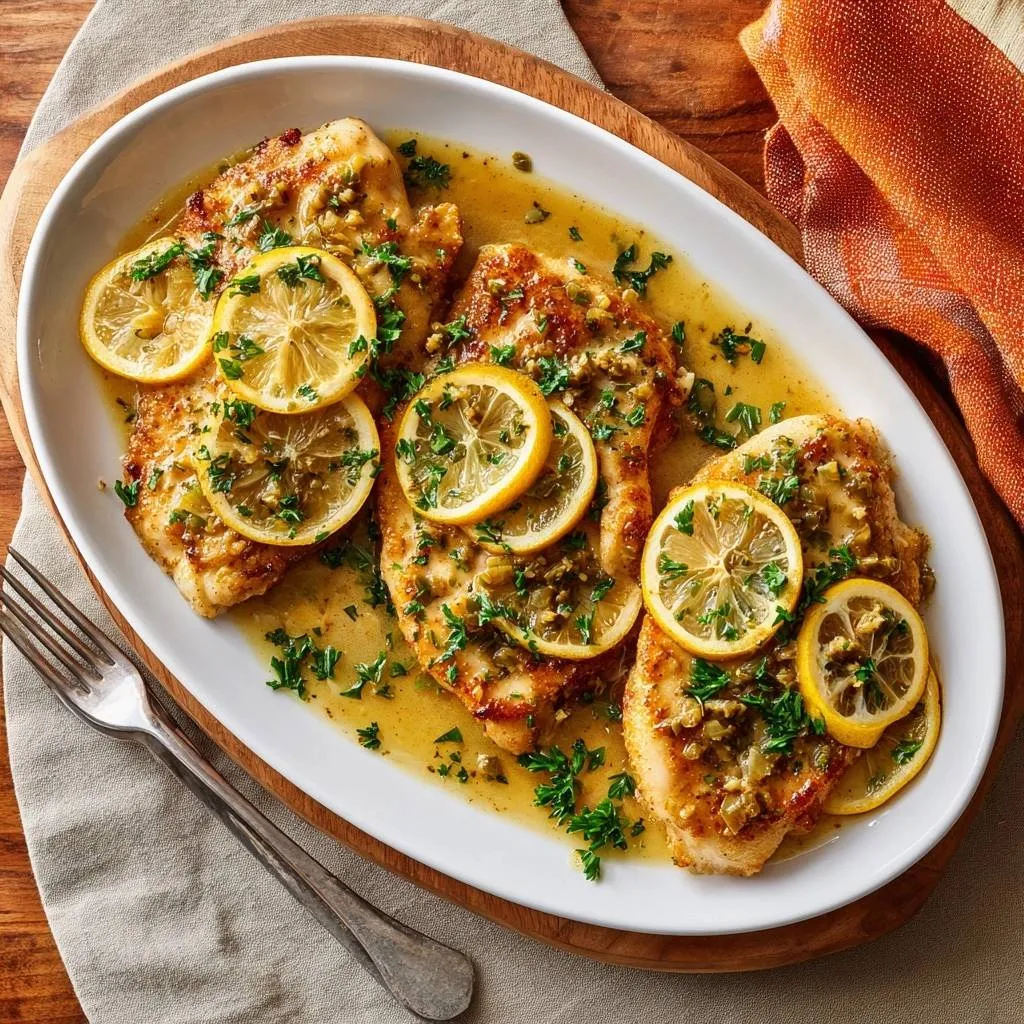
Lemon Caper Chicken
Course: Main CourseCuisine: AmericanDifficulty: easy4
servings10
minutes15
minutes450
kcal25
MinutesDry chicken breasts ruining your weeknight dinners? This foolproof technique pounds them thin for even cooking, sears hot for a crispy crust, and finishes gently in the sauce to lock in juices every single time. Ready in under 30 minutes!
Ingredients
4 boneless skinless chicken breasts
1/2 cup all-purpose flour
1 teaspoon salt
1/2 teaspoon black pepper
2 tablespoons olive oil
3 tablespoons butter divided
1 cup chicken broth
1/4 cup fresh lemon juice (about 2 lemons)
1/4 cup capers drained
1/4 cup fresh parsley chopped
Lemon slices for garnish
Directions
- Pound chicken breasts to 1/2-inch thickness between plastic wrap using a meat mallet. This ensures even cooking so the outside crisps before the inside dries out. Pat dry thoroughly.
- Mix flour, salt, and pepper in a shallow dish. Dredge chicken in flour mixture, shaking off excess.
- Heat olive oil and 1 tablespoon butter in a large skillet over medium-high heat until shimmering hot (about 2 minutes). This high-heat sear creates the crispy golden crust without overcooking the meat. Add chicken; cook 3-4 minutes per side until deeply browned. Remove to a plate.
- Reduce heat to medium. In same skillet, melt remaining 2 tablespoons butter. Stir in chicken broth, lemon juice, and capers; scrape up browned bits for flavor. Simmer 2 minutes until slightly thickened.
- Return chicken to skillet, spoon sauce over top. Simmer gently 2-3 minutes just until chicken reaches 165F internally. The sauce steams the chicken softly, keeping it juicy and tender.
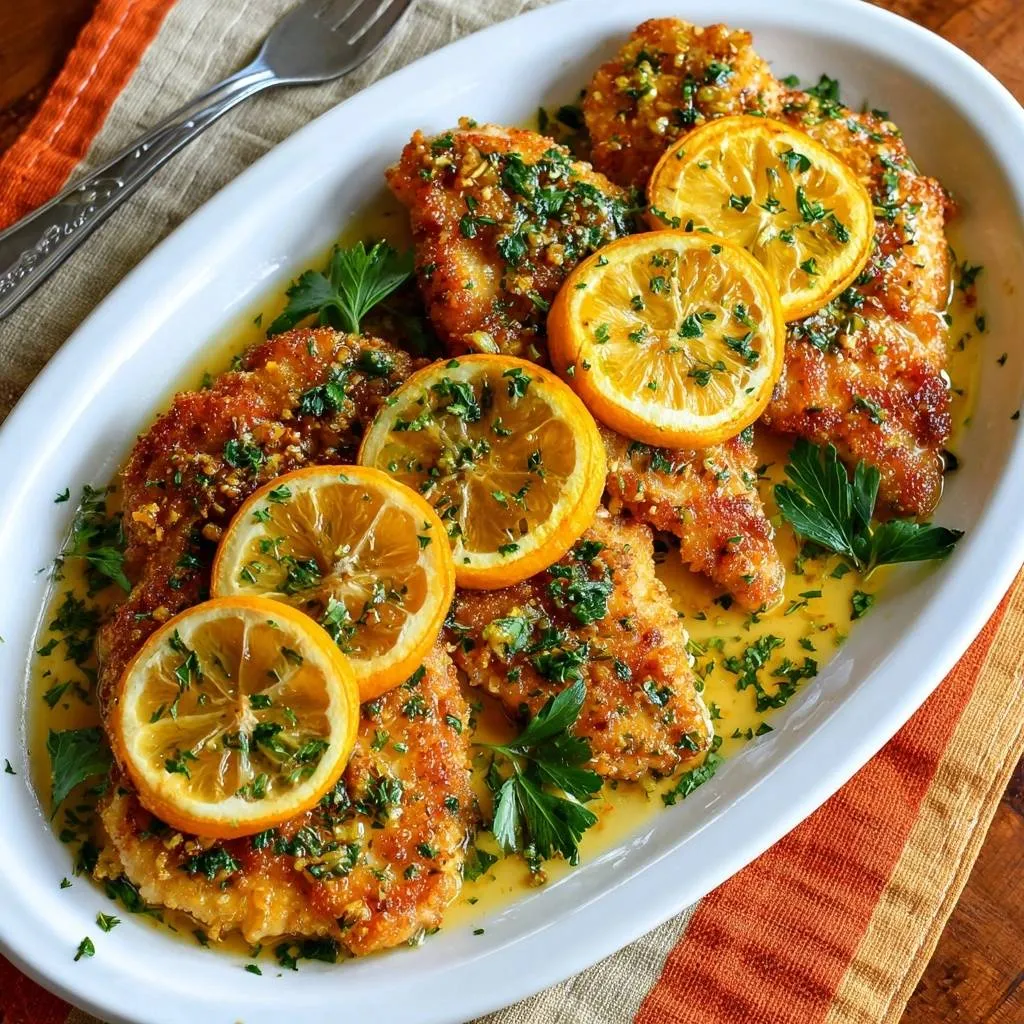
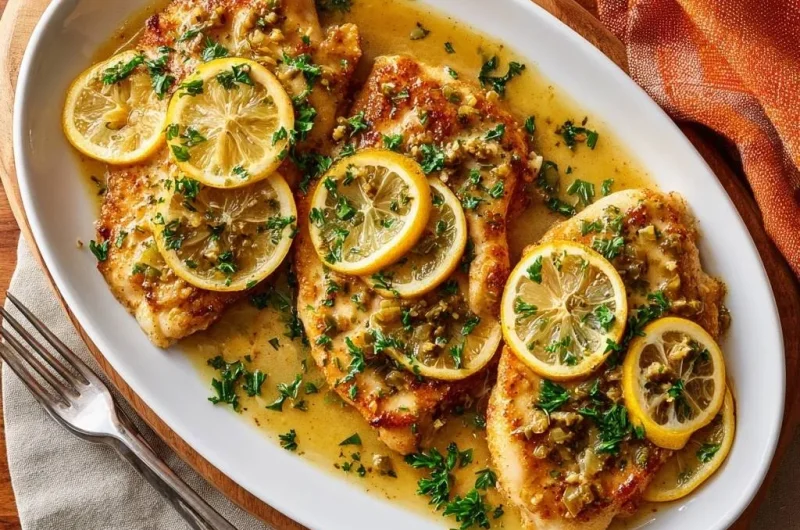
- Garnish with parsley and lemon slices. Serve immediately.
- Juicy, crispy perfection guaranteed!
Notes
- Pound chicken to 1/2-inch thickness for even cooking. High-heat sear creates crispy crust. Finish in sauce to keep juicy. Internal temp 165°F.