The most common complaint about making piccata is cutting into a dry, rubbery piece of chicken after all your efforts. I cracked the code years ago, realizing that the secret lies not in the cooking, but in the specific preparation of the meat itself.
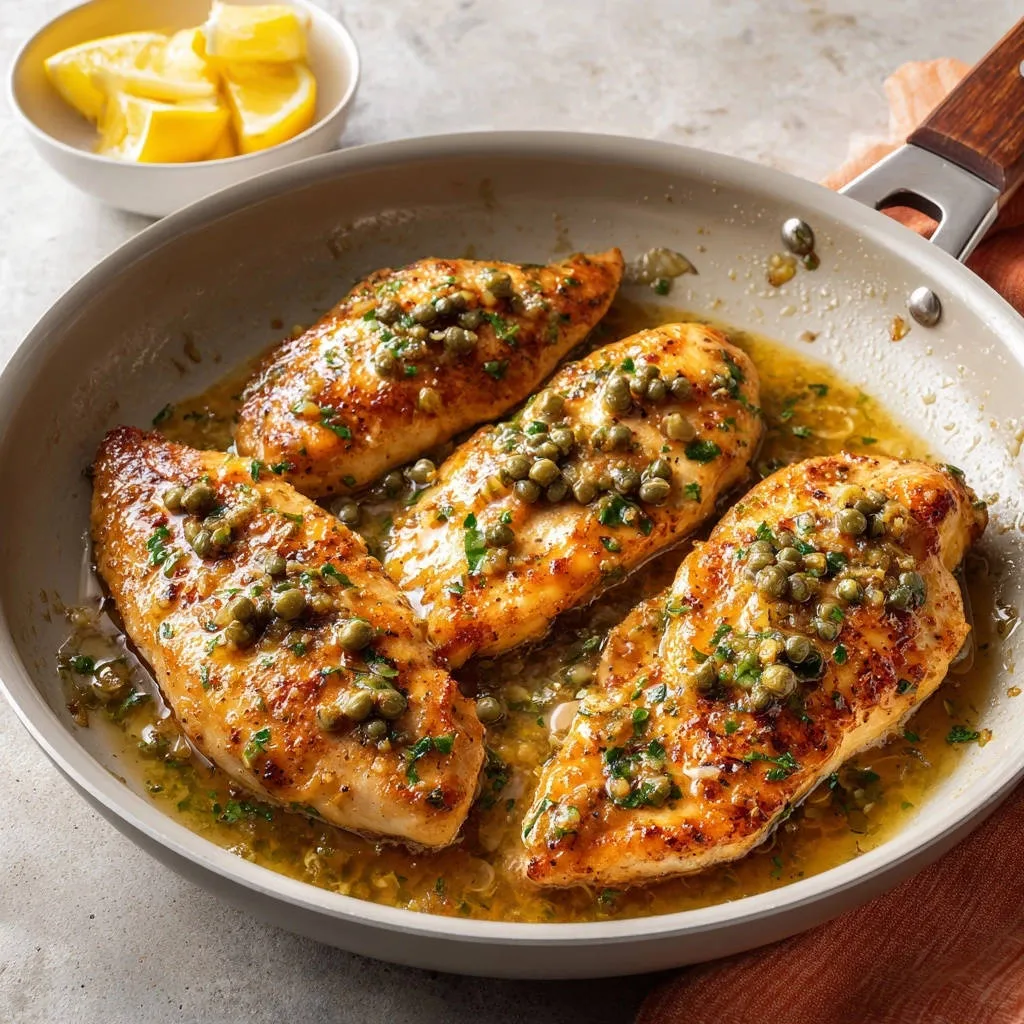
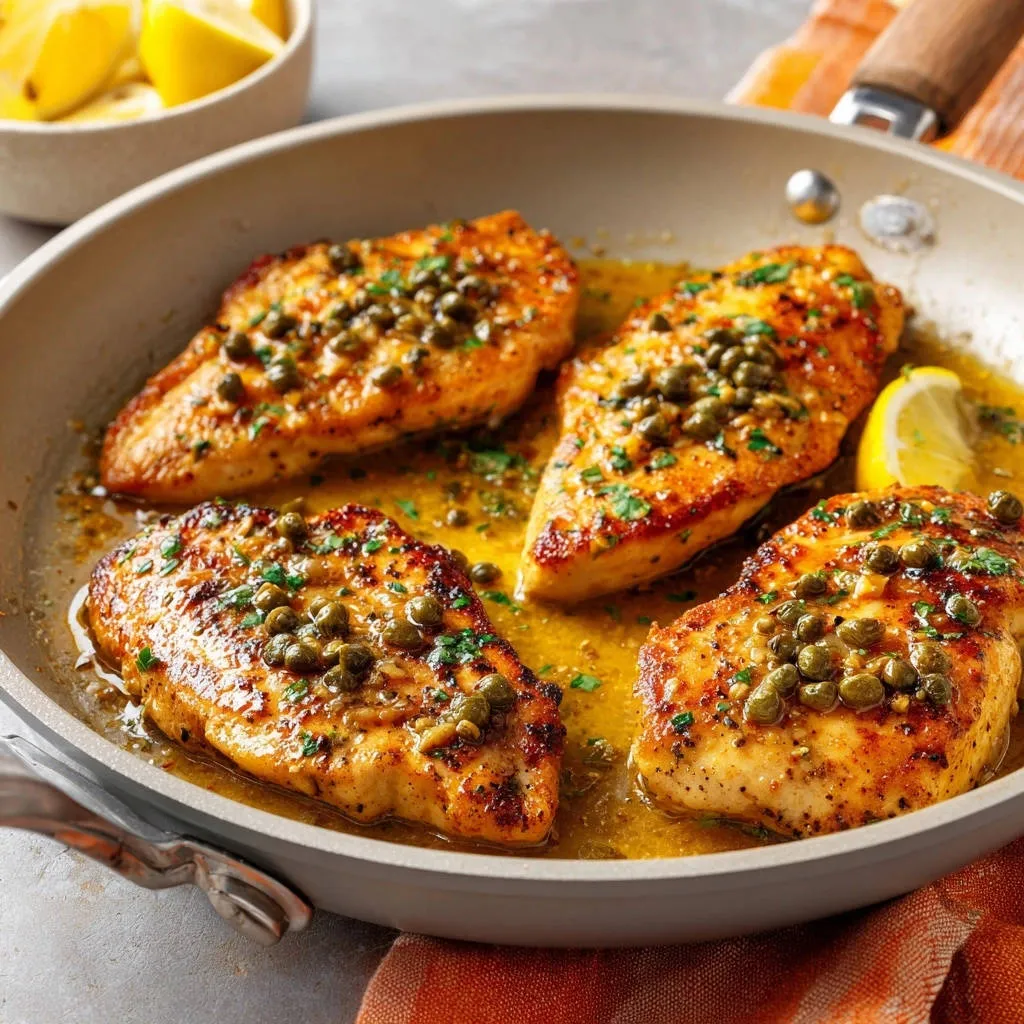
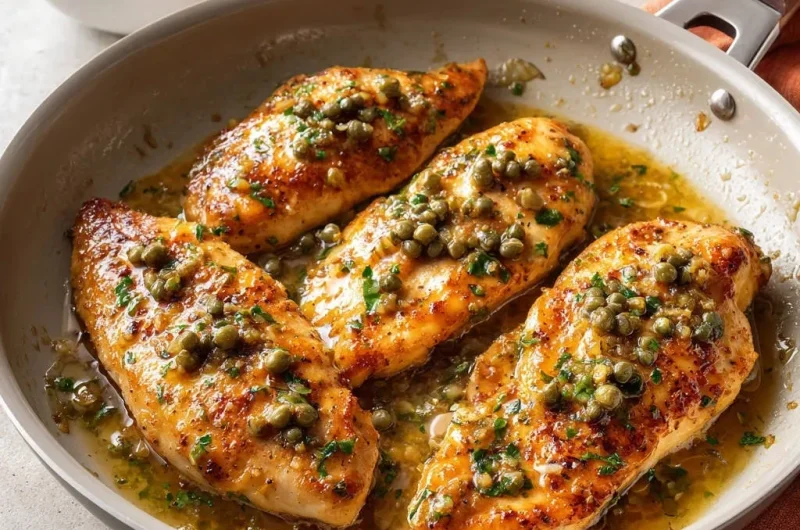
By following this expert method-starting with perfectly pounded cutlets-you will achieve moist, fork-tender results with this bright, flavorful Lemon Caper Chicken Piccata every single time.
For even more perfectly pounded cutlets, see how to achieve moist chicken in classic lemon caper chicken piccata.
The Secret to Never-Dry Chicken Piccata: Why This Recipe Works
The Magic of the Thin Cutlet: Uniformity Equals Tenderness
Pounding the chicken breasts to an even 1/4-inch thickness is the absolute most critical step for success. This ensures that every part of the meat cooks at the exact same rate, preventing thinner edges from drying out while the center finishes.
For even more tender results, explore how to achieve juicy tender chicken piccata every time.
The thinness drastically reduces the overall time the chicken is exposed to high heat, resulting in maximum tenderness and a consistent, beautiful sear.
Quick Weeknight Elegance: Timing is Everything
Because the chicken cutlets are so thin, they sear and cook completely in approximately four to five minutes total time. This speed is indispensable for home cooks.
This reliable technique transforms classic chicken piccata into a highly sophisticated, quick weeknight dinner that is easily prepared in under 30 minutes.
Achieving the Perfect Golden Crust Before the Sauce
The goal of the initial searing stage is to quickly create a deep golden crust on the exterior of the cutlets. This crispy crust is crucial because it protects the meat during the brief period it rests off-heat.
You must immediately remove the cutlets the moment they are cooked through. Leaving them in the pan while the sauce is built will cause them to steam and toughen, undermining all the prep work.
Building the Bright, Briny Sauce: Essential Ingredients Checklist
Selecting the Foundation: Chicken Breasts vs. Chicken Thighs
Boneless, skinless chicken breasts are traditional for piccata due to their lean profile and ability to cook extremely fast when pounded thin.
However, if you prioritize maximum moisture, you can certainly substitute chicken thighs. Thighs offer natural juiciness due to a higher fat content, but they may require slightly longer pounding and searing times.
Flour Power: The Purpose of the Light Dredge
A very light dredge in all-purpose flour serves three vital purposes for making this delicate dish. It provides a protective barrier for the meat during the sear and aids in achieving a beautiful golden crust.
Additionally, the residual flour helps slightly thicken the resulting pan sauce during the deglazing step. For a gluten-free option, a high-quality gluten-free all-purpose blend works perfectly.
The Holy Trinity: Fresh Lemon, Capers, and Parsley
The signature flavor of this bright lemon-caper sauce relies entirely on high-quality, fresh ingredients. You must use fresh lemon juice, as bottled juice lacks the vibrant acidity necessary to cut through the richness of the butter.
Capers, which are brined flower buds, provide the crucial salinity and the textural ‘pop’ that defines the dish’s complexity. Their briny flavor is irreplaceable.
Finally, fresh parsley is essential not just for visual appeal, but for adding a subtle, clean herbal finish right before serving.
Butter vs. Oil: Getting the Sear, the Shine, and the Richness
We use a combination of olive oil and unsalted butter for the initial sear because the oil raises the smoke point of the butter, preventing scorching at high heat.
The remaining butter is divided. Crucially, the final tablespoon of cold butter is whisked in at the very end to emulsify the sauce, adding luxurious velvetiness and rich, mirror-like shine.
Essential Tools and Prep for Seamless Piccata Execution
The Importance of the Meat Mallet (Or Alternatives)
The meat mallet is the easiest tool to ensure the chicken is pounded to a uniform thickness, which is a non-negotiable step for achieving tender results.
If you do not own a specialized mallet, you can successfully use the smooth bottom of a small, heavy pot or a sturdy rolling pin to achieve the same even thickness. Always pound the cutlets between two sheets of plastic wrap to prevent tearing the meat.
Skillet Selection: Why Size and Material Matter
A large, wide skillet-ideally 12 inches or more-is mandatory because it prevents overcrowding the chicken cutlets. Overcrowding drops the pan temperature significantly, causing the chicken to steam instead of sear, ruining the crust.
Stainless steel skillets are excellent for building the crucial brown bits, or “fonds,” needed to flavor the sauce, but a quality nonstick pan works well if you are aiming for easier cleanup.
Step-by-Step Guide: Crafting Your Lemon Caper Chicken Piccata Masterpiece
-
Prepare the Chicken for Juiciness:
Slice the chicken breasts horizontally to create thin cutlets, aiming for eight pieces from four breasts. Place each cutlet between two sheets of plastic wrap and use a meat mallet to gently and evenly pound them to an absolute 1/4 inch thickness.
This uniform thinness guarantees speed and the fork-tenderness required for perfect piccata.
-
Dredge and Season:
In a shallow dish, thoroughly combine the flour, salt, and pepper. Lightly dredge each chicken cutlet in the flour mixture, ensuring you shake off any excess flour before they hit the heat.
-
Sear the Chicken in Batches:
In the large skillet over medium-high heat, melt the searing portion of butter and olive oil until shimmering. Place cutlets in the pan, ensuring they do not touch; you must work in two batches.
Sear for just 2 to 3 minutes per side until they achieve a deep golden brown color and are cooked through. Immediately remove the finished chicken from the pan and set it aside on a plate to rest and maintain moisture.
-
Build the Sauce Base:
Reduce the heat to medium-low. Add the remaining olive oil and the minced garlic to the pan, stirring quickly for about 30 seconds until the garlic is intensely fragrant.
Crucially, watch the garlic carefully and remove the pan from the heat momentarily if necessary to avoid any risk of burning.
-
Deglaze and Reduce the Stock:
Pour the chicken stock and fresh lemon juice into the pan. Bring the mixture to a simmer, scraping up all the savory browned bits (the fonds) from the bottom of the pan to incorporate maximum flavor into the liquid.
Let the sauce reduce by approximately one-third, concentrating the flavor and slightly thickening the base, which typically takes 3 to 4 minutes of simmering.
-
Finish the Sauce and Warm the Chicken:
Stir in the drained capers. Remove the pan from the heat and stir in the final tablespoon of cold, unsalted butter until it is completely melted and the sauce looks glossy and rich-this is the critical emulsification step.
Return all the cooked chicken cutlets to the pan, nesting them gently in the sauce. Allow the cutlets to warm through for just 1 minute; avoid boiling or simmering the delicate chicken here.
-
Garnish and Serve:
Finish the dish by stirring in the freshly chopped parsley. Serve your masterpiece immediately with generous spoonfuls of the bright lemon-caper sauce spooned over the top and a side of fresh lemon wedges.
Troubleshooting & Chef’s Secrets for the Ultimate Piccata Flavor
Why Is My Sauce Too Thin or Too Salty? (Easy Fixes)
If your piccata sauce is too thin, stir together a slurry of 1 teaspoon of cornstarch mixed with 2 teaspoons of cold water. Whisk this mixture into the simmering sauce until it coats the back of a spoon and thickens slightly.
A salty sauce, often caused by the briny capers or highly seasoned stock, can be effectively balanced by adding a teaspoon of heavy cream or a very small pinch of sugar to harmonize the flavors.
Preventing Garlic Burn: The 30-Second Rule
Burnt garlic introduces a bitter, acrid flavor that instantly ruins the clean taste of your bright lemon-caper sauce. Never add the garlic until the heat has been reduced to medium-low.
Cook the garlic for only about 30 seconds, just until it releases its raw aroma, before immediately pouring in the liquid to stop the cooking process and capture its savory essence.
The Professional Trick: Using Cold Butter for Emulsification
Adding the final piece of butter while the pan is off the heat is a classic French technique called monté au beurre, which effortlessly thickens and emulsifies the sauce.
The cold temperature of the butter prevents the fat from separating, ensuring the sauce becomes velvety smooth, rich, and attains that beautiful, professional-grade shine.
Make-Ahead Prep and Reheating Solutions
You can pound and dredge the chicken cutlets up to four hours ahead of time; store them layered between wax paper or parchment in the refrigerator to keep them moist.
To reheat leftovers, avoid the microwave, which drastically dries out the thin meat. Place the chicken in a baking dish with the sauce and warm it gently in a 300°F oven for just 5 to 7 minutes until heated through.
The Perfect Plate: Complementary Side Dishes and Wine Pairings
Classic Pairings: Pasta, Polenta, or Rice?
This dish is ideally paired with a neutral carbohydrate that will effectively soak up the plentiful, bright lemon sauce. Angel hair or linguine pasta are classic choices, as their thin strands absorb the flavor beautifully.
What to Serve Alongside
Round out your meal with these complementary dishes that pair well with chicken.
- For a comforting addition, try this cheesy garlic bread, perfect for soaking up extra sauce.
- If you prefer a more dippable option, consider these cheesy garlic breadsticks for a satisfying crunch.
For a richer, heartier meal, serve the piccata over creamy polenta. Alternatively, simple jasmine rice provides a lovely, light base and textural contrast to the tender chicken cutlets.
Lightening the Meal: Fresh Vegetable Sides
Balance the rich, buttery sauce with sharp, fresh green vegetables. Roasted asparagus, sautéed zucchini, or quick-steamed green beans complement the acidity without competing with the flavor profile.
A simple side salad of fresh arugula tossed lightly with good olive oil and a few shaved Parmesan curls provides a sharp, peppery counterpoint that cuts through the sauce’s richness.
Wine Pairings: Matching Acidity with Brightness
The high acidity and bright flavors in piccata require a wine that is equally crisp and dry. Look for varietals that have enough zest not to clash with the lemon and caper brine.
Excellent choices include Sauvignon Blanc, which mirrors the herbaceous notes, or a dry, high-acid Italian Pinot Grigio. These selections harmonize beautifully with the Lemon Caper Chicken Piccata profile.
Common Questions About Lemon Caper Chicken Piccata
Can I Make This Lemon Caper Chicken Piccata Gluten-Free?
Absolutely. You can substitute the all-purpose flour in the dredge with a cup-for-cup gluten-free flour blend or successfully use a combination of cornstarch and rice flour.
What is the Best Substitute for Capers if I Don’t Have Them?
If capers are unavailable, the best substitute is finely chopped, brine-cured green olives, which offer a similar salty, briny depth to the sauce.
Be sure to use significantly less, as olives tend to be stronger and saltier than capers.
How Can I Store Leftovers Safely?
Store leftover chicken and sauce together in an airtight container in the refrigerator for up to three days. Ensure the container is well-sealed to prevent drying.
Can I Add Cream to the Sauce for Extra Richness?
While not traditional, adding heavy cream creates a richer, slightly more mellow sauce that many enjoy. If you choose to use it, add about 1/4 cup of heavy cream after the sauce has reduced but before stirring in the final cold butter.
Ready to Impress? Share Your Lemon Caper Chicken Piccata Masterpiece!
This preparation method focused on thin, evenly pounded chicken cutlets is truly the secret to a flawless Lemon Caper Chicken Piccata experience. Once you adopt this expert technique, dry, rubbery chicken will be a distant memory.
I hope you find this elegant dish as easy and rewarding to execute as I do. Try this recipe tonight, nail the sear and the sauce, and let us know in the comments how the tender results transformed your weeknight dining!
Chicken Piccata
Course: Main CourseCuisine: Italian-AmericanDifficulty: easy4
servings15
minutes20
minutes650
kcal35
minutesThis recipe guarantees moist, tender chicken cutlets every time by using a simple pounding technique before searing. Swimming in a bright, rich lemon-caper sauce, this dish is a sophisticated and speedy weeknight main course.
Ingredients
4 boneless, skinless chicken breasts (about 6 oz each)
1/2 cup all-purpose flour
1 teaspoon salt
1/2 teaspoon black pepper
2 tablespoons olive oil
4 tablespoons unsalted butter, divided
2 cloves garlic, minced
1 cup low sodium chicken stock
1/4 cup fresh lemon juice
2 tablespoons capers, drained
1/4 cup chopped fresh parsley
Lemon wedges, for serving
Directions
- Prepare the Chicken for Juiciness This step is the secret to tender results. Slice the chicken breasts horizontally to create 8 thin cutlets. Place each cutlet between two sheets of plastic wrap and use a meat mallet to pound them gently and evenly to about 1/4 inch thickness. This guarantees fast, uniform cooking and tenderness.
- Dredge and Season In a shallow dish, combine the flour, salt, and pepper. Lightly dredge each chicken cutlet in the flour mixture, shaking off the excess.
- Sear the Chicken In a large skillet (preferably nonstick) over medium-high heat, melt 2 tablespoons of butter and 1 tablespoon of olive oil. Once the oil shimmers, place 4 cutlets in the pan, making sure not to overcrowd. Sear for 2 to 3 minutes per side, just until deeply golden brown and cooked through. Immediately remove the chicken from the pan and set aside on a plate. Repeat with the remaining oil, butter, and chicken cutlets. This fast searing locks in moisture.
- Build the Sauce Reduce the heat to medium-low. Add the remaining 1 tablespoon of olive oil and the minced garlic to the pan, stirring quickly for about 30 seconds until fragrant.
- Deglaze Pour the chicken stock and lemon juice into the pan. Bring the mixture to a simmer, scraping up any browned bits from the bottom of the pan. Let the sauce reduce by about one-third, which should take 3 to 4 minutes.
- Finish the Sauce and Chicken Stir in the drained capers and 1 tablespoon of the remaining cold butter. The cold butter emulsifies the sauce, giving it richness and shine. Return all the cooked chicken cutlets to the pan, nesting them in the sauce. Let the chicken warm through for 1 minute (do not boil or simmer for long).
- Serve Finish the dish by stirring in the fresh parsley. Serve immediately with extra sauce spooned over the top and a side of fresh lemon wedges.
Notes
- The key is pounding the chicken thin (1/4 inch) for quick, even cooking and guaranteed tenderness.