For years, the nemesis of my baking was the dreaded cheesecake crack-that deep fissure that mars an otherwise perfect dessert. Mastering the art of the Lemon Drizzled Baked Cheesecake hinged entirely on perfecting a slow, controlled cooling technique.
This method ensures you achieve that signature tall, creamy, and flawlessly smooth surface every single time, transforming a tricky dessert into a dependable showstopper you can trust.
For a similar creamy experience, explore the red velvet cheesecake cookies.
Beyond Basic: What Makes Our Lemon Drizzled Baked Cheesecake So Special?
Our goal is not just a tasty cheesecake, but a structurally perfect one, rivalling any professional bakery display case. We prioritize temperature control and ingredient preparation to guarantee a velvety texture and bright, balanced flavor.
For another delightful cheesecake variation, explore creamy pumpkin swirl cheesecake.
The “Never Cracked” Secret: Achieving a Flawless Surface
Cheesecakes crack primarily due to rapid temperature change, known as thermal shock, which causes the outside to contract much faster than the still-warm core. Our method combats this by using a hot water bath for gentle, moist baking and, most importantly, the slow, staged cooling in the residual heat of the turned-off oven.
This gradual temperature reduction allows the entire cake to settle and firm up uniformly, preventing the collapse and inevitable fissures.
Why Room Temperature Ingredients Are Non-Negotiable
Starting with cold cream cheese guarantees a lumpy, uneven batter, no matter how long you beat it. Room temperature cream cheese and eggs blend quickly and seamlessly, which is essential for minimizing mixing time.
Minimal mixing prevents the incorporation of excess air; too much air leads to a rapid rise during baking, followed by a dramatic and cracking fall upon cooling.
The Perfect Balance: Zesty Citrus and Creamy Richness
The flavor profile is specifically designed to be rich but not heavy, thanks to the addition of fresh lemon zest and juice. The zest delivers powerful, aromatic lemon oil notes, while the juice provides the necessary acidity to balance the sweetness of the sugar and richness of the full-fat cream cheese.
The Essential Building Blocks: Ingredients for Your Best Cheesecake
The Foundation: Pressing the Perfect Graham Cracker Crust
The correct ratio of melted butter to crumbs ensures a crust that is moist enough to bind without being greasy. Pressing the crust firmly into the pan establishes a dense foundation that resists moisture absorption.
Freezing the crust for at least 15 minutes before adding the filling solidifies the butter, making the base rigid and preventing it from crumbling when sliced.
The Creamy Core: Dairy and Flavor Components
Choosing Cream Cheese: Always select full-fat, block-style cream cheese for superior richness and structure. Low-fat varieties contain more water, which compromises the final texture and density.
The Role of Heavy Cream: Heavy cream adds essential fat content and acts as a stabilizer. It ensures the final baked filling remains dense, luxurious, and supremely creamy.
The Citrus Kick: Lemon Zest vs. Lemon Juice
Lemon zest contains concentrated essential oils, giving the most vibrant and fragrant citrus flavor. Be sure to use a microplane to remove only the yellow portion, avoiding the bitter white pith beneath.
The Final Flourish: Glaze, Garnish, and Salt
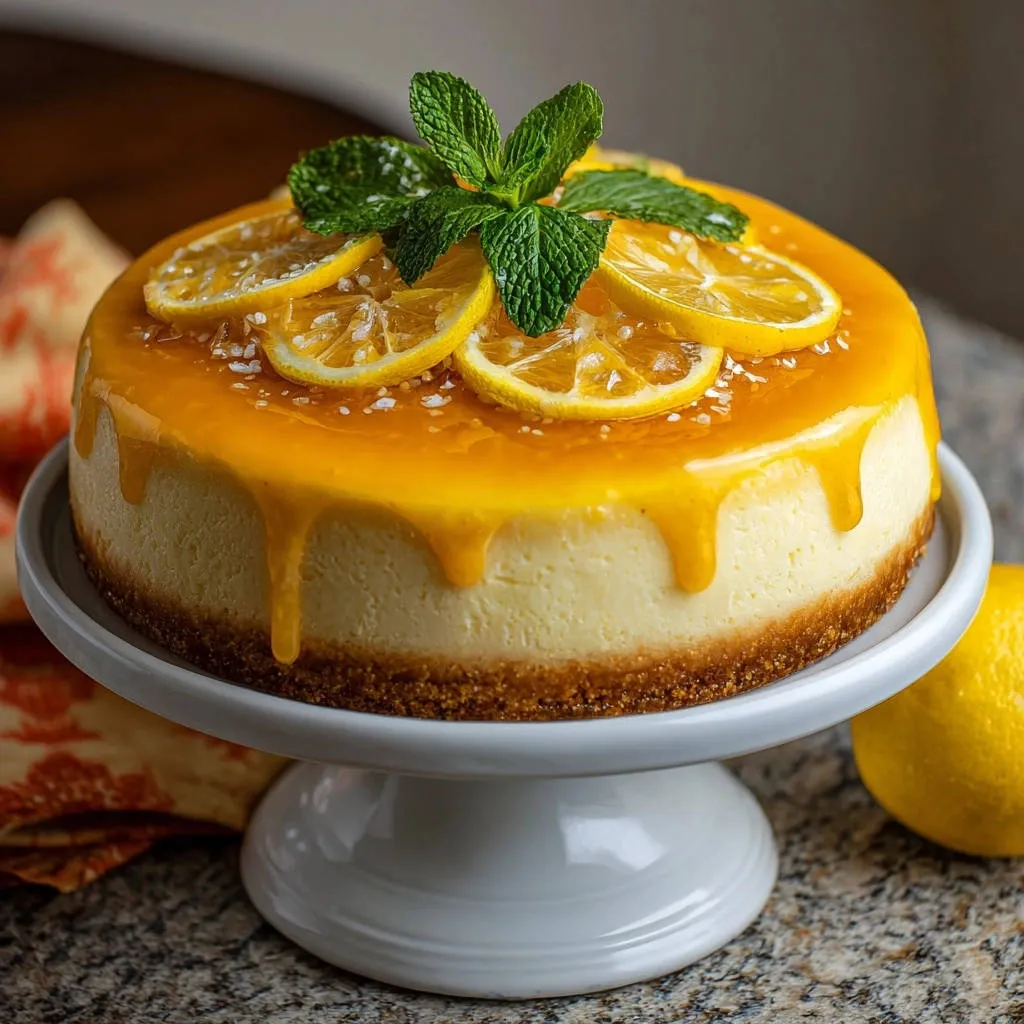
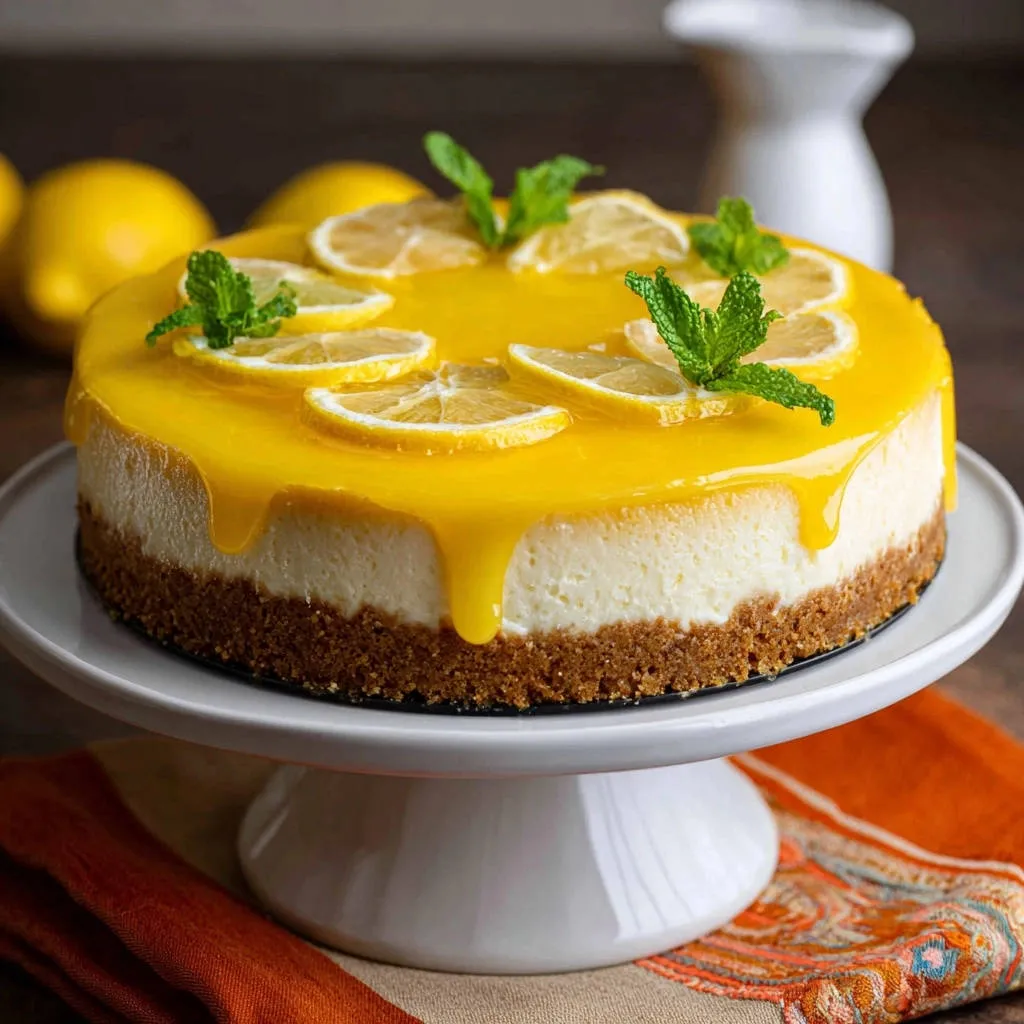
Using a good quality lemon curd or glaze provides both a visually appealing sheen and an intense boost of lemon flavor on top. The simple garnish of thin lemon slices and fresh mint adds visual appeal and freshness.
A very light sprinkle of flaky sea salt (like Maldon) on top is optional, but highly recommended, as it brilliantly enhances the sweetness and acidity through contrast.
Sweet Companions
To round out your dessert experience, consider these delightful treats.
- For a savory contrast to your Lemon Drizzled Baked Cheesecake, try these Crispy Cheesy Puff Pastry Bites, offering a flaky shell and gooey center.
- If you enjoy cream cheese in your desserts, you’ll appreciate these Cinnamon Sugar Cream Cheese French Toast Rolls for another taste of that familiar flavor.
Essential Equipment for Cheesecake Mastery
While the ingredients are important, the right tools are crucial for executing the specialized crack-free baking method.
The 9-Inch Springform Pan: The removable collar is vital for effortlessly serving a tall, beautiful cake. Ensure the pan is sealed tightly before wrapping for the water bath.
Heavy-Duty Aluminum Foil: You must use thick, heavy-duty foil, and preferably two layers, to create an impenetrable seal around the springform pan. Thin foil can easily tear when submerged in boiling water.
Stand Mixer vs. Hand Mixer: Both work, but always use the absolute lowest speed setting once the cream cheese is smooth. This prevents aggressive aeration of the batter, a key factor in crack prevention.
Detailed Blueprint: Preparing Your Lemon Drizzled Baked Cheesecake
-
Step 1: Preparing the Pan and Crust Base
Preheat the oven to 325°F (160°C). Ensure the crust mixture is pressed firmly and evenly into the bottom of the pan and slightly up the sides.
Chilling the crust is critical for structural integrity during baking, preventing it from turning mushy under the weight of the filling.
-
Step 2: Building the Water Barrier (The Key to Moisture)
Use two large sheets of heavy-duty foil, wrapping the pan completely up and over the rim to create a high, secure seal. This precise wrapping prevents even minor water leakage, which is the cause of a soggy crust.
-
Step 3: Cream Cheese Mixing Strategy
In a large bowl, beat the room temperature cream cheese until perfectly smooth and lump-free before gradually adding the sugar. Beating the cream cheese first prevents a gritty texture later and ensures the sugar dissolves fully.
-
Step 4: Incorporating the Flavor Agents
Mix in the heavy cream, vanilla, lemon zest, and lemon juice immediately after the sugar, mixing only until combined. Do not mix at high speed; keep the mixer on a medium-low setting throughout the process.
-
Step 5: The Gentle Addition of Eggs (The Crack Prevention Stage)
Add the eggs one at a time, mixing on the absolute lowest speed only until the yellow streak disappears. Stop immediately after each egg is incorporated.
Overmixing at this stage incorporates too much air, which is the number one cause of the rise-and-collapse cycle that results in cracks.
-
Step 6: Setting Up and Baking the Water Bath
Pour the filling over the chilled crust. Place the foil-wrapped pan inside a larger roasting pan before adding the boiling water.
Carefully pour boiling water into the roasting pan until it reaches halfway up the sides of the springform. The boiling water creates the humid environment necessary for gentle, even baking, protecting the cake from intense dry heat.
Bake for 65-75 minutes. The edges should appear set, but the center 2-inch circle should still wobble slightly, indicating perfect doneness.
-
Step 7: The Critical Slow Cooling Method (Do Not Skip!)
Once baking time is complete, turn off the oven but leave the cheesecake inside with the door closed for 1 hour. This gradual cooling prevents the temperature shock that causes instant cracking.
After one hour, crack the oven door slightly and let the cake cool for another 30 minutes. This two-stage slow cooling process is the ultimate safeguard against cracking and shrinking.
-
Step 8: Final Chilling and Release
Remove the cake from the oven and the water bath, and carefully remove the foil. Allow it to cool completely on the counter before covering and chilling in the refrigerator for a minimum of 6 hours, or ideally overnight.
Only after the cheesecake is fully chilled should you gently loosen and remove the springform ring for serving and garnishing.
Mastering Cheesecake Technique: Chef’s Tips and Troubleshooting
Solving the Soggy Crust Dilemma
Moisture enters the crust either through poor foil wrapping or through steam settling during the long cooling process. The initial crust freeze helps set the structure, minimizing absorption.
Ensure your heavy-duty foil wrap extends well above the filling line and is completely sealed to create a reliable waterproof barrier against the boiling water.
Avoiding the Dreaded Center Crack and Sinkage
The main culprits are excess air and rapid cooling. Always use the lowest mixing speed, especially when incorporating the delicate eggs, and never skip the slow oven cooling steps.
Tip on Batter Bubbles: After pouring the batter into the pan, gently tap the pan on the counter three or four times. This action helps any large air bubbles trapped near the surface rise and pop, preventing unsightly craters.
Temperature Monitoring: Oven temperatures often fluctuate wildly, causing uneven baking and cracks. Always use an independent oven thermometer to ensure your oven holds a steady 325°F (160°C).
The Best Technique for a Smooth Drizzle Glaze
If you are using lemon curd or a thicker glaze, warm it gently until it achieves a liquid, pourable consistency. This ensures a clean, controlled drizzle that adheres smoothly to the chilled cheesecake surface.
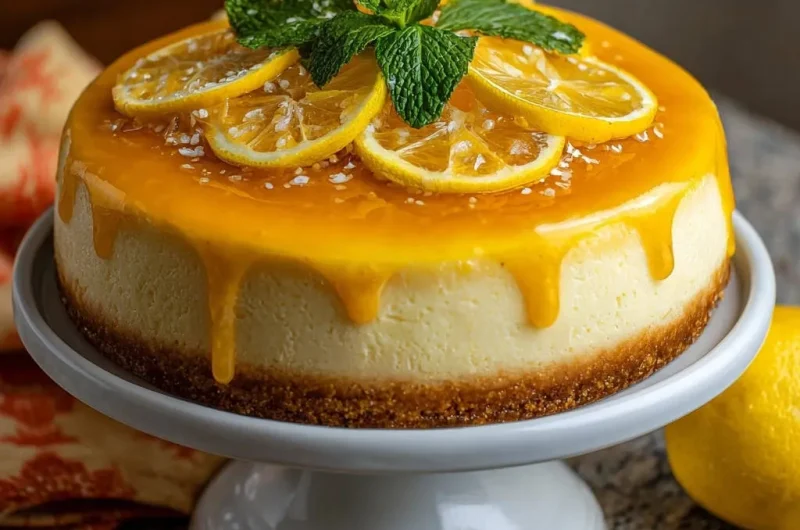
Use the back of a spoon to guide the glaze, starting in the center and allowing it to cascade naturally down the sides for an elegant, artisanal look.
Beyond the Recipe: Storage, Variations, and Serving Suggestions
How Long Does Lemon Drizzled Baked Cheesecake Last? (Storage Guidelines)
Tightly covered, the Lemon Drizzled Baked Cheesecake remains fresh in the refrigerator for 5 to 7 days.
If freezing, chill the plain cheesecake completely first, then wrap it tightly in plastic wrap followed by foil. It can be frozen for up to one month; thaw overnight in the refrigerator before glazing.
Serving Temperature: Chilled, Room Temp, or Warm?
The ideal serving temperature is slightly chilled, which provides the best structural integrity and firmness.
Serving the cheesecake too cold dulls the vibrant citrus notes; remove it from the refrigerator about 30 minutes before serving to allow the flavors to awaken.
Flavor Twists: Adapting the Citrus Drizzle
Infusing the heavy cream used in the filling with rosemary or thyme for 30 minutes before mixing creates a subtle, herbaceous note that pairs beautifully with the lemon.
Swapping the lemon curd for a homemade raspberry reduction or passion fruit glaze offers a beautiful color contrast and tropical acidity.
Quick Answers: Your Top Lemon Drizzled Baked Cheesecake FAQs
Can I make this cheesecake without a water bath?
While technically possible, we firmly advise against it for this high-quality result. The water bath (bain-marie) is non-negotiable for guaranteeing a cheesecake that is creamy throughout, not rubbery at the edges.
Without the steam and insulation provided by the water, the cake will likely bake too quickly, resulting in both a cracked top and a texture gradient from firm edges to a sunken center.
How do I know if my cream cheese is truly “room temperature”?
Your cream cheese should be soft enough to yield easily when pressed gently with a finger, but it should not look shiny or melted. This usually takes about one to two hours sitting on the counter, depending on kitchen temperature.
What type of pan should I use if I don’t have a springform?
A deep 9-inch pie plate or a removable-bottom tart pan can work in a pinch, but the presentation will be less dramatic. If using a standard pan, line it completely with two layers of parchment paper that overhang the sides significantly, creating “slings” to lift the finished cake out after chilling.
Ready to Impress? Share Your Lemon Drizzled Baked Cheesecake Masterpiece!
This recipe transforms the tricky art of cheesecake into a reliable science, giving you the confidence to produce a bakery-quality dessert every time. The combined brilliance of the water bath and the critical slow cooling method ensures your Lemon Drizzled Baked Cheesecake will be perfectly smooth.
Try this crack-free blueprint today and delight your friends and family with a masterpiece that looks as impressive as it tastes.
Baked Cheesecake
Course: DessertCuisine: AmericanDifficulty: medium12
servings20
minutes1
hour15
minutes450
kcal480
minutesThis perfected recipe guarantees a classic, tall, smooth, creamy cheesecake every single time. Utilizing a critical water bath and a slow cooling method, this dessert eliminates common issues like center dips and deep cracks, resulting in a bakery-perfect finish.
Ingredients
For the Crust:
1 and 1/2 cups graham cracker crumbs
1/4 cup granulated sugar
6 tablespoons unsalted butter, melted
For the Filling:
3 8-ounce packages full-fat cream cheese, room temperature
1 and 1/2 cups granulated sugar
4 large eggs, room temperature
1/4 cup heavy cream
1 tablespoon lemon zest
1 teaspoon vanilla extract
1 tablespoon fresh lemon juice
For the Glaze and Garnish:
1/2 cup lemon curd or glaze
4 thin lemon slices
Small sprig of fresh mint
Flaky sea salt (optional, for garnish)
Directions
- Prepare the Pan and Oven: Preheat your oven to 325 degrees F. Prepare a 9-inch springform pan. Mix the graham cracker crumbs, sugar, and melted butter. Press the mixture firmly into the bottom and slightly up the sides of the pan. Place the crust in the freezer while you prepare the filling.
- Build the Water Barrier (Pain Point Solution Highlight): This step is crucial for moisture and crack prevention. Take two large sheets of heavy-duty aluminum foil and wrap the entire outside of the springform pan, making sure the foil extends all the way up and over the rim. This prevents water leakage during the water bath.
- Mix the Filling (Avoid Cracks): In a large mixing bowl, beat the room temperature cream cheese until completely smooth and there are no lumps remaining. Scrape down the sides. Gradually add the sugar and mix only until combined. Beat in the heavy cream, vanilla, lemon zest, and lemon juice.
- Add Eggs Carefully (Avoid Sinking): Add the eggs one at a time, mixing only until just incorporated after each addition. Do not overmix. Overmixing incorporates too much air, which causes the cake to rise rapidly and then collapse and crack as it cools. Pour the filling over the chilled crust.
- Bake with the Water Bath: Place the foil-wrapped springform pan inside a large roasting pan. Carefully pour boiling water into the roasting pan until the water reaches about halfway up the sides of the springform pan. Bake for 65 to 75 minutes. The cheesecake should be mostly set, but the very center (about a 2-inch diameter) should still have a slight wobble.
- The Slow Cooling Method (The Ultimate Crack Solution): This is the most important step for a smooth top. Once baking time is up, turn off the oven but do not open the door. Leave the cheesecake inside the turned-off oven with the door closed for 1 hour. This extremely slow cooling process prevents temperature shock, which is the main culprit for cracks.
- Final Cool: After 1 hour in the warm oven, crack the oven door slightly and let the cheesecake cool for another 30 minutes. Remove the cheesecake from the oven, take it out of the water bath, and carefully remove the foil. Let it cool completely on the counter before covering it and chilling it in the refrigerator for at least 6 hours, or preferably overnight.
- Garnish: Once completely chilled, gently loosen and remove the springform ring. Warm the lemon glaze slightly if needed for better drizzling consistency. Drizzle the glaze over the top of the cheesecake, allowing it to drip down the sides. Garnish with fresh lemon slices, mint, and a light sprinkle of flaky sea salt.
Notes
- The slow cooling method (leaving the cake in the turned-off oven for 1 hour) is the most important step for preventing cracks.